DxO PhotoLab 9 vs Lightroom – Part 1: Interface and Library
Can standalone DxO PhotoLab 9 dethrone Lightroom as the one-stop photo editing suite?
Part 1 of 3: 4543 words; 24-minute read; 4 photographs
This Review first appeared on Luminous-Landscape.com 6 Oct 2025
Background
Last month, DxO HQ in France asked me to review the newest iteration of PhotoLab, PL9, for Luminous Landscape. I must admit to being a bit surprised as I hadn’t found their PureRAW product (v.4 or 5) to be significantly better than Lightroom to denoise, demosaic, and sharpen raw files. However, with the amount of online chatter around Lightroom performance, the cost and value of Adobe’s subscription service, and other alternatives out there, I thought, why not? Let’s give it a whirl.
Just two days after DxO contacted me, I received an email from Topaz Labs informing me, as a ‘founding customer’, that Topaz is moving to a subscription service—Yikes! That announcement has put this review of PL9 into a stronger light for me, as PL9 is just about the ‘last man standing’ in the standalone field of full editing suites.
I applaud DxO for continuing a non-subscription-based software platform. When I asked directly, I was told by the official at DxO, “we have no plans to move to a subscription model”. Good to hear! Frankly, Adobe needs the competition, not just to keep them competitive on pricing, but also to urge them to innovate and improve.
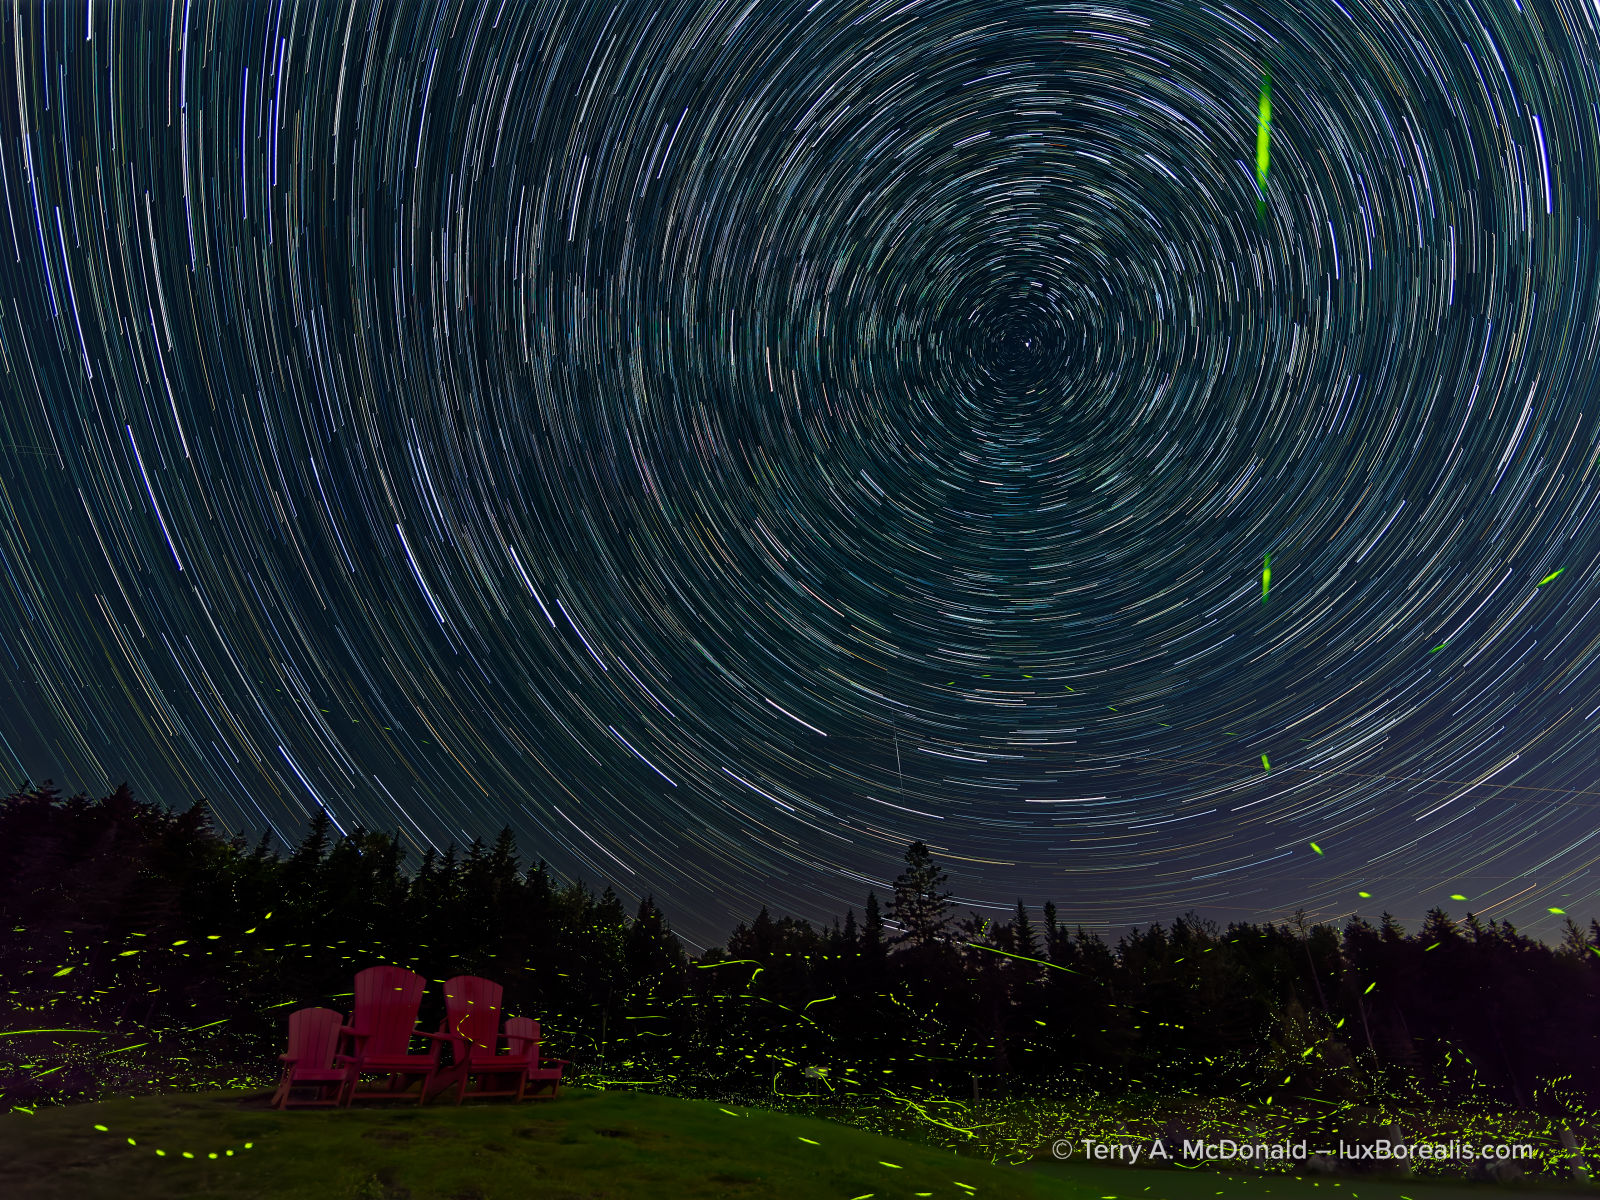
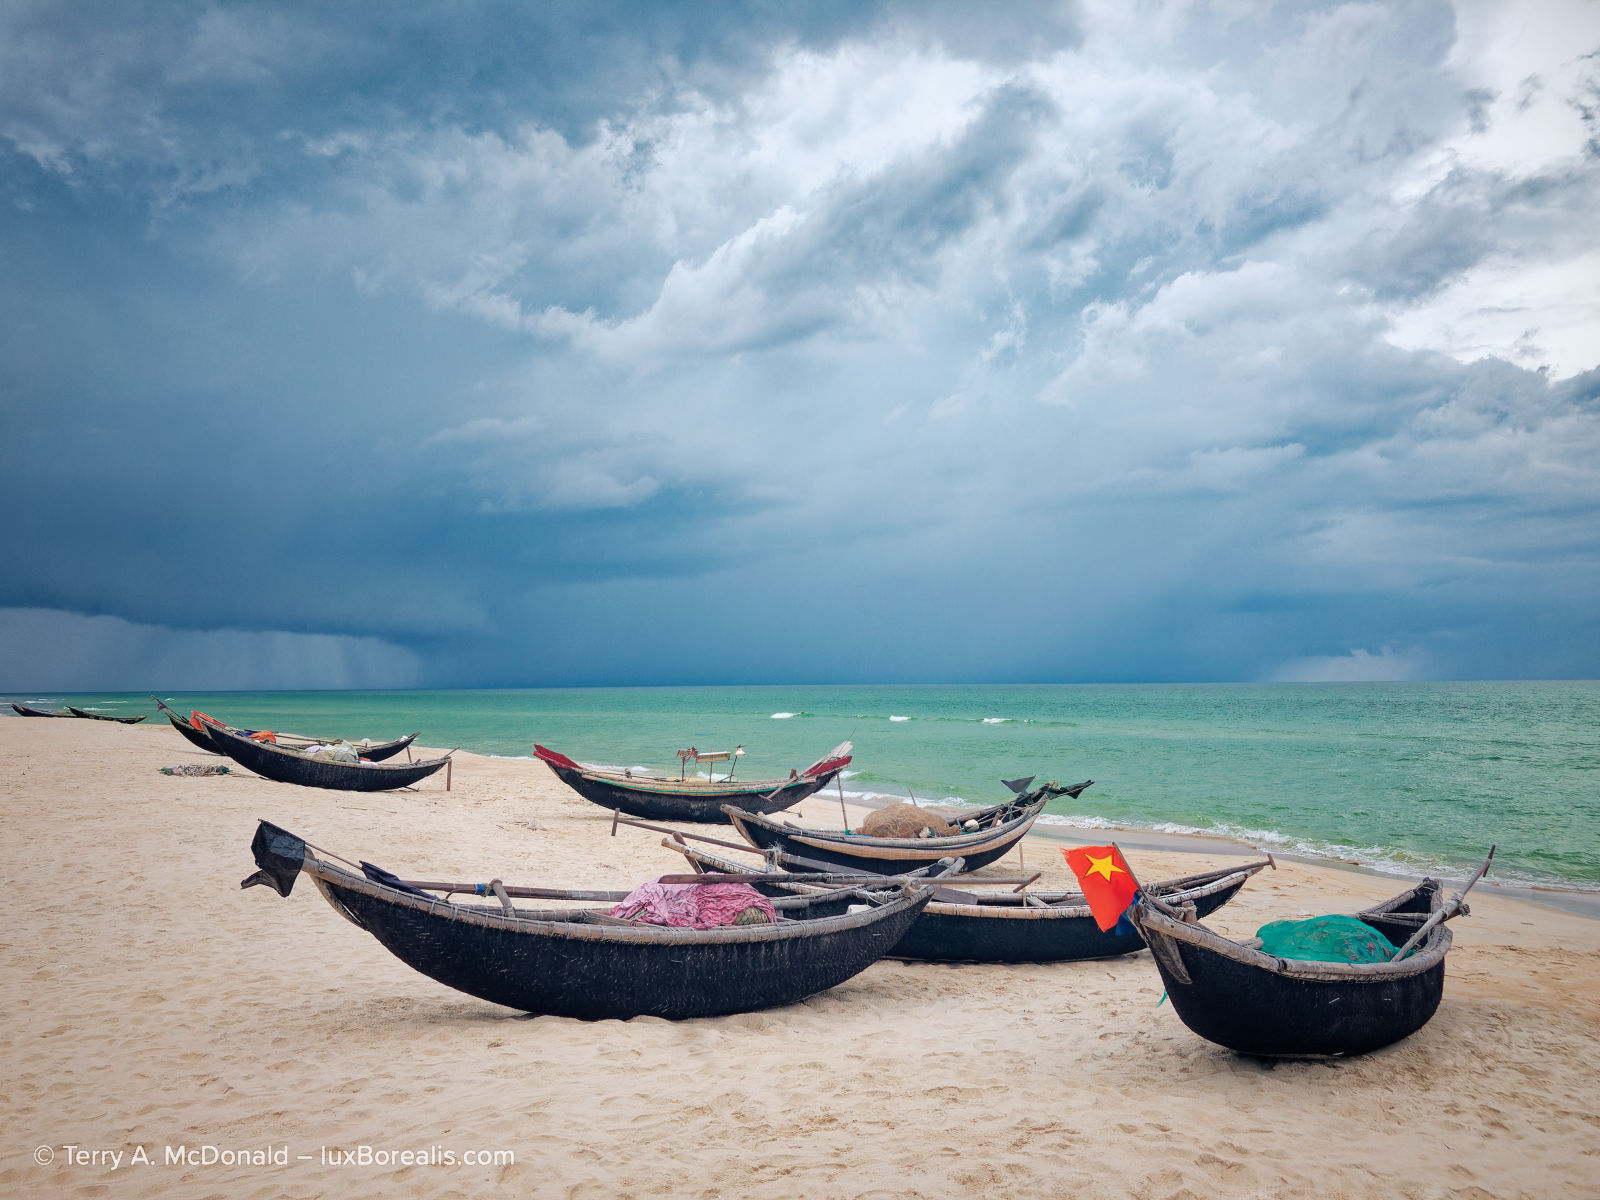
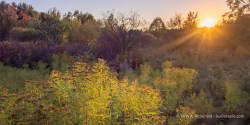
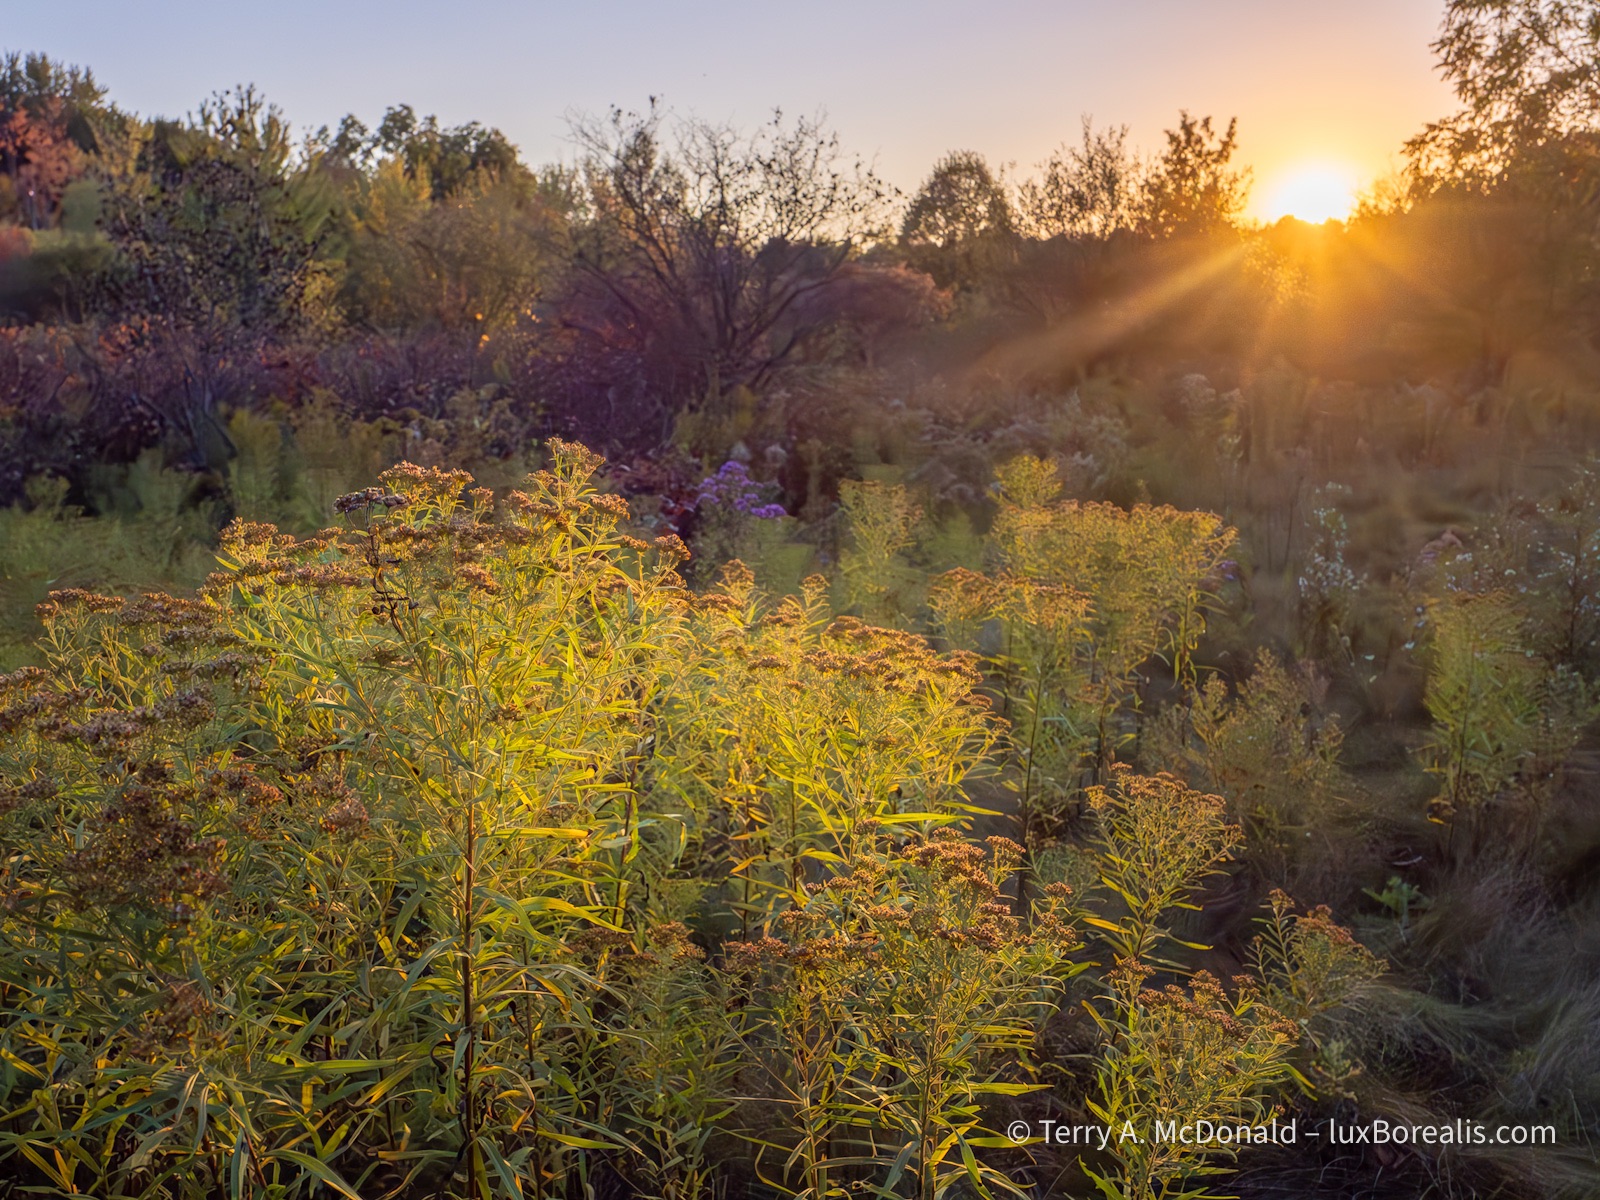
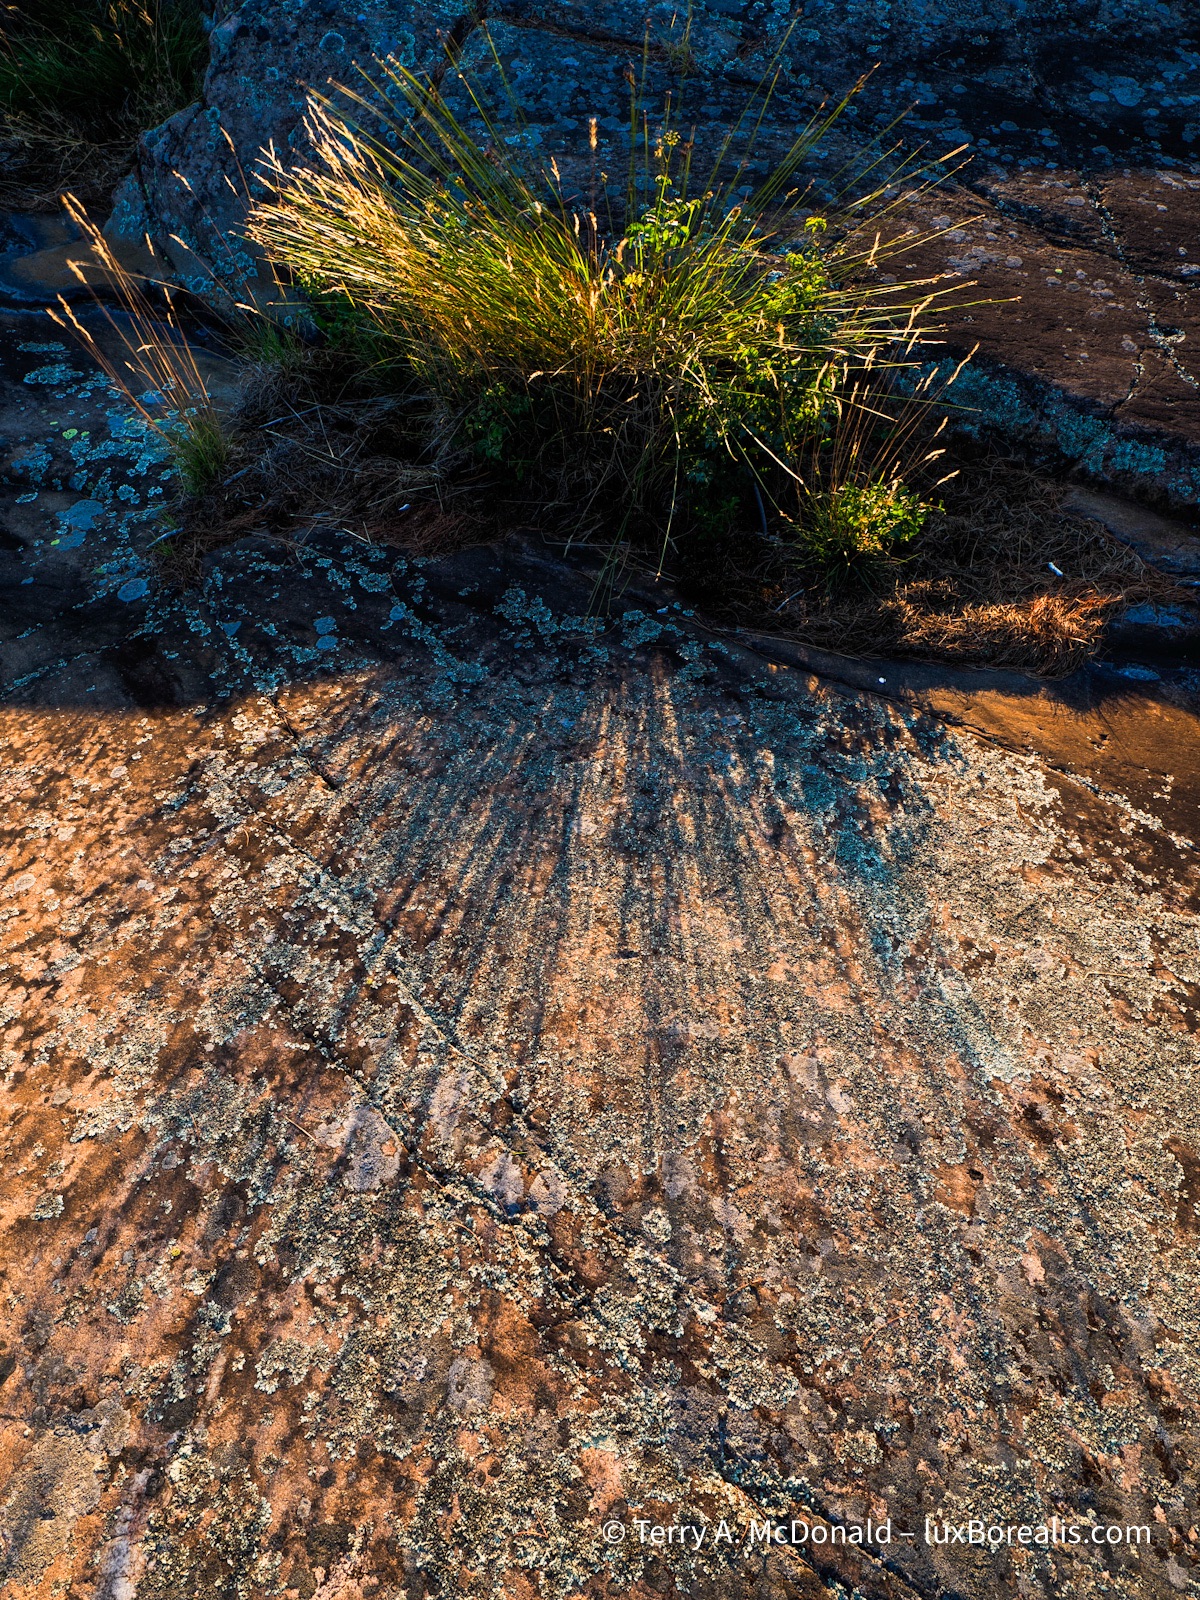
OM-1 | 9mm (18mm efov) | ƒ2 @ 40x1min. | LiveComp | ISO 400 | PhotoLab 9
I am very pleased with how well PL9 handled this image file, especially the tweaks to the green lights of the fireflies, and the sky mask and the masks needed for the grass and chairs in the foreground.
DxO has industry-leading demosaicing, denoising, and sharpening—that’s not in question here. It’s all the other aspects of photo management and editing that will be examined. To me a ‘full editing suite’ is one that allows users to:
- input images, organize them in a library, and manage them, numbering in the tens of thousands, to create custom albums/collections/projects, with a robust search function;
- add metadata such as copyright, geo-tagging and keywords;
- process with nuanced exposure, colour and monochrome control using retouching and adjustment masks; then
- export files for a variety of uses including printing;
—all with efficiency and speed through each stage. These are the functions I am used to with Lightroom; I would expect nothing less from PhotoLab 9.
Before we get too far, let’s clear up a few abbreviations and references; Lightroom (Lr), itself, creates the confusion:
- PL9: DxO PhotoLab 9 Elite – the complete version of the app;
- LrC: Lightroom Classic – the original, full-featured version of Adobe Photoshop Lightroom (its full name), useable only on a desktop or laptop;
- LrCC: typically called just Lightroom, this version uses Adobe’s Creative Cloud to store images and refers to BOTH the MacOS/Windows version (commonly called the ‘desktop’ version, though it’s also compatible with laptops), the online version, AND the mobile version for tablets (iPad and Android);
- LrD: I’ll use this only when referring to the MacOS/Windows ‘desktop’ version of LrCC; the desktop version is close enough to the web version that I won’t make a distinction between the two;
- LrM: I’ll use this only when referring to the tablet version of LrCC for iPads and Android tablets, which is a paired down (some would say ‘handcuffed’) version of LrD.
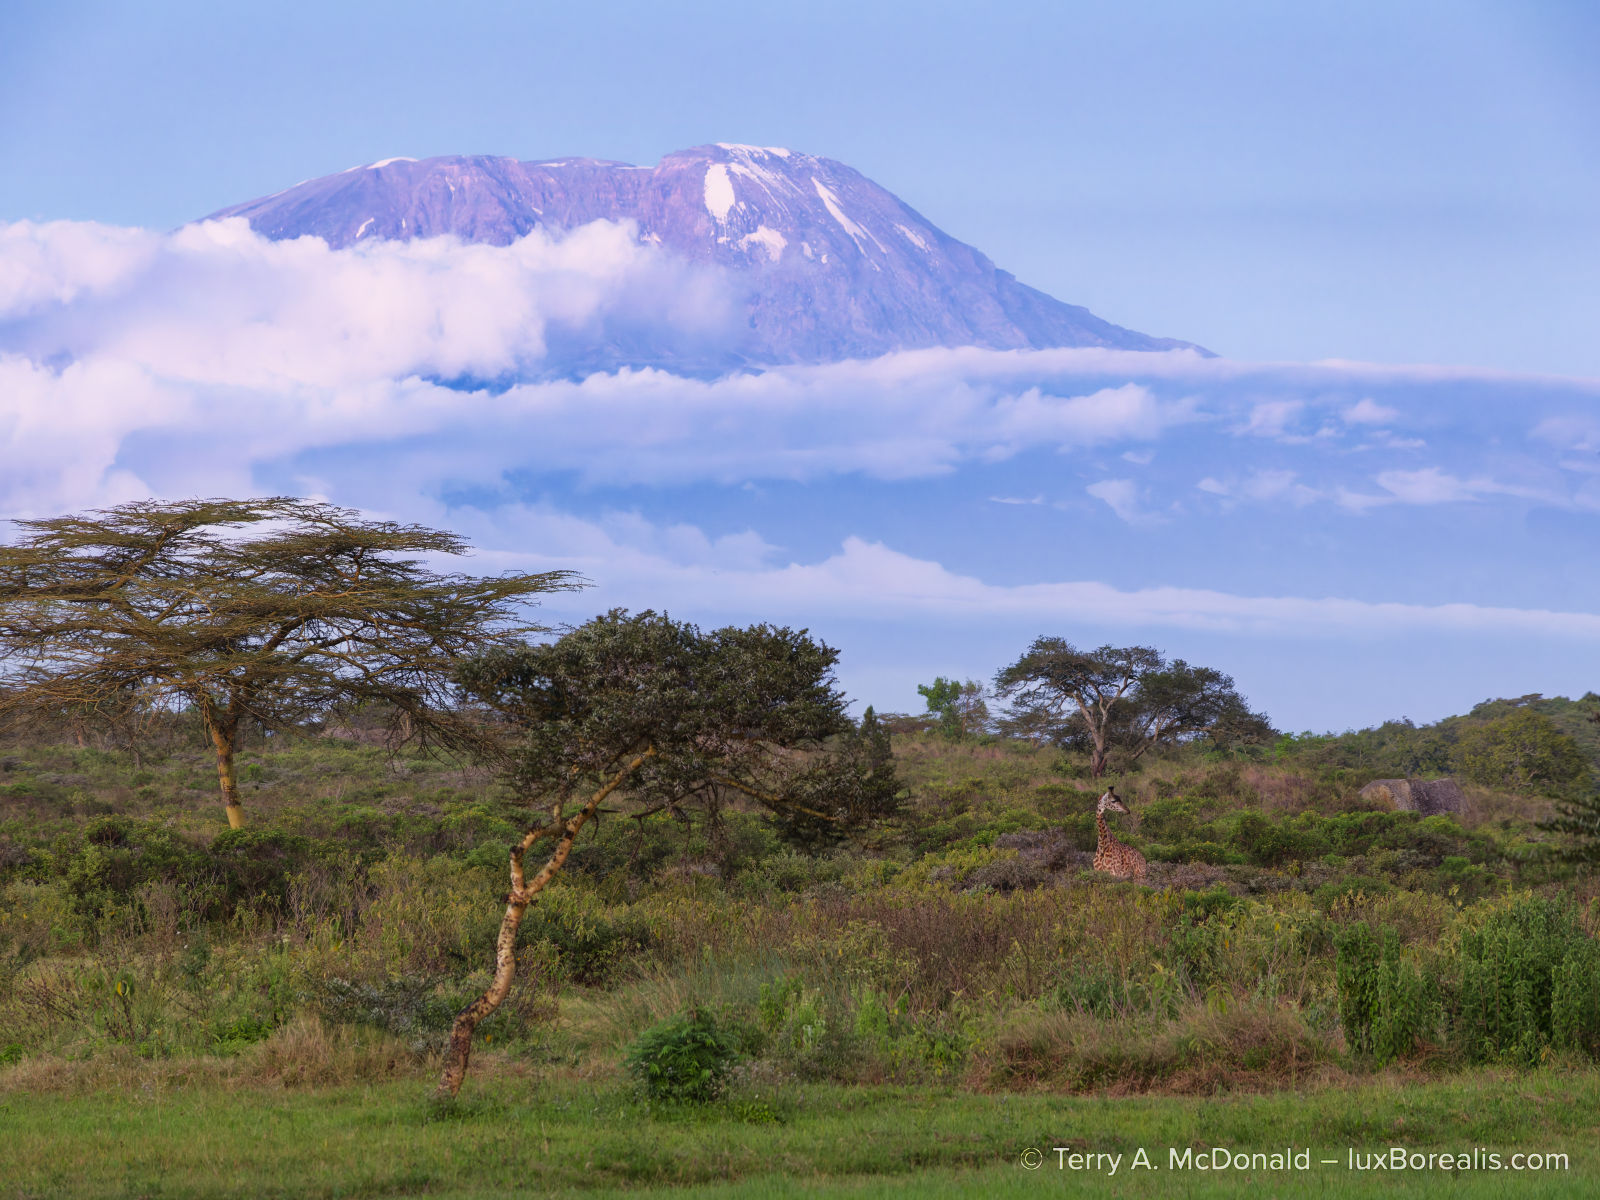
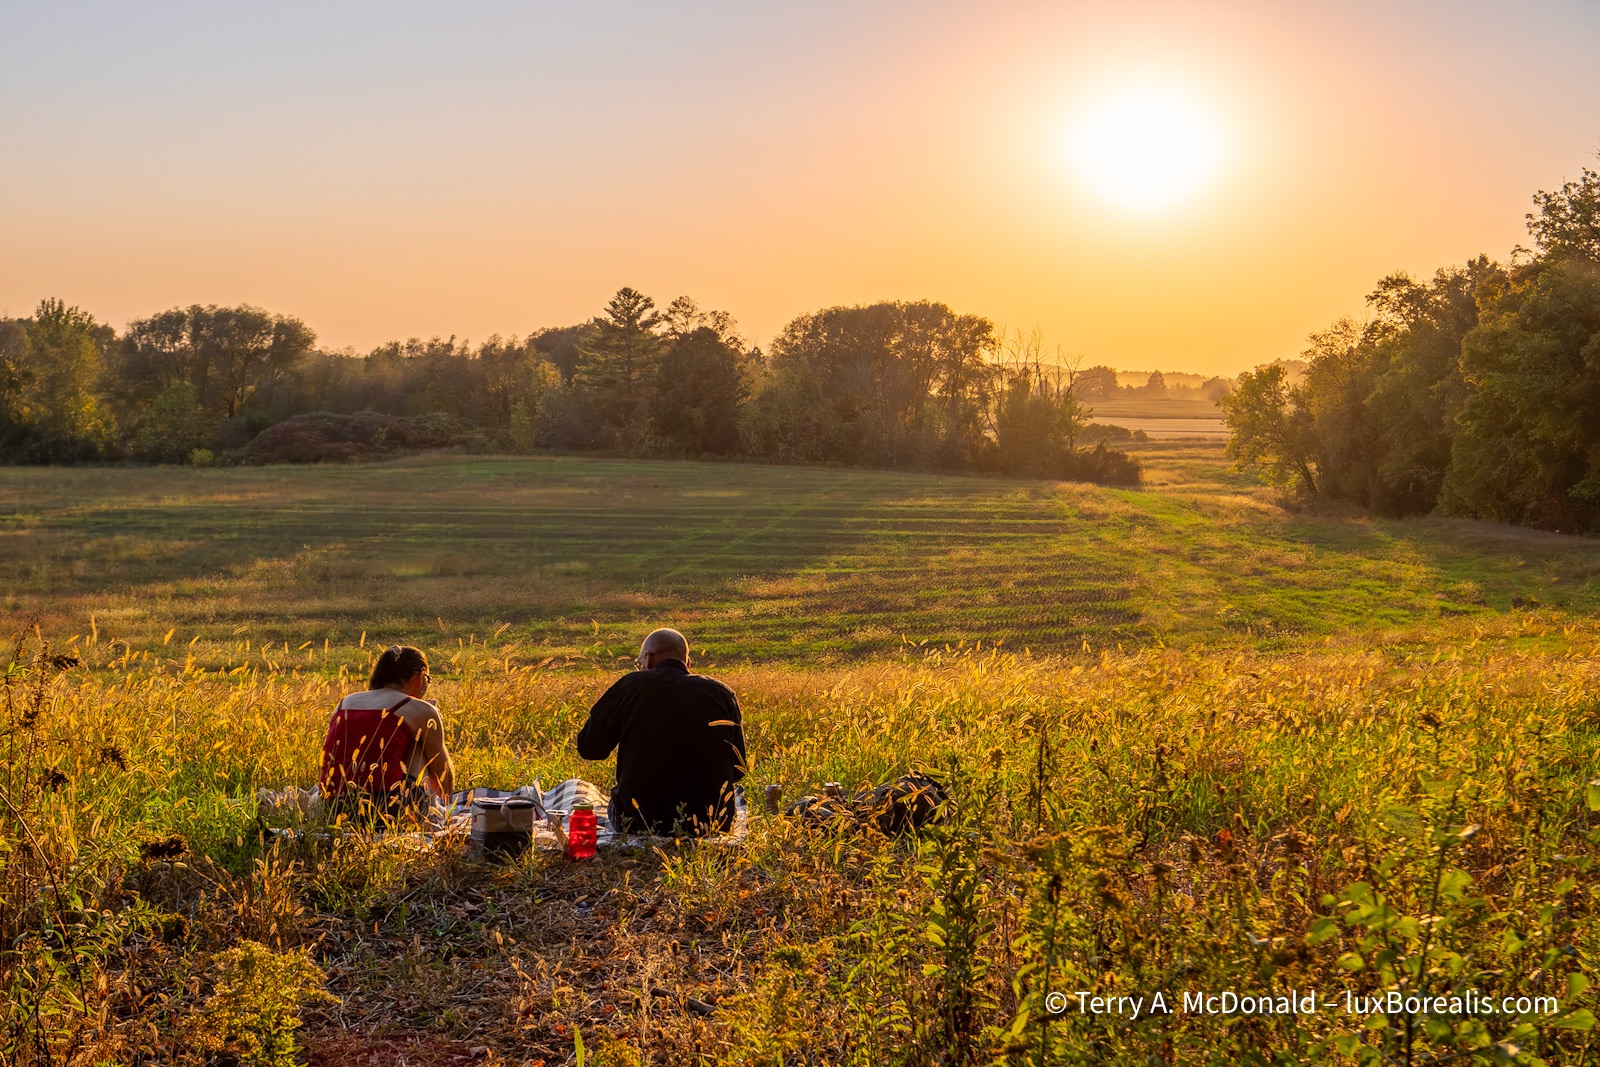
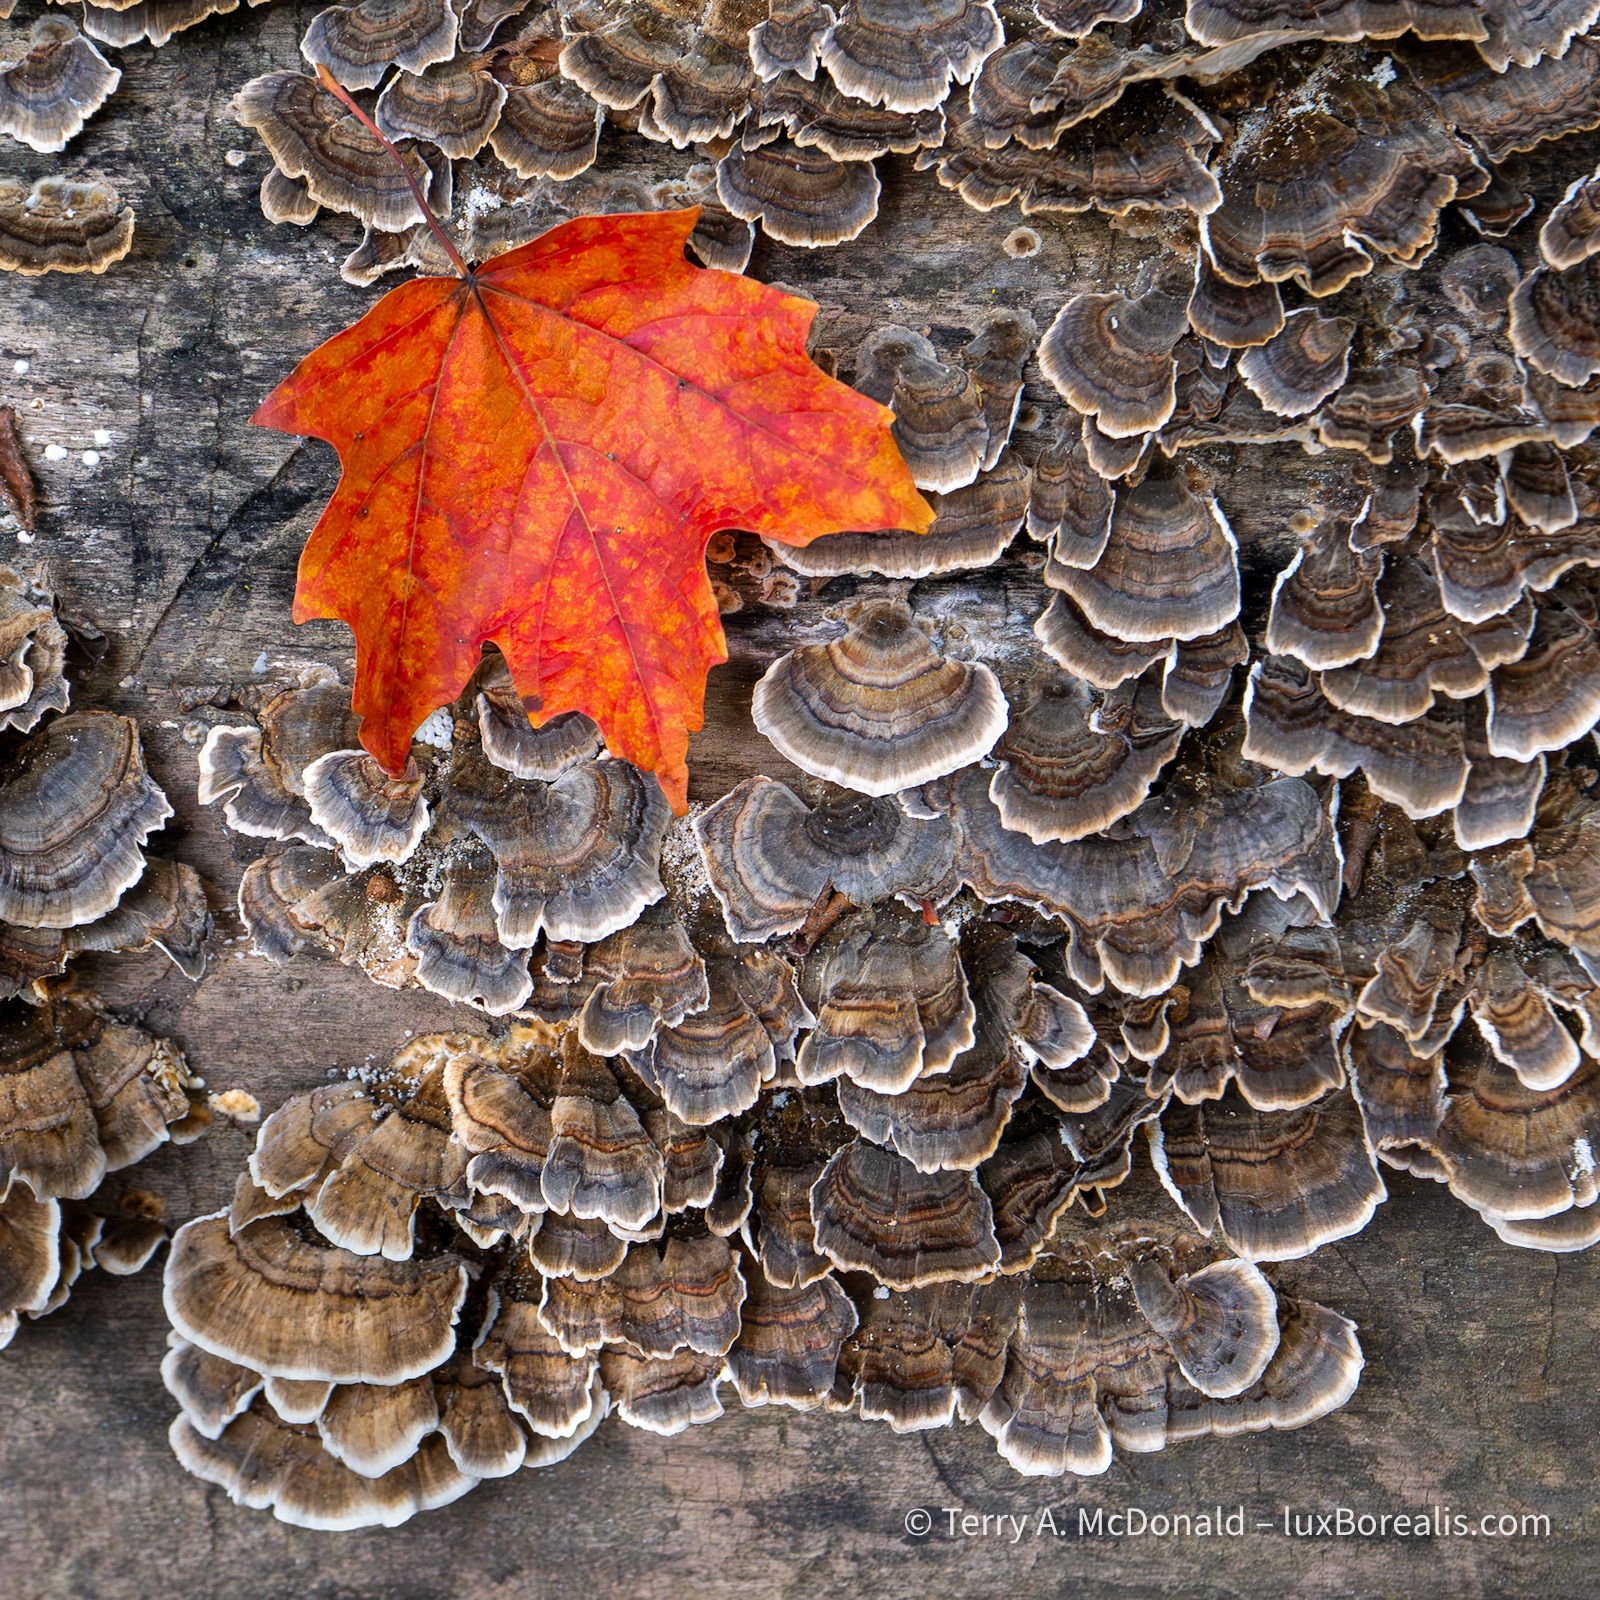
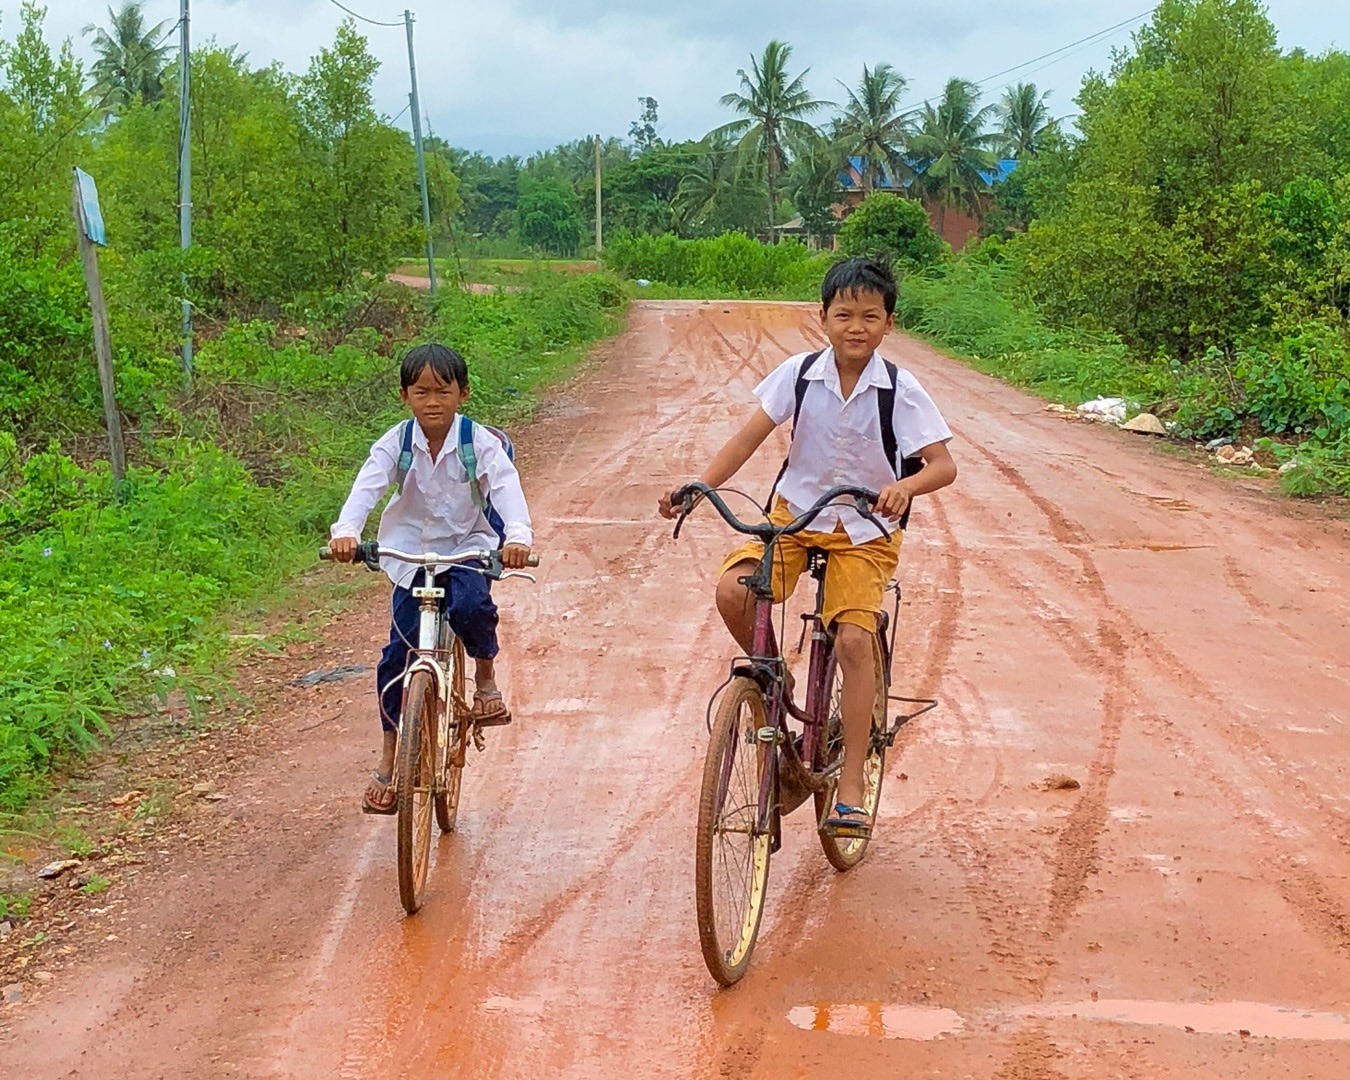
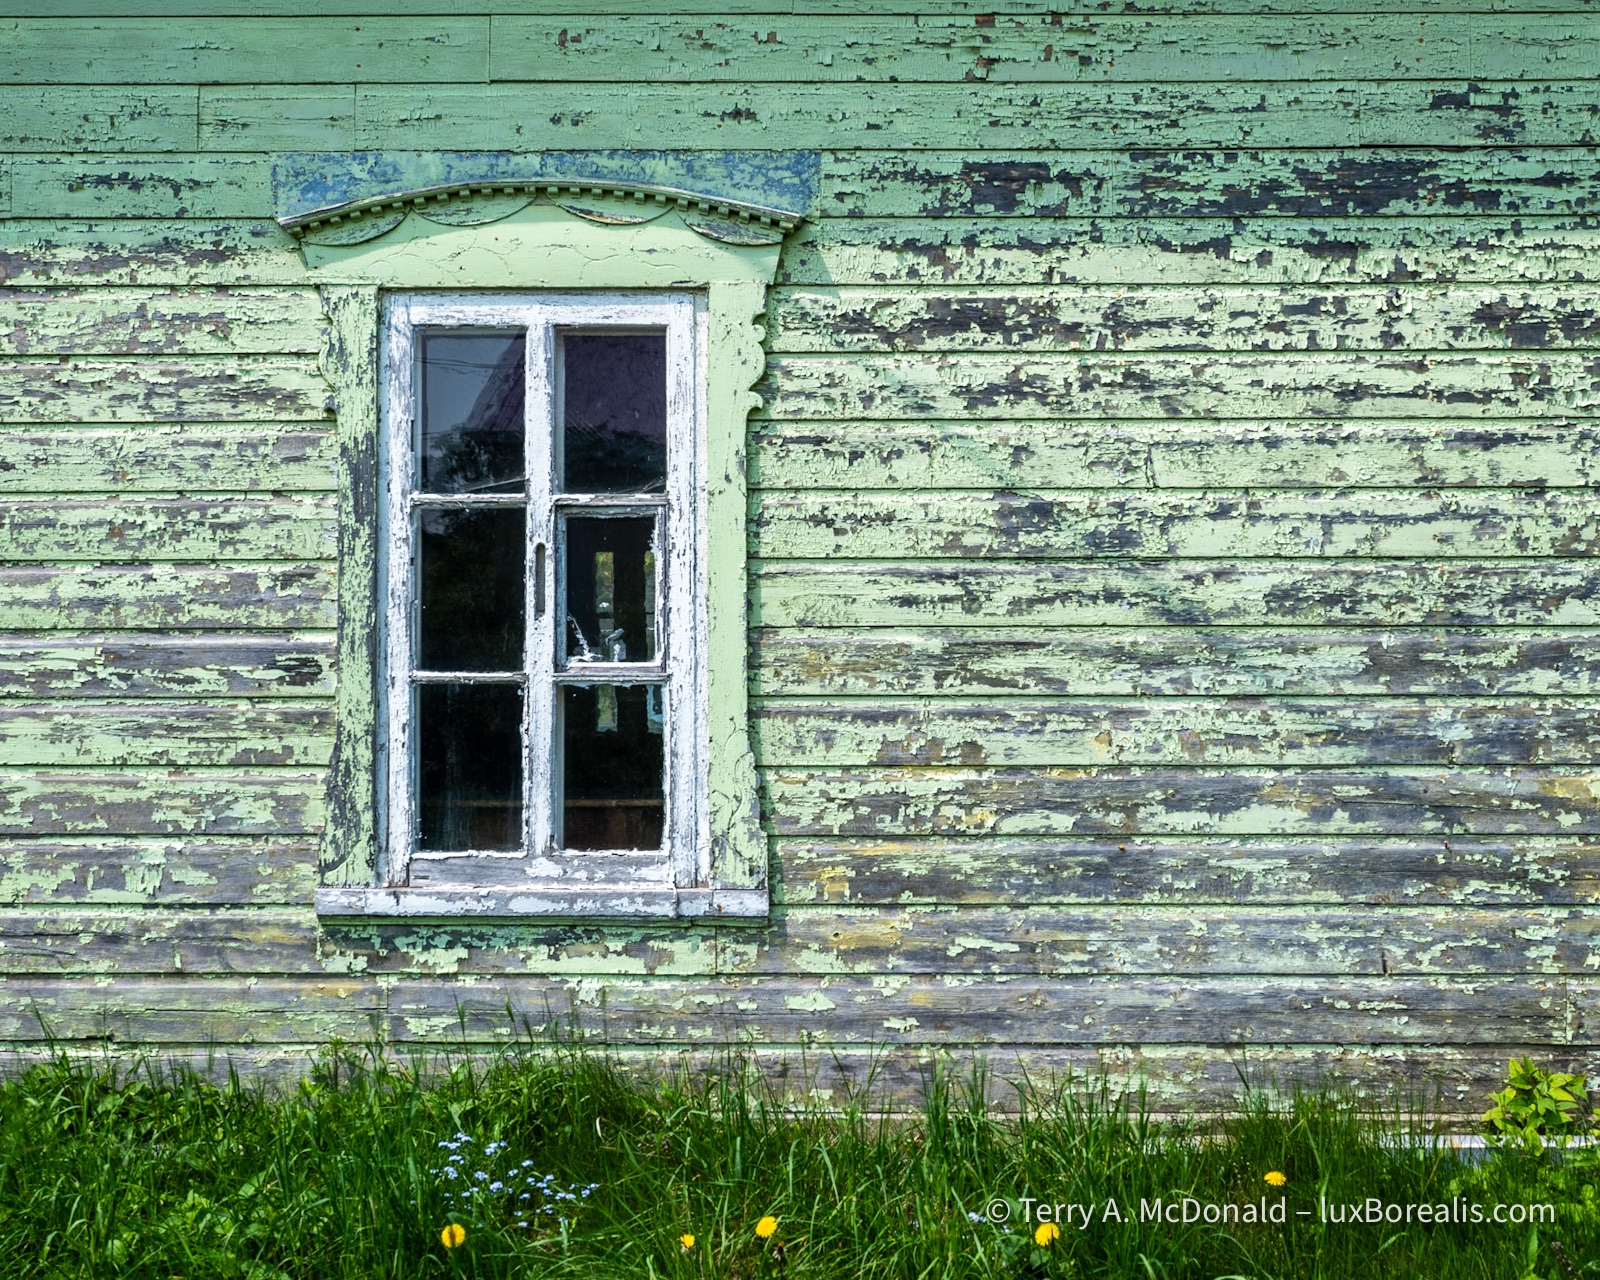
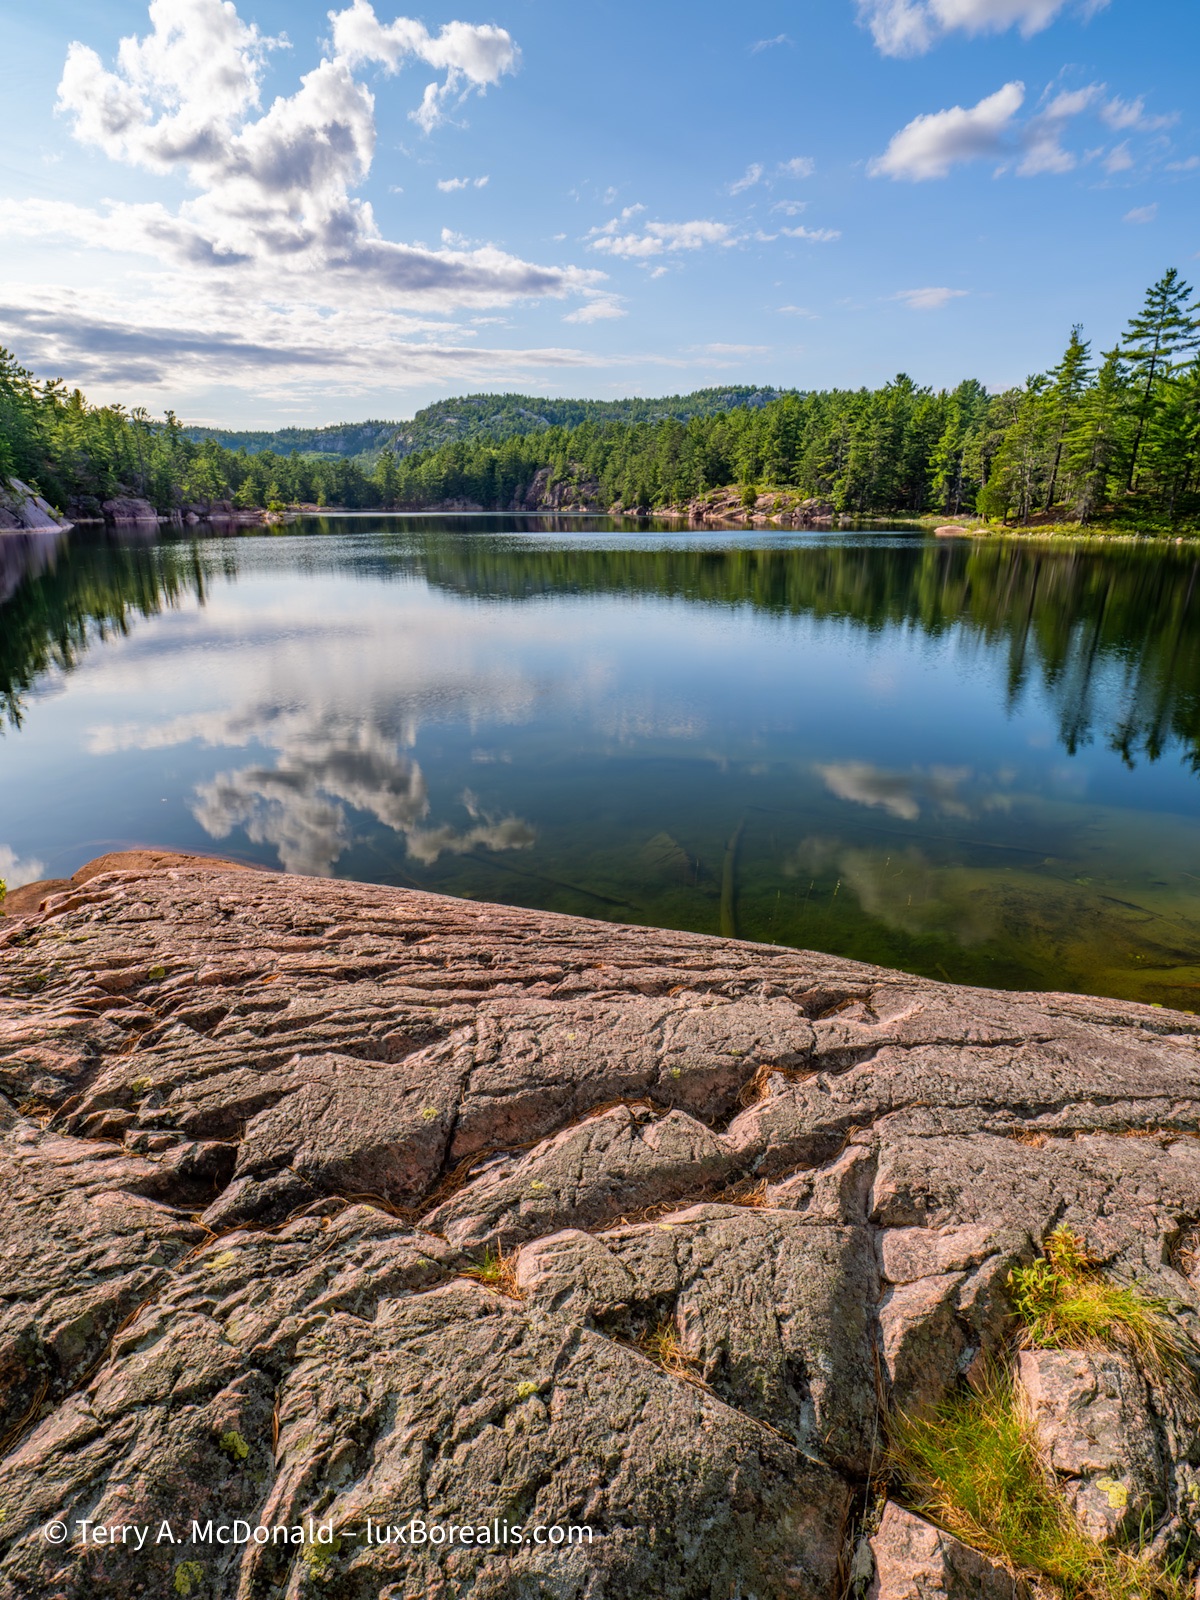
OM-1 | 100mm (200mm efov) | POL | ƒ5.6 @ ⅓ | ISO 800 | DxO PhotoLab 9
DxO’s excellent DeepPRIME XD/XD2s was supported by masking using a Grad ND sky mask with the foreground trees removed using the AI mask removal tool. I notice that lens vignetting in the top left and right was not corrected despite using the correct lens module. They were subsequently removed with Grad ND masks.
As you may have guessed, this is not some promotional glimpse at all the wonderful features available in PL9. This is a deep dive into the app, and I’m approaching the review as a longtime user of Lightroom, both Classic and CC, since each was introduced. I want to know if PL9 can replace Lr as my go-to editing suite. My goal is get under the hood and down to specifics of how the app works, really pushing PL9 to do what has long since become intuitive to me with Lr.
Challenging me to do all of this with an app new to me may sound unfair, even unrealistic. How can I possibly know all subtle and nuanced ins and outs of PL9 compared to Lr? And, what about my Lr-bias?
Regarding Lr-bias, I’ll be upfront: I recognize my bias, but I would love to find a standalone app that would replace the Adobe subscription model I’m shackled to. So, I’m going to be thorough and nit-picky. Any aspect that is better than Lr, I will herald; anything that’s not, I will point out, then go back to work to find a seamless solution within PL9. I really want PL9 to work for me. I want PL9 to shine.
As for my limited experience with PL9, I’m well used to working with a variety of editing apps—Topaz Photo AI, ON PhotoRAW, OM Workspace, Affinity Photo and Photoshop. I also use and have reviewed DxO PureRAW 4 and 5, so I’m not completely in the dark. But, editing a photograph is far more complex and nuanced than simply applying denoise, demosaic and sharpening, so I have dug down to really learn the app over the last month. I have put to the test all aspects of editing: exposure and tone control, colour balance, retouching, making monochromes with toning, masks—the works—as well as the complete experience of using PL9: the GUI, the Photo Library, its speed, and the overall feel of the app experience.
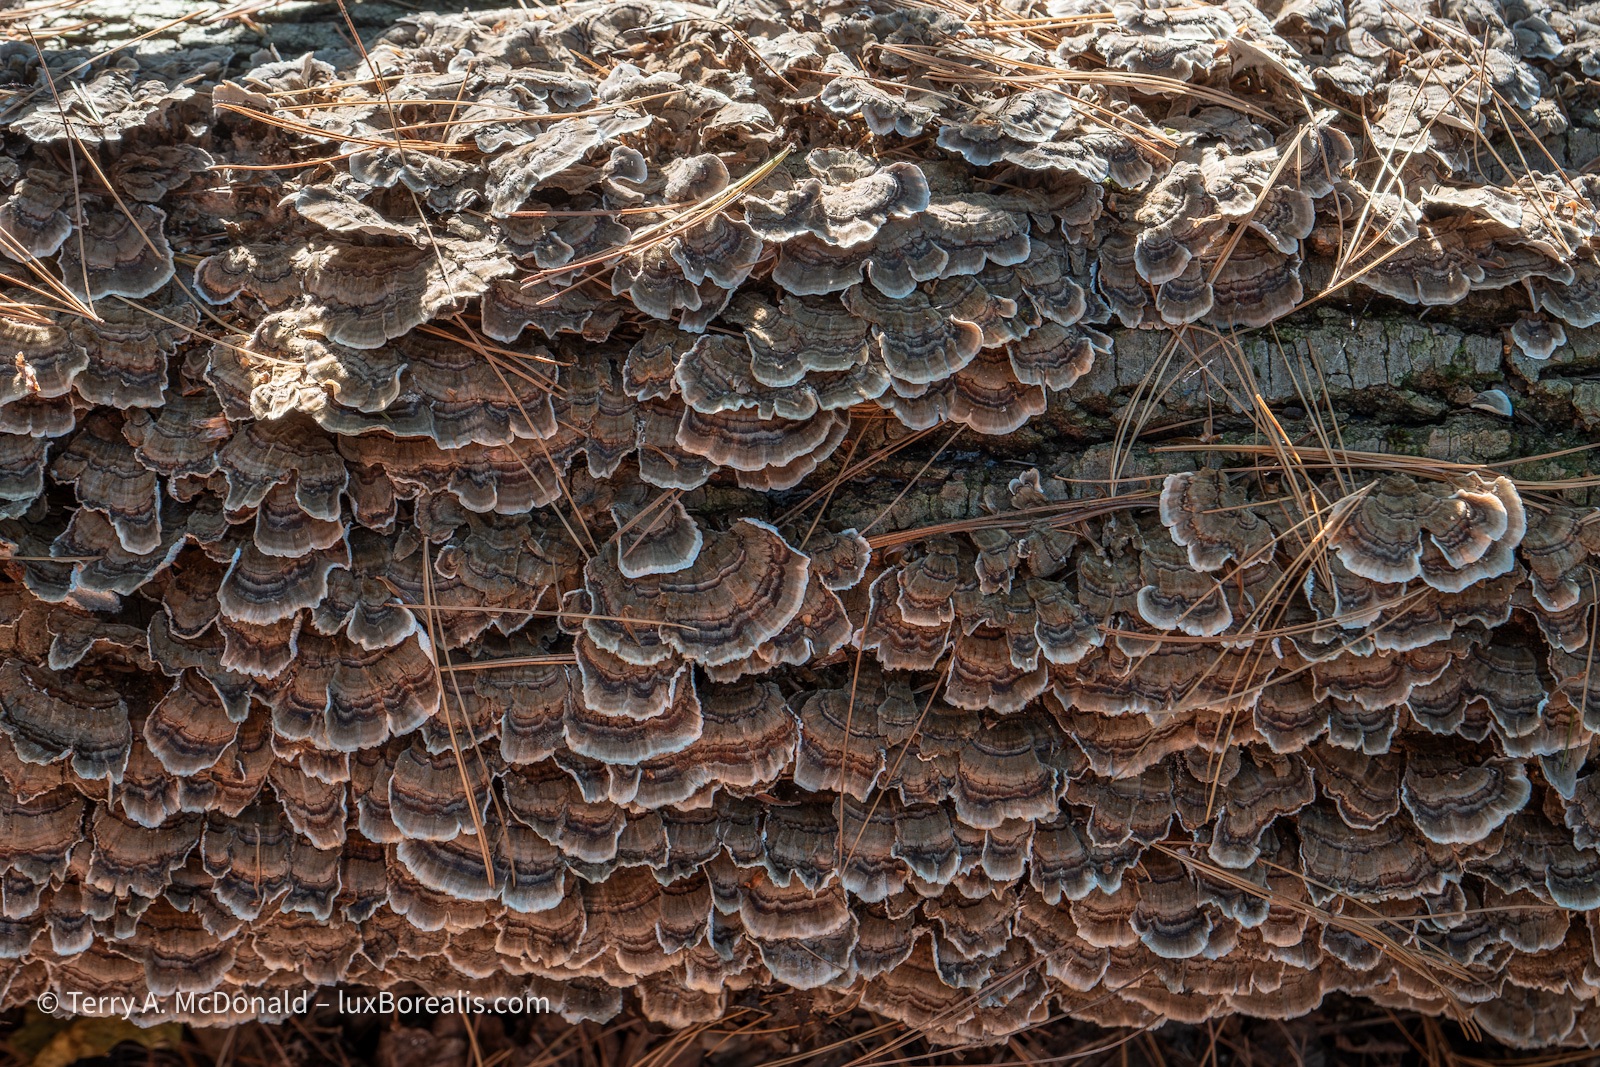
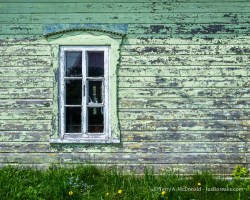
OM-1 | 16mm (32mm efov) | ƒ5.6 @ ⅗ | ISO 800 | LiveND 64 | PhotoLab 9
Although PL9’s black-and-white options are minimal, they are effective. Unfortunately, PL9 relies on purchasing add-on software (FilmPack and/or NIK Collection) to fully realize the potential of monochrome images.
Full Disclosure: Although I received DxO PhotoLab 9 at no cost, I have reached my own conclusions by testing my own images, ones chosen for both my familiarity with them and for their complexity either with high ISO noise, masking needs, and/or tone/exposure balancing. While DxO requested the review, they have had no further input into the results of my review.
I’ll be honest. I have always been impressed with DxO, beginning with DxO Mark. Their testing of sensors and lenses over the years have always been refreshingly scientific in approach, creating confidence in the results. I hope I can do the same here. Another reason I’m interested in DxO PhotoLab 9 is because of the Library attached to it, its Photo Library.
Having access to all my photos at my fingertips is an essential efficiency. Any editing suite that does not have a Library feature is useless to me. With tens of thousands of images, I don’t have time to be flipping through folders and sub-folders. I must be able to find specific images within seconds. I can do this in both versions of Lr; can it be done in PL9?
Let’s set up PhotoLab 9 and the Photo Library . . .
Start up
Install was completely straightforward, with no issues. Before opening PL9, I selected a set of images from Lightroom and exported them as unmanipulated original raw files. They are a mix of 1” sensor, M43s, 35mm sensor, and camera phone photos. They may be familiar, but they are not without their complications as I chose both low and high ISO files and photos that demand the use of Local Adjustments (Masks). I want to confirm PL9’s top-rated raw file optimization, but more importantly, I need to test how capable and nuanced the library and editing are.
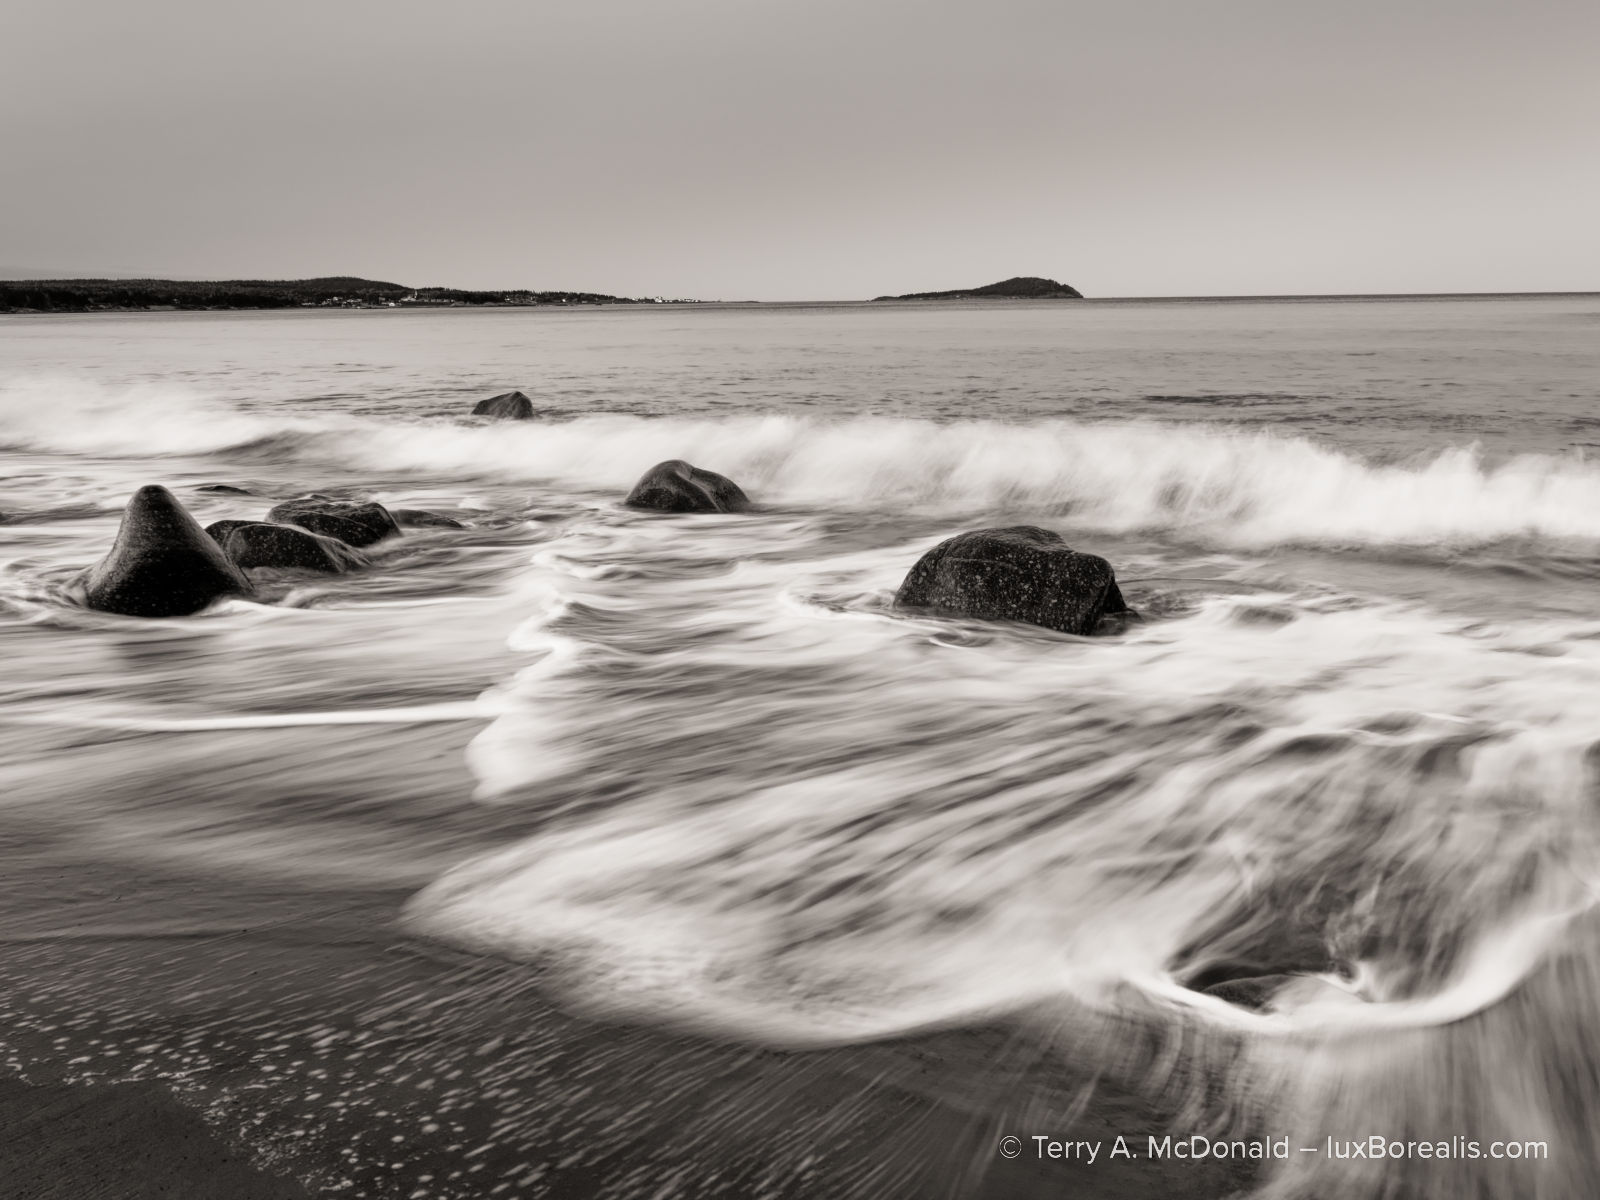
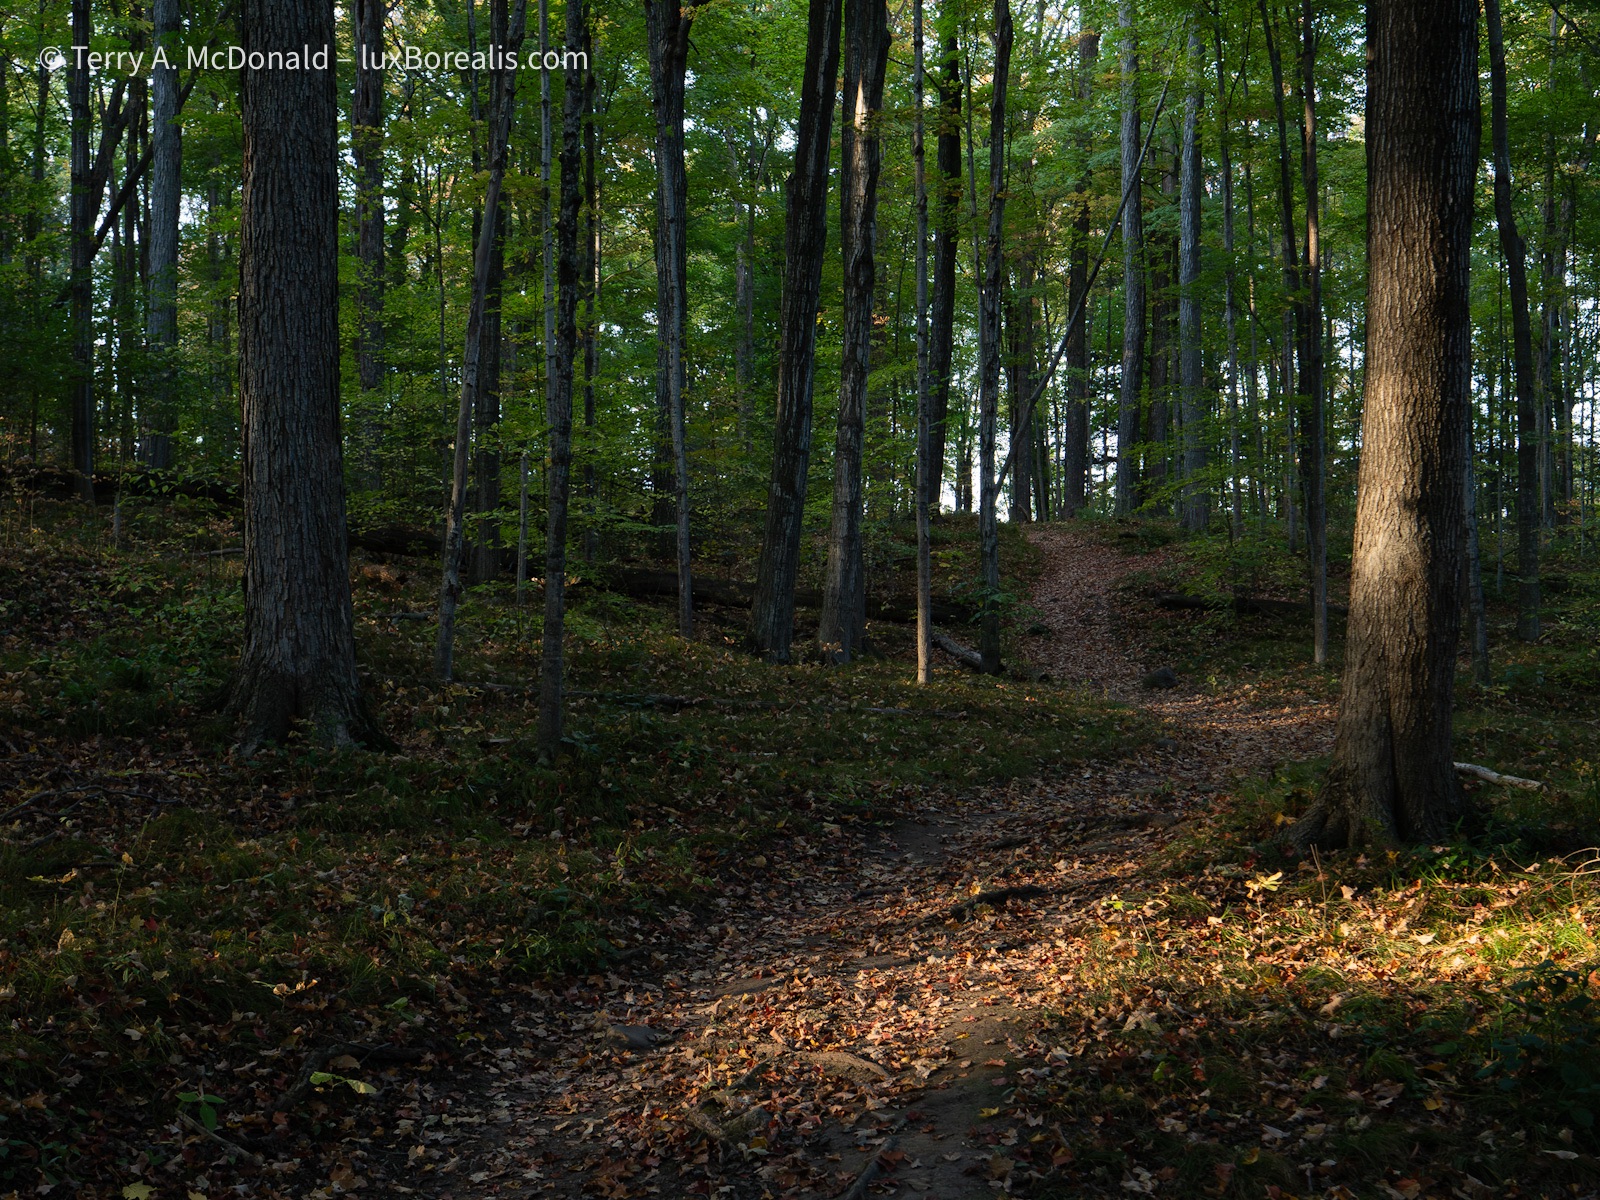
iPhone 8 Plus | 4mm (28mm efov) | ƒ1.8 @ 1/640 | ISO 20 | DxO PhotoLab 9
DeepPRIME XD/XD2s cleaned up the sensor noise. A Grad ND mask was used over the upper right of the sky plus an auto brush mask over the water.
Sadly, the first thing I learned was that PL9 cannot process my iPhone 11 Pro DNG (raw) files made with the Lightroom camera. While they are not ’true raw’ photos (even ProRAW files are processed in-camera before you see them) (DxO), it shouldn’t matter, especially since PL9 will process JPEGs. Interestingly, although PL9 can process DNGs from my older iPhone 8 Plus, it won’t play with HDR-raw DNGs. This is unfortunate, as serious iPhoneography is more common than many realize.
According to DxO, “DxO PhotoLab 9 now supports Apple’s HEIC/HEIF and ProRAW formats, letting you bring DxO’s processing power to images captured on your [newer] iOS devices.” which is a good thing. However, according to this DxO Forum post “There is no support for single-frame RAW DNGs from third-party apps like ProCamera or CameraPixels. Same for the DNGs produced by the Adobe Indigo Project camera app.” Too bad, as ProCamera is one of the leading professional phone camera apps.
GUI
An app’s interface is like your kitchen or workshop. To build a workflow that works for you, the tools you need most must be close to hand. PL9’s interface does this incredibly well, and has the added bonus of significant customization. But first . . .
Background Canvas
The first thing I changed was the background/canvas of the image view panel, from dark grey to white (Settings > Display). When making tonal adjustments to photos that will appear against a white background, which includes most online photos and prints—in books, calendars and as framed photographs—a white background calibrates both the image and your eye to the complete tonal spectrum, enabling more accurate tones and hues. Adjusting tones when an image is against a dark background often results in photos that appear slightly dim when presented against a white background.
Back to the GUI . . . Beginning in the top left, there are buttons to switch between the Photo Library and Customize, the processing/editing side of PL9. Thankfully, there are also keyboard shortcuts for each of these commands. I hate the seek-and-find scrolling and clicking of buttons; using keyboard shortcuts keeps my eyes on what I’m doing—typically, the image I’m working on.
Along the top of the Photo Library view are various buttons to compare images and zoom. The pre-set zoom percentages are restricted to 50%, 75%,100% and 200%, with no 25% or 300% or 400%. Of course, the user can pinch to zoom using a touchpad. One niggly is that when ’Fit’ is chosen, the image is zoomed until two sides of the image are right against the black frame, leaving no white space. Having a margin of a half centimetre/quarter inch of white (as Lr does with Fit) would be helpful for maintaining the aesthetic of the view and, more importantly, the eye-image tonal balance, the whole reason for having a white background to begin with.
In Customize, (just double-click on the preview image) a variety of buttons are added to this array, including Crop (R), Horizon (H), and Retouch (N), amongst others. I like the addition of a Loupe tool (S) to check details at 100% (or 200%) while viewing the whole image in Fit view. To reduce, even eliminate any processing lag, the Loupe can be used to preview DeepPRIME and DeepPRIME XD/XD2s denoise when they turned off in Settings. More on this later.


Shifting Palettes
The most significant customization is the ability to shift palettes between the left and right panel, or set palettes to float over the image. This is handy is just like with Affinity Photo and Photoshop. Palettes can also be removed from a panel, yet are still retrievable via the Palettes menu in the menu bar. Lightroom allows similar customization of the Develop panel, shifting palettes upa nd down the order and toggling off those not used. But more on this in OoO under Customize.
It’s important to note that both PL9 and Lr suggest an order of operations through the default order of the palettes. While there is no right or wrong order with PL9, the more high-intensity processes, such as denoise and masks, should be done towards the end to avoid unnecessary lag times.
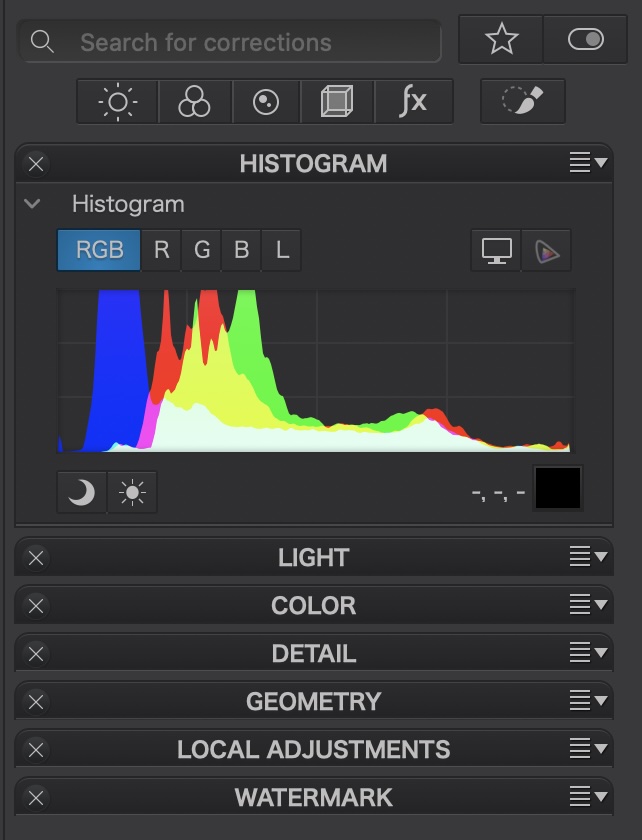
However, one palette I moved was the all-important Histogram. I prefer to edit with only the right panel open. This provides more screen real estate for the image being edited. Yet, upon opening, PL9 had the histogram in the left panel. Not any more. It’s now lives in the top right, above Light where I can see it as I adjust exposure and tone.
An advantage of the PL9 Histogram over Lr is its detail. Not only does it show Luminance and RGB values, the user can turn on the gamut warnings, then select each colour channel to, for example, determine more precisely which colour is triggering the warning. This can also be seen in RGB mode as well. The out-of-gamut warnings appear in a hue opposite of the colour going out-of-gamut. For example, when yellow is out of gamut, a cyan colour appears. How very helpful.
Unfortunately, the histogram is not ‘sticky’; it disappears when the ’Light’ icon is selected and when the Favourites are selected. Solution: I drag it out as a floating window then drag it back in when finished. I’m liking this!


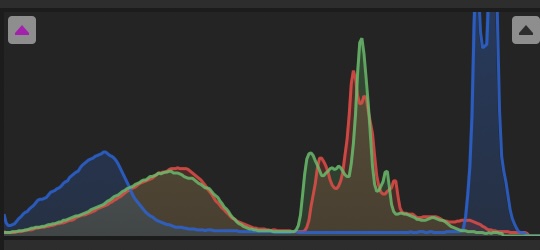
Histogram palettes from left to right: PL9, Lr Classic; LrCC Desktop
Two additional improvement DxO can make to the Histogram are (1) allow it to be favourited with the blue star to keep it always visible, if the user chooses; and (2) tone down the bright, saturated colours of the histogram as I find them distractingly enthusiastic.
I also removed the Tone Curves palette, as I did with Lr. I know, shocking, but despite many years of using Curves in Photoshop, since Lightroom adopted its White-Highlights-Exposure-Shadows-Blacks system of discrete tone controls, I’ve found little use for Curves. Frequently during workshops and courses I’ve conducted, I’ve seen users using Curves at cross-purposes with the various exposure sliders.
Taming the Palettes
One area I would like to see improved is the overall ‘elegance’ of the app. Without some ‘tidying’, the right panel can look like an overstuffed toolbox or kitchen drawer, with dozens of lines of narrow processing functions close together. Within each palette, there are several options users need to click open/close as they make their way down the panel. Users can reduce the clutter by opening one palette at a time, making adjustments, then closing it. Adopting Lr’s ‘Solo Mode’ could further improve this by automatically closing an open panel when the next palette is selected.
Alternatively, users can simply use the buttons at the top to select which palette to work with. Just beware that the Histogram disappears when individual buttons are used. It would be helpful if DxO finds a way to keep the histogram visible if a user so chooses.
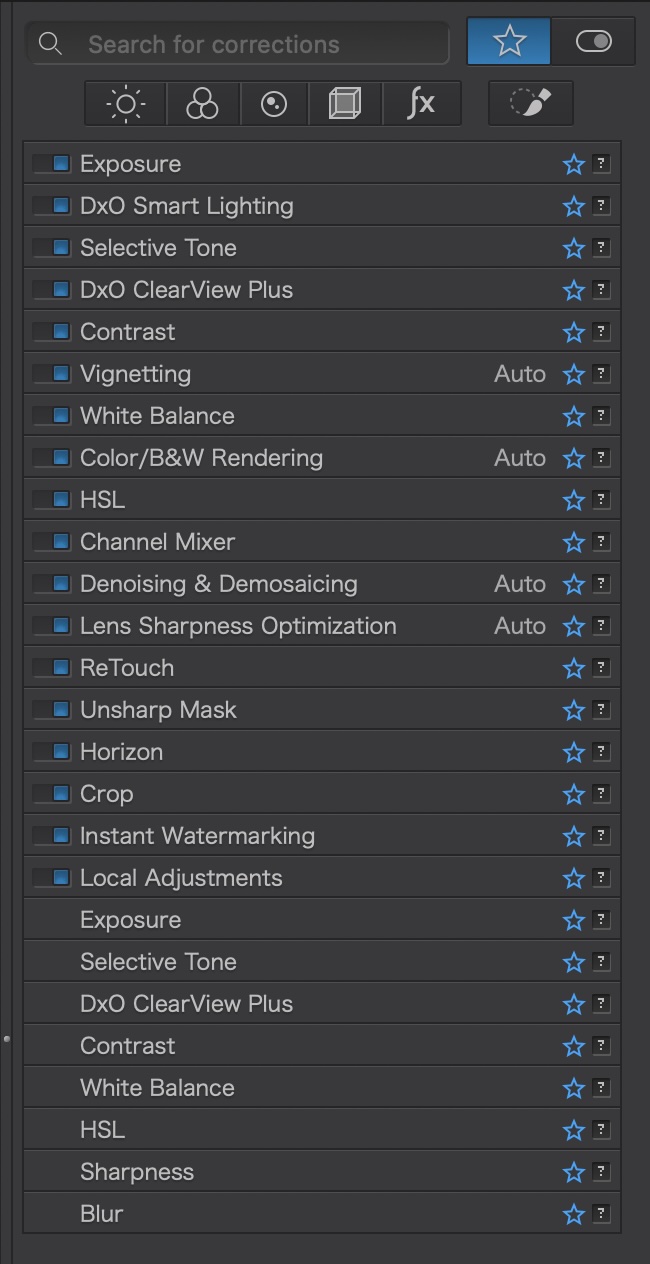
Another method of organization is with Favourites by selecting the blue star to the right of a process. Selecting the large star in the top right will reduce the toolbox to just those that have been favourited. With so many processing options, this is an ideal way of prioritizing the ones used most frequently. To clean up my workbench, I selected only those processes I regularly use, leaving out things like Working Colour Space (it’s always set to DxO Wide Gamut), LUT Grading, Style-Toning, and Soft Proofing, amongst others. It’s still quite full, but it helps.
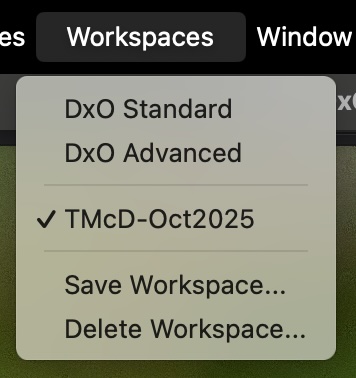
The best part of this customization is that once I have dragged and dropped palettes into a framework that is efficient for me and favourited chosen processes, I can Save my Workspace. Fantastic!
I must admit that, overall, I find LrCC to be the most elegant. The font and spacing between lines of text (the leading) in LrCC makes for easier reading. Sounds nit-picky, but when working with an app for hours on end, it becomes significant.
Adjustment slider behaviour
One hurdle I’ve found to distraction-free editing with PL9, is the behaviour of the adjustment sliders. I’m not one to drags sliders up and down looking for the right ’look’. For one thing, you can’t always do this with PL9 as there is often a lag time after every change (more on lag time below). But I also find slider-dragging too imprecise.
Typically, I use the cursor/arrow keys to increase and decrease values. With PL9, the cursor only changes values in small increments of 1 or 0.1. With Lr, I have the choice of holding Shift+Cursor up/down to make larger-increment jumps of 10 or 0.33. Typically, I increase/decrease a setting in jumps of 10 until I go past the ideal. Then, I’ll creep back to it using just the up/down cursor key. This is not possible with PL9. I find myself looking away from the image to the slider to make changes or I rapidly tap the cursor in burst of 10 for larger-increment changes. This is not what I would call a smooth action.
Photo Library
You’re likely wondering, why I’m writing about ”library” features when we’re talking about editing and processing?
A Photo Library is the organizational hub of your editing system and a highly under-rated key component. But when you have tens of thousands of image files spread over many years, it becomes your lifeline. When I have a call for photos, I don’t have time to flip through folders like shoeboxes of negatives; I need to access them without having to wonder where they are. And PL9 does it, mostly.
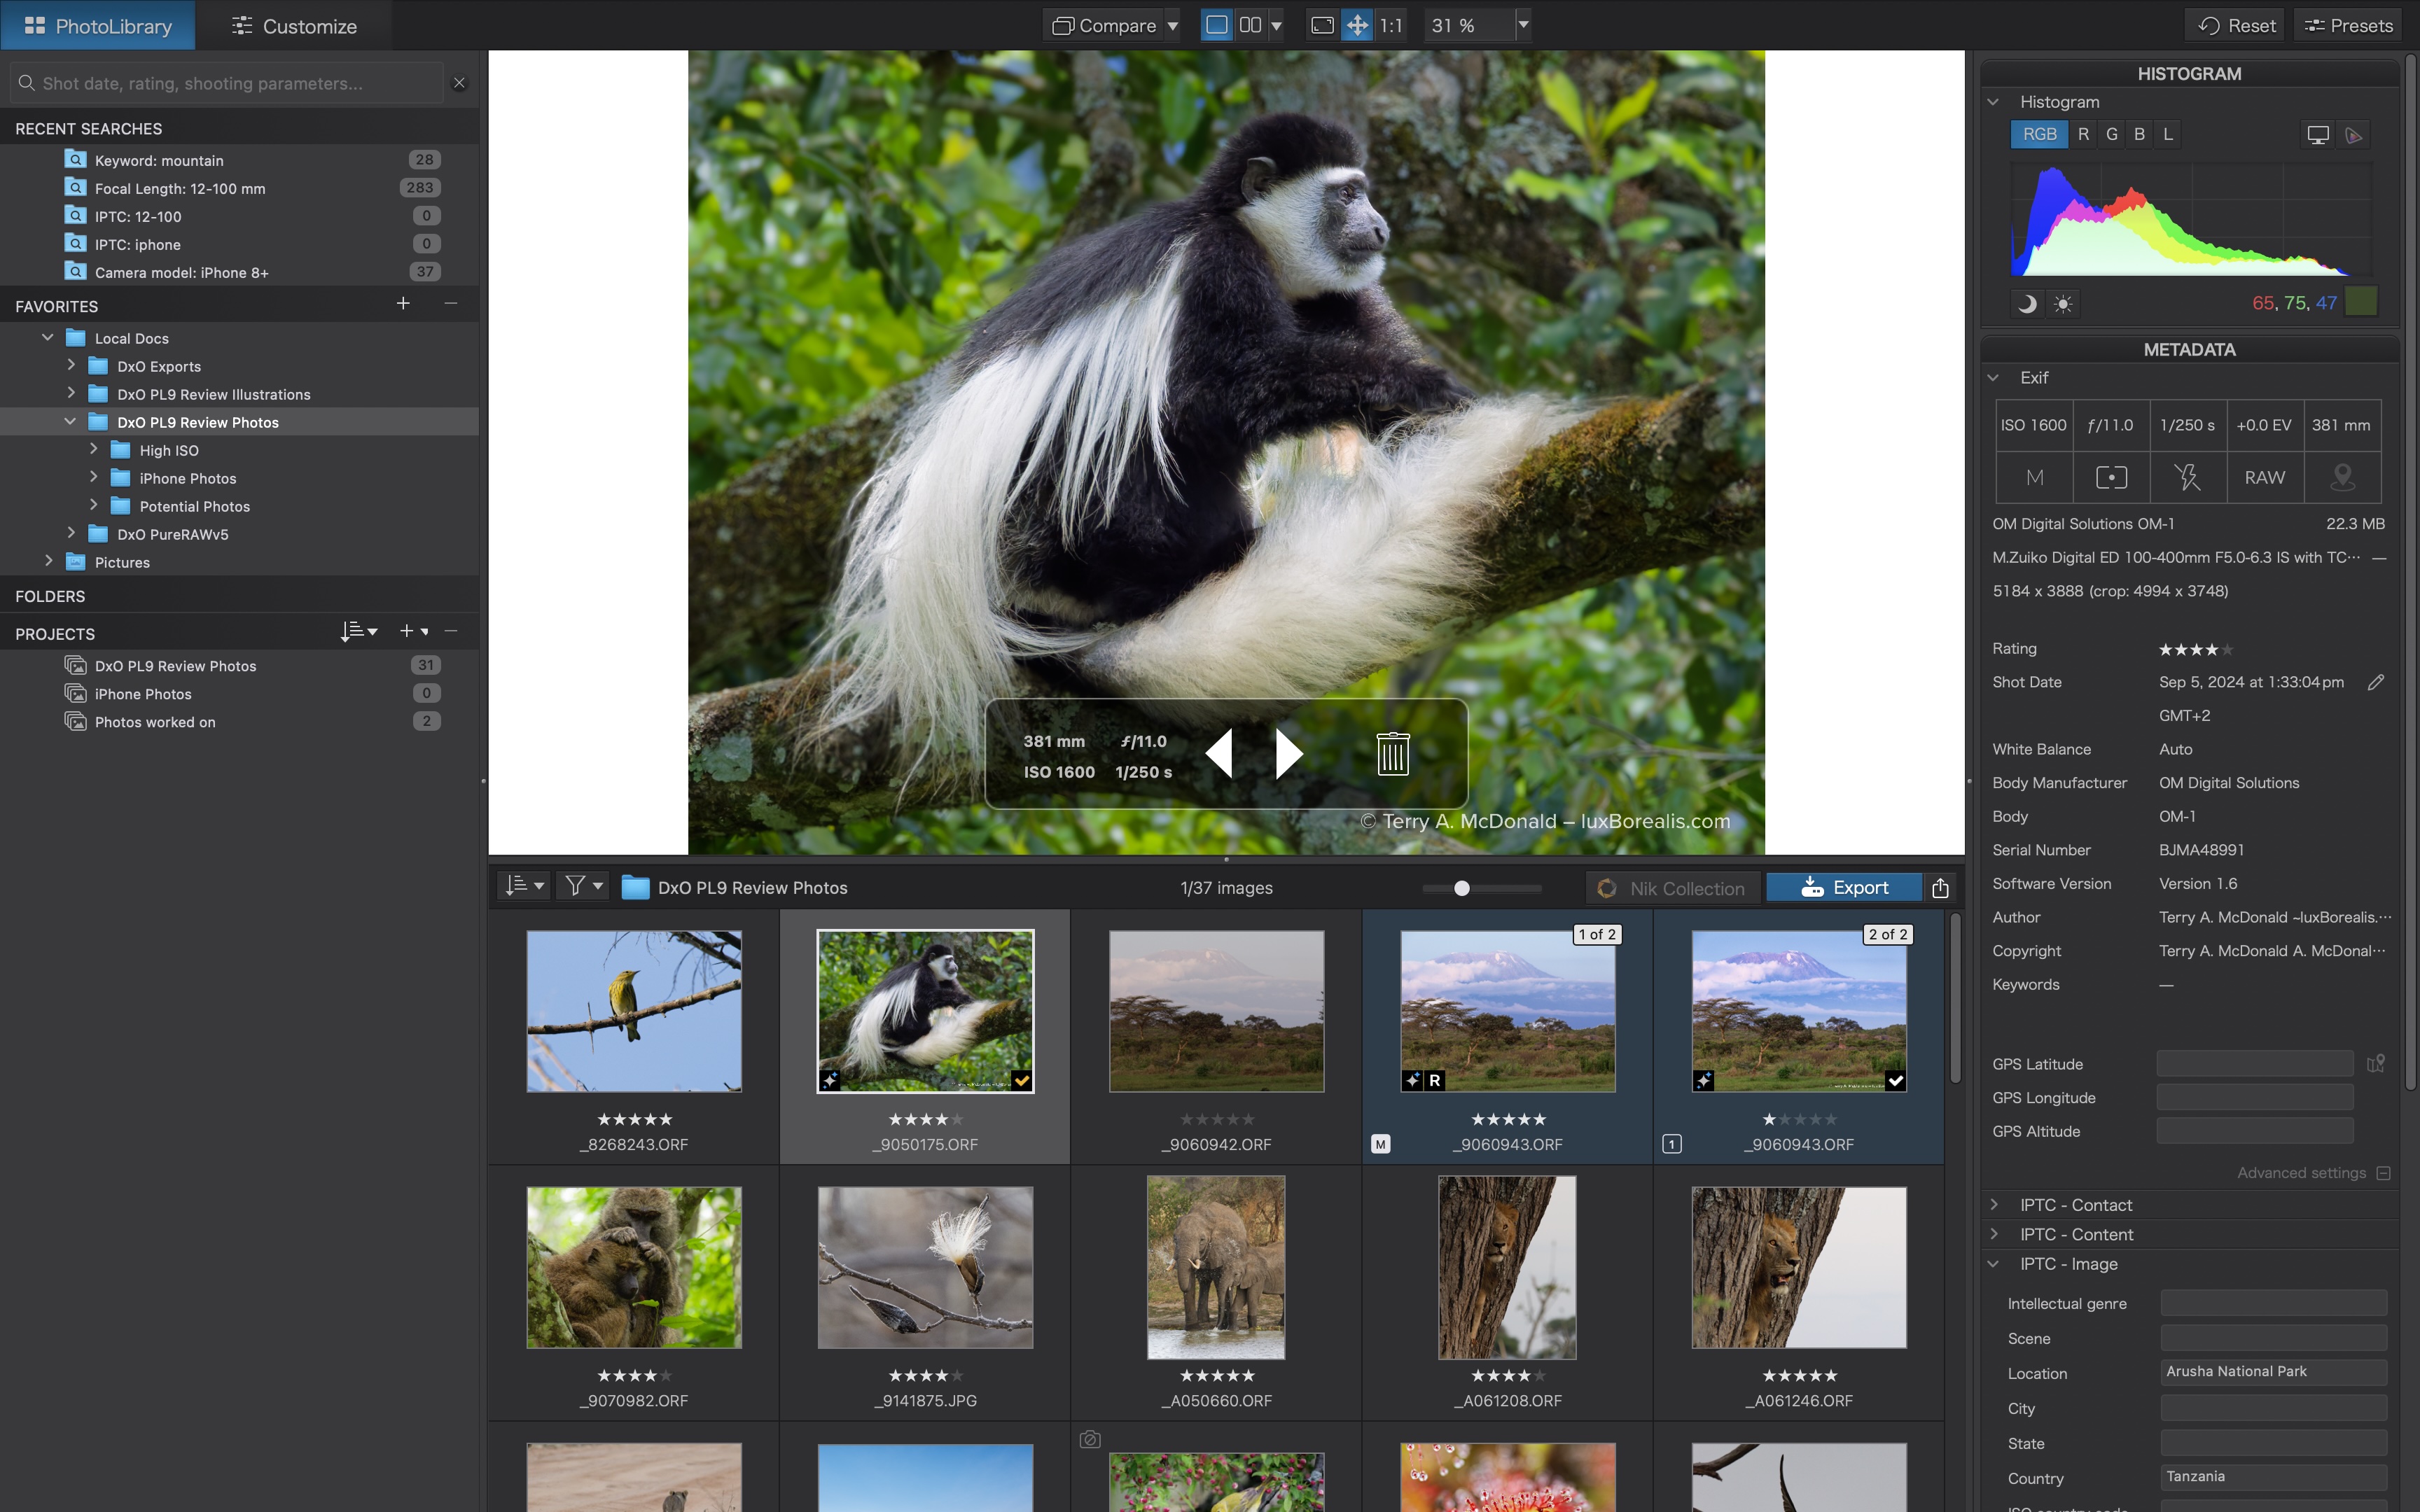
Photo Library has a left panel for navigation, a right panel for metadata, and a very helpful split screen in the middle, showing a selected image and a contact-sheet-like display of the images in the folder. This image browser section can be re-sized for multiple rows of images—how very helpful! Any image in the browser can be viewed in the viewer with a single-click or, with a double-click, can be opened directly in Customize. Brilliant! LrCC has only a single-row filmstrip at the bottom; LrC has neither, so PL9 is definitely ahead in this regard.
File System
PhotoLab 9 uses an open file system, mirroring the computer’s file structure. This is unlike Lightroom, which is a self-contained photo database (photos are imported into the app and managed from within it). Basically, PL9’s Photo Library is a file browser, hierarchically listing folders and files as they appear on your drive, either internal or external. Unfortunately it lists every forced in the hierarchy, starting with the root of whatever device you are accessing. Many of the folders listed are irrelevant to processing photos, so it is helpful that PL9 has a Favourites section. With Favourites showing the user-selected folders, the FOLDERS section can be left closed.

I’m fine with either an open or closed file structure, provided it is efficient and I can import images to folders and give them names significant to me; e.g. YYYYMMDD-DescriptiveTitle. Within the PL9 Photo Library, users can rename folders, but folders cannot be moved, as they can in a closed system. Moving folders must be done using the computer’s file structure; e.g. the Finder or File Browser. Easy enough. In a closed system (e.g. Lr), any changes made to folders or images in the Finder/File Browser breaks the link within Lr, which must be re-established within the app. So, there are pros and cons of each; it comes down to what you are used to.
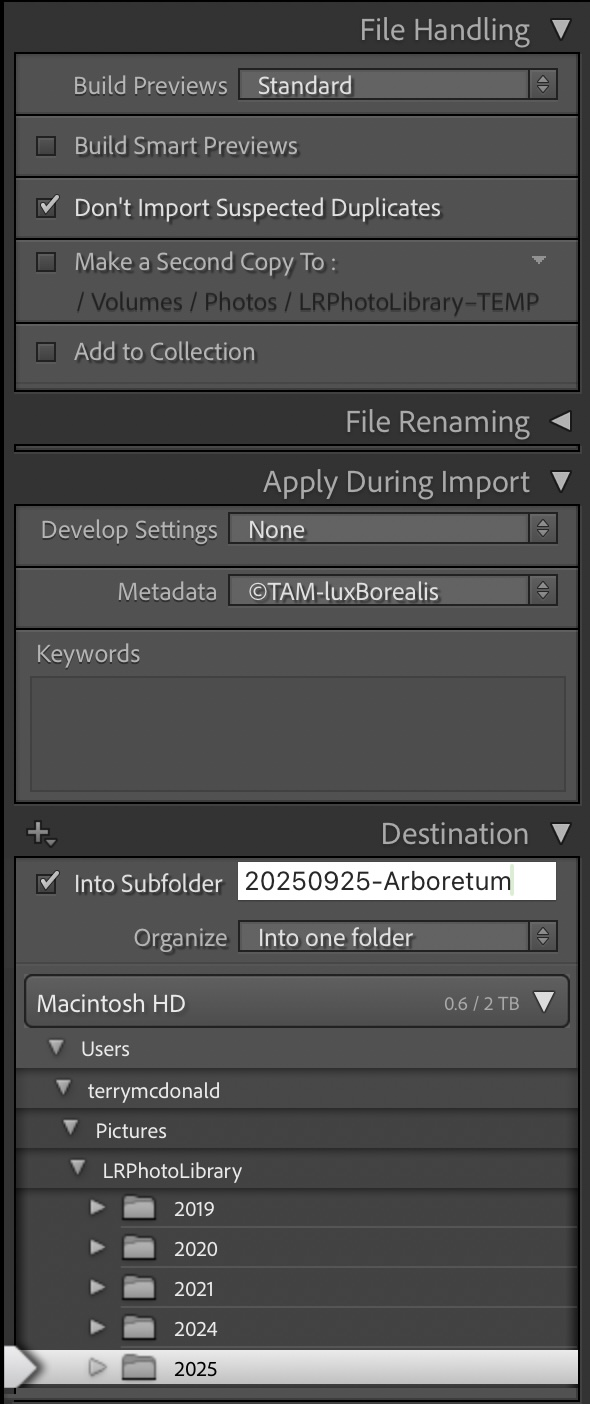
However, one of the advantages of a closed system is the ability to apply a anumber of customizations during import including metadata and Develop presets. LrC allows this; PL9 does not. In PL, I must input metadata to an image then copy and paste the metadata to others. It’s an extra step. However, PL9 applies the Preset selected in Settings > General where you can save your own preset, once the nuances of imported images are known, based on lens and/or camera and/or genre of photography.
On the plus side, PL9 allows images to be moved from one folder to another as easily as dragging and dropping. Interestingly, in the DxO User Guide, which I now know inside-outside-upside-downside, it states that moving images on a Mac duplicates them (https://userguides.dxo.com/photolab/en/managing-images/). I’m pleased to see this is not the case.
Projects within PL9 are like LrCCs Albums and LrC’s Collections. Organization using Projects (or Albums / Collections) is an invaluable tool for making collections of photos drawn from across different folders; e.g. Bird Portraits; 2025-Best; or Tanzania Trip-Best. This can speed up the sometimes endless searching for specific sets of photos. Projects narrow down the starting point for selecting photos for a specific use.
Metadata
Managing the metadata associated with each image file is an essential component of any photo library/catalogue. For professionals and many serious photographers, metadata is critical for finding, keeping track of, and using images. When photos number in the tens of thousands, finding one or a small group within seconds is much easier with up-to-date metadata: keywords, star ratings, perhaps titles and captions, and GPS data.
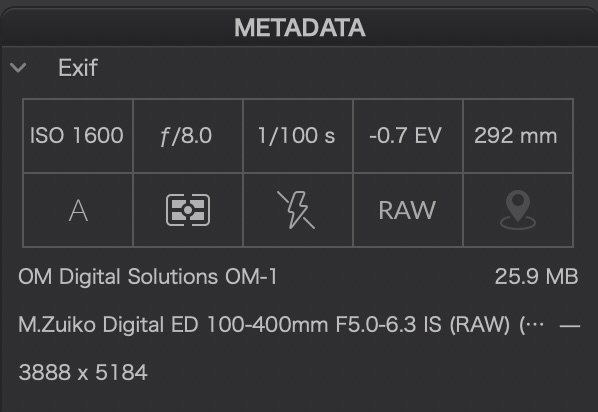
I like the clean layout of the EXIF data found in the top right of the default panel. Using a combination of numbers and easy-to-understand icons, I can quickly glimpse the camera controls used to capture an image, which then drive some of my editing decisions.
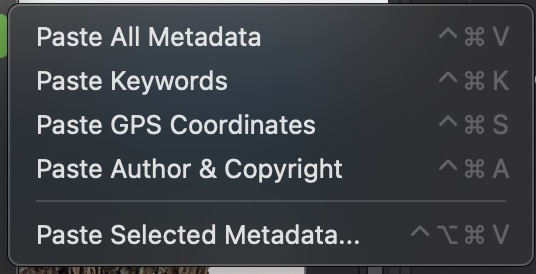
Furthermore, metadata is easily edited, copied and pasted to other photos and to batches of photos. Batch processing of metadata is an essential efficiency and DP9 handles it well, though not completely seamlessly. It’s easy enough to right-click on an image and select Copy Metadata then, select the batch of images you want it copied to, right-click and select the option you wish:
As with a number of PL9’s functions, metadata sits between the robust batch editing of Lr Classic and the clunkiness of LrCC.
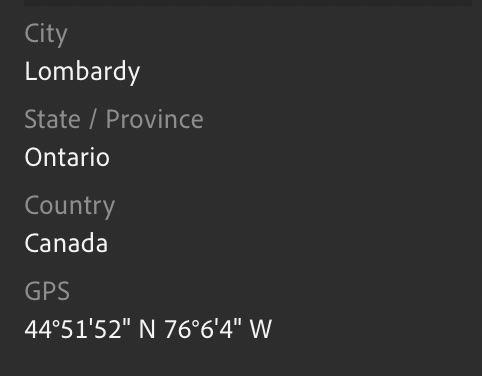
Adding location and GPS data is very helpful, especially for travel, nature and landscape photography. I don’t always publish the data, but it is also helpful for remembering locations. In PL9, holding the cursor over the map pin shows the lat & long, if entered for the file. Unless your camera writes GPS data to each file, you will need to input it. One way is to use Google Maps to pinpoint the location then copy and paste the lat & long. I do this with LrCC for individual and batch images. From there, LrCC populates other relevant locational data: city, province/state, and country.
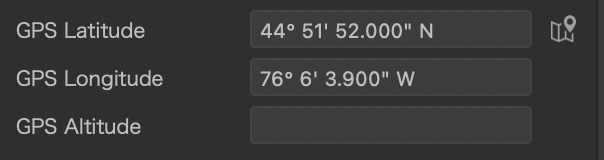
With PL9, it’s not as straightforward. Since latitude and longitude are two separate fields, each must be copied and pasted separately. Huh? In Lr, it is one field, one copy and one paste. With Lr Classic, it’s even simpler. I use the powerful and under-utilised Map module and drag and drop batches of images to the precise location: voilà, they are geo-tagged.
Adding Keywords is another essential function of metadata. With PL9, one keyword at a time is entered, followed by a Return. To me, this is inefficient. With Lightroom, I can enter (type or paste) a string of comma-separated keywords, then tap Return. Lr converts the string to individual keywords. Definitely more efficient. Other than this, PL9 has a powerful keywording system that also accepts hierarchical keyword lists.
Search
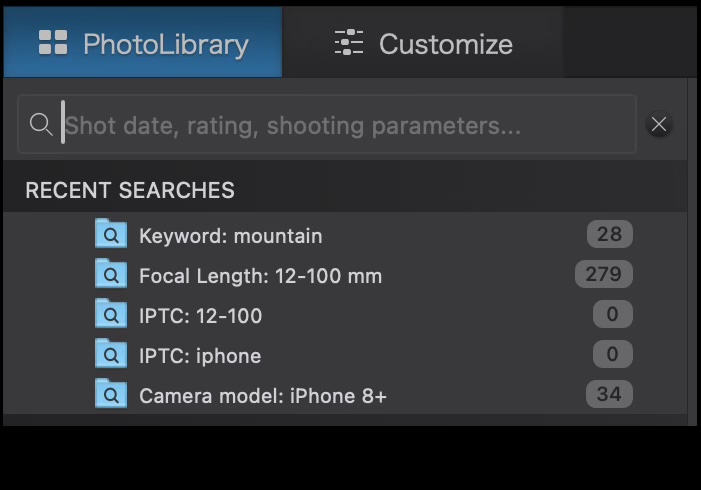
I’m loving PL9’s Search. A solid search function is indispensable for efficiently wading through thousands of photos to gather a set of similar images or to help create a Project. I like the way PL9 creates a pre-search list using a combination of terms and easily-recognised icons: IPTC metadata, pictures, folders, keywords, date, lenses and camera bodies, even by phone type.
If I search ’10/2024’, I get all the images from 1 Oct. 2024 to 31 Oct. 2024. Brilliant! It just seems so much more intuitive, providing the user with choices as they work.
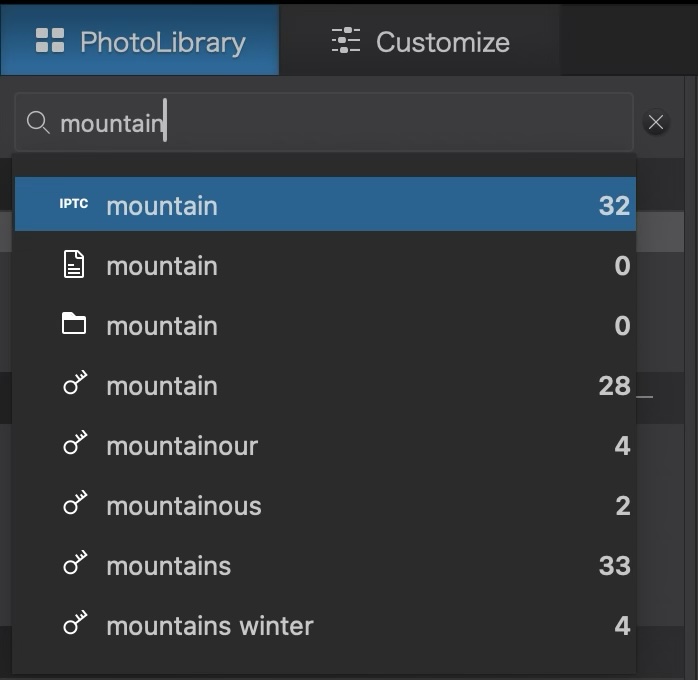

Caption: PL9: The incredibly helpful search previews of two different types of searches.
Even with Adobe Sensei in LrCC, results are often hit-and-miss; e.g. for 10/2024, I get images from the 10th day of any month plus those for October. The ’pre-search’ list is not as complete as the one provided by PL9’s search, unless you use the often hidden operative words such as ’lens’ or ’keyword’. Have a look at what ’12-100’ shows—what a great seelction! Plus, if anything comes up in the search for which the specific camera body or lens module is missing and needs to be downloaded, PL9 provides an alert. Now that’s proactive.
I’ll be honest, though. Lr Classic’s Library Filter takes the cake, with discrete sections for Text and/or Attribute and/or any number of Metadata entries. It’s the mark of a truly integrated database, rather than a file browser. That being said, PL9’s search is really no slouch and is made even better by keeping Recent Searches. Accruing a set of searches while building a Project of images is very helpful.
Sadly, PL9’s Search function does not work within a Project or within the Projects section like the Search/Filter does with LrC with its Collections Search. For instance, the group of photos I chose for the PL9 review included a mix of 35mm sensor, M43, iPhone, and 1” sensor photos. I wanted to select out just the iPhone photos, but the search function in the Photo Library only works on the folder hierarchy of the active drive. It can’t be directed to Projects or a Project within Projects. So, I had to go through the images manually and select them. Is this a deal-breaker? Probably not as the Search function is already excellent. Might there be a workaround? Perhaps, but, it points to another inefficiency of using an open system file browser method as opposed to a photo management database.
Photo Library Conclusion
In summary, the PhotoLab in PL9 is truly a file browser, rather than an image management system like Lr. There are pros and cons of both open and closed systems of file organization. In some ways, it’s whatever method you get used to. However, with Lr being a database, with user-customized import presets, a more powerful search function acting both within folders and within Collections, as well as easier batch metadata and geo-tagging, I’d say that PhotoLab’s Photo Library has come a long way, but is not yet as efficient or complete a tool as we have with either version of Lightroom.
Next up, I’ll take a look at processing order and masks.
Thanks for reading. Your feedback, comments and questions are welcome! Be sure to SHARE with those contemplating the same decisions in photo editing.
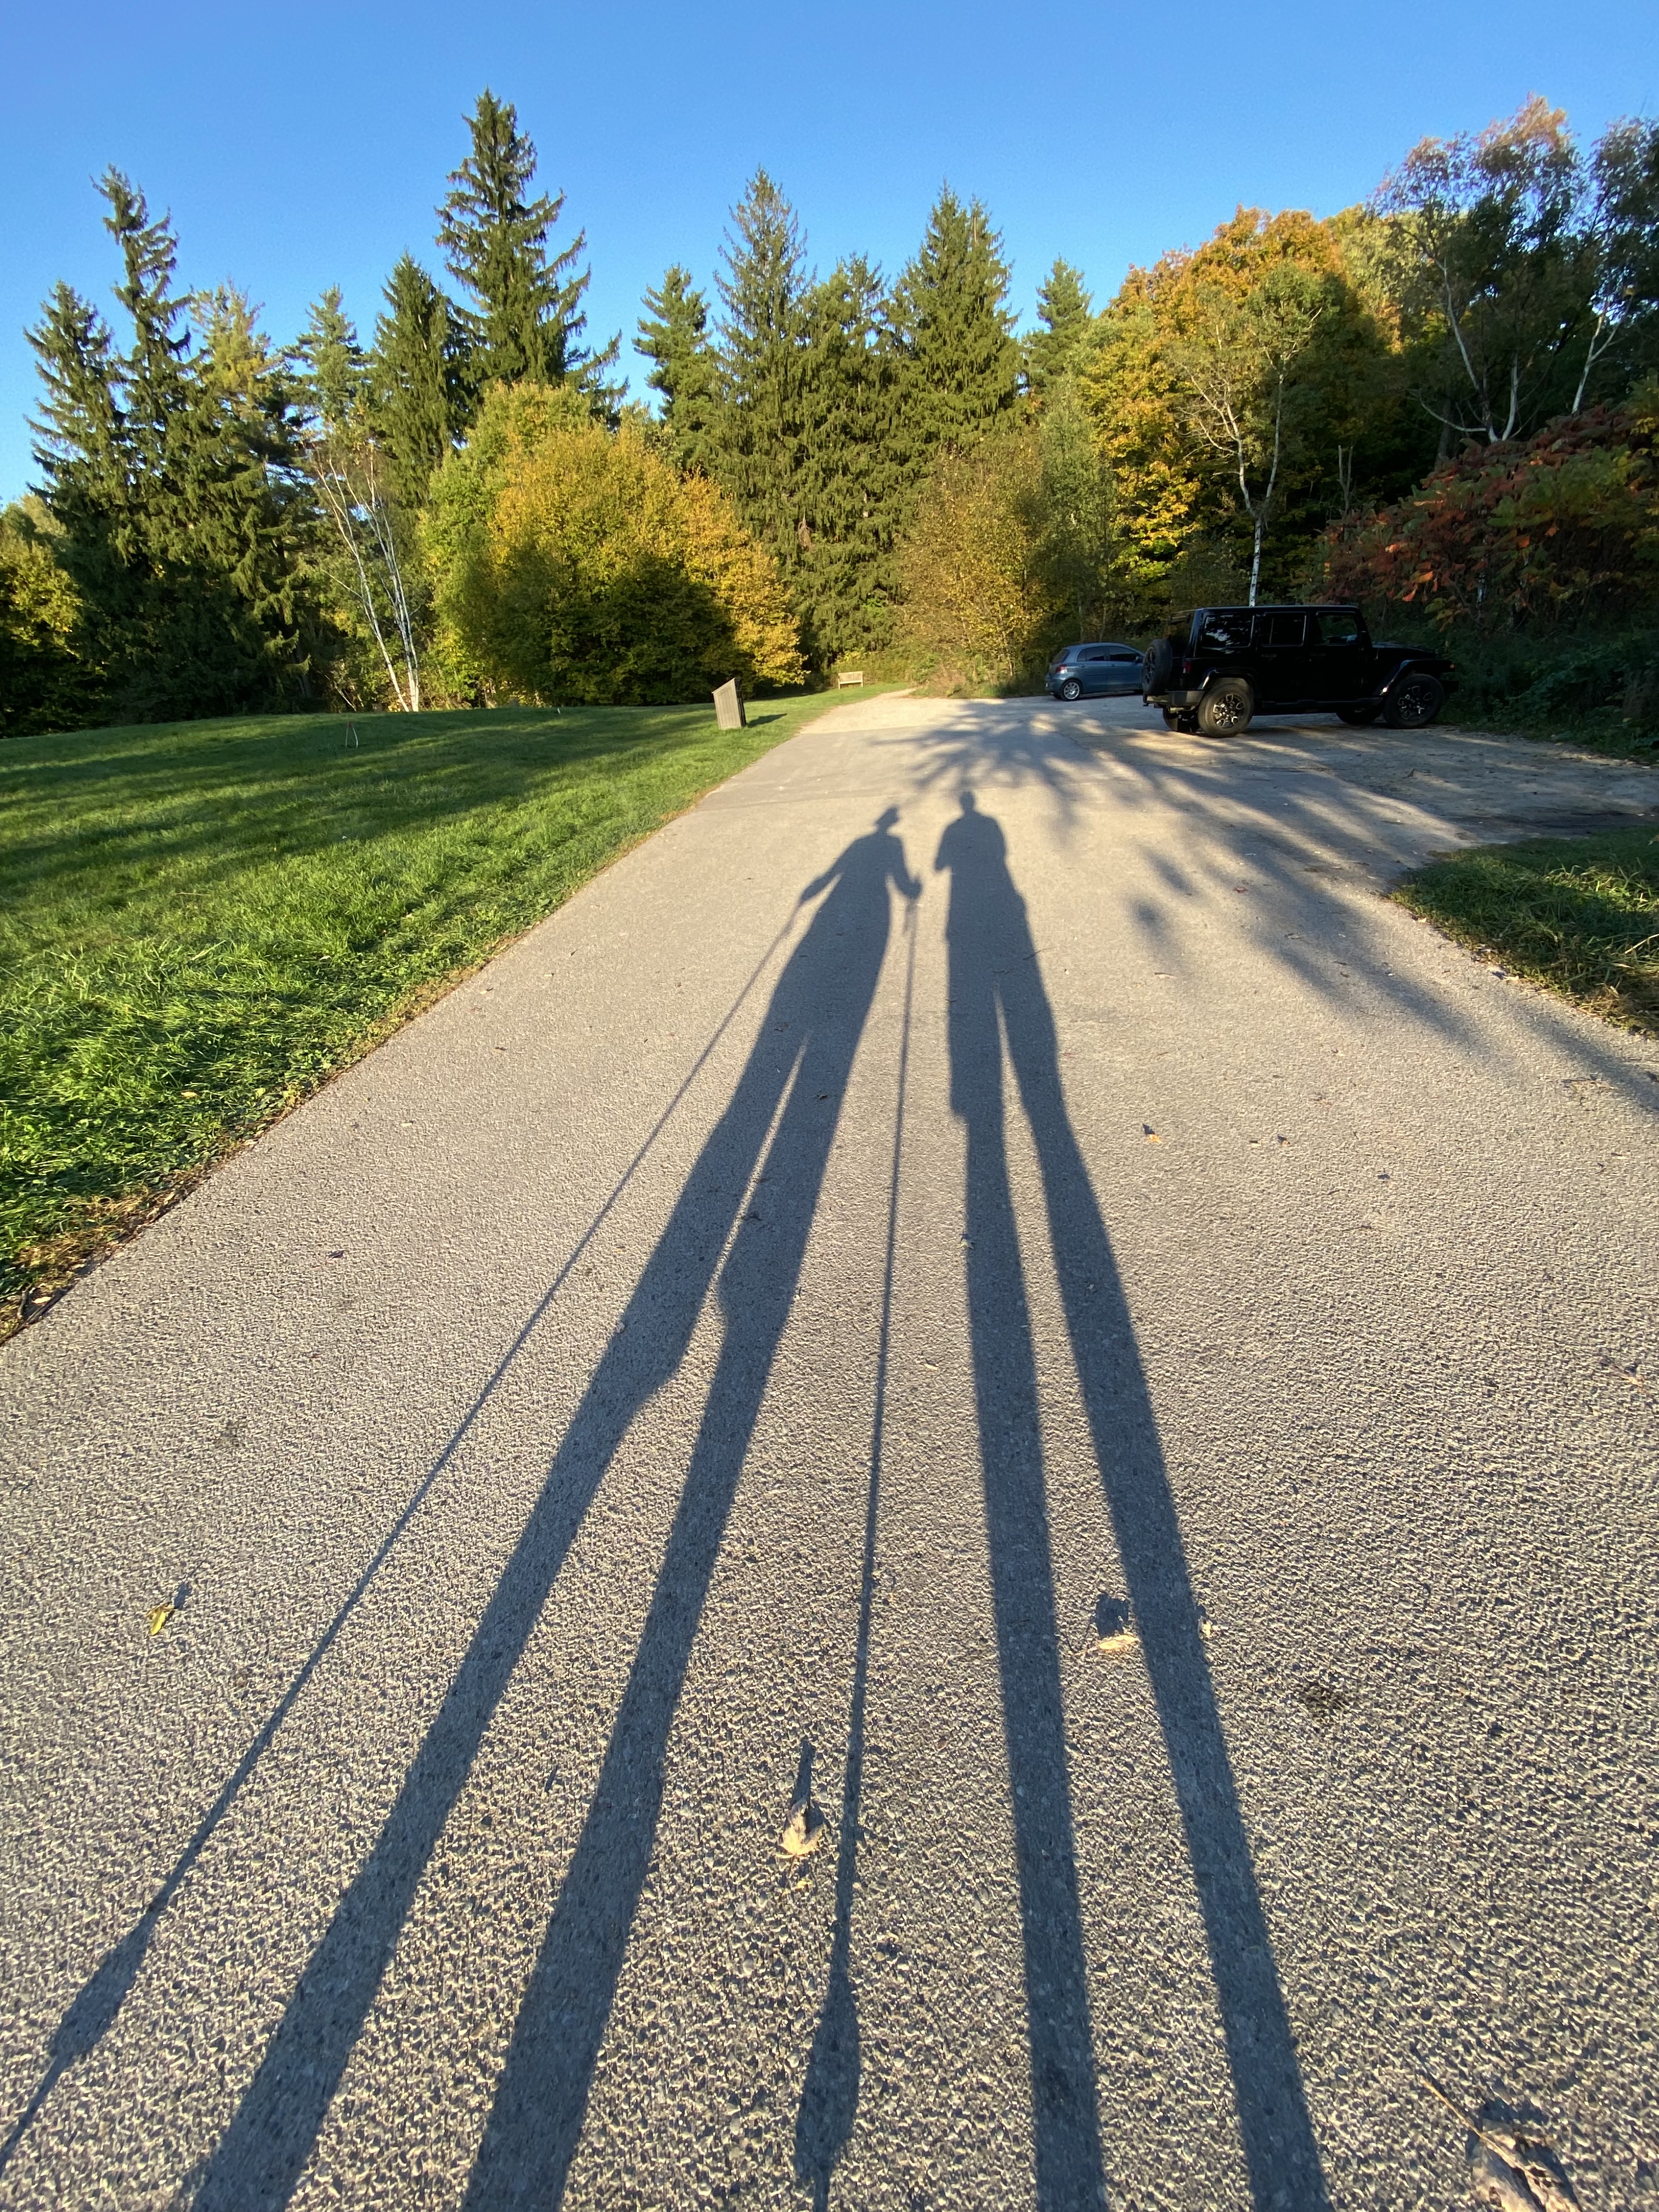
Beautiful Autumn Light . . .
631 words; 6 photographs; 3-minute read
. . . at least here in /southern Ontario. Not to boast, but we’ve been enjoying 20°C to 28°C days and brilliantly clear blue skies without a cloud in site. What’s not to like?
I’m dedicating this blog post to my dear wife, life partner and best friend. Two months ago, she underwent a hip replacement and this weekend, successfully hiked 10km over our two hikes. I’m amazed, and she is ecstatic. Her recovery is on-going, but getting better everyday. I know how grateful she is to her health care professionals at St. Mike’s and her physiotherapists, but it also comes down to her own determination!
Now for some Autumn Light . . .
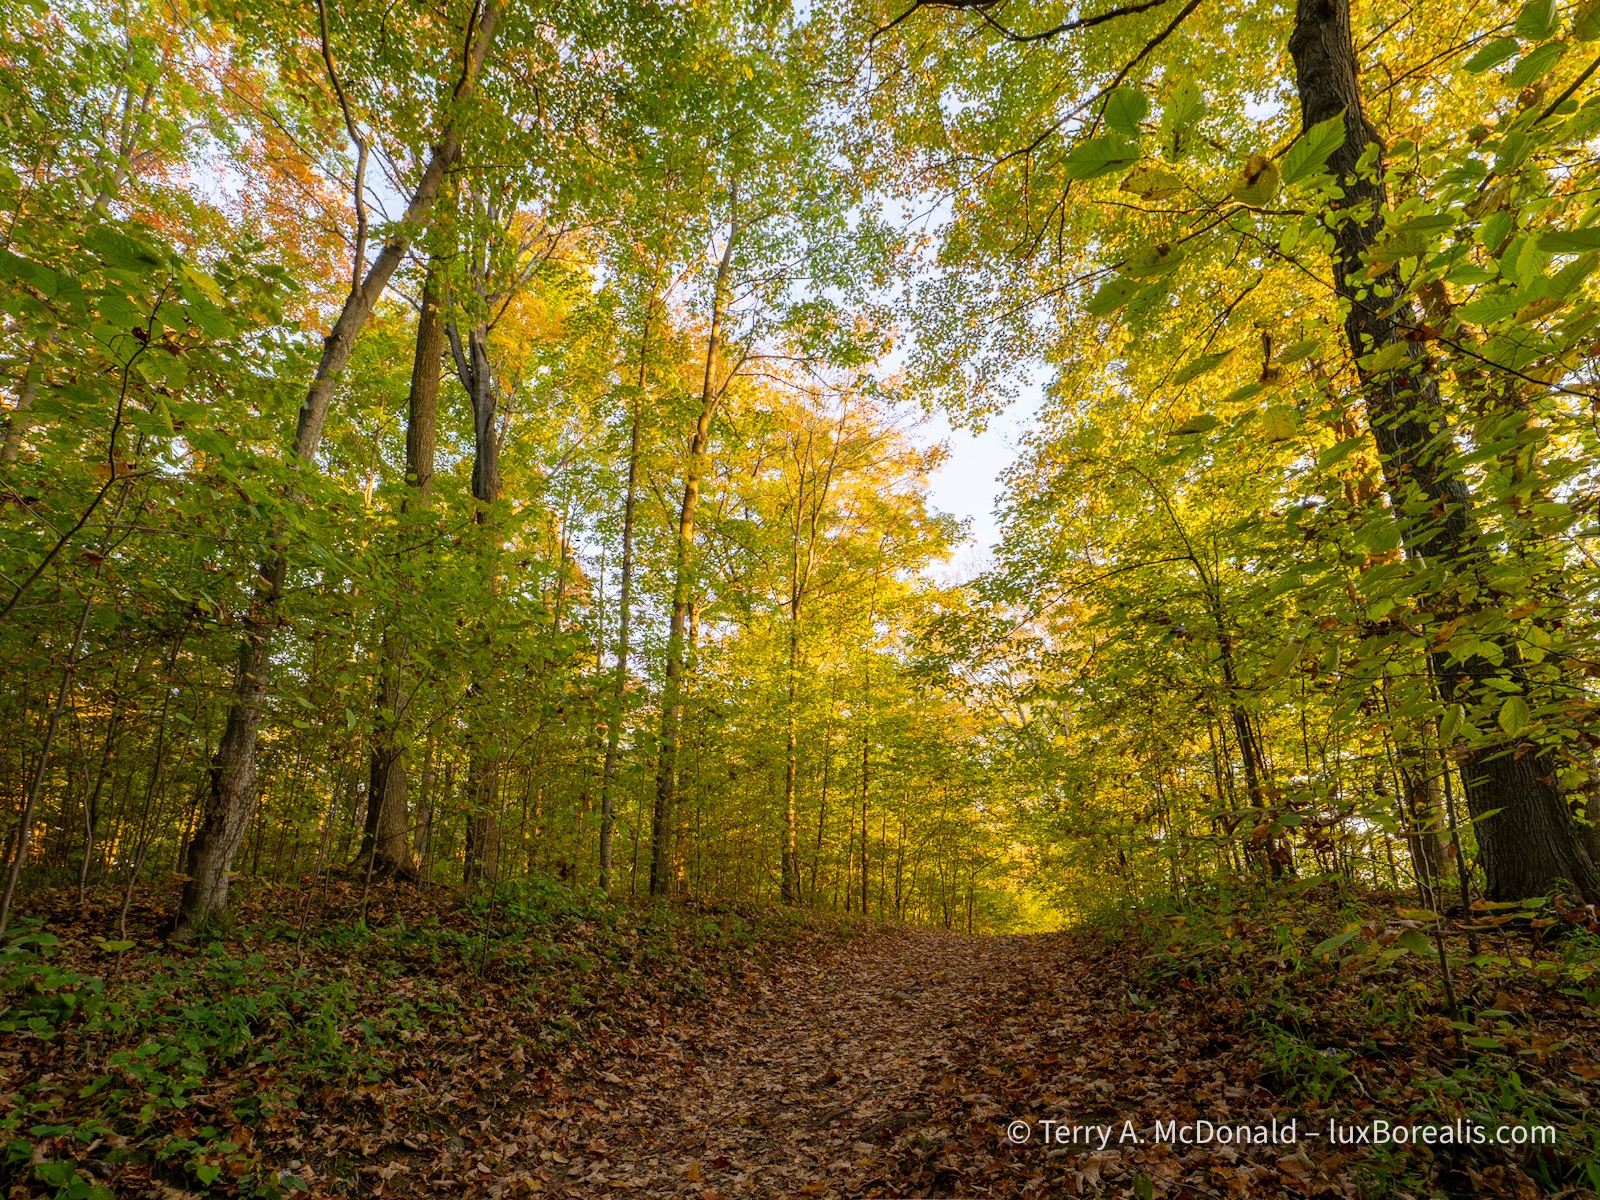
OM-1 | M. Zuiko ED 8-25mm ƒ4 at 23mm (46mm efov) | ƒ5.6 @ 1/2000 and 1/32000 | HDR blend +/– EV2 | Lightroom
I’m of two minds regarding this gorgeous weather. It’s easy to fall into the trap of celebrating—who doesn’t love a warm October day?—but it is also a stark reminder that being 10°C above normal has its costs as well: everywhere is dry; it may be confusing wildlife, birds and insects; and it’s the product of our lifestyle and the carbon we continue to spew into our air.
OM-1 | 25mm | ƒ 5.6 @ 1/125 | ISO 800 | Lightroom
In other words, enjoy it now, but it’s all connected to the wildfires, the smoke, the shorter ski season, the increased frequency and severity of storms and flooding and droughts. There’s no such thing as a free lunch, right!?
The photos in this post are from the last couple of days out and about. We chose late in the day more for the cooler temps than for the light, but, hey, I’ll take the gorgeous late-day warm, angled light anytime. And when the sunsets and the forest becomes dark, well, that’s what ISO 3200 is for.
OM-1 | 25mm (50mm efov) | POL| ƒ5.6 @ 1/13 | ISO 3200 | Lightroom
I specifically went out with only the M. Zuiko Digital ED 8-25mm ƒ4 PRO zoom (16-50mm efov). I love this lens. It is so versatile. I can get ‘close’ if I need to, but really it’s the premier landscape lens. It’s sharp wide open and is brilliant at ƒ5.6 or even ƒ8.
OM-1 | 8mm (16mm efov) | ƒ5.6 @ 1/80 and 1/1250 | HDR +/– EV2 | Lightroom
With the bright autumn light slanting through the forests, I often shot using HDR. Lightroom Desktop (not Mobile!!) has an excellent HDR Blend mode that uses only 2 files: the brightest and the darkest. I typically shoot 3 frames EV2 apart giving me a 2 over and 2 under. But I also shot 3 frames, EV3 apart for 3 over and 3 under. Both worked brilliantly, but +/– EV2 covered the dynamic range well.
OM-1 | 25mm (50mm efov) | ƒ5.6 @ 1/10 and 1/160 | HDR blend +/– EV2 | Lightroom
You’ll notice that every photo presented here but one, relies on back and side-lighting. Front lighting is, frankly, boring, too ‘tectbook’ with little character. AS I walk along, I’m constantly assessing the interplay of light and details.
When I stop to compose, I’m composing the light as much as I’m composing for leading lines and three-dimensionality of the foreground, mid-ground and background relationships. It’s the light that counts; how it shapes the land, the textures and the colours.
OM-1 | 15mm (30mm efov) | ƒ5.6 @ 1/40 and 1/2500 | HDR blend +/– EV3 | Lightroom
Thanks for reading. Be sure to get out and spend some time enjoying the beauty autumn has in store for us.
Be sure to SHARE and COMMENT, and, if you’re not yet a subscriber the SUBSCRIBE—it’s as easy as adding your email. And, no, I do not ever share or sell emails. Nor will I hound you with posts.
BOLO! Upcoming Presentations
522 words; 4 photos; 3-minute read
Next week I have two evening presentations lined up:
- Monday 15 Sept., Hamilton Camera Club, “Just Photography” — an exploration of the grey area between authentic photography and digital art. At what point does the use of third-party editing and Generative AI turn your photographs into digital art?
- Wednesday 17 Sept., Guelph Photographers Guild, “iPhoneography”—how great photographs can be made with phone camera
Just Photography—Pure & Natural
As I wrote in an earlier blog post (Navigating the AI Juggernaut), there is no escaping AI these days. Along with Third-Party Pre-Sets, the two technologies are speeding up the editing process while providing unlimited creative freedom. But, are AI and Pre-Sets also eroding the authenticity of photography?

If it is not acceptable to judge AI images and photographs in the same competition, how much AI or Third-party editing should be permitted?
It seems everyone and every photo app company has jumped on the AI bandwagon creating this unspoken expectation that we accept and adopt these push-button editing solutions because they will make our life easier. I’m asking the question, should we?
What might be ideal for commercial photography is playing havoc with competition photography. And what about decorative photography—to what extent are AI-users willing to divulge to clients their use of AI and Third-Party pre-sets in making a photograph they claim to be ‘theirs’?
28mm | ƒ5 @ 1/80 | ISO 100 | Lightroom | #AuthenticPhotography (made without the use of third-party pre-sets or Generative AI)
With blue hour and golden hour pre-sets, generative fill, expand and replace, at what point does the photograph stop being a photograph and become digital art? Can digital art be called photography? Is it possible to carve out a space for Authentic Photography? What, exactly, is Authentic Photography?
Many photographers are grappling with these questions everyday. The blurred lines created by these advances represent the grey areas we will be exploring on Monday evening with the Hamilton Camera Club.
iPhoneography
The ubiquitous phone camera. With us everyday and every waking moment of our 21st century existence. Though we often treat them as such, they are far beyond the Instamatics of last century. Are we really taking full advantage of the cutting-edge technology sitting in our pocket or purse?
iPhone 8 Plus — the camera that’s always with me.
Like you, I shoot with a ‘real’ camera. But my camera and sensor agnosticism has led me to explore and unlock some of the potential built into phone cameras. I’ve learned that the versatility of phone cameras, despite the limitations of sensor size and lenses, can result in some truly remarkable photographs. Especially when, as Ansel Adams once said, “the most important component of a camera is the twelve inches behind it.”
Join me Wednesday evening with the Guelph Photographers Guild for what I hope is an inspiring presentation unlocking the true potential of the ubiquitous phone camera.
iPhone 11 Pro | 6mm (50mm efov) | ƒ2 @ 1/950 | ISO 20
Looking forward to meeting you next week!
The subscription plot thickens
Topaz Labs enters the subscription fray.
681 words; 4 photographs; 3-minute read
As a ‘founding customer’, I received an email today from TopazLabs, stating that they will be moving to a subscription model. If you use Topaz, you may have received the same email. I was assured that my current desktop version of PhotoAI would remain valid in perpetuity with the standard caveat of free updates being available for up to 1 year after purchase.
So, in some ways, things haven’t changed: buy PhotoAI desktop for USD $199 and use it forever with 1 year of upgrades. Renewals are USD $119 unless you choose to auto-renew which is discounted to USD $99/year.
OM-1 | 60mm Macro )120mm efov) | ƒ8 @ 1/125 | ISO 200 | Lightroom
All of this is confirmed on TopazLabs website. However, a little digging turned up some interesting reading.
A Monthly Subscription has been introduced for each of their desktop apps (PhotoAI, Gigapixel and VideoAI). Photo AI will be USD $35/month. I choked when I saw the price. Why so much? For 12 months, it would be $420!! I just rechecked the website and, sure enough, it really is $35/month. And that does not include additional ‘Cloud Credits’ for faster AI processing.

Huh? What am I missing here? Why would someone pay $420 each year for software that is $200 + $100/year thereafter?
OM-1 | 60mm Macro (120mm efov) | ƒ4 @ 1/80 | ISO 1600| 10-shot in-camera Focus Stack | Lightroom
Currently, I’m paying CAD $16/month (USD $12/mo) for Lightroom Mobile and desktop + Lightroom Classic + 1 TB of Adobe cloud space. It’s easy to forget that this subscription also comes with the highly useful Lightroom Camera for iPhone (with hdr-raw capture), Adobe fonts and a highly customizable Adobe Portfolio website—the platform I use for luxBorealis.com. Adding industry-leading Photoshop (mobile and desktop) puts the monthly cost up to CAD $26/month (USD $20/mo).
You can do the math as well as I can—$35 for PhotoAI versus $20 for Lightroom + Photoshop. It’s a no-brainer. To be fair, Topaz offers WebTools, a series of apps that are similar to, though not as complete as the various desktop modules in PhotoAI, (denoise, sharpen, upscale, etc.). But even they are, collectively, $20/month for an annual commitment of $200. Even Capture One, as industry-leading as Lightroom, is USD $25/month. What’s with TopazLabs?

OM-1 | 60mm Macro (120mm efov) | ƒ4 @ 1/100 | ISO 1600 | Lightroom
Earlier this year, I did a fairly detailed direct comparison of Topaz with Lightroom and DxO: how well could each demosaic, denoise and sharpen raw files? I found the three were almost indistinguishable. So, in my eyes, it seems more than a bit unreasonable for Topaz Labs to be charging as much as they are for software that may match Lightroom in basic image quality, but lacks the complexity and depth of Lightroom as an almost complete editing suite.
Anyway . . . I’m still shaking my head.
On a related note . . . Earlier this week I was approached by DxO HQ in France to evaluate DxO PhotoLab 9. They assured me that it would remain a standalone app and would not be transitioning to a subscription model. I figure it will take me a few weeks to put together a thorough review in the context of someone who is well-entrenched in Lightroom—so stay tuned!
OM-1 | 23mm (46mm efov) + POL| ƒ5.6 @ 1/500 | ISO 200 | HHHR | Lightroom
My hope is that DxO has come through with an editing suite that will be a solid standalone competitor for Lightroom, along the lines of Capture One, if only to make the switch away from subscriptions closer to reality. Interesting, last week Fstoppers had an article The End of Adobe’s Monopoly? Why Creatives Are Switching which has generated much discussion. Perhaps with Topaz’s pricing challenges and a new DxO PhotoLab 9, we may be one step closer to ditching subscriptions.
Thanks for reading! Add your COMMENTS below or your questions. Hit the SUBSCRIBE button to receive notice of each post and be sure to SHARE this with others.
A Week in Killarney Provincial Park—2.4 billion years in the making
1114 words; 14 photographs; 6 minutes
For the past week, I’ve had the pleasure and honour of being the Friends of Killarney Park Artist in Residence.
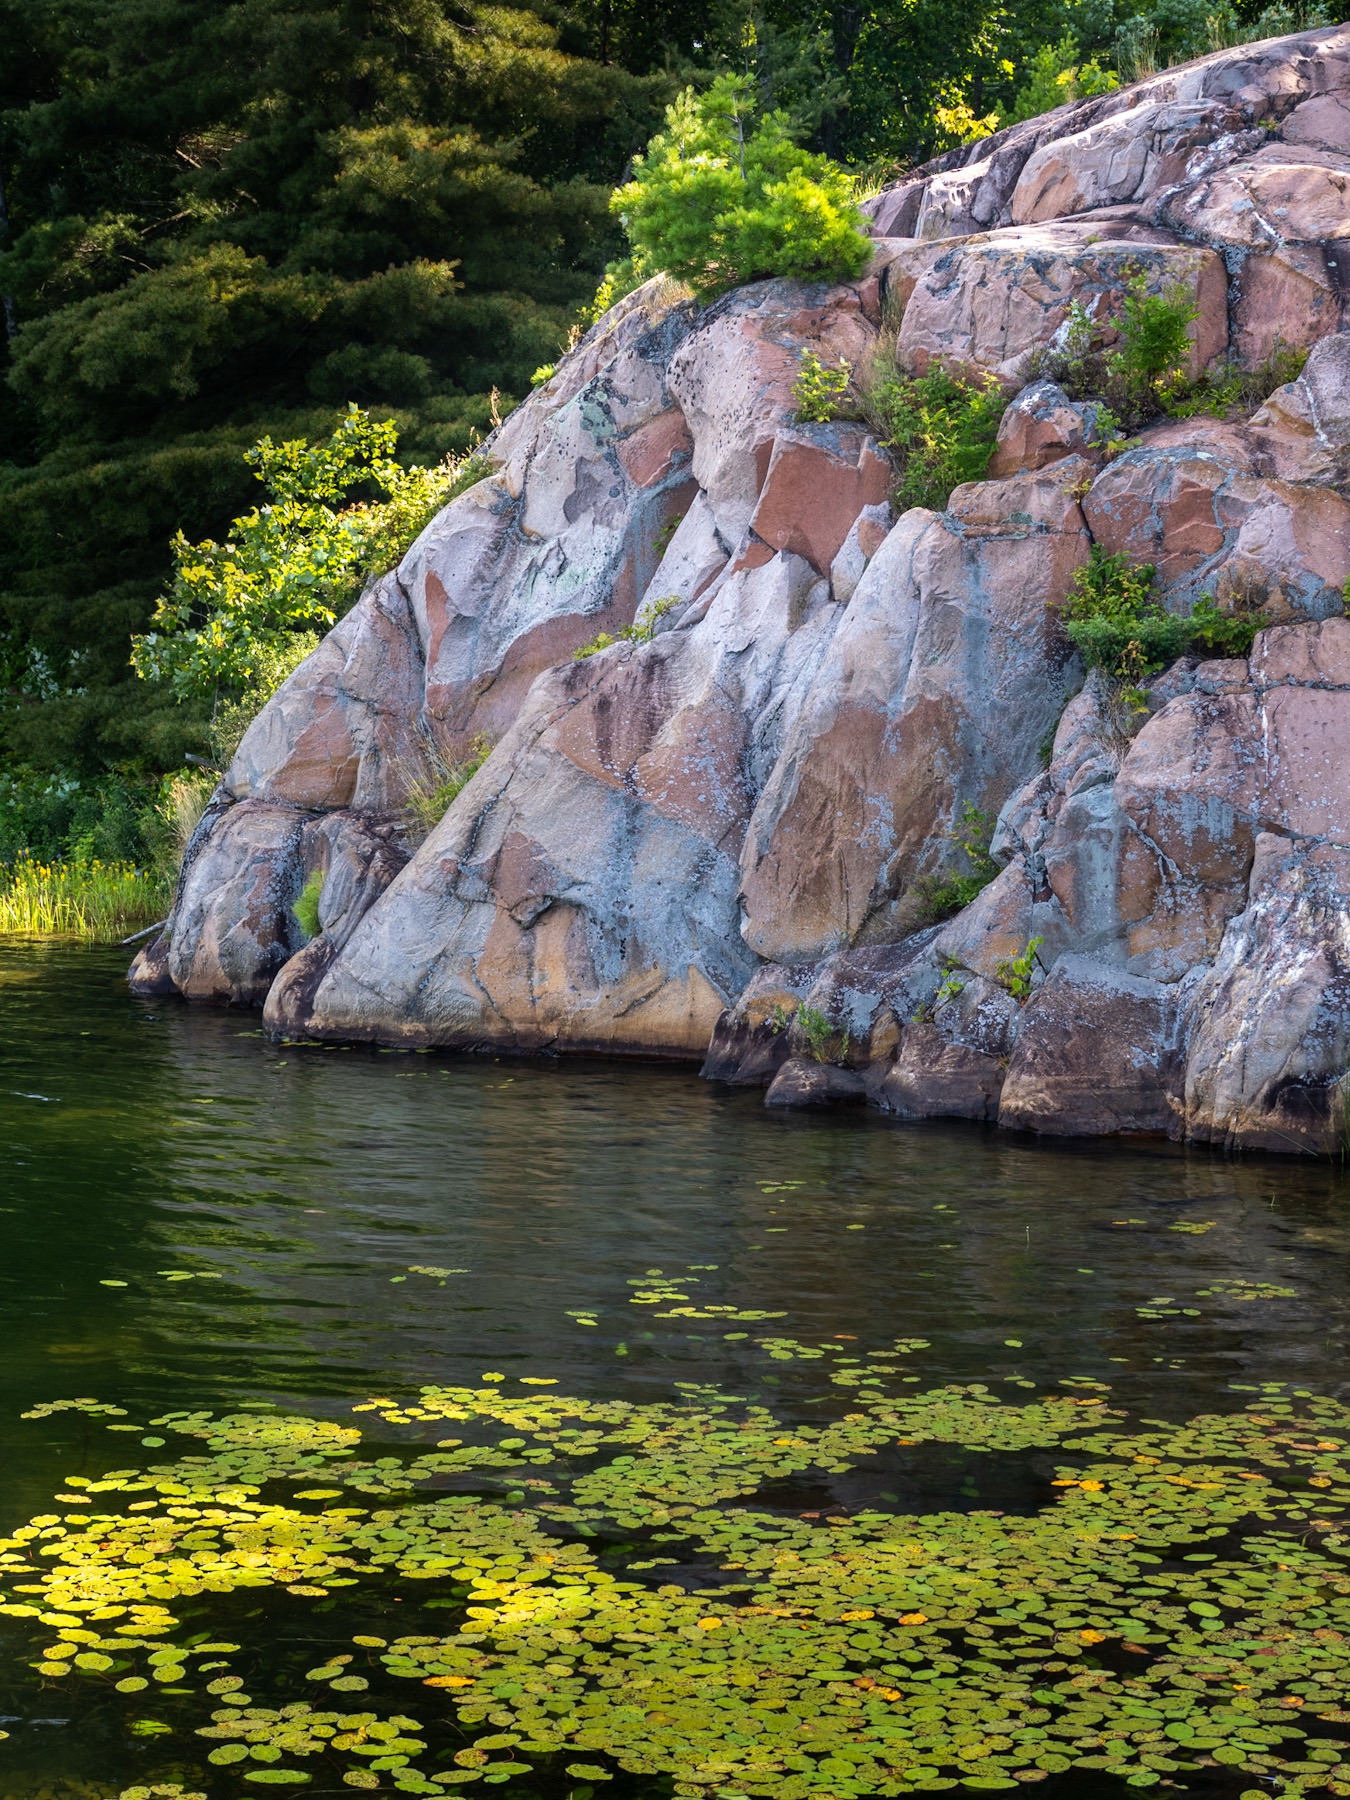
Killarney Provincial Park is truly a gem in the crown of Ontario Parks. From a landscape photographer’s perspective, the unique juxtaposition of the pink granite of the Killarney batholith and the white quartzite La Cloche Range mean more than simply colourful rocks. The two rock types are crucial in determining the biology going on at the surface as well.
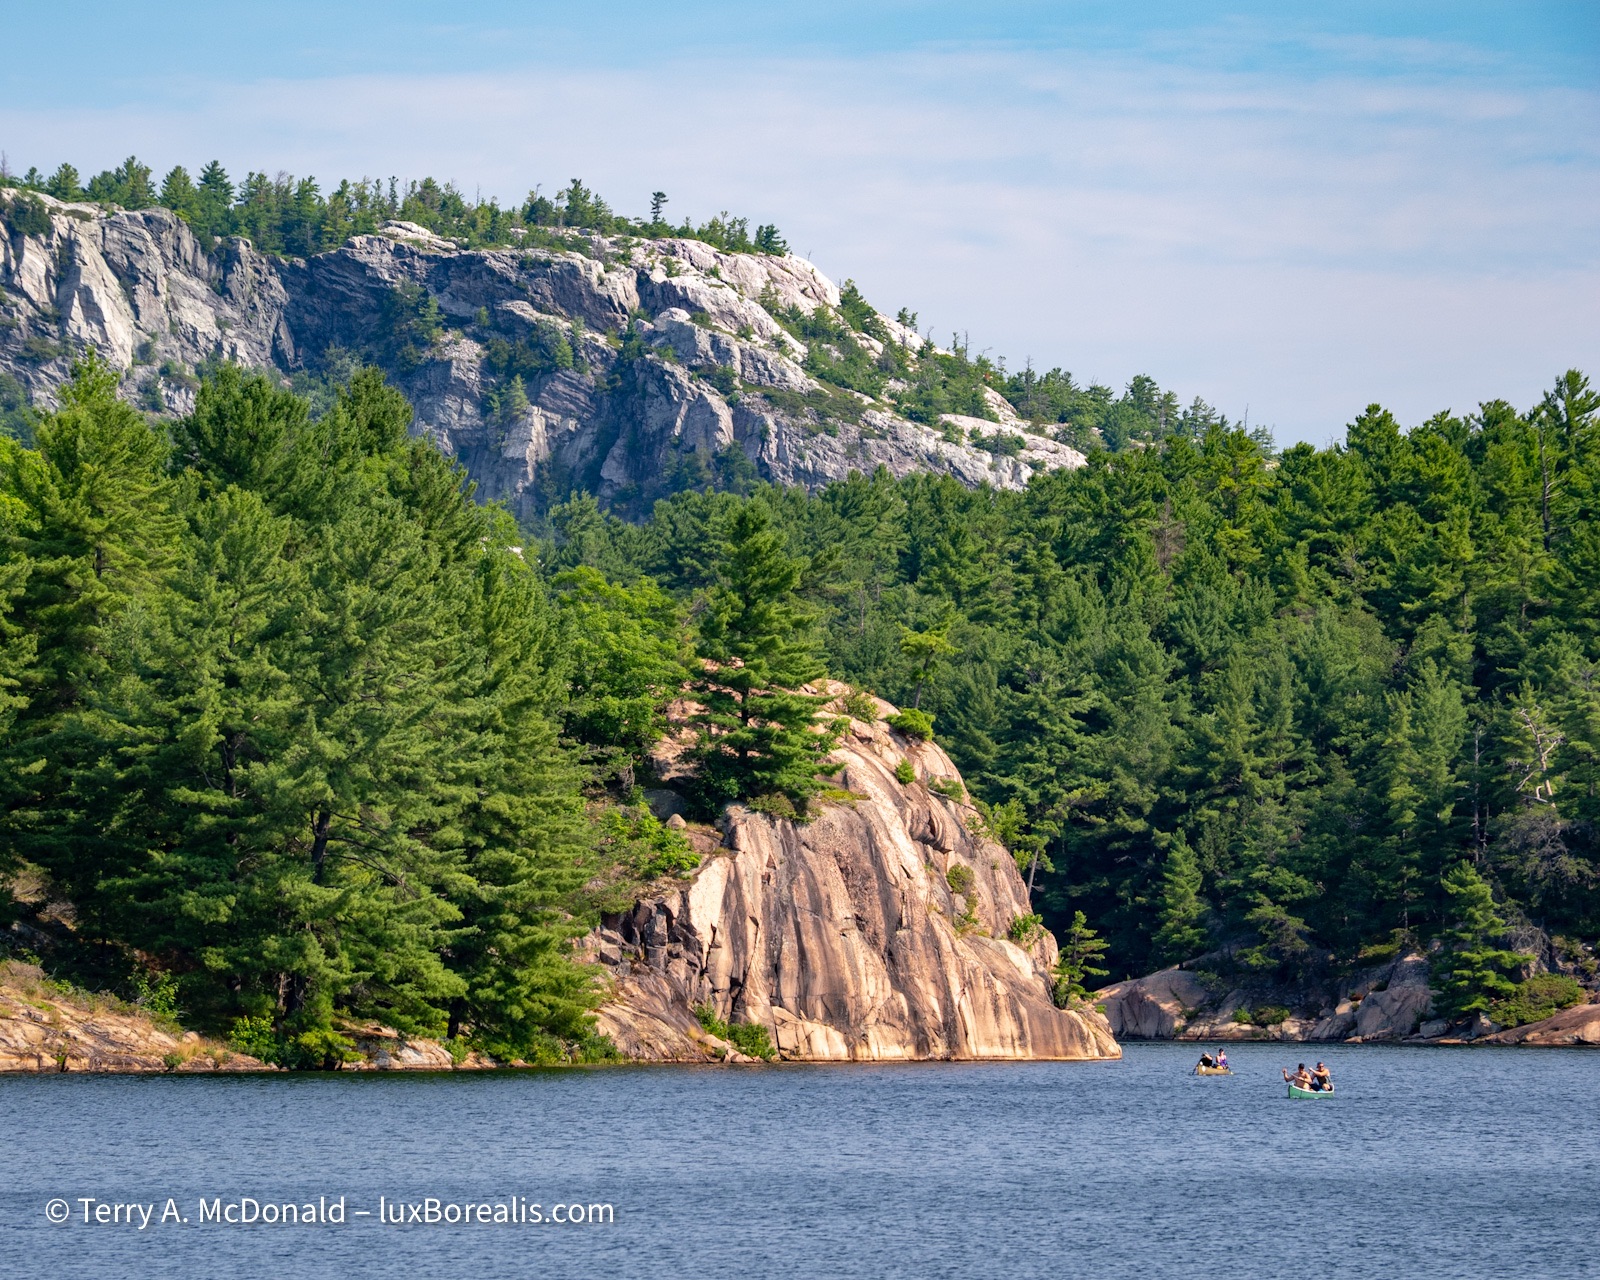
Scale, perspective, juxtaposition, and timing make this the quintessential view of Killarney Provincial Park: billion-year-old pink granite backed by 2.4 billion-year-old white quartzite.
OM-1 | 100mm (200mm efov) | POL | ƒ5.6 @ 1/125 | ISO 200 | Lightroom
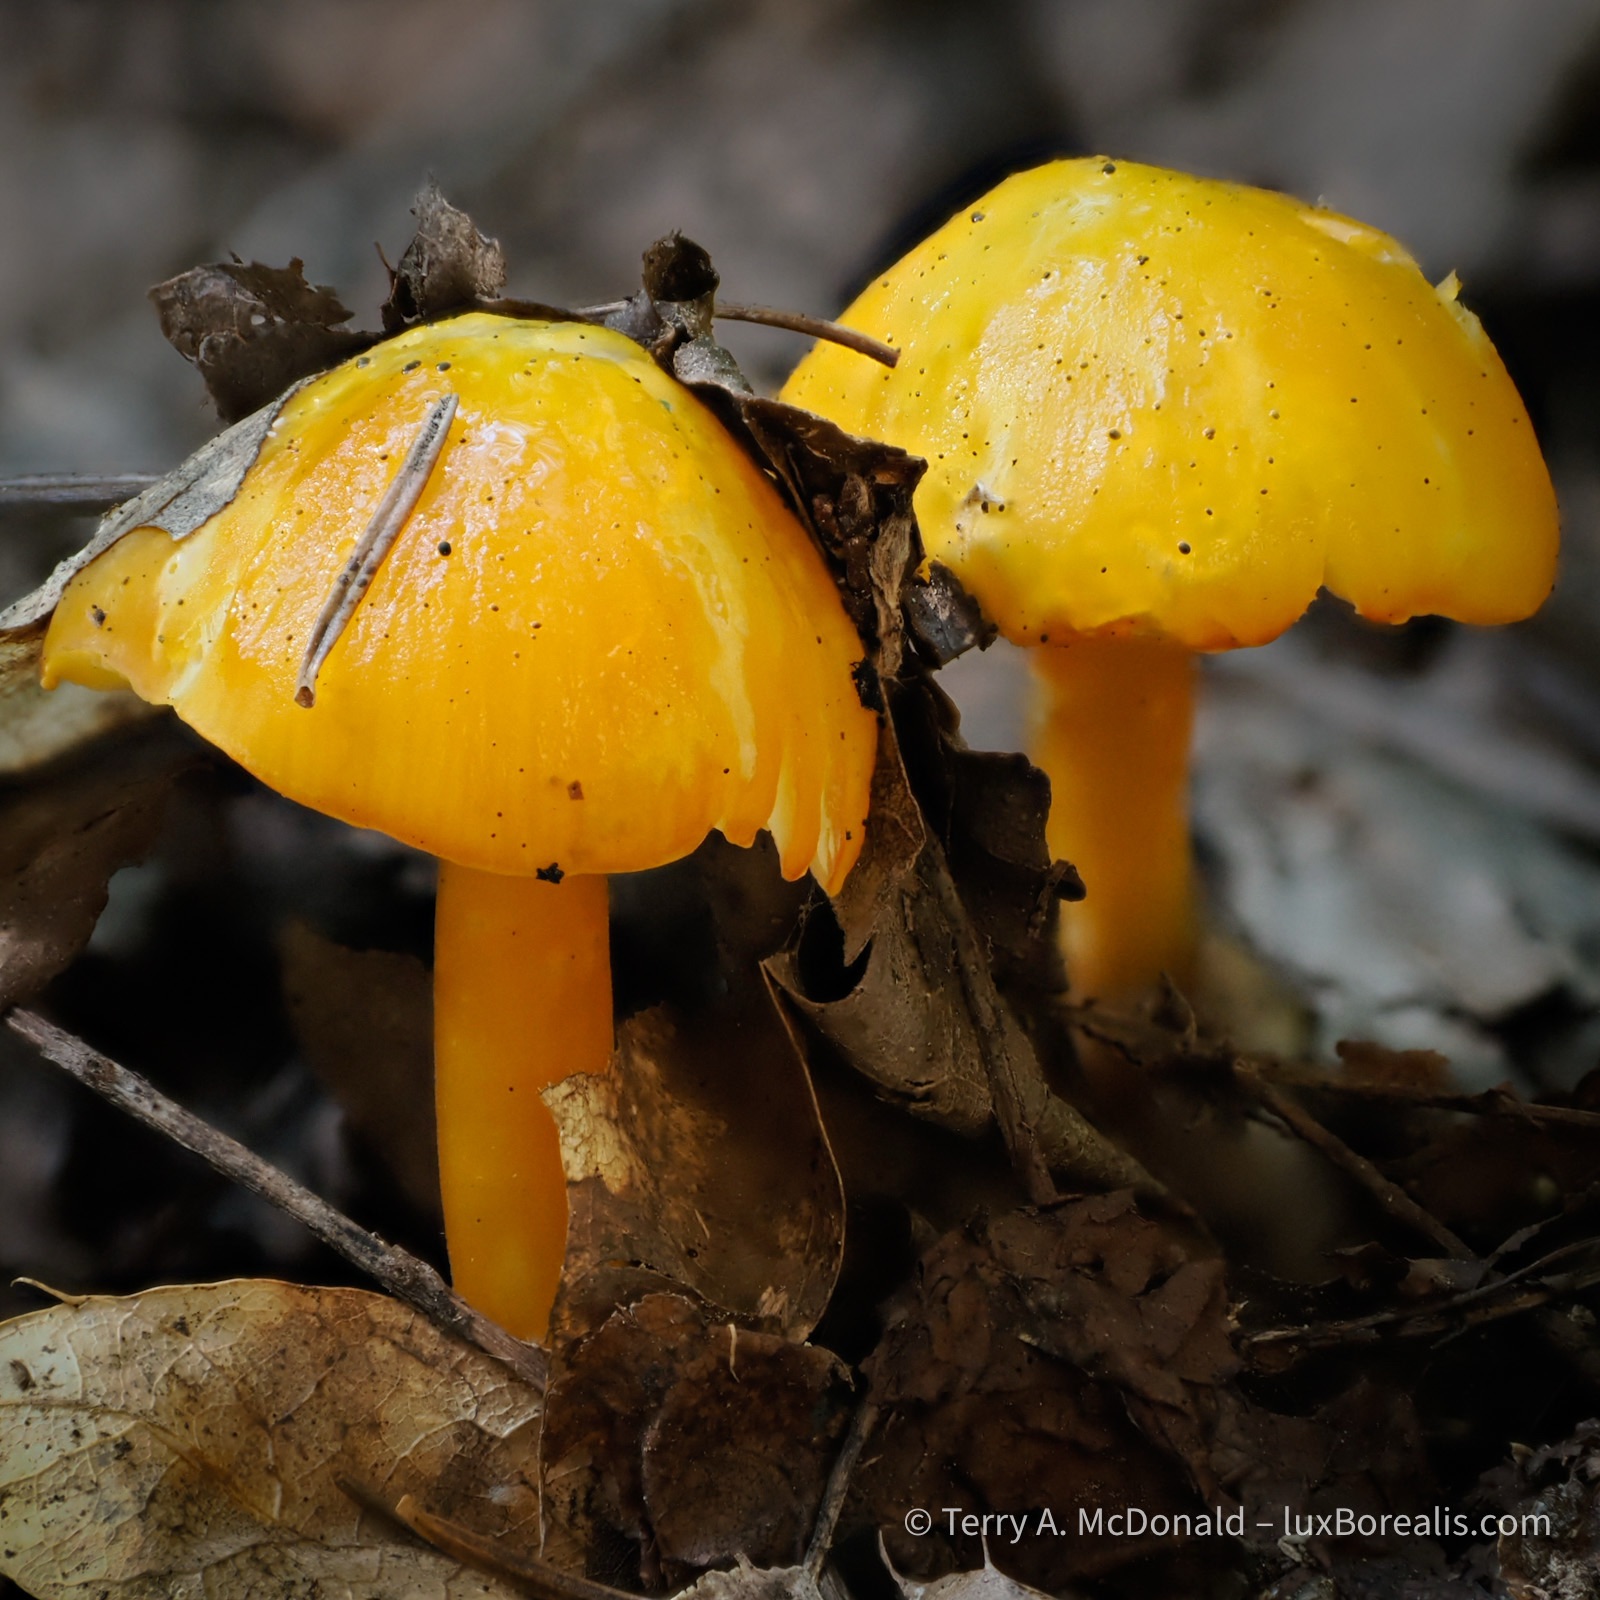
This week, I was overwhelmed by the variety of colourful fungus/mushroom species on display along all of the trails. Rain from the previous week must have triggered them as many were new emergents. My 60mm Macro lens teamed up with in-camera focus-stacking were essential for capturing the depth necessary for clear, crisp photographs.
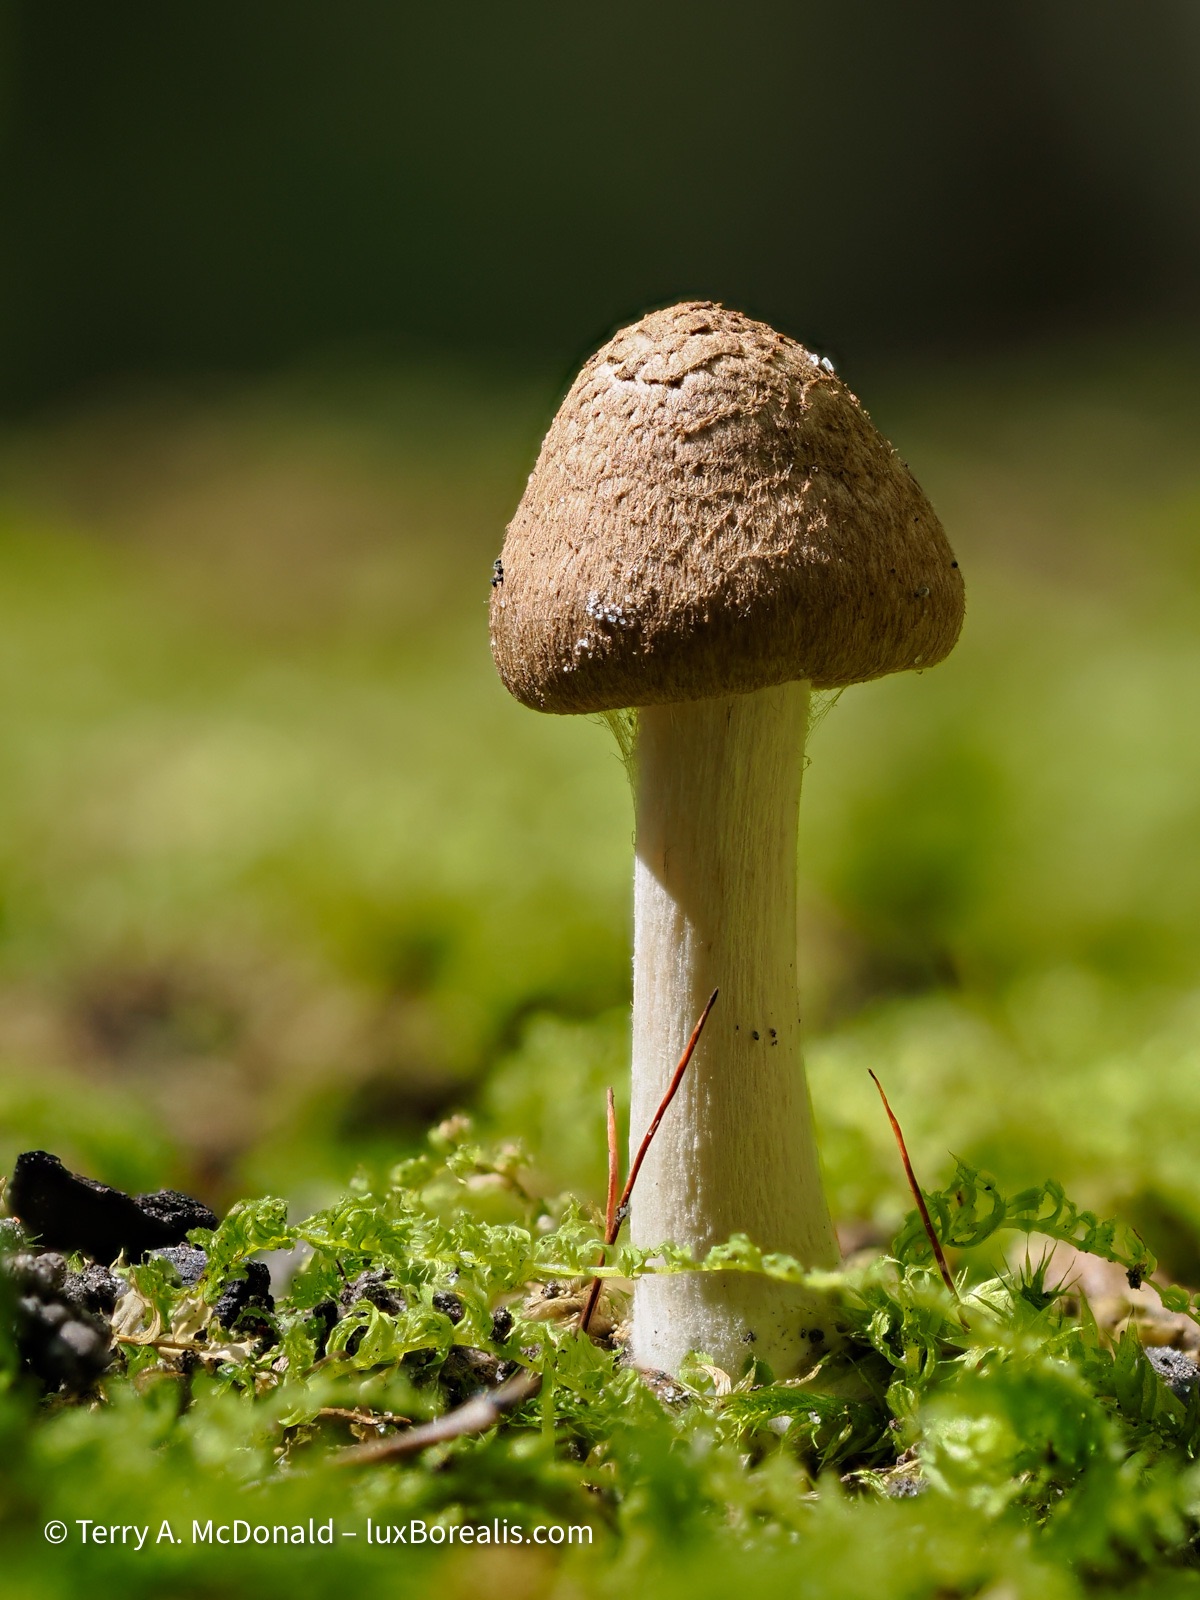
At just 3cm high, this diminutive mushroom was right in my campsite.
OM-1 | 60mm Macro (120mm efov) | ƒ4 @ 1/60 | ISO 200 | 10x in-camera focus stack | Lightroom
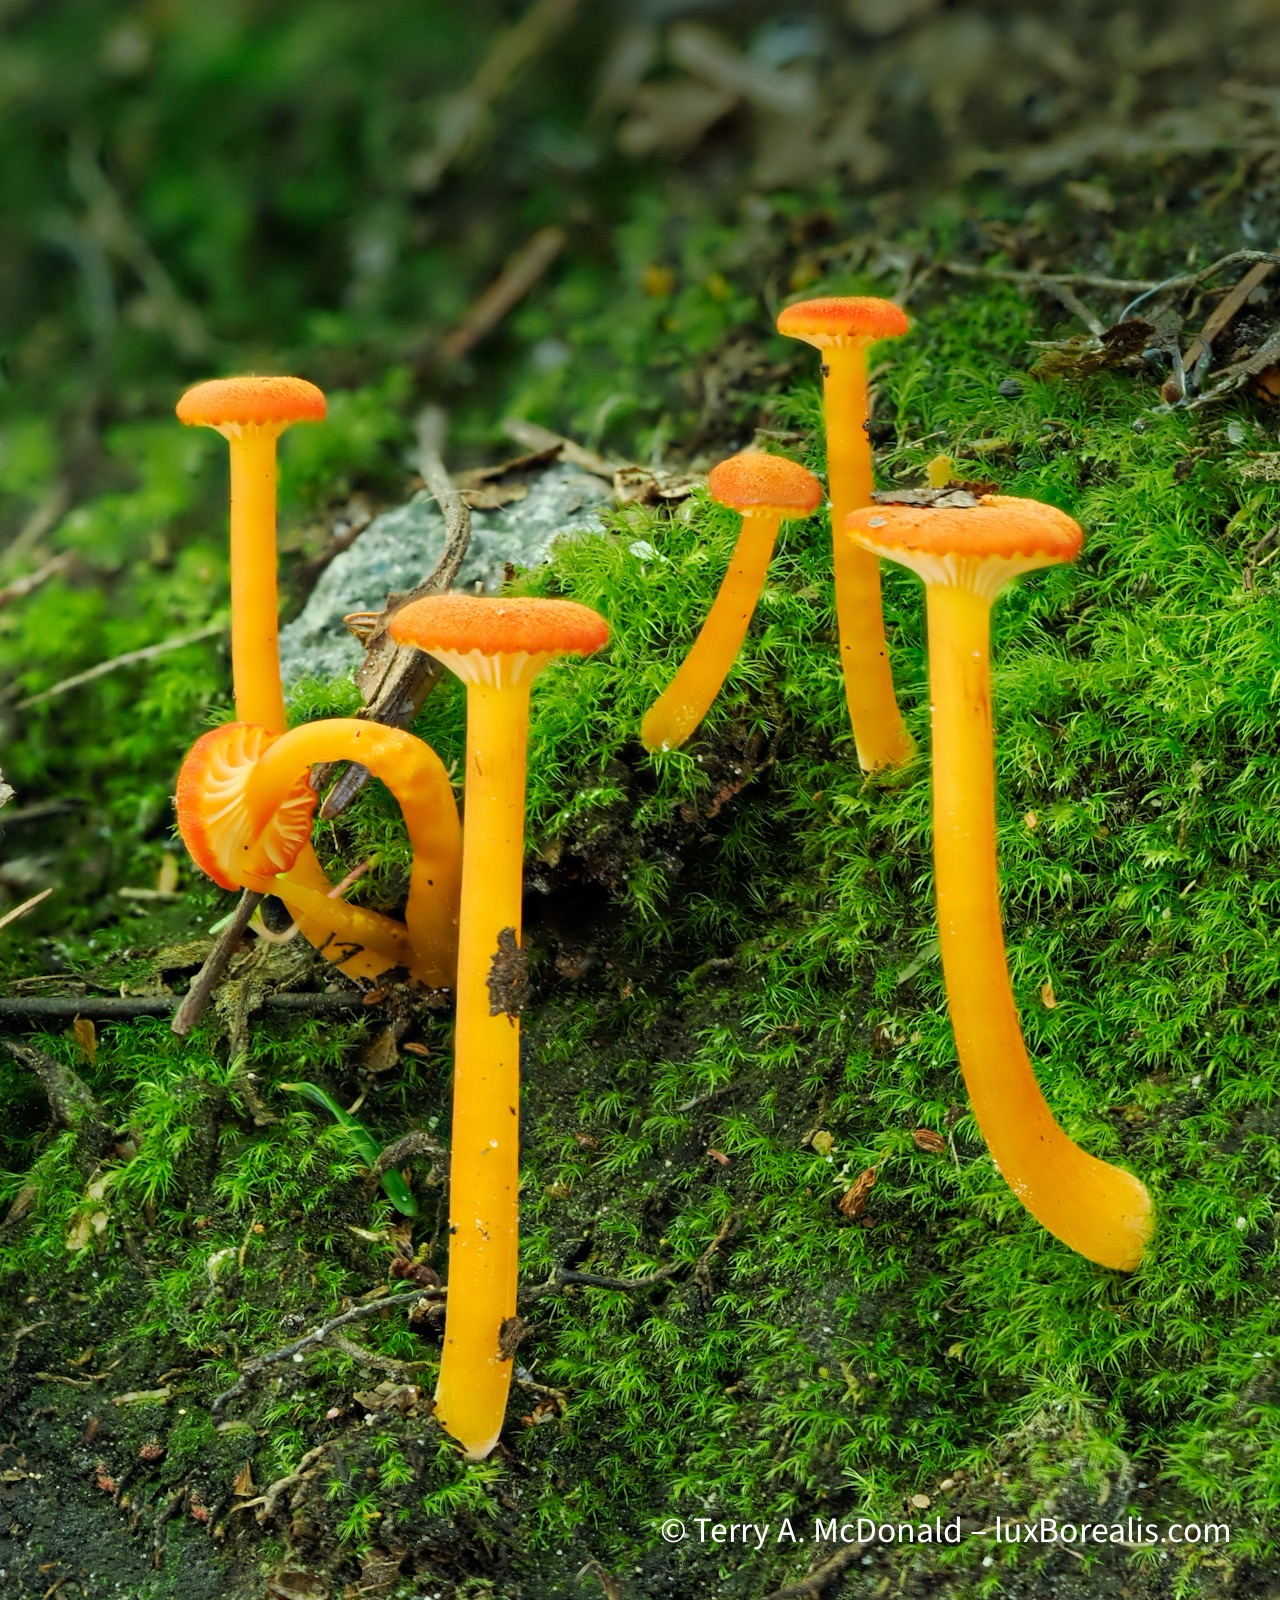
These long, slender mushrooms, found along the campground road, were just 4 to 5cm in height.
OM-1 | 60mm Macro (120mm efov) | ƒ4 @ 1/6 | ISO 200 | 10x in-camera focus stack | Lightroom
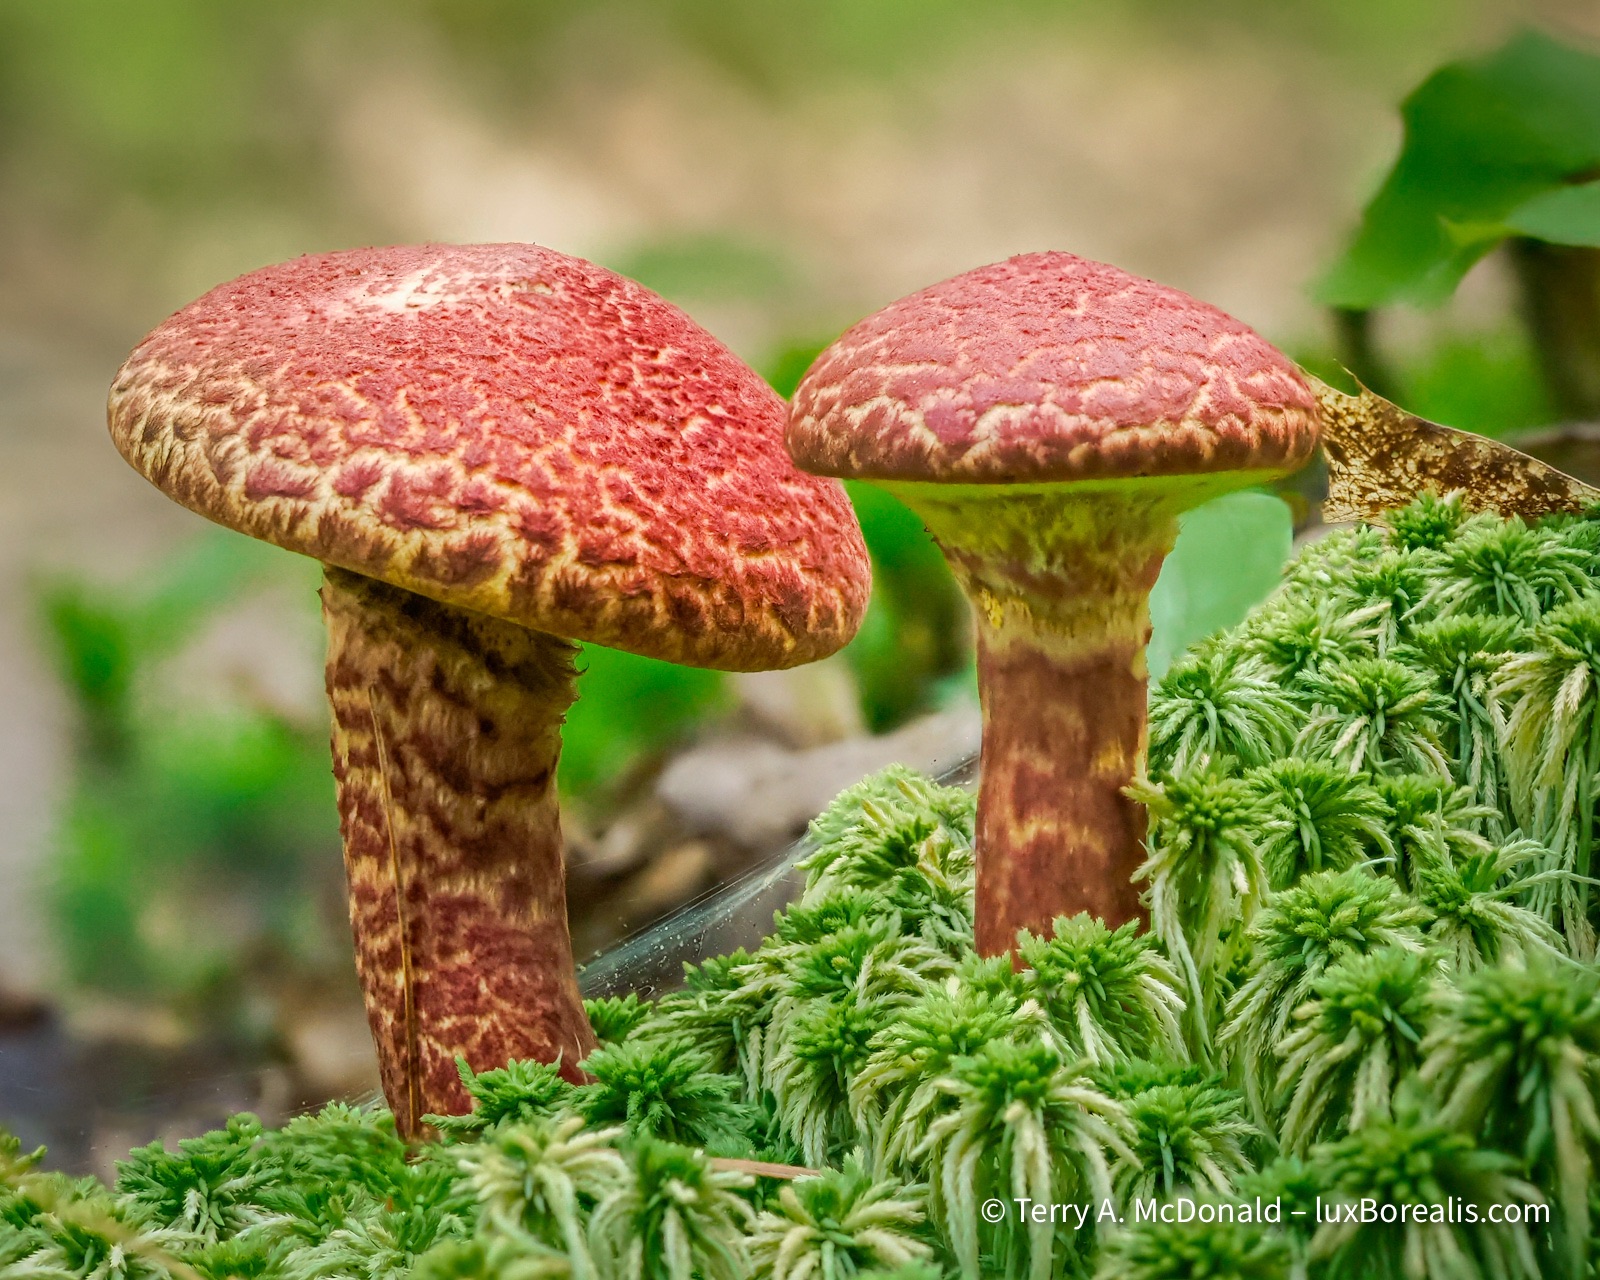
Found in the deep shade along the trail to A.Y. Jackson Lake.
OM-1 | 60mm Macro (120mm efov) | ƒ5.6 @ 1/60 | ISO 200 | 10x in-camera focus stack | Lightroom

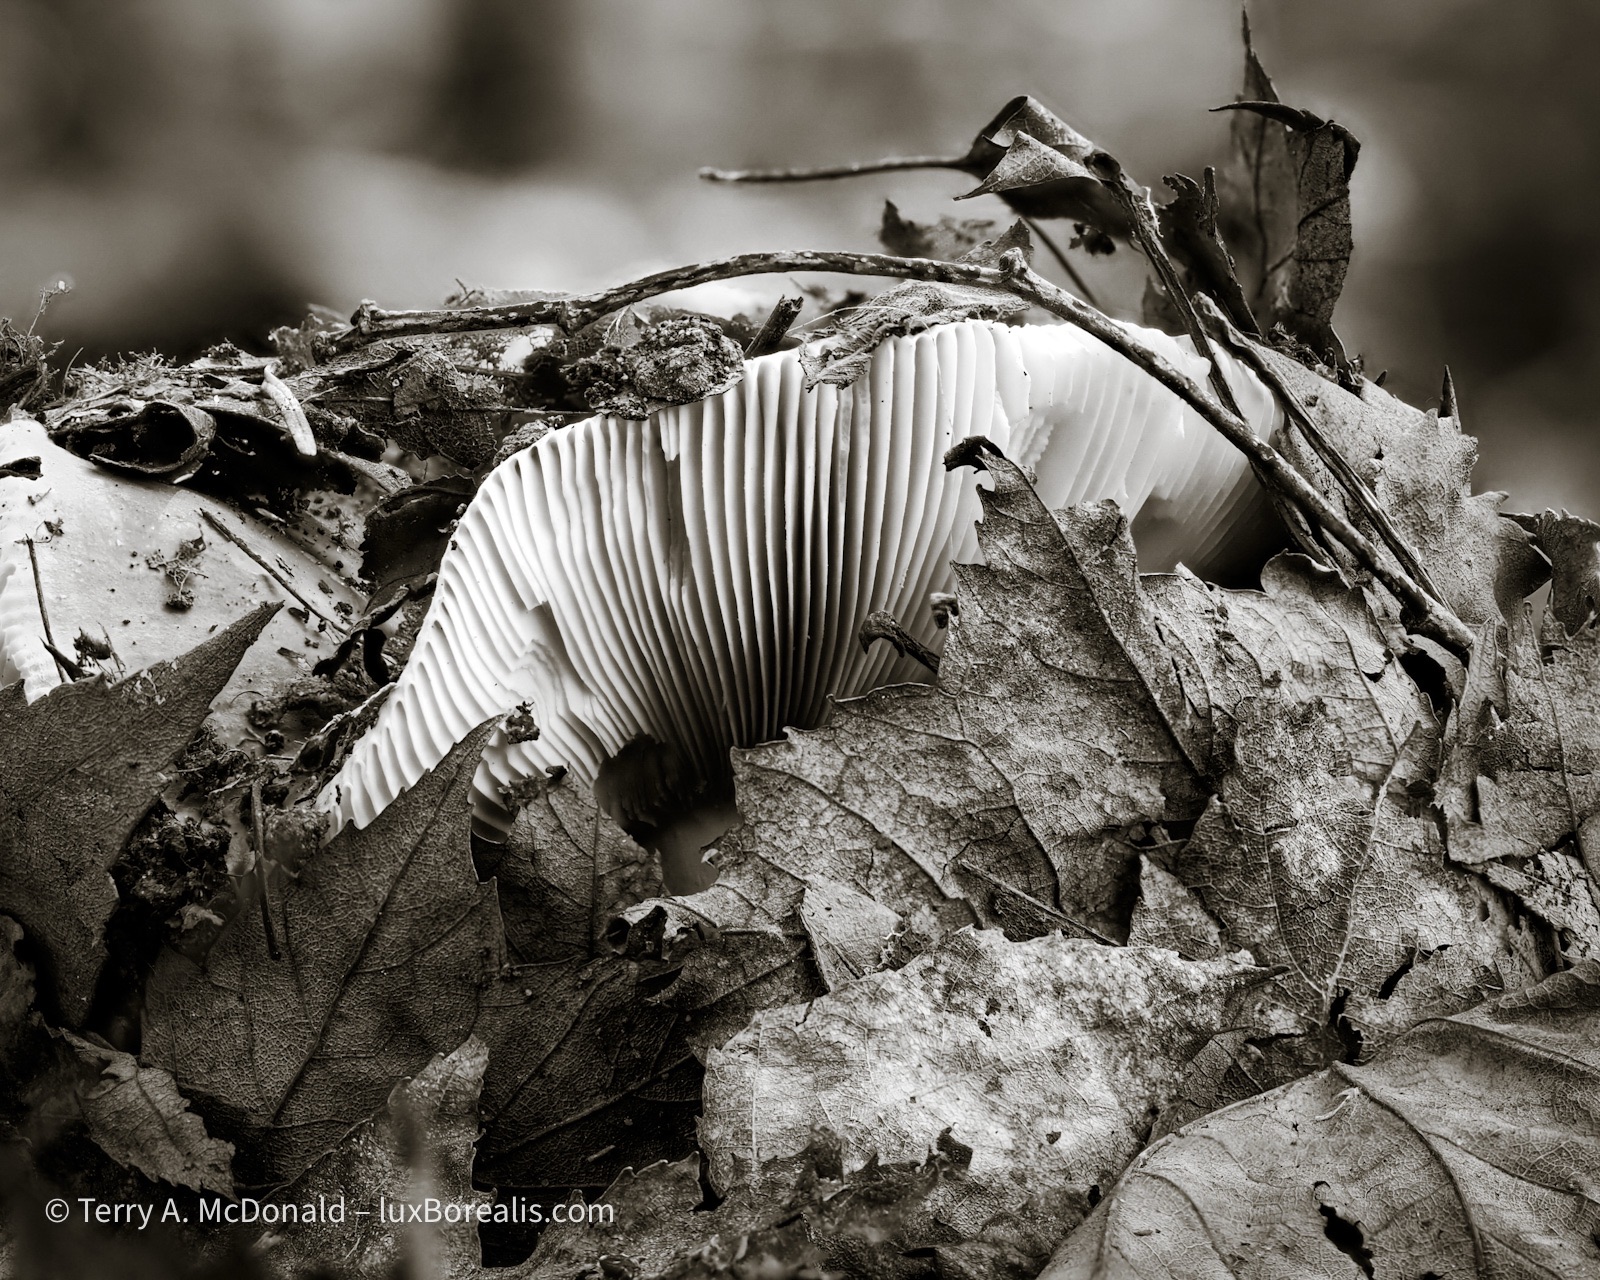
I found these unique fungi along the Lake of the Woods Trail and the Cranberry Bog Trail.
OM-1 | 60mm Macro (120mm efov) | ƒ4 @ 1/50 | ISO 1600 | 10x in-camera focus stack | Lightroom
Aside from determining the names of the different mushroom, the difficulty with mushrooms is that they are at ground level. Despite having a ground sheet, my knees and elbows took a beating. Then, keeping still for 10 consecutive exposures while crouched on all fours isn’t easy! For some, I improvised, resting my hands and the camera on my waist pack camera bag, using it like a bean bag on the ground for support. I’m sure people passing by had a good laugh at this old man with his butt in the air looking at mushrooms!
Using a tripod was certainly an option, but, in the summer heat, I was feeling lazy and didn’t feel like lugging it around with me. Once again, I was pleasantly surprised, shocked even, at how well the internal stabilization of the OM-1 worked. I realize now that I could have (should have) bumped the ISO up for focus stacking to at least 400 if not 800.
OM-1 | 60mm Macro (120mm efov) | ƒ4 @ 1/25 | ISO 200 | 10x in-camera focus stack | Lightroom
Landscapes lagged behind somewhat. In the early part of the week, we were plagued with high temperatures and humidity, turning the blue skies milky, rather than filling them with fair-weather cumulus. Smoke from western wildfires also contributed to the haziness.

OM-1 | 8-25mm at 10mm (20mm efov) | POL | ƒ5.6 @ 1/250 | ISO 200 | HHHR | Lightroom
From a workshop perspective, things were slow at the beginning of the week. However, after my slide presentation Wednesday evening—Ontario’s Natural Gems: Nature photography in our own backyards— attendance picked up for the Thursday and Friday programmes. We had a great range of abilities—from beginners to seasoned photographers—and cameras—phones, point and shoots, DSLRS and mirrorless—and ages—from under 10 to over 70. The best part was everyone was patient, inquisitive and wanting to put into practice new techniques and new ways of seeing.

OM-1 | 60mm Macro (120mm efov) | ƒ4 @ 1/125 | ISO 800 | 10x in-camera focus stack | Lightroom
I presented each ‘Walk, Talk & Shoot” as an outing dedicated to sketching. Our goal was not to make masterpieces, but rather to discover and make photographic sketches of how light creates shape, texture and colour, and how perspective changes from standing to crouching to putting the camera right down on the ground for a worm’s eye view; how vertical can be made horizontal or even square, and how to zoom using your feet to get closer and closer and closer. I related how I came to this idea of sketching after viewing a sketch book of renowned artist Robert Bateman, during a presentation of his many years ago; it has stuck with me since.
OM-1 | 12-100mm at 28mm (56mm efov) | ƒ5.6 @ 1/40 | ISO 200 | Lightroom
OM-1 | 8-25mm at 9mm (18mm efov) | POL | ƒ8 @ 1/320 | ISO 800 | HHHR | Lightroom
We worked on techniques for phone cameras, as well; for example, rotating the phone upside down to place the camera right at ground level; switching on the Rule of Thirds grid; and using Live Photos set to Long Exposure to capture moving water.
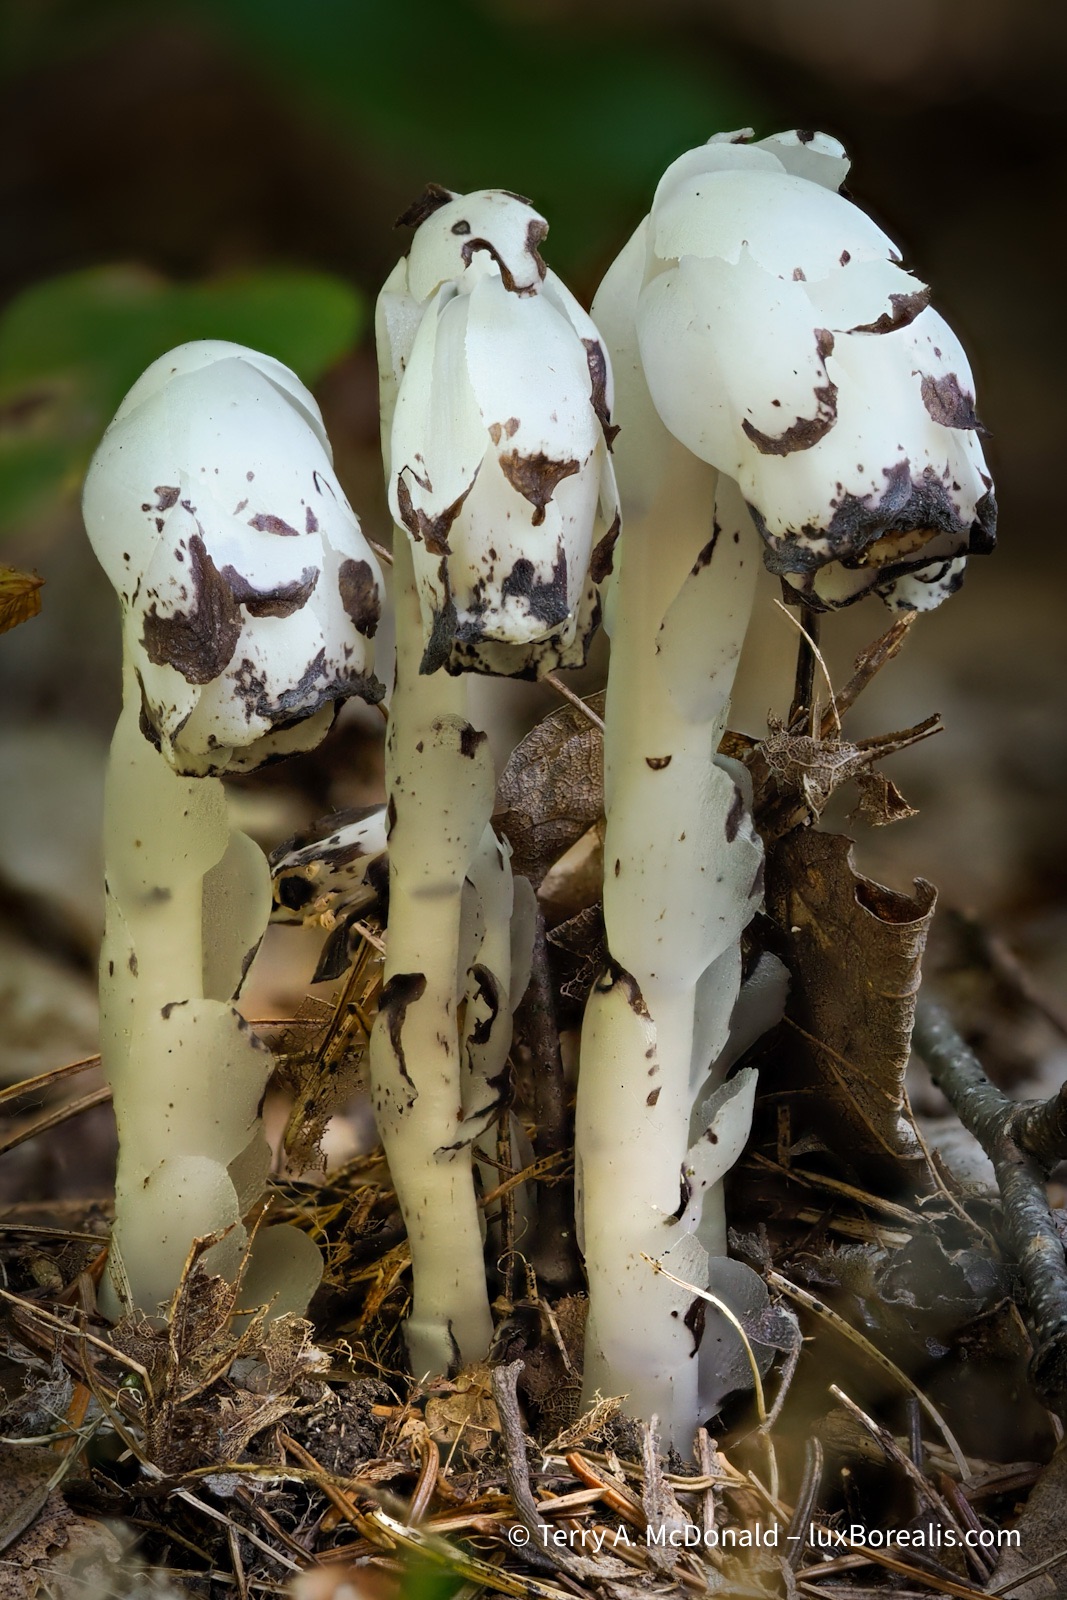
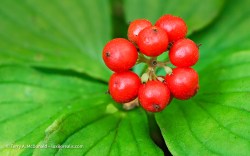
I find it impossible to visit the north and not photograph these unique plants. (Yes, they are plants, not a fungus!)
OM-1 | 60mm Macro (120mm efov) | ƒ4 @ 1/30 | ISO 200 | 10x in-camera focus stack | Lightroom
The added value of the Artist in Residence programme is that it also gives each artist plenty of time on their own to explore the park and their art. I pre-hiked each of the trails my programmes were using, plus I got out to a new trail to me, Lake of the Woods, off the Bell Lake Road.
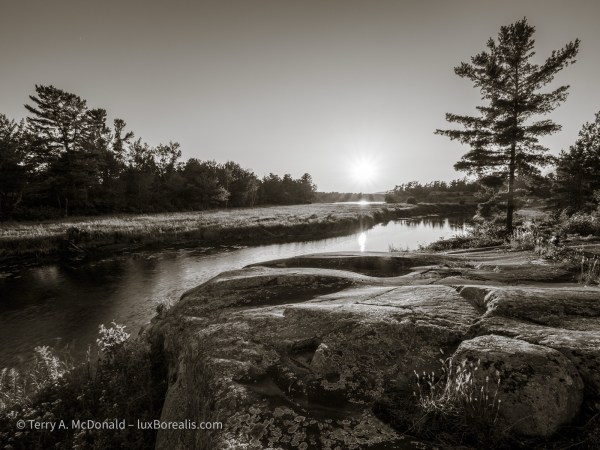
I also returned to a couple of favourite places: a late evening dash down the Chikanishing River Trail to catch the sun over the water, as well as an evening spent paying homage to A.Y. Jackson at his namesake lake and nearby Lake Sheguiandah, whose cliffs come alive in the late day sun.
OM-1 | 8-25mm at 9mm (18mm efov) | POL | ƒ11 @ 1/125 | ISO 200 | HHHR | Lightroom
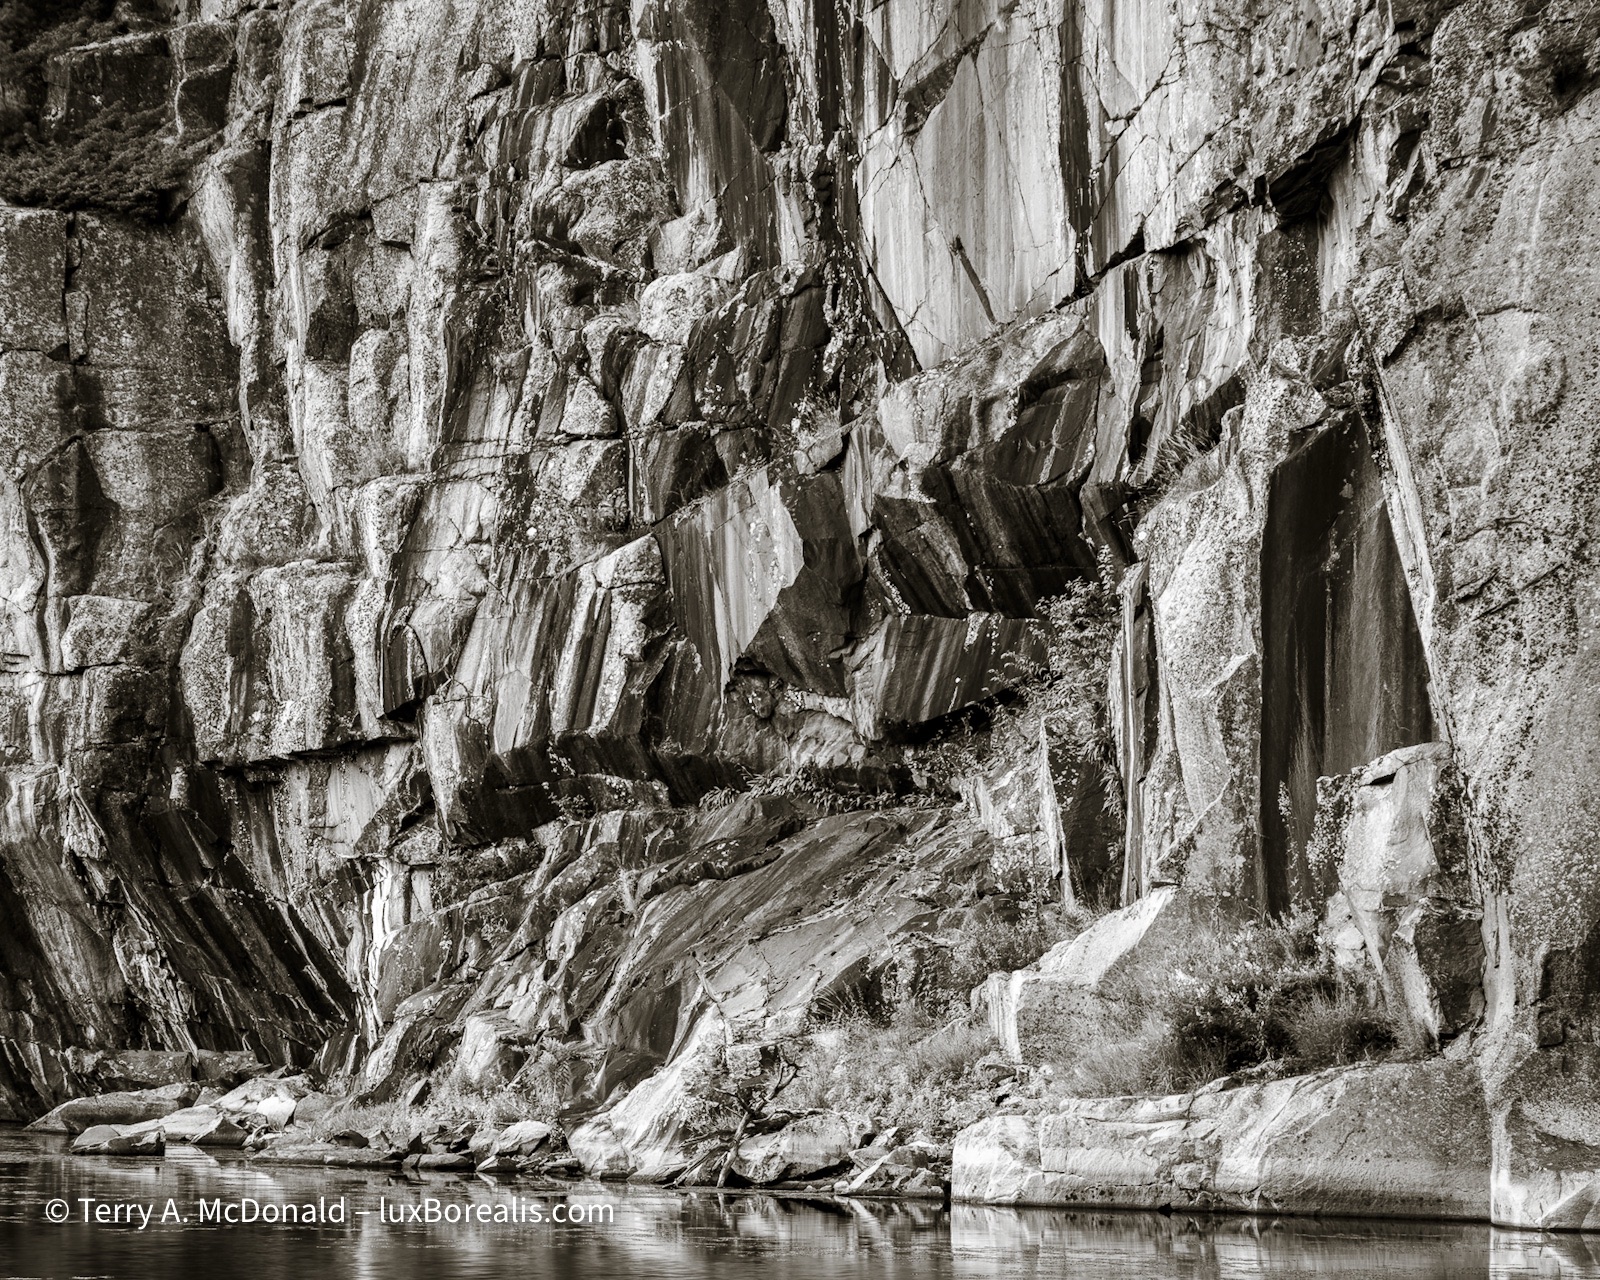
OM-1 w/ 12-100mm at 80mm (160mm efov) | POL | ƒ5.6 @ 1/80 | ISO 400 | Lightroom
Many thanks to Ontario Parks staff and the Friends of Killarney staff for a great week in Killarney Provincial Park and for your helpful insights and guidance. I’d name each of you, but I’m afraid of leaving out one or two, so suffice it to say, each of you made meaningful contributions, for which I am grateful.
OM-1 | 8-25mm at 8mm (16mm efov) | POL | ƒ8 @ 1/2500 | ISO 800 | HHHR | Lightroom
Thanks for reading! Be sure to add to the discussion with a question or COMMENT about equipment, techniques or locations.
