OM System 2x Digital Teleconverter – How good is it?

Since I began using the OM system OM-1, I’ve been intrigued by the 2x Digital Teleconverter (2xDTC). It is one of the camera’s computational photography options and is easily accessed via the menus (2.2 Other Shooting Functions). When the camera is set to LSF+Raw (Large Super Fine JPEG + a Raw file), you get two files, both at the native resolution of 3188×5184 pixels: the original raw at the native focal length plus a JPEG produced from the cropped raw that is then re-sized and enhanced to be double the focal length.

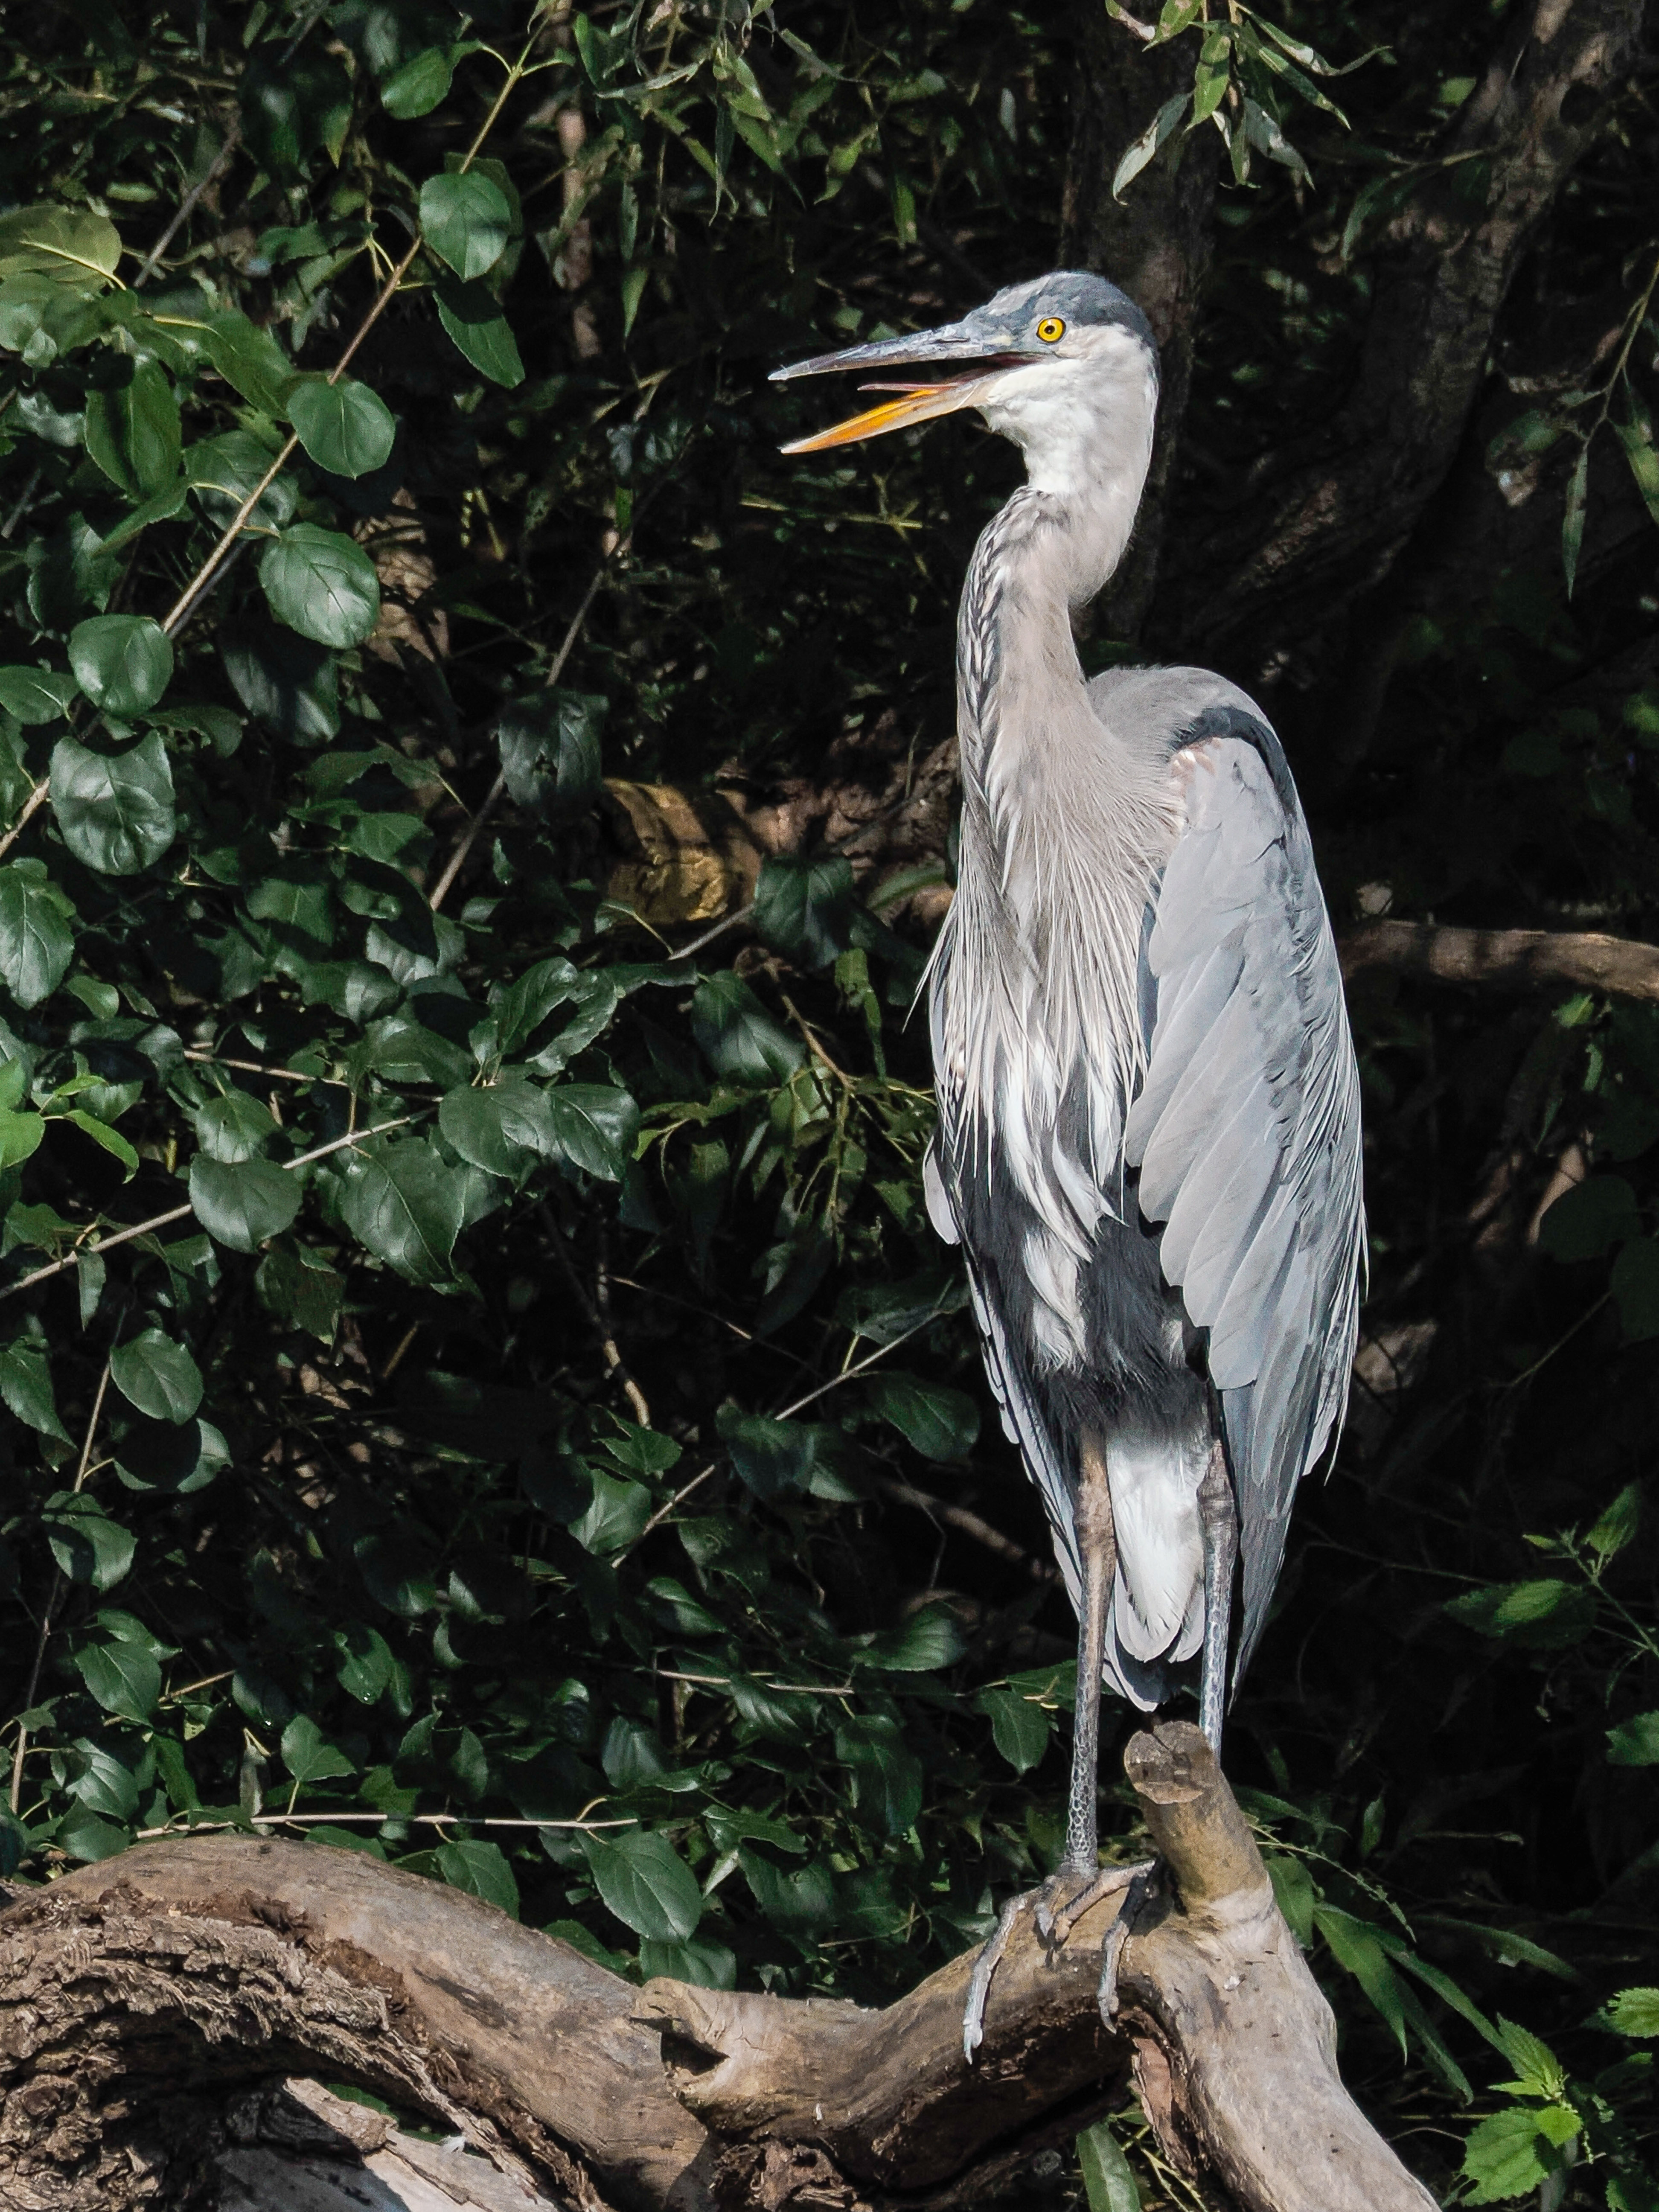
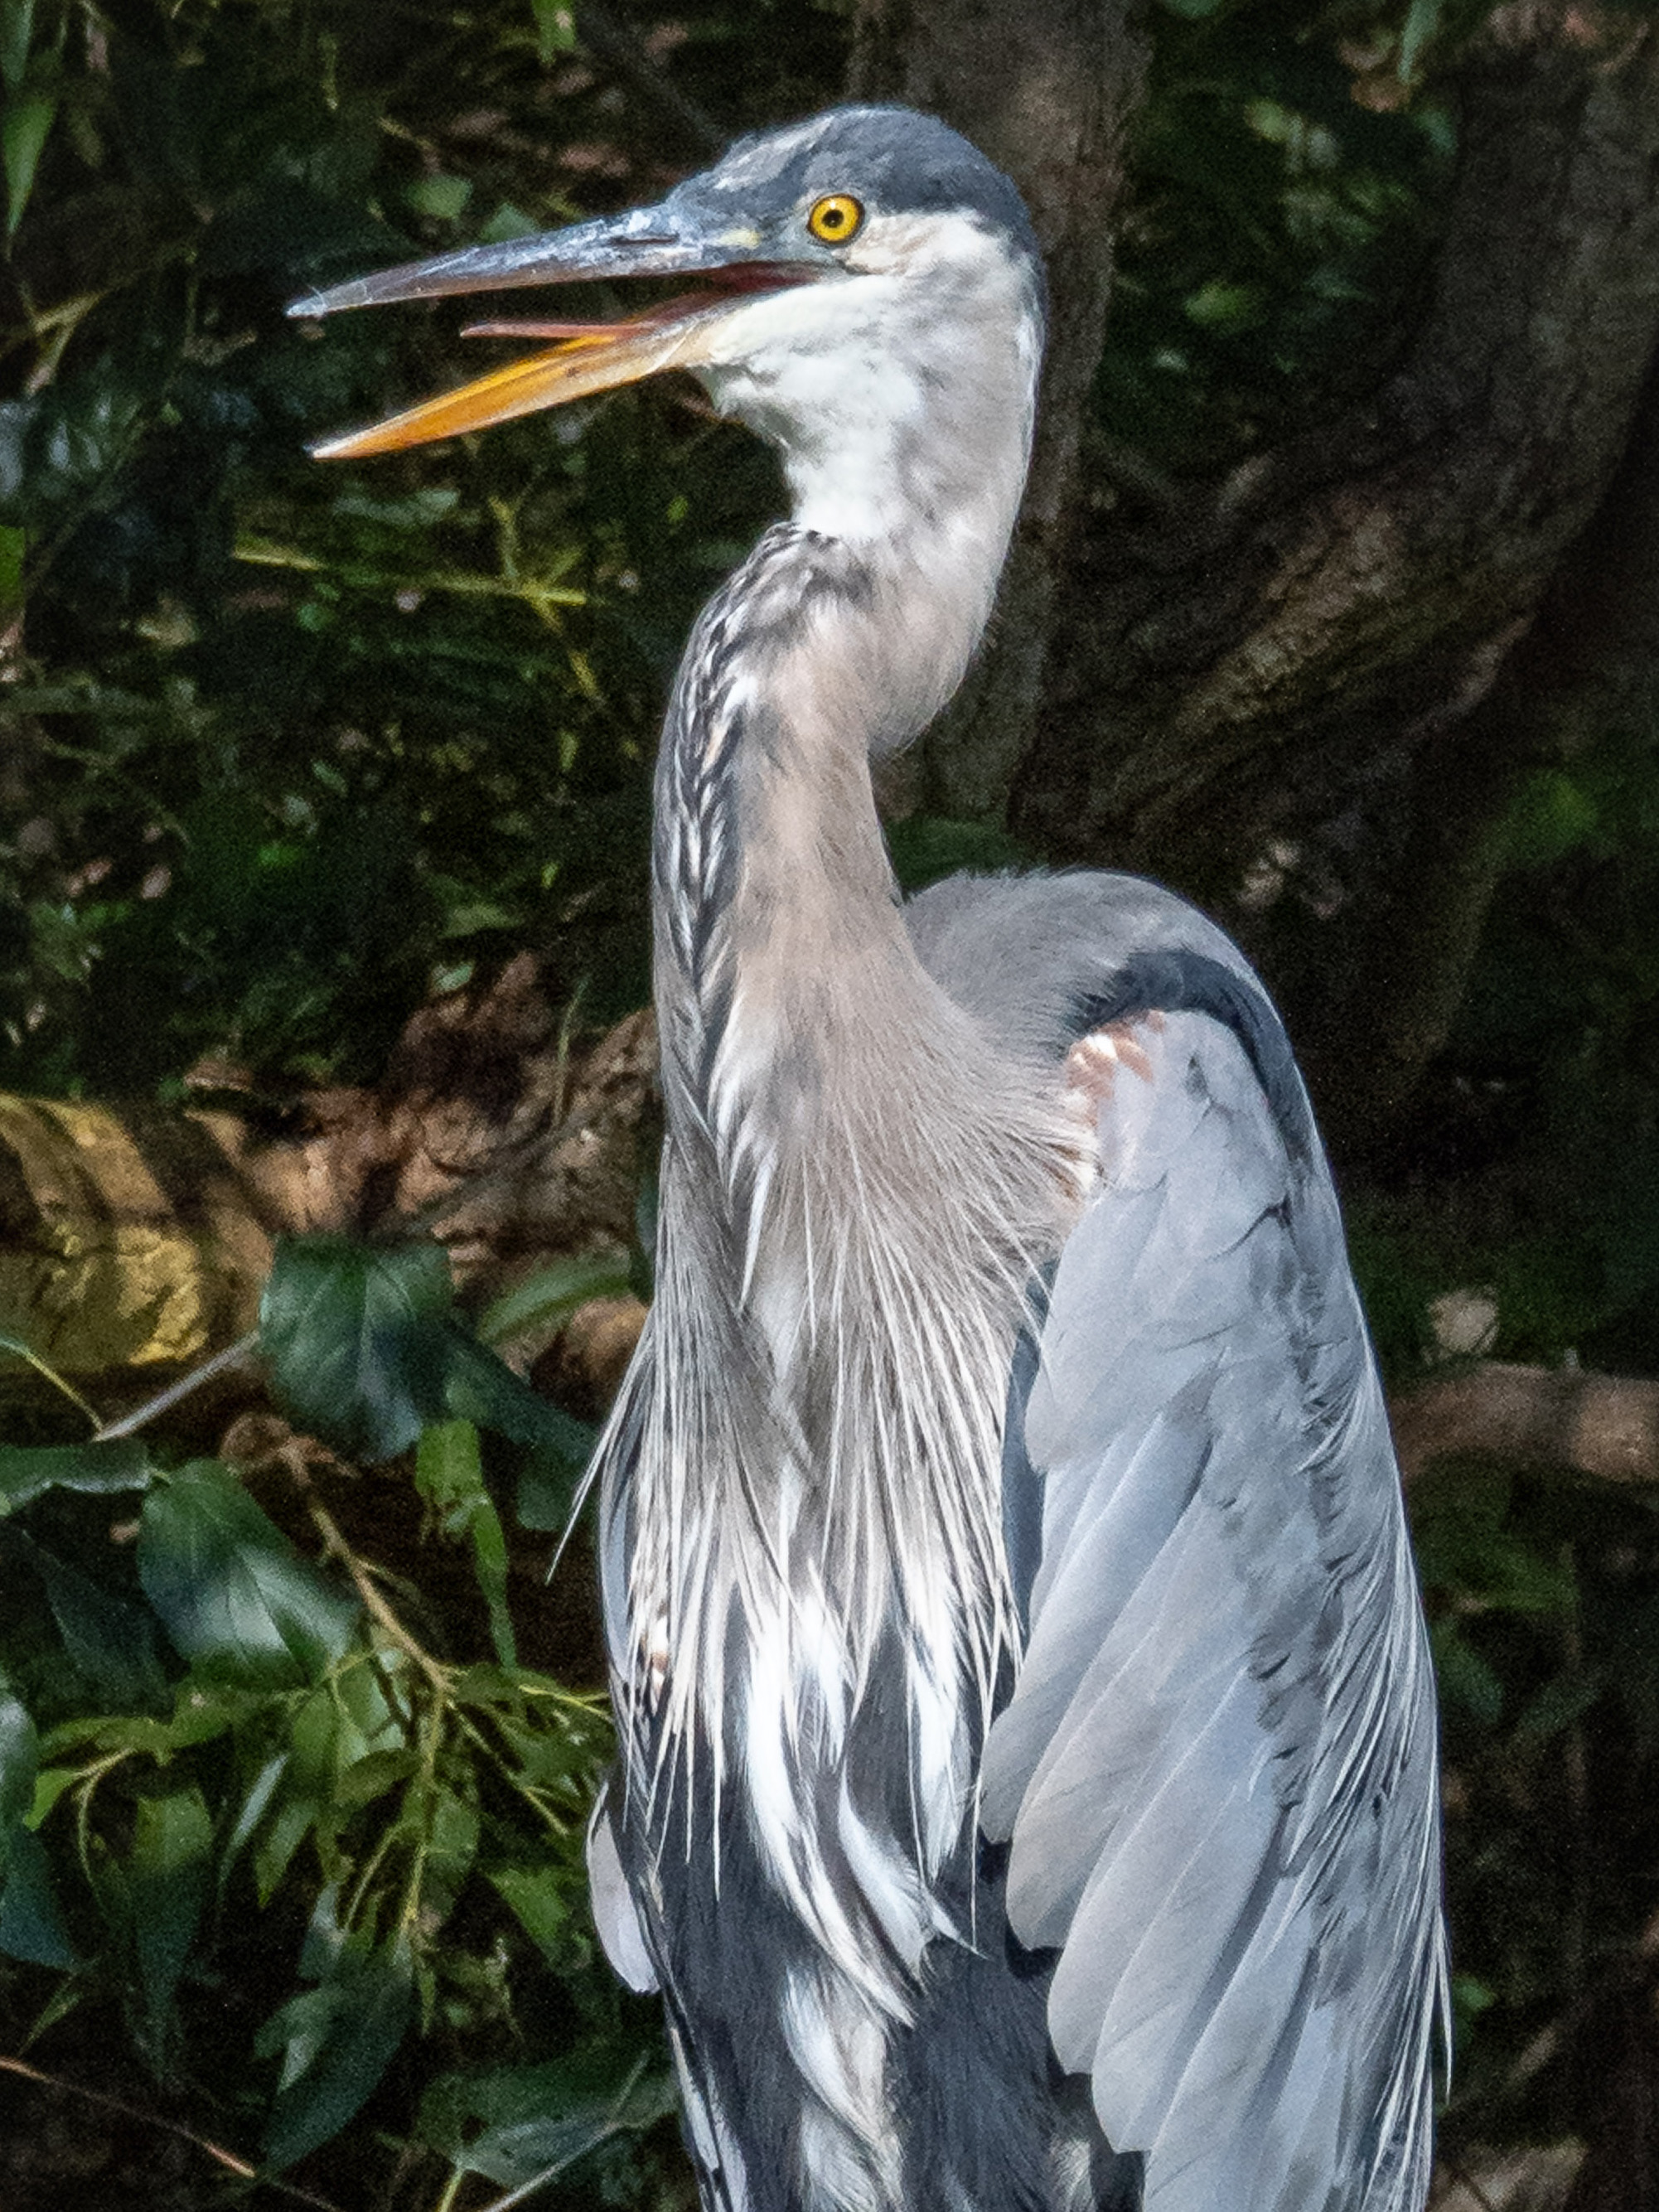
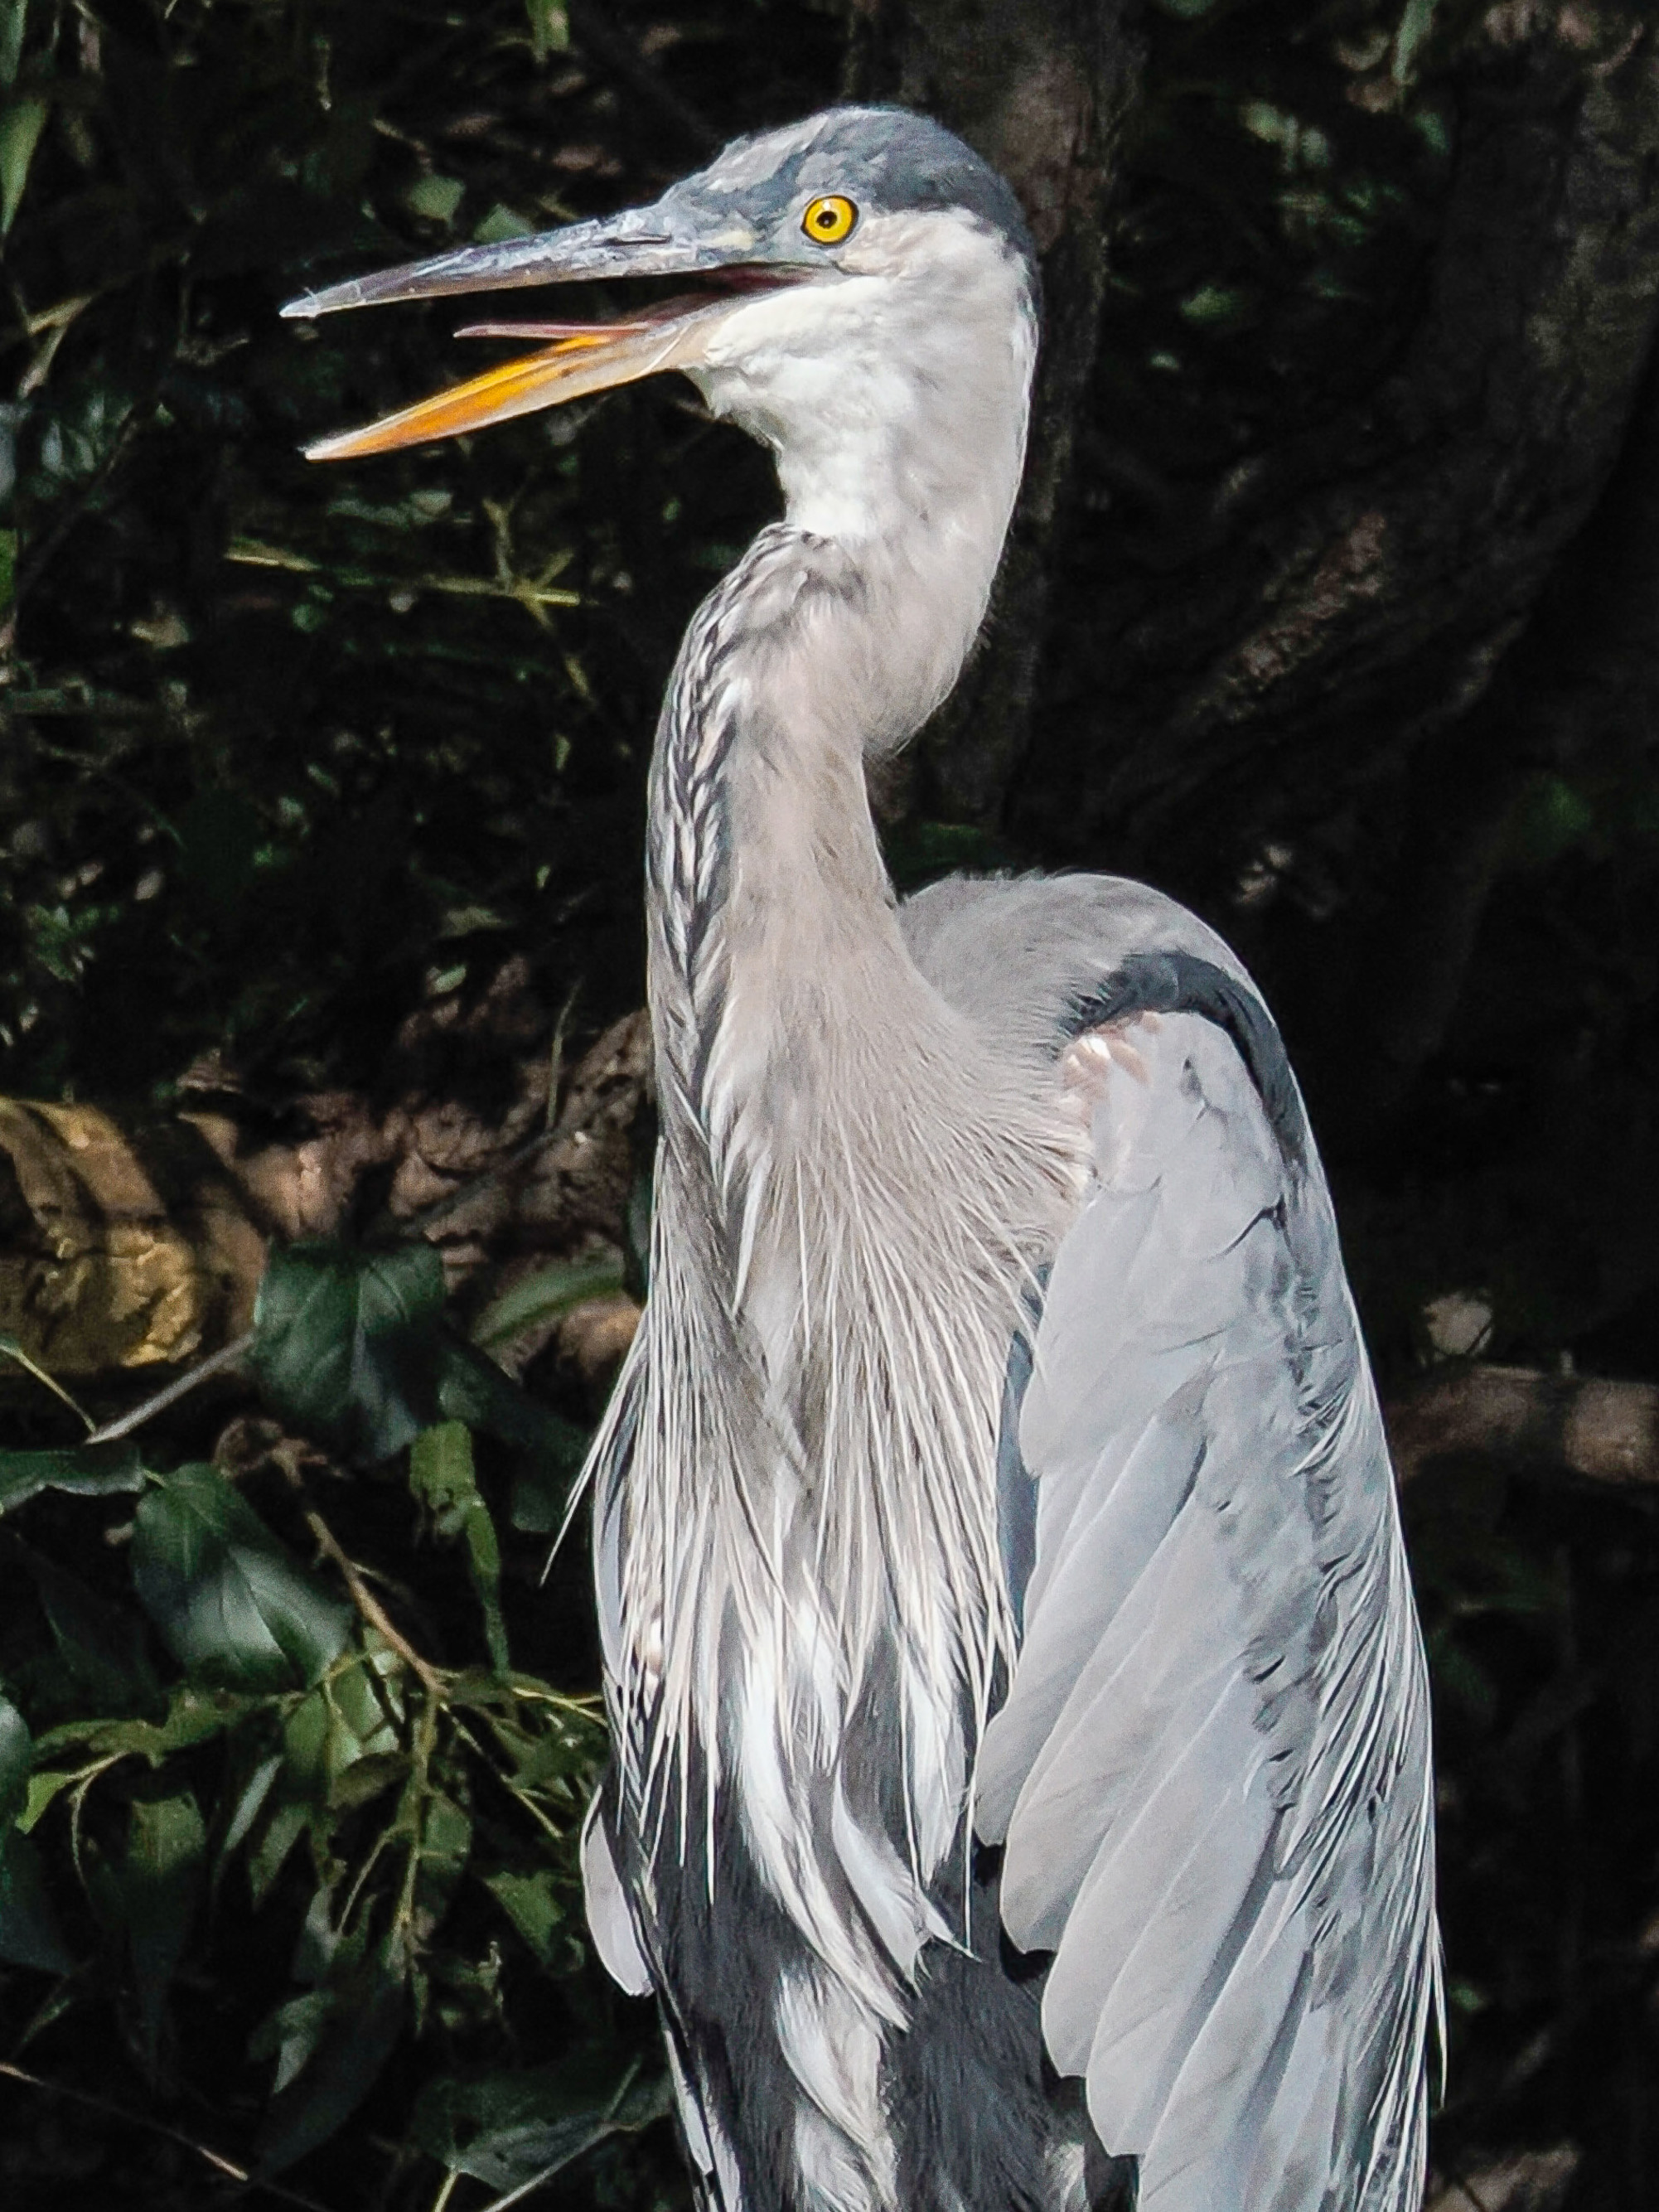
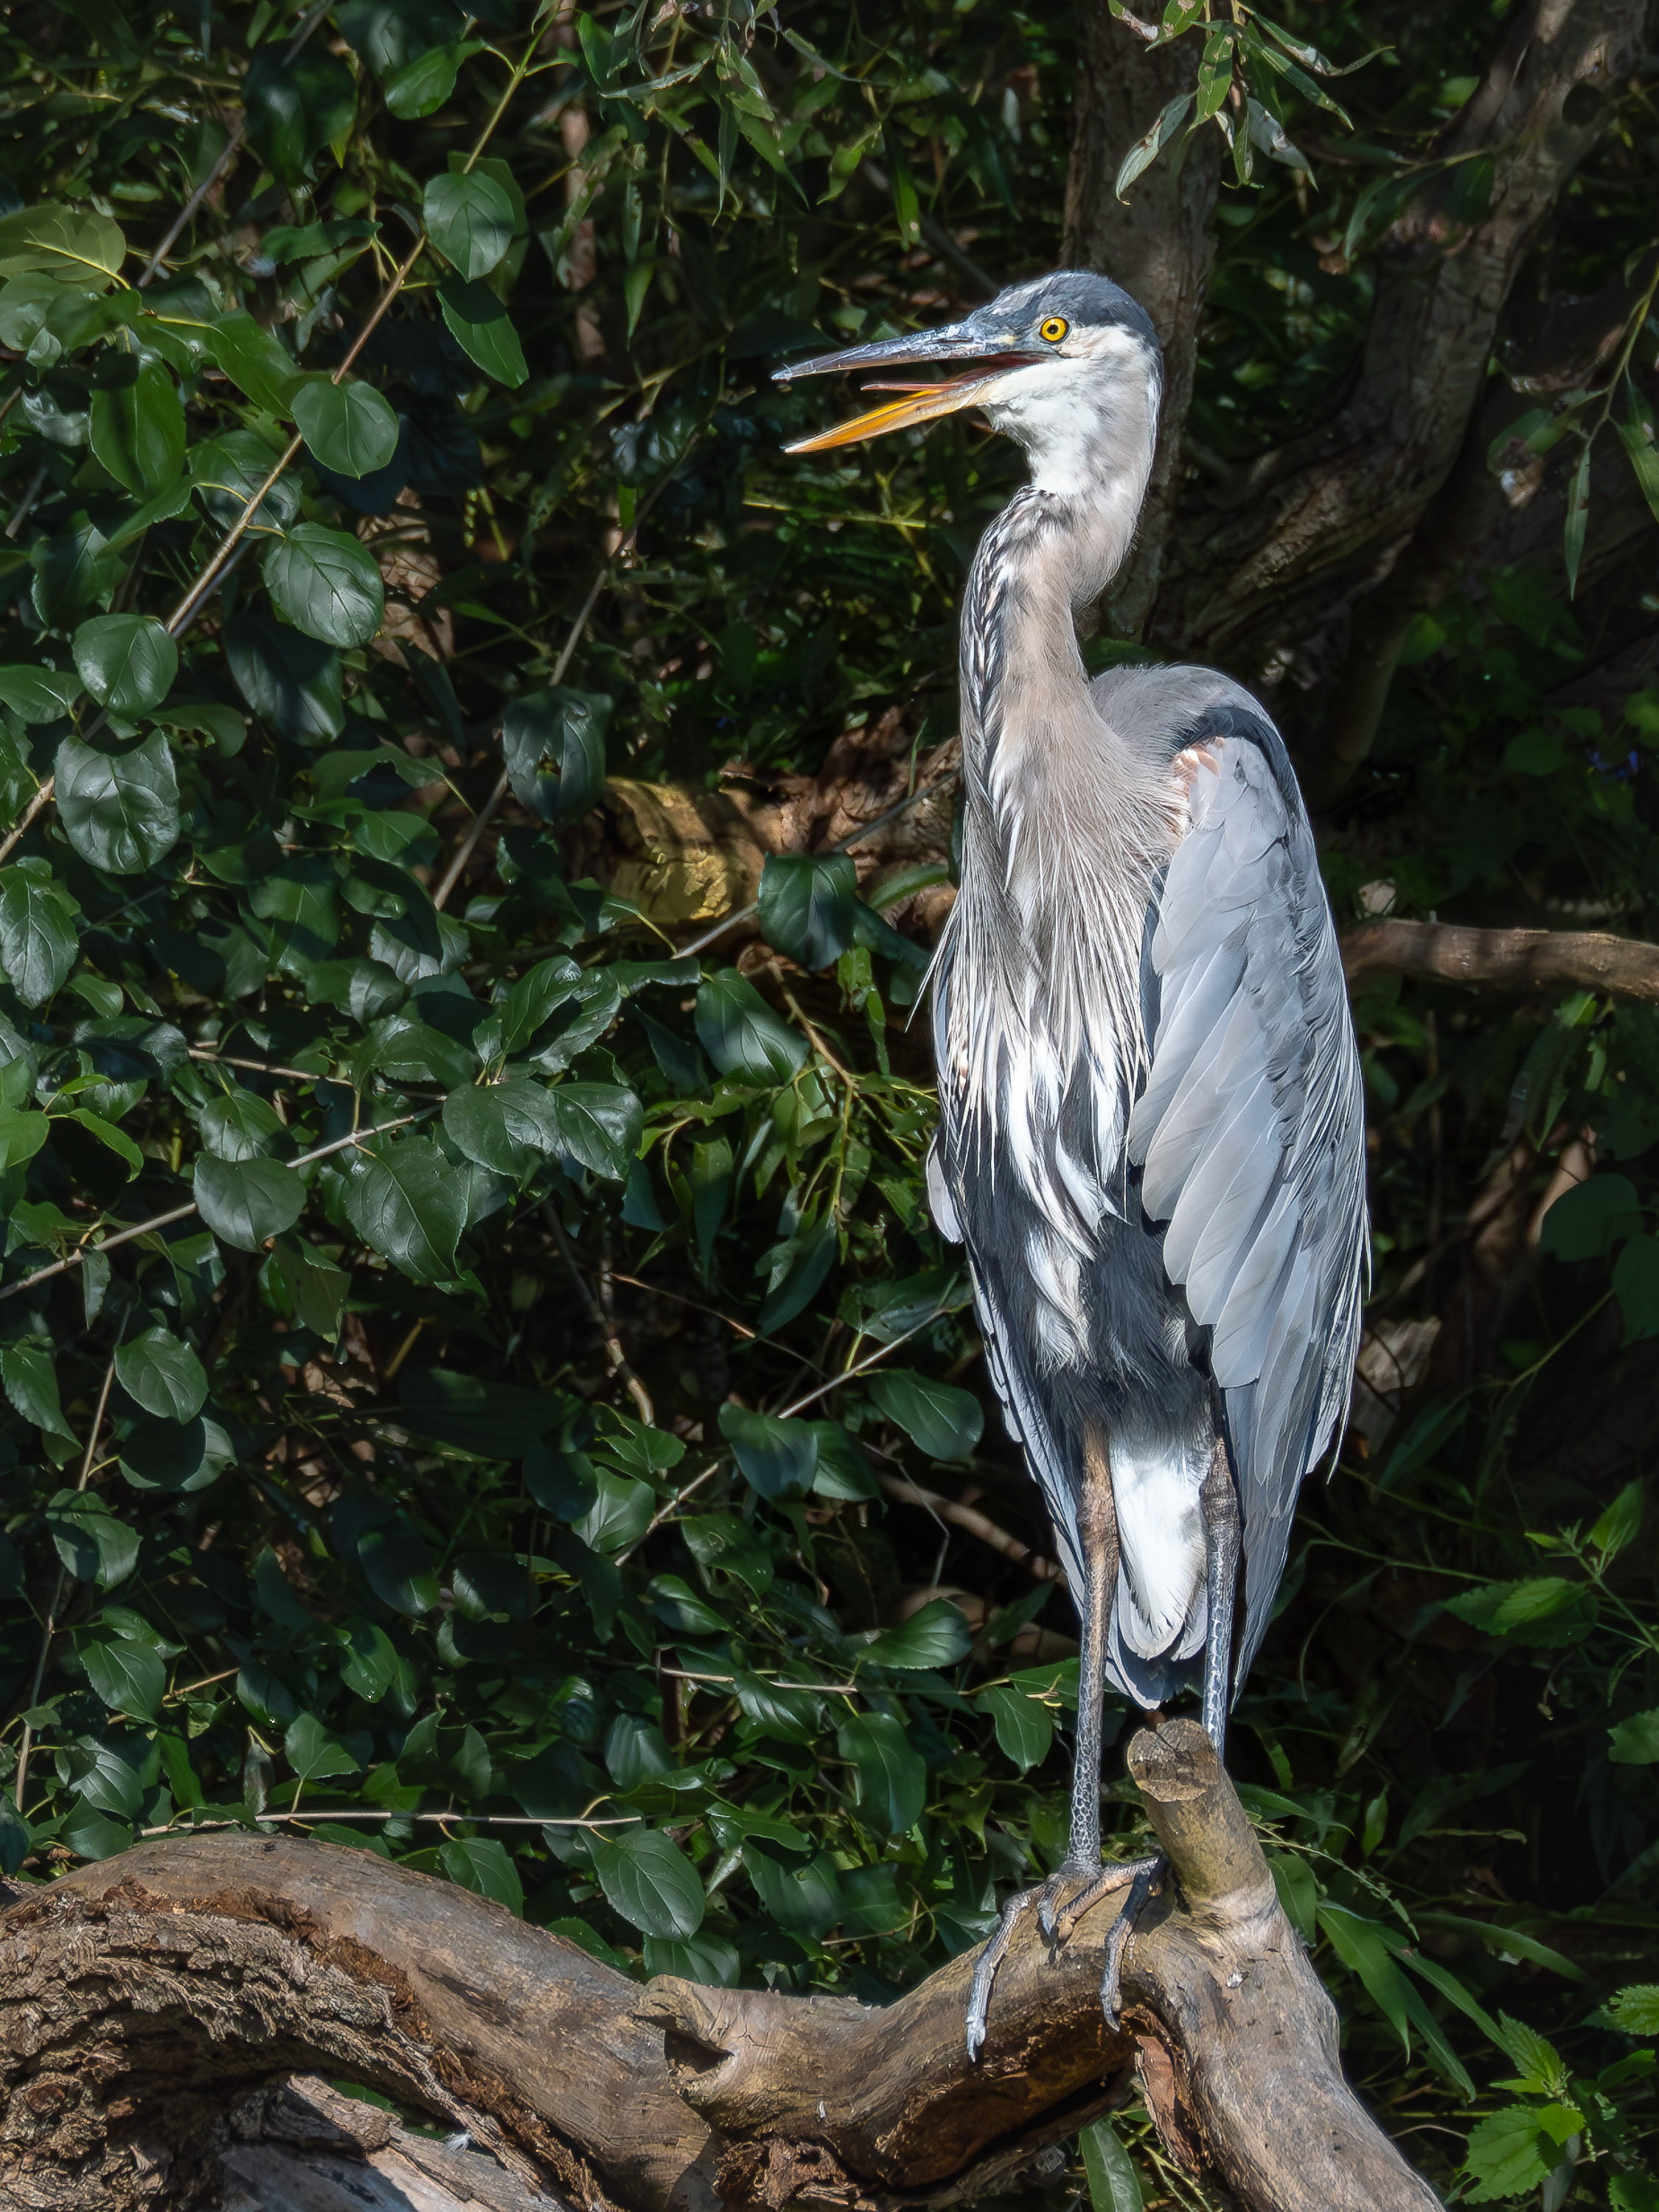
Left: the original Raw image; Right: the resulting 2xDTC JPEG produced in-camera.
OM-1 w/M.Zuiko Digital 100-400mm ƒ5-6.3 @ 400mm (evoke 800mm); ƒ8 @ 1/2500; ISO 800, handheld, which is the same shooting style I would use for this kind of photograph.
The 2xDTC image has an efov of 1600mm, with no loss of light!
I’ve read a number of posts and watched a few YouTube videos about the 2xDTC process and the jury seems to be out as to how useful it is. This post is meant to set the record straight.
The advantage is you get double the focal length without buying or having to carry an extra accessory and with no loss of light. A real teleconverter fits between the camera and the lens and magnifies 2x, but the downside is it reduces the light by 2 stops; ƒ5.6 @ 1/2000sec shutter speed suddenly becomes ƒ5.6 @ 1/500, potentially reducing the sharpness of the image when handholding long focal lengths. As with everything in photography, it’s a trade off; double the focal length but 1/4 the light. By the way, by all accounts, Olympus teleconverters are beautifully matched to the lenses that accept them, maintaining excellent image sharpness, but at a loss of 2 stops.
The 2xDTC doubles the focal length with no loss of light, but does the image quality hold up?
In this YouTube video professional British wildlife photographer Andy Rouse calls the 2xDTC ”a hidden gem” and says ”the results are quite actually amazing”. He feels that the quality from the JPEG is better than the quality from the raw file cropped then re-sized to the same size as the JPEG. In fact, he goes as far as saying the files are good enough for the stock agency he’s with. He recognises the shortcomings with regards to sharpness, but overall gives it a thumbs up.
Peter Forsgård, finds the 2xDTC ”helpful sometimes” as he explains in this YouTube video. However, unlike Andy Rouse, Peter Forsgård found that a cropped raw is better than the JPEG produced using the 2xDTC.
At the same time, Thomas Stirr at SmallSensorPhotography.com has some excellent out-of-the-camera JPEGs made using the 100-400 and the 2xDTC.
So what to do? How does the 2xDTC stack up?
Full Disclosure: Without even looking at the images, I must declare my bias against JPEGs. I’ve always disliked the fact that JPEGs are finished products. They’ve been processed, sharpened, and compressed by the camera. Call me a control freak, but the individual photographer can do little to further improve the base image quality (detail, sharpness, highlights, shadows) without stressing the file quality. Whereas with Raw, much can be done to improve the image beyond what a camera can do in creating a JPEG.
Warning: Pixel-peeping ahead. Since moving from full frame to Micro Four Thirds, I’ve come to realize there is little to be gained from continually pixel peeping every image, mainly because the people looking at photos and buying photos do not pixel peep. Other photographers pixel peep, but they don’t generally buy other photographers photos. People who love a photo are drawn in by the emotional connection with the photograph, not the sensor it’s made with. Yes, the image must be well-crafted with sharp focus and accurate exposure. And certainly tweaking the colour balance and shaping the light using masking all play a role, but people who like the photo do not stick their noses up against the photo to check out the pixels.
So why am I pixel peeping now? I’m assessing the file in terms of fine prints, not casual web scrolling. Rather than incurring the hefty cost of printing each of the test shots, I’ll look at them on-screen at 100%. Basically, I’m trying to answer two fundamental questions:
- Would the JPEG created by the Digital Teleconverter stand up to the requirements of a fine print made at native resolution, basically a 12 x16″ image that would print nicely on 13 x 19′ fine art paper? This kind of quality would also be acceptable for photo competitions and stock agencies.
- Is it possible to improve upon the JPEG by using a crop from the original raw file and properly sharpening and enlarging it?
I examined the images at 100% after making JPEGs of each the test images. Wait! JPEGs? Why JPEGs? Like it or not, JPEGs are the online currency of photographs. Once a raw image has been processed, it gets output as a JPEG for online print services and for stock agencies. Sometimes finished Raw files are output as TIFF files, but the file size is often 20 to 30 times larger; e.g. a 4.2mb JPEG versus a 121mb TIFF.
Needless to say, I wasn’t entirely enamoured with the in-camera JPEG made by the Digital Teleconverter. Comparison photos are shown below. The cropped and enlarged Raw file is worse – just as Andy Rouse said, so it will need a bit of work.


Right: The original Raw file cropped to the same image view, then resized to the same native resolution as the JPEG.
The Raw file is clearly mushy, but the JPEG isn’t really “better”. It’s sharper, especially in the feather detail of the breast, but around the head, it looks more like a paint-by-numbers picture. Neither is usable for a fine art print.
However, the question becomes, would the Raw file come out better if it was sharpened before or after enlarging? Here are two images – you tell me . . .

Lightroom > Detail: Sharpening=40; Radius=1.0; Detail=50; Masking=50
Right: Sharpening is applied AFTER resizing back to native resolution.
Lightroom > Detail: Sharpening=100; Radius=1.3; Detail=50; Masking=70.
To get this file even close to other, much more aggressive sharpening was required.
Perhaps like you, I’m not happy with the quality of either image. The ‘sharpening before’ image looks crisper, but there are artefacts and a real graininess to the image. The ‘sharpening after’ is just plain mushy. To be clear, I did not sharpen each image the same, as that would be unrealistic. Each photo was sharpened to achieve my subjective ‘ideal’ sharpness. I specifically tried to improve feather detail beyond what the original JPEG showed.
But I think there is more that can be done to the Raw file to improved it. One of the most important options would be to run it through Lightroom’s AI-powered Denoise. This is a recent feature that was not available to Andy Rouse or Peter Forsgård when they did their testing.
Can AI Denoise improve the Raw file?
In a word: YES! Big time! Have a look at these comparison images:

Lightroom > Detail: Sharpening=40; Radius=1.0; Detail=50; Masking=50
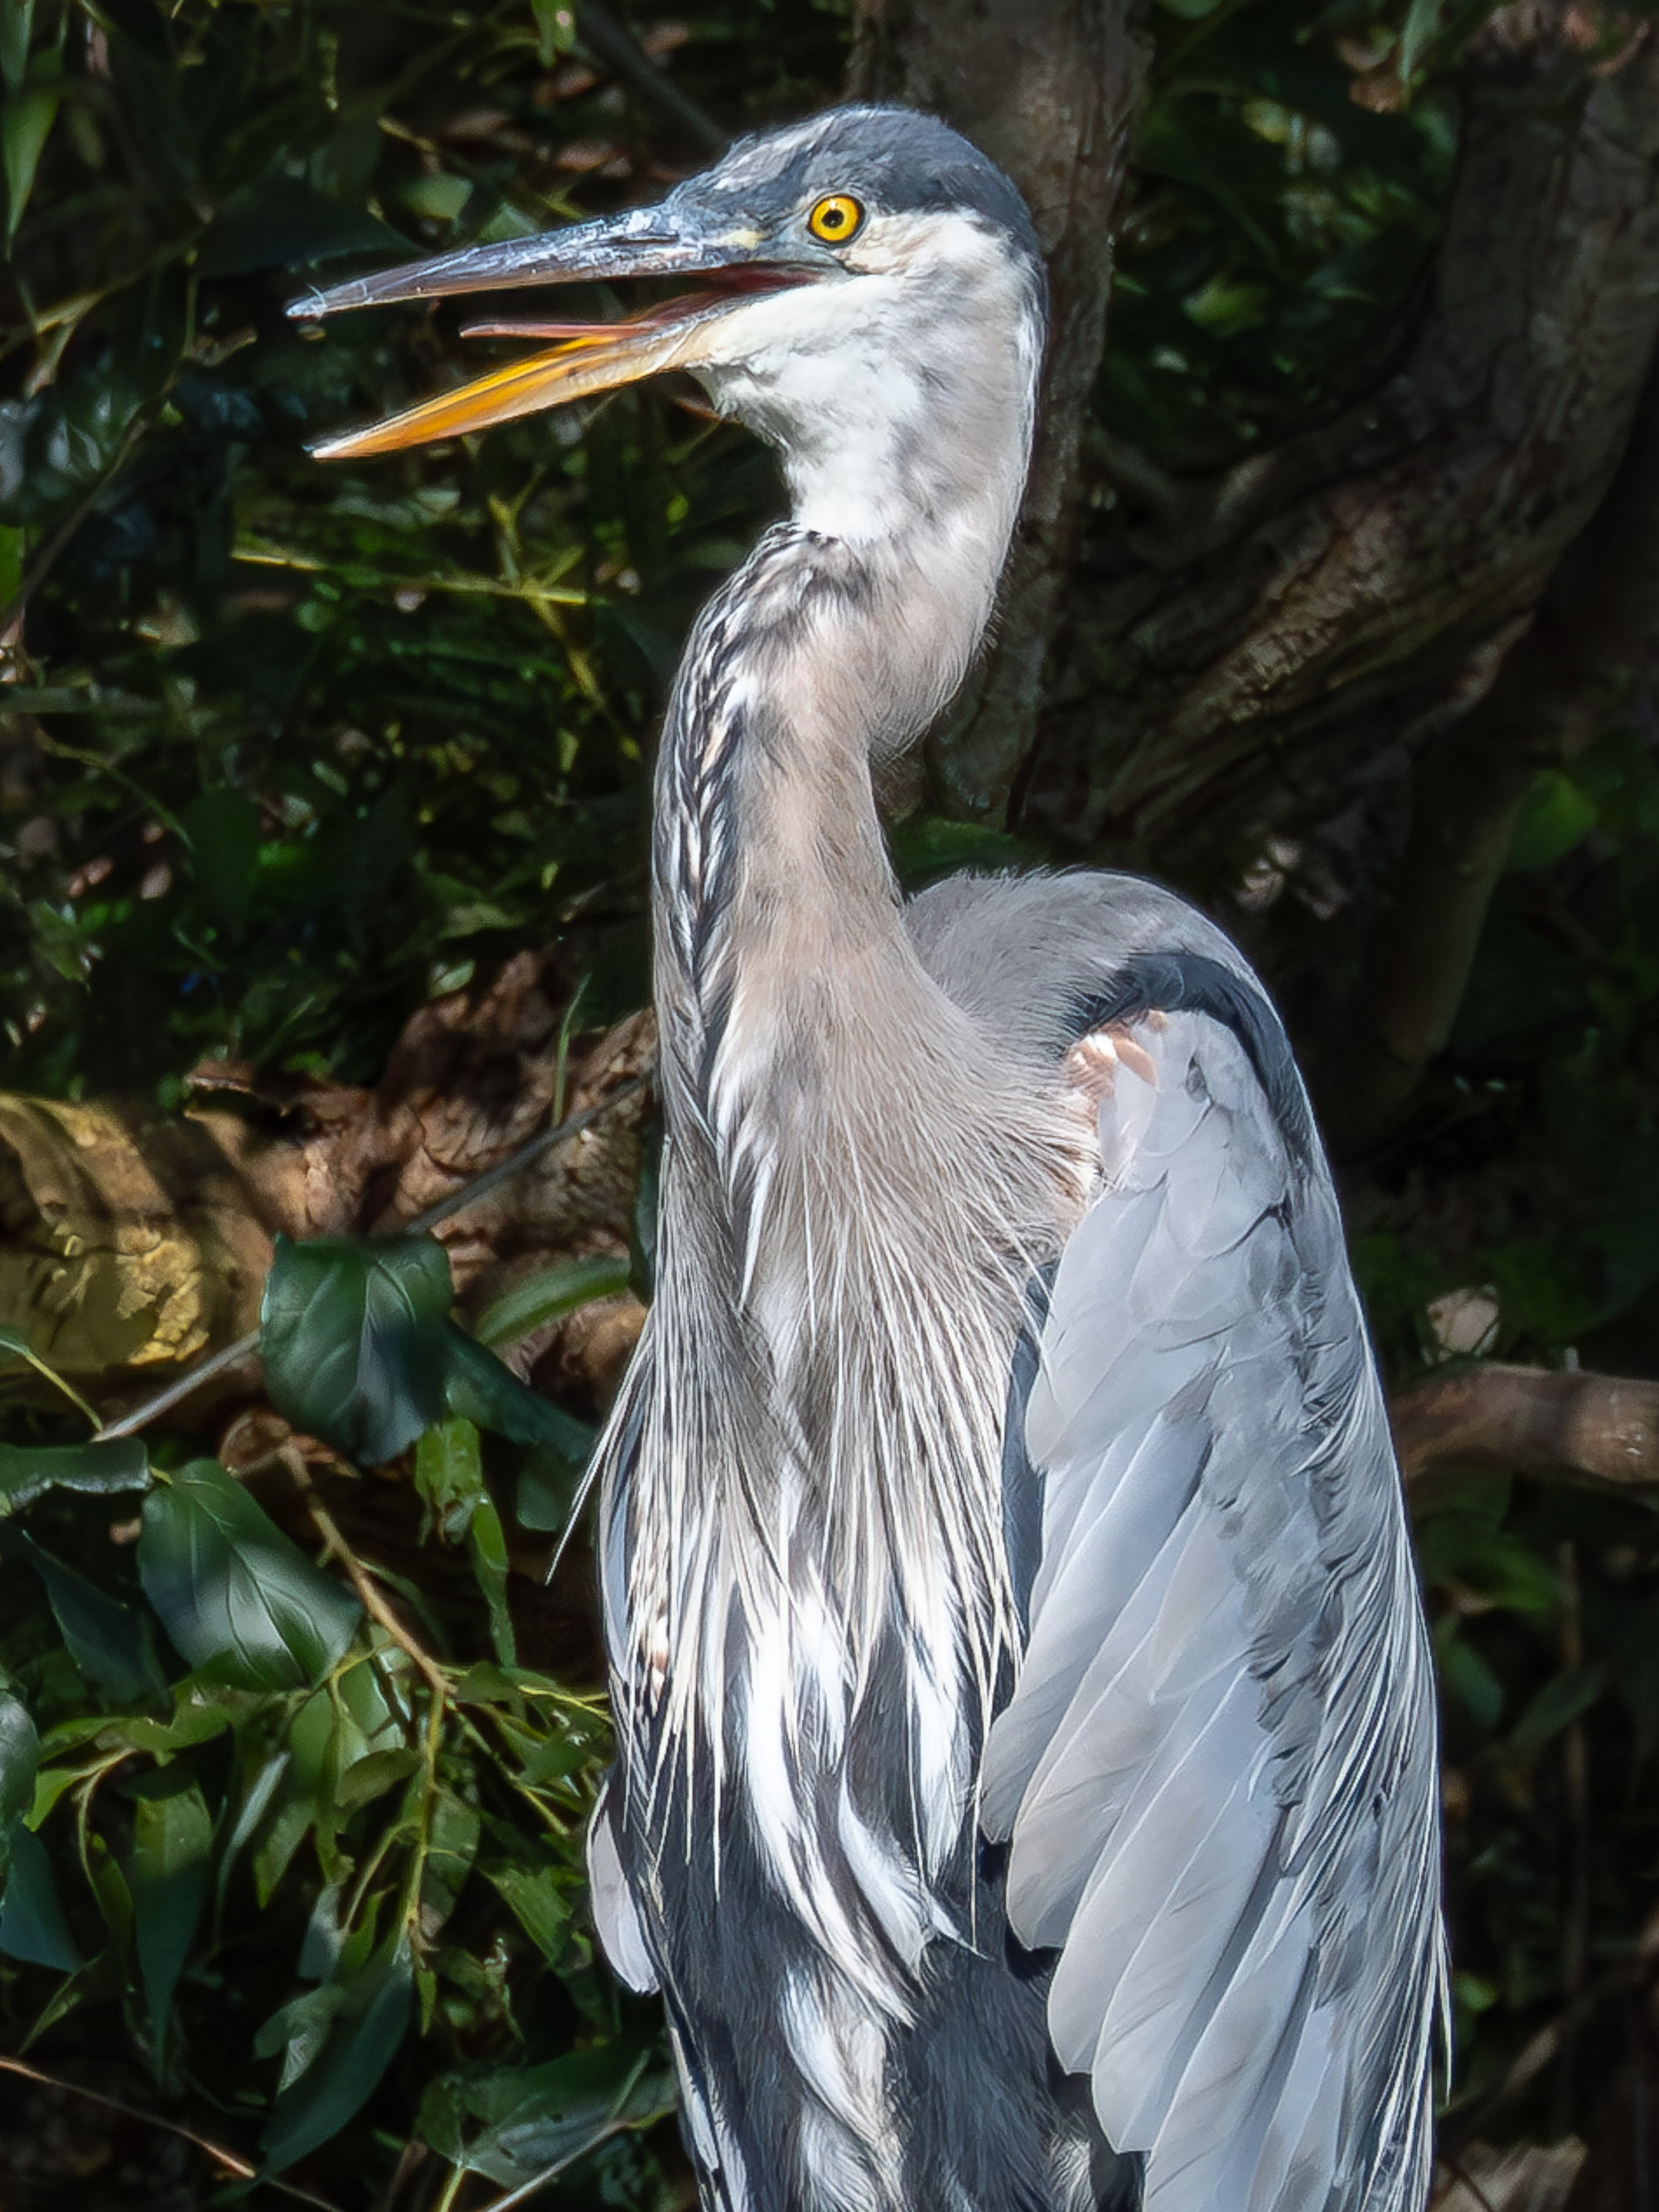
Right: A Denoise setting of 80 nicely cleaned this file, after which appropriate sharpening was applied.
Lightroom > Detail: Sharpening=60; Radius=1.0; Detail=50; Masking=50
The big difference between the original raw and the denoised version is how clean the smooth-textured areas are.Take a look at the eye, an important part of every wildlife photo. It is much cleaner after denoising. Also, compare the large feathers of the wing. The denoised feathers are gorgeous!
Overall, the detail is about the same. Check the really fine short feathery bits sticking out at the back of the neck and at the top of the back. The detail is the same, but the clarity of the surrounding background allows those details to stand out more clearly. As well, with the denoised image, there isn’t the distracting graininess through the neck and breast feathers.
But how does the the denoised, sharpened and resized raw compare to the original in-camera JPEG?

Right: The denoised, sharpened and resized Raw file.
The difference is clear!
So now we know the difference is clear. A better image can be made by denoising, sharpening and resizing the original Raw file. This is why I declared my bias against JPEGs early in the article! But, is the improvement great enough to make the added time and effort worth it? It depends:
- Do you have the time?
It only takes two minutes to Denoise, sharpen and crop, provided you have the app . . . - Do you have Lightroom Classic?
Denoise is only available in Lr Classic (Desktop), not LrMobile or LrWeb (yet!). Topaz Denoise and DxO PureRaw also have excellent AI denoise options. - Do you need a native resolution image file?
The cropped Raw would be 1944 x 2592 pixels – large enough for any web use and will provide a high quality 5×7 print; even an 8×10 is possible or an 11×14 canvas – all without upsizing. - Will you be printing the image or submitting it for competition or to a stock agency?
If it’s for web use, projection or small prints, the in-camera JPEG will do. Otherwise, the two minutes are well worth it.
Everything about the Denoised, sharpened and resized Raw file is superior to the in-camera JPEG. The Denoised-and-Sharpened Raw is sharper with fewer and smaller ‘paint-by-number’ areas. Overall, I feel it has a much more three-dimensional look with more realistic colours. It just looks more realistic.
So I think we’ve put to rest the Digital Teleconverter question. Bottom line: If you are after ultimate image quality, do not use it! That being said, I have two more comparisons to show you . . .

Once the original files are downsized, the differences become much less apparent. The above example is sized to print an 8×10″ fine print; i.e. at 300 pixels per inch. Other than the slight difference in colour balance and some mid-tone contrast (both of which are easily corrected in Lightroom), the difference in overall sharpness is minimal, though, the Denoised-and-Sharpened Raw file would still print better, as it retains the three-dimensionality referred to above.
However, when these same images are resized to 1600 pixels for web use (see below), the difference in apparent sharpness disappears completely, though still the Denoised-and-Sharpened Raw file has a presence to it not found in the JPEG (and that may vary with different subjects and scenes).


Final Verdict
In summary, the 2xDTC is a convenient way to double the focal length of any lens. The is especially true for those who regularly shoot JPEGS and are not interested in post-capture processing. My advice to you, though, is to set the file option to LSF+Raw as this will give you your JPEG but it will also save a Raw file, thereby future-proofing your work in case you take up processing at a later date.
The 2xDTC can be helpful when travelling, as it double the range of a ‘walkabout’ lens, such as the 12-100mm (efov of 24-200mm) without having to carry any extra gear. And, if the longest focal length in your kit is simply not long enough, you now have another option. Andy Rouse claims the quality is good enough for professional uses and I can’t argue with his success. But, to me, JPEGs from 2xDTC seem to lack sharpness, mid-tone contrast and three-dimensionality.
TIt is important to remember that though the 2xDTC does a fair job in a number of circumstances, it does not replace the quality provided by a real teleconverter, which for OM System cameras and lenses is excellent.
Furthermore, before using the 2xDTC, photographers should consider whether a full, native resolution image file is actually needed – which is surprisingly rare. By far the majority of images are used and viewed at considerably smaller sizes (e.g. for web, small prints, etc.) so, a simple crop of the raw file would suffice without using the 2xDTC. And, as shown above, if captured as a Raw file then processed properly, a higher quality image is possible.
The images presented here demonstrate that if you are inclined to capture Raw files and process them in an app like Lightroom Classic, Topaz PhotoAI or DxOPureRaw, it is in your best interest to extract a final photo by denoising, sharpening and (if needed) resizing the raw file. By all means, shoot using 2xDTC – I find it helpful for framing – but capture images using LSF+Raw so you can make the necessary improvements. As mentioned previously, processing takes no more than a couple of minutes and you are welcome to use the settings provided above as starting points. The little bit of time it takes, certainly pays dividends in image quality!
Try it out and let me know how it goes!
Thanks for reading!
If you have any questions or comments about OM System, the Digital Teleconverter option, raw capture, processing in Lightroom or anything else, please add it to the Comments section.
If you are not yet a subscriber, then consider adding your email in the form below to be instantly alerted to new blog posts. And I promise not to inundate your inbox.
Have a look at my work by visiting www.luxBorealis.com and consider booking a presentation or workshop for your Photo Club or a personal field and/or screen workshop at Workshops.
Discover more from luxBorealis Blog
Subscribe to get the latest posts sent to your email.

Great point on JPEGs, maybe the camera knows better than us humans but personally I think that raw just gives more opportunity to make the photo result more personal. Great Review! (Pretend this is in pink pen!)
I am a Jpeg shooter, and I have a couple issues with your analysis here. First, you don’t give any information about the picture quality settings for the Jpeg image you’re showing here. What were your camera settings for Contrast, Sharpness, Saturation, Noise Filter, etc. — since all those are important. I ask because the Jpeg DTC image appears excessively sharpened and contrasty — and your ‘paint by numbers’ impression could be the result of using the default “Standard’ Noise Filter setting.
Secondly, like most RAW only shooters, you seem to suggest that the Jpeg shooter is simply ‘stuck’ with what comes out of the camera, and there is no post processing involved. I post process every ‘keeper’ image I capture and there is usually night and day difference in the results.
I’m not arguing that shooting RAW doesn’t result in a better image, I just feel the the comparisons you are showing here have substantially exaggerated that difference. I use the DTC fairly often and have done a number of very high quality exhibit prints from those files — and as you correctly mentioned above, viewers don’t know, nor care what type of file was used.
Thanks, Greg, for your questions, comments, and overall assessment.
I do admit in the article to my bias against JPEGs which has, no doubt, tainted my analysis. I always figure if someone is going to spend anytime at all on post-capture processing, doing so from a Raw file will always result in higher quality result. To address your observations and questions:
My JPEG settings were: picture Mode 4 (Muted); Sharpness 0; Contrast 0; Saturation –2; and Gradation Normal. These settings should only affect overall colour, but not Sharpness. The only additional sharpening applied was upon Export from Lightroom, for “Screen”.
What settings do you recommend for shooting JPEGs using an OM-1? As well, what are your recommendations for getting higher-quality DTC JPEGs? This would be helpful for me (and others) who wish to improve their JPEG captures.
If there is a better solution to providing higher quality images from the Digital Teleconverter, it would be helpful to know.
– Terry
Terry,
I appreciate your reply.
I can see one major problem already. The ‘Muted’ Picture Mode is a complete waste. I have done some careful test shooting of upholstery fabric with fine threads using ‘Natural’ and ‘Muted’ Picture Modes with my Oly 60mm f/2.8 Macro and my Oly 12-100mm f/4 Pro — two of my sharpest lenses — both shot at f/5.6. Shooting with camera tripod mounted, using the wireless shutter release, and Sharpness, Contrast, & Saturation all set to ‘0’, Normal Gradation, and Noise Filter set to ‘Low’ — there is a clear and obvious smearing of fine detail in the images captured in ‘Muted’ Picture Mode. I honestly don’t know why anyone would use that mode, since there is also a ‘Portrait’ Mode to smooth skin texture. It certainly is a bad choice for shooting bird feathers.
As far as the DTC, I generally try to avoid using it at ISO’s above 3200.
My Jpeg processing is done in Photoshop and can range from a few simple tweaks, such as Levels adjustment and Sharpening, more involved stuff such as layer masking, burning, dodging, selective sharpening, and noise reduction in Topaz DeNoise AI, etc. — it all depends on the image and how I’m going to use it.
I actually got converted to shooting Jpeg only due to many years shooting corporate events and conferences. So many of my clients wanted on-site upload and crazy short print turn around for tournament award ceremonies, etc, as well as wanting a full set of images at or shortly after the event end, that I was forced to shoot Jpeg and the RAW’s ended up being extra baggage — never had an unhappy client (and I had some big ones).
All of this is personal choice, and I might change my attitude about this down the road, but I’m pretty set in my ways (and retired now) 🙂
Thanks for the additional information, especially about “Muted” picture mode. As I shoot raw only, “Muted” was recommended to provide a more accurate histogram for judging exposure, as the histogram is generated from the JPEG, not from the Raw itself, even when Raw-only is selected for file capture.
Lots to learn about this system and how one setting can affect others. Thanks again!
If you don’t mind me saying, the post-capturing processing you’re doing to your JPEGs is really better suited to Raw files, and would produce a higher-quality result. I realize you know this, so the statement is really directed to anyone who might be reading these comments.
Hi Terry. I enjoyed reading this analysis of the 2X digital TC. None of it applies to me as my OM-D MarkII does not include this option. I had been waiting for OM Systems to come back online so I could order the physical 1.4 teleconverter. As the warblers have headed further north I wasn’t in a big hurry and also hoped they would put the 1.4 on sale at some point.
So I continue to use Raw files in Lightroom as my “go to”. At some point, II do need to chat with you about focussing issues using the 100-400 lens. I am not entirely satisfied with the sharpness of my shots and suspect that I am not using the most amenable settings for some of my birding pics.
Also enjoyed your insights on focus stacking as, again, this is not something I have yet explored. Lots of inspiration to up my game. Cheers.
Thanks for your comments, Dan. With regards to the 100-400, I’ve found that it is sharper at f/8 ithan f/5 or f/6.3 – not by a lot, but it’s there. Shooting at ISO 1600 and ore often at 3200 has allowed for fast enough shutter speeds to ensure s sharp captures.
Dan,
Not sure which model Olympus you have, but all of the OM-D models since the original E-M5 have the Digital Teleconverter Function. You need to check your User Manual — it’s there and you can assign it to a button if you want to.
You are absolutely right, Greg. My brain fart. I had been recently reading about the ND long exposure handheld capability that came with the E- Mark III, and was disappointed to see it is not available on my E-Mark II, and then transferred that notion to the present topic. I do indeed have the 2X tele-converter option, but had never used it, in part because of comments about its limitations from Daryl Young in “Mastering your Olympus”. I shoot raw and use LR Classic for any fine tuning so didn’t really see the need for the JPEG crop. Cheers.