Some thoughts on Focus Stacking using the OM-1

Finally, I have some time to really delve into some of the computational features of OM-1, in this case Focus Stacking. I won’t blab on about what it is and all that since it has already been covered well by a number of photographers such as:
- Chris McGinnis (YouTube 3min);
- Peter Baumgarter (OM Photo Tips);
- Thomas Stirr (a variety of helpful blog posts); and
- Rob Trek (YouTube 13min)
This morning, I was walking along the hydro corridor at the end of Water Street, here in Guelph. This area was converted to a tall grass prairie habitat about 5 years ago and the city is working to maintain it as such. As a result, a number of wildflower species indigenous (native) to Ontario are now becoming established: foxglove beardtongue, wild bergamot, grey-headed (prairie) coneflower, Culver’s root, giant sunflower, black-eyed Susan, and tall coreopsis (tickseed).
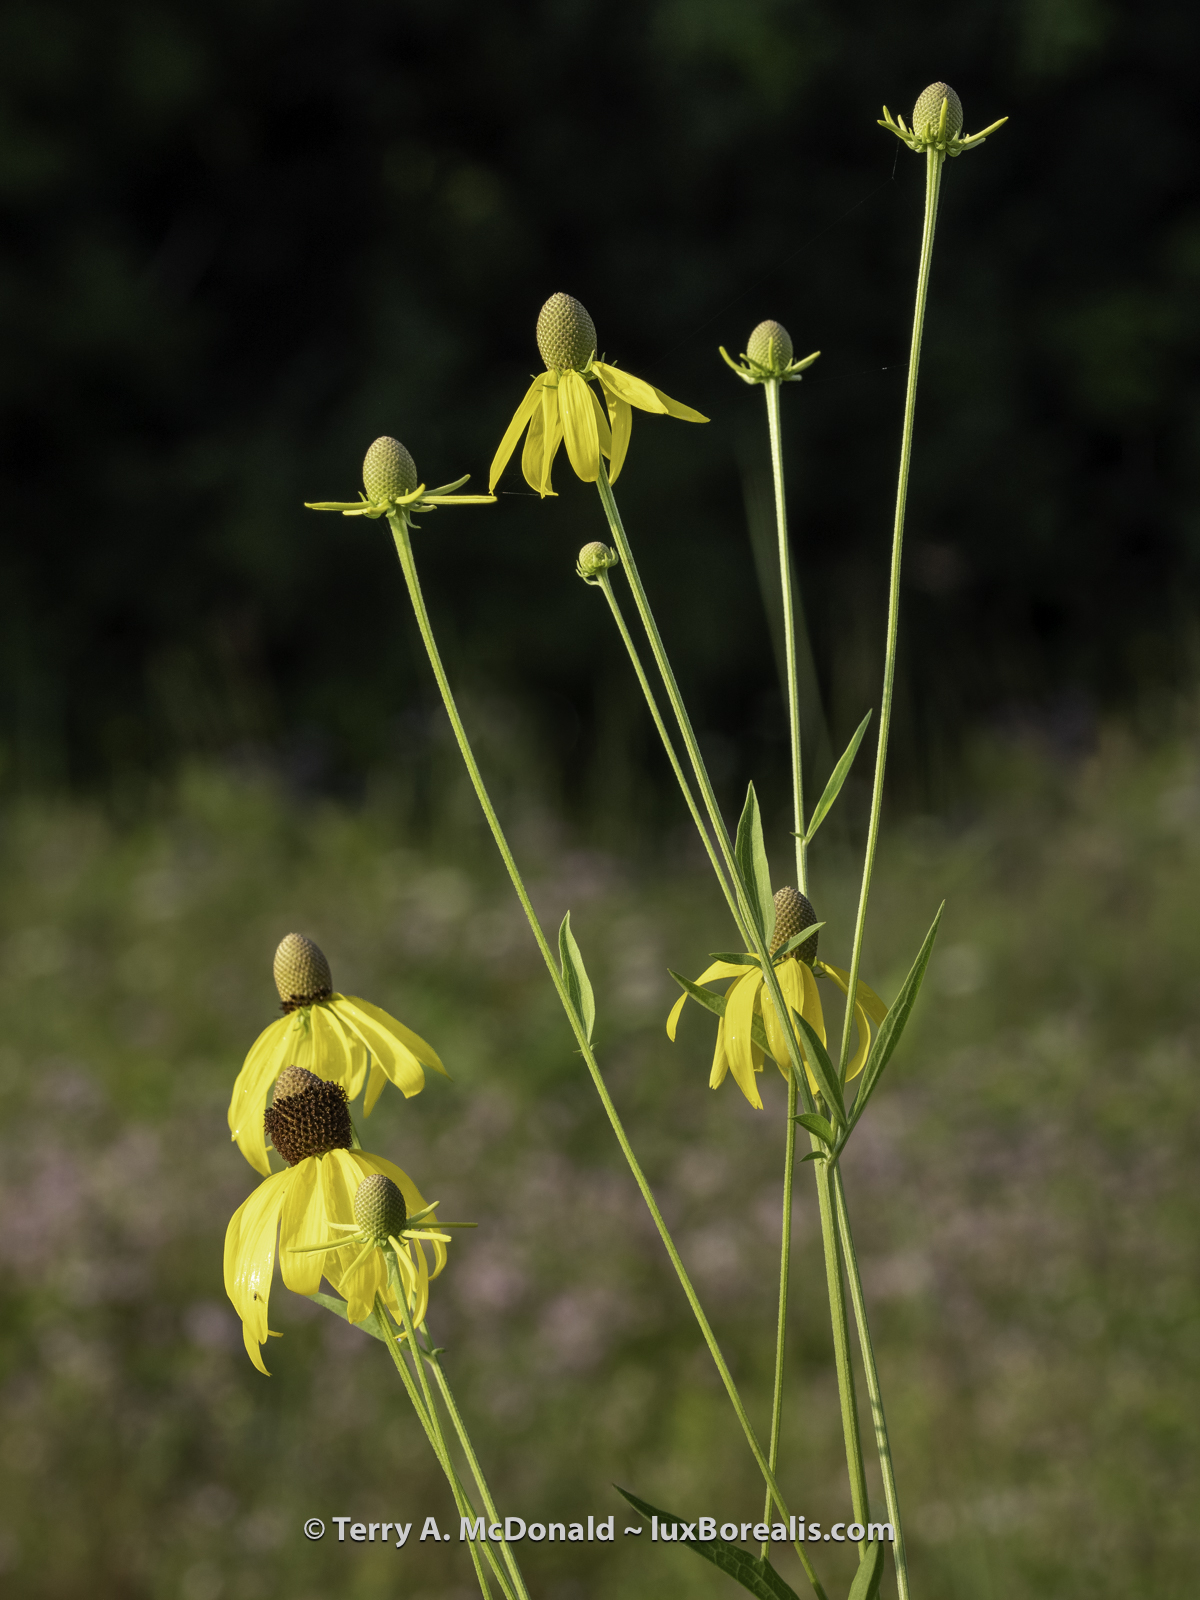
OM-1 with M.Zuiko ED 12-100mm ƒ4.0 IS PRO at 100mm (efov 200mm);
ƒ8 @ 1/400; ISO 200; EV–1⅓; processed in Lightroom Classic
The wild bergamot was in full bloom with carpets of them covering the open area. My goal was to capture the light pink flowers and green foliage lit by the warm early morning light. Traditionally, I would have used a small aperture like ƒ11 or ƒ16 to achieve maximum depth-of-field, or even ƒ22 with a full frame camera. But small apertures increase the risk of defraction leading to a softening of details. This happens with all cameras, but with Micro Four Thirds sensors, it kicks in at about ƒ8.
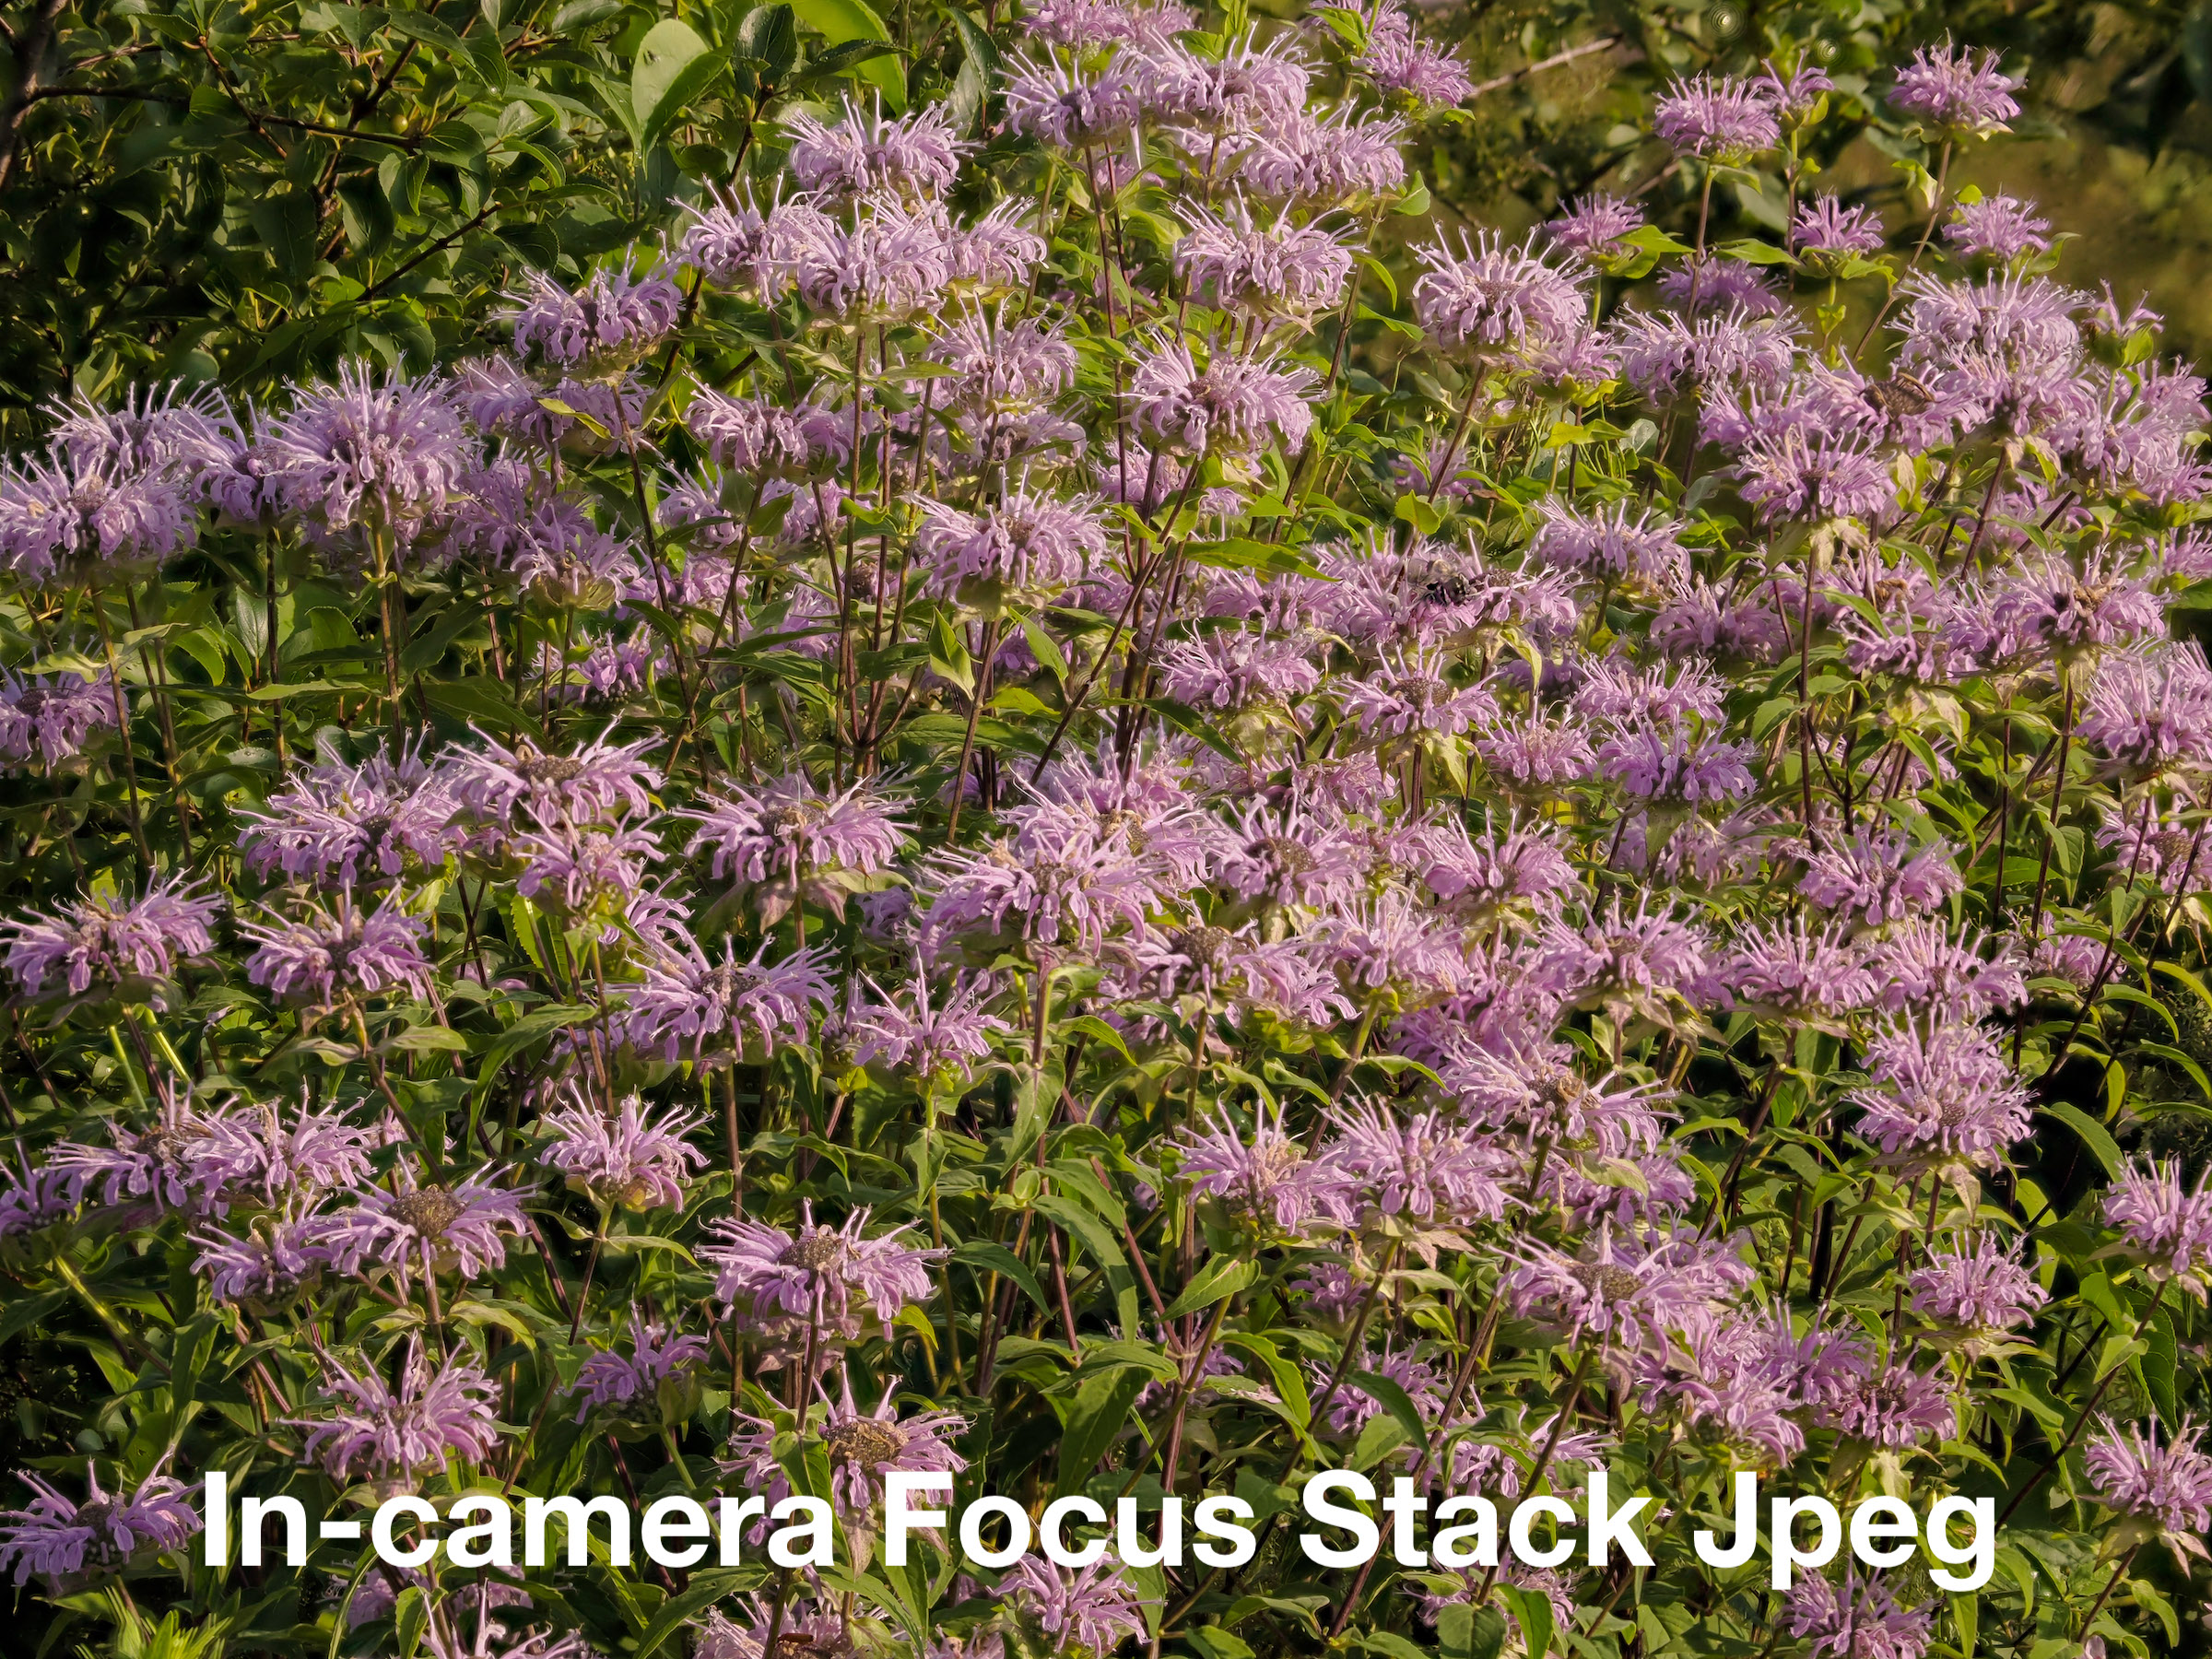
No worries. I still shot at ƒ11 and ƒ16, just to see how far I could push the system, also knowing that some of that lost detail may be recoverable with appropriate sharpening of the raw file. However, this was also a great opportunity to try the in-camera ‘computational photography’ mode called Focus Stacking. For that, I set the lens to ƒ4 and Focus Stacking to 10 shots with a focus differential of 4. These settings are what Thomas Stirr recommended in one of his recent articles, so it seemed like a good place to start. I focussed on the closest part I wanted in focus and presses the shutter release. The 10 photos were made in quick succession, then processed in-camera. In about 20 seconds I had a finished JPEG.
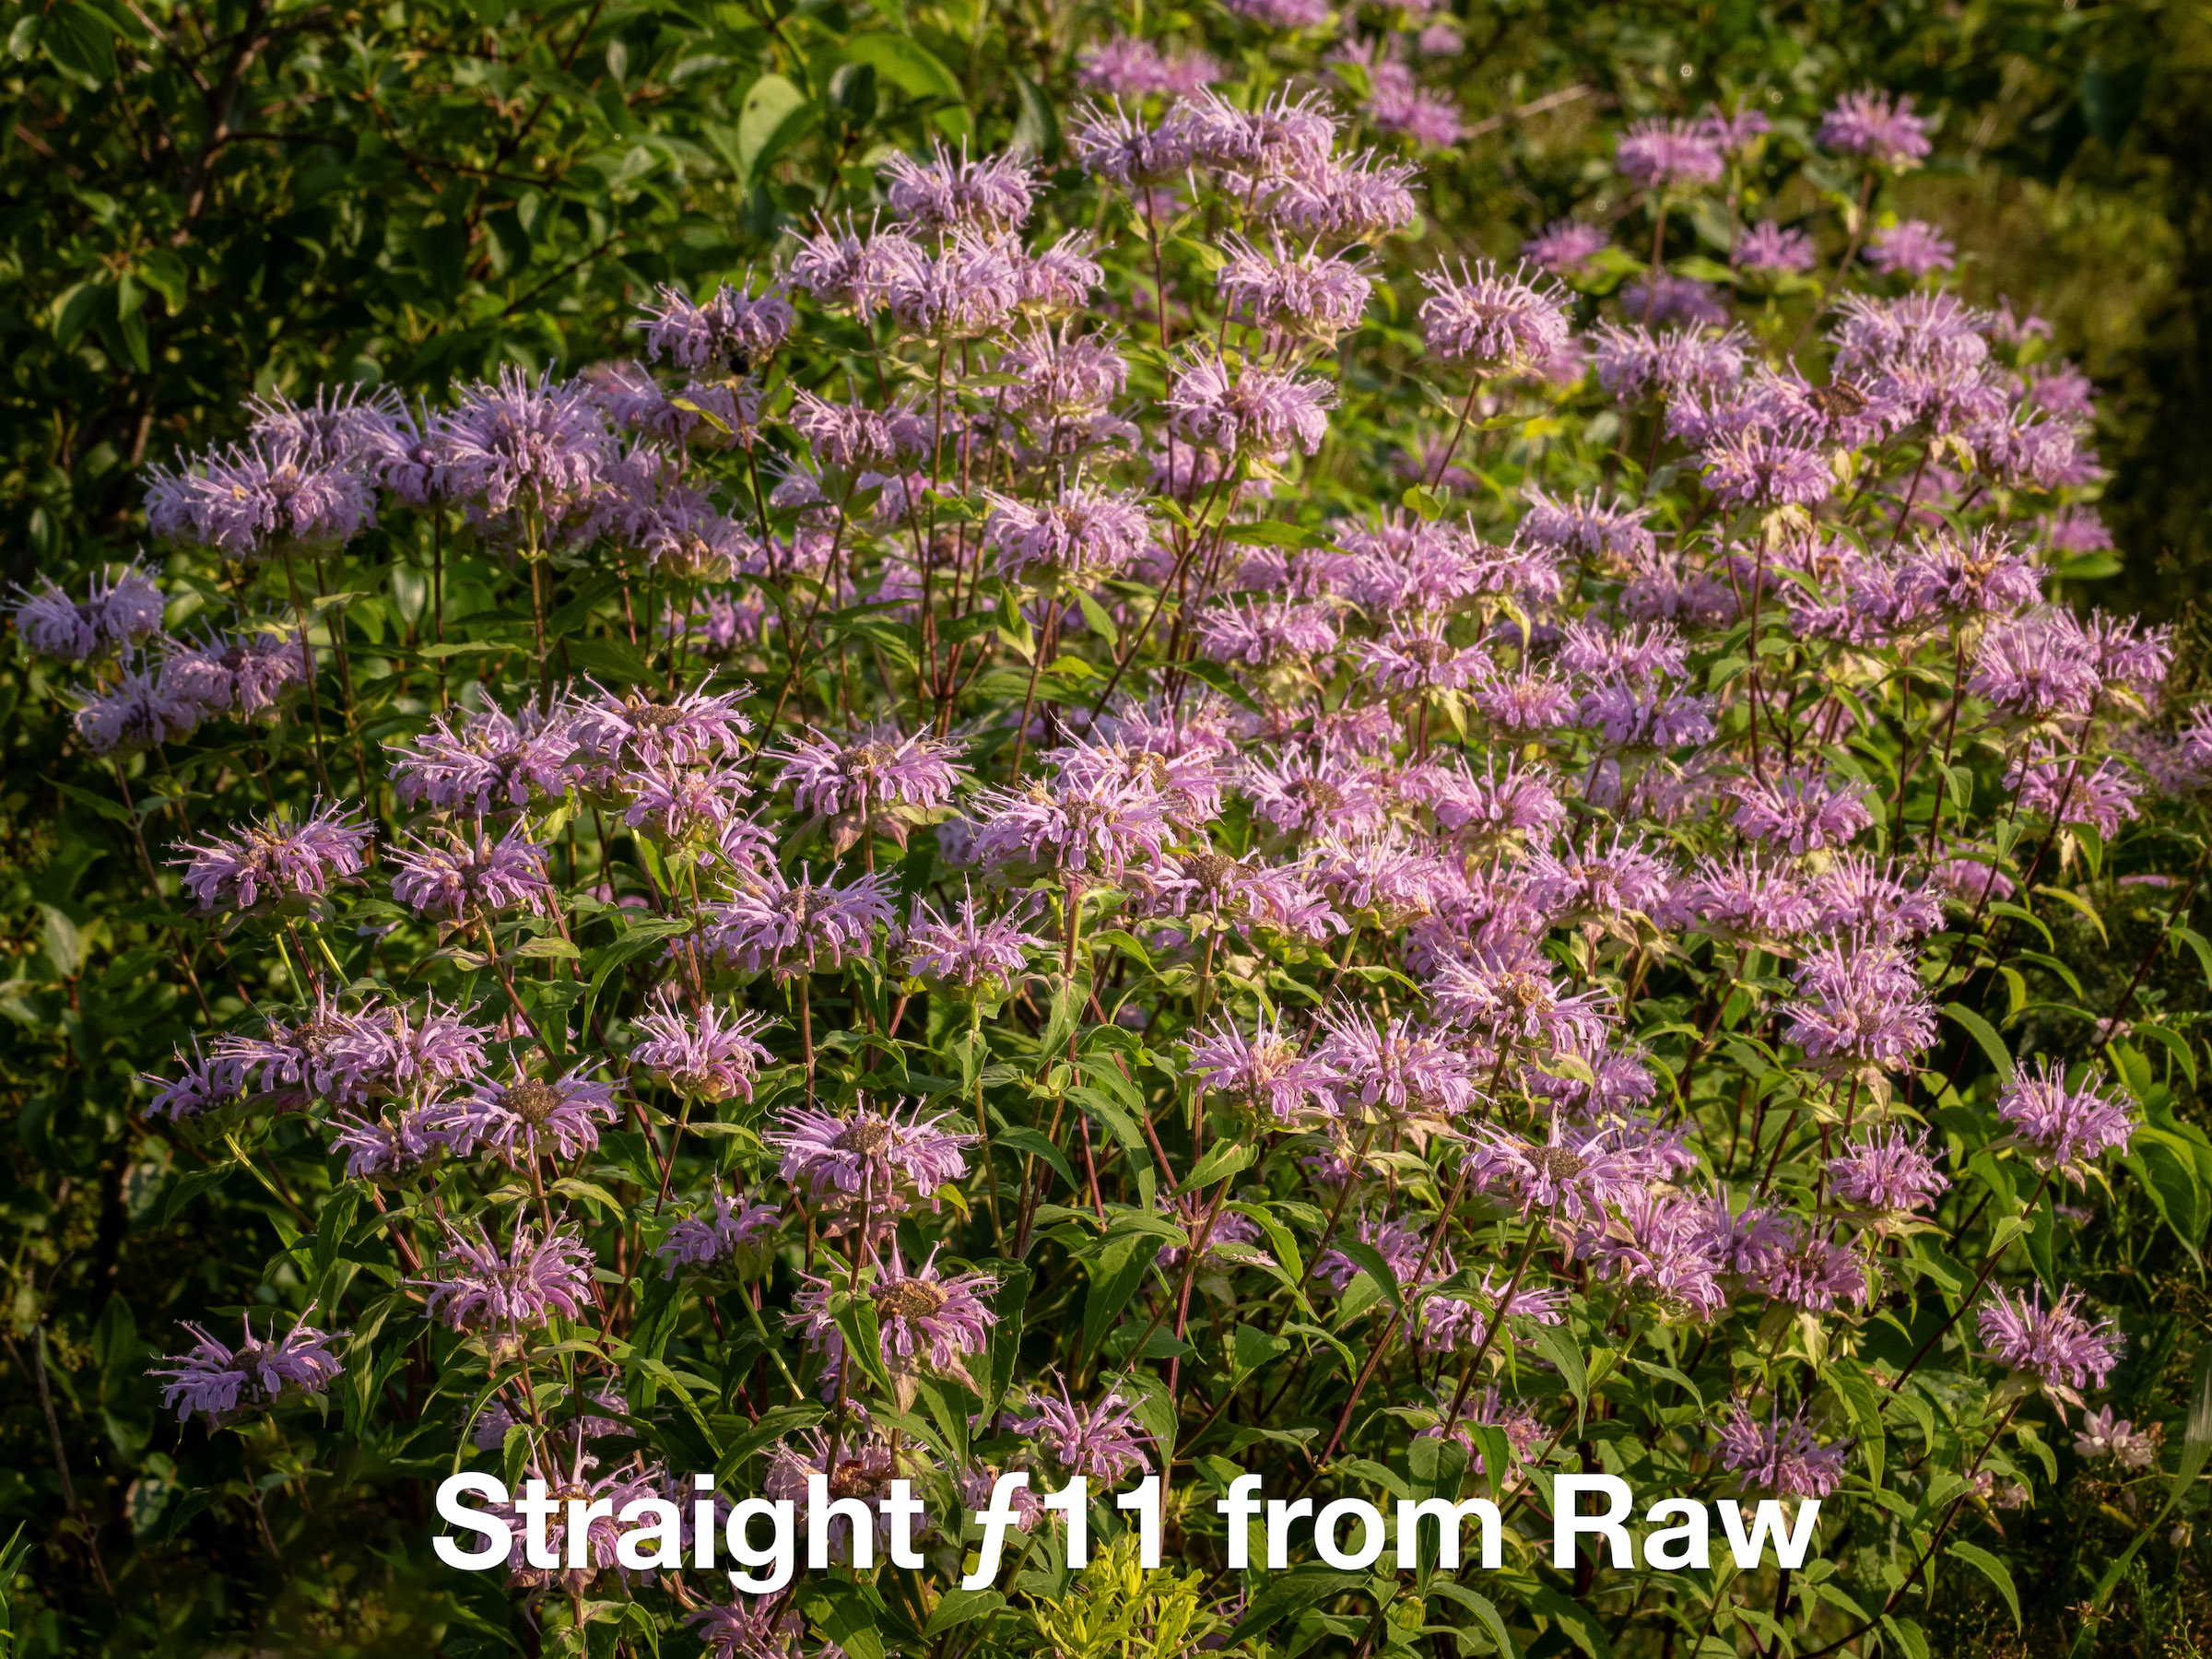
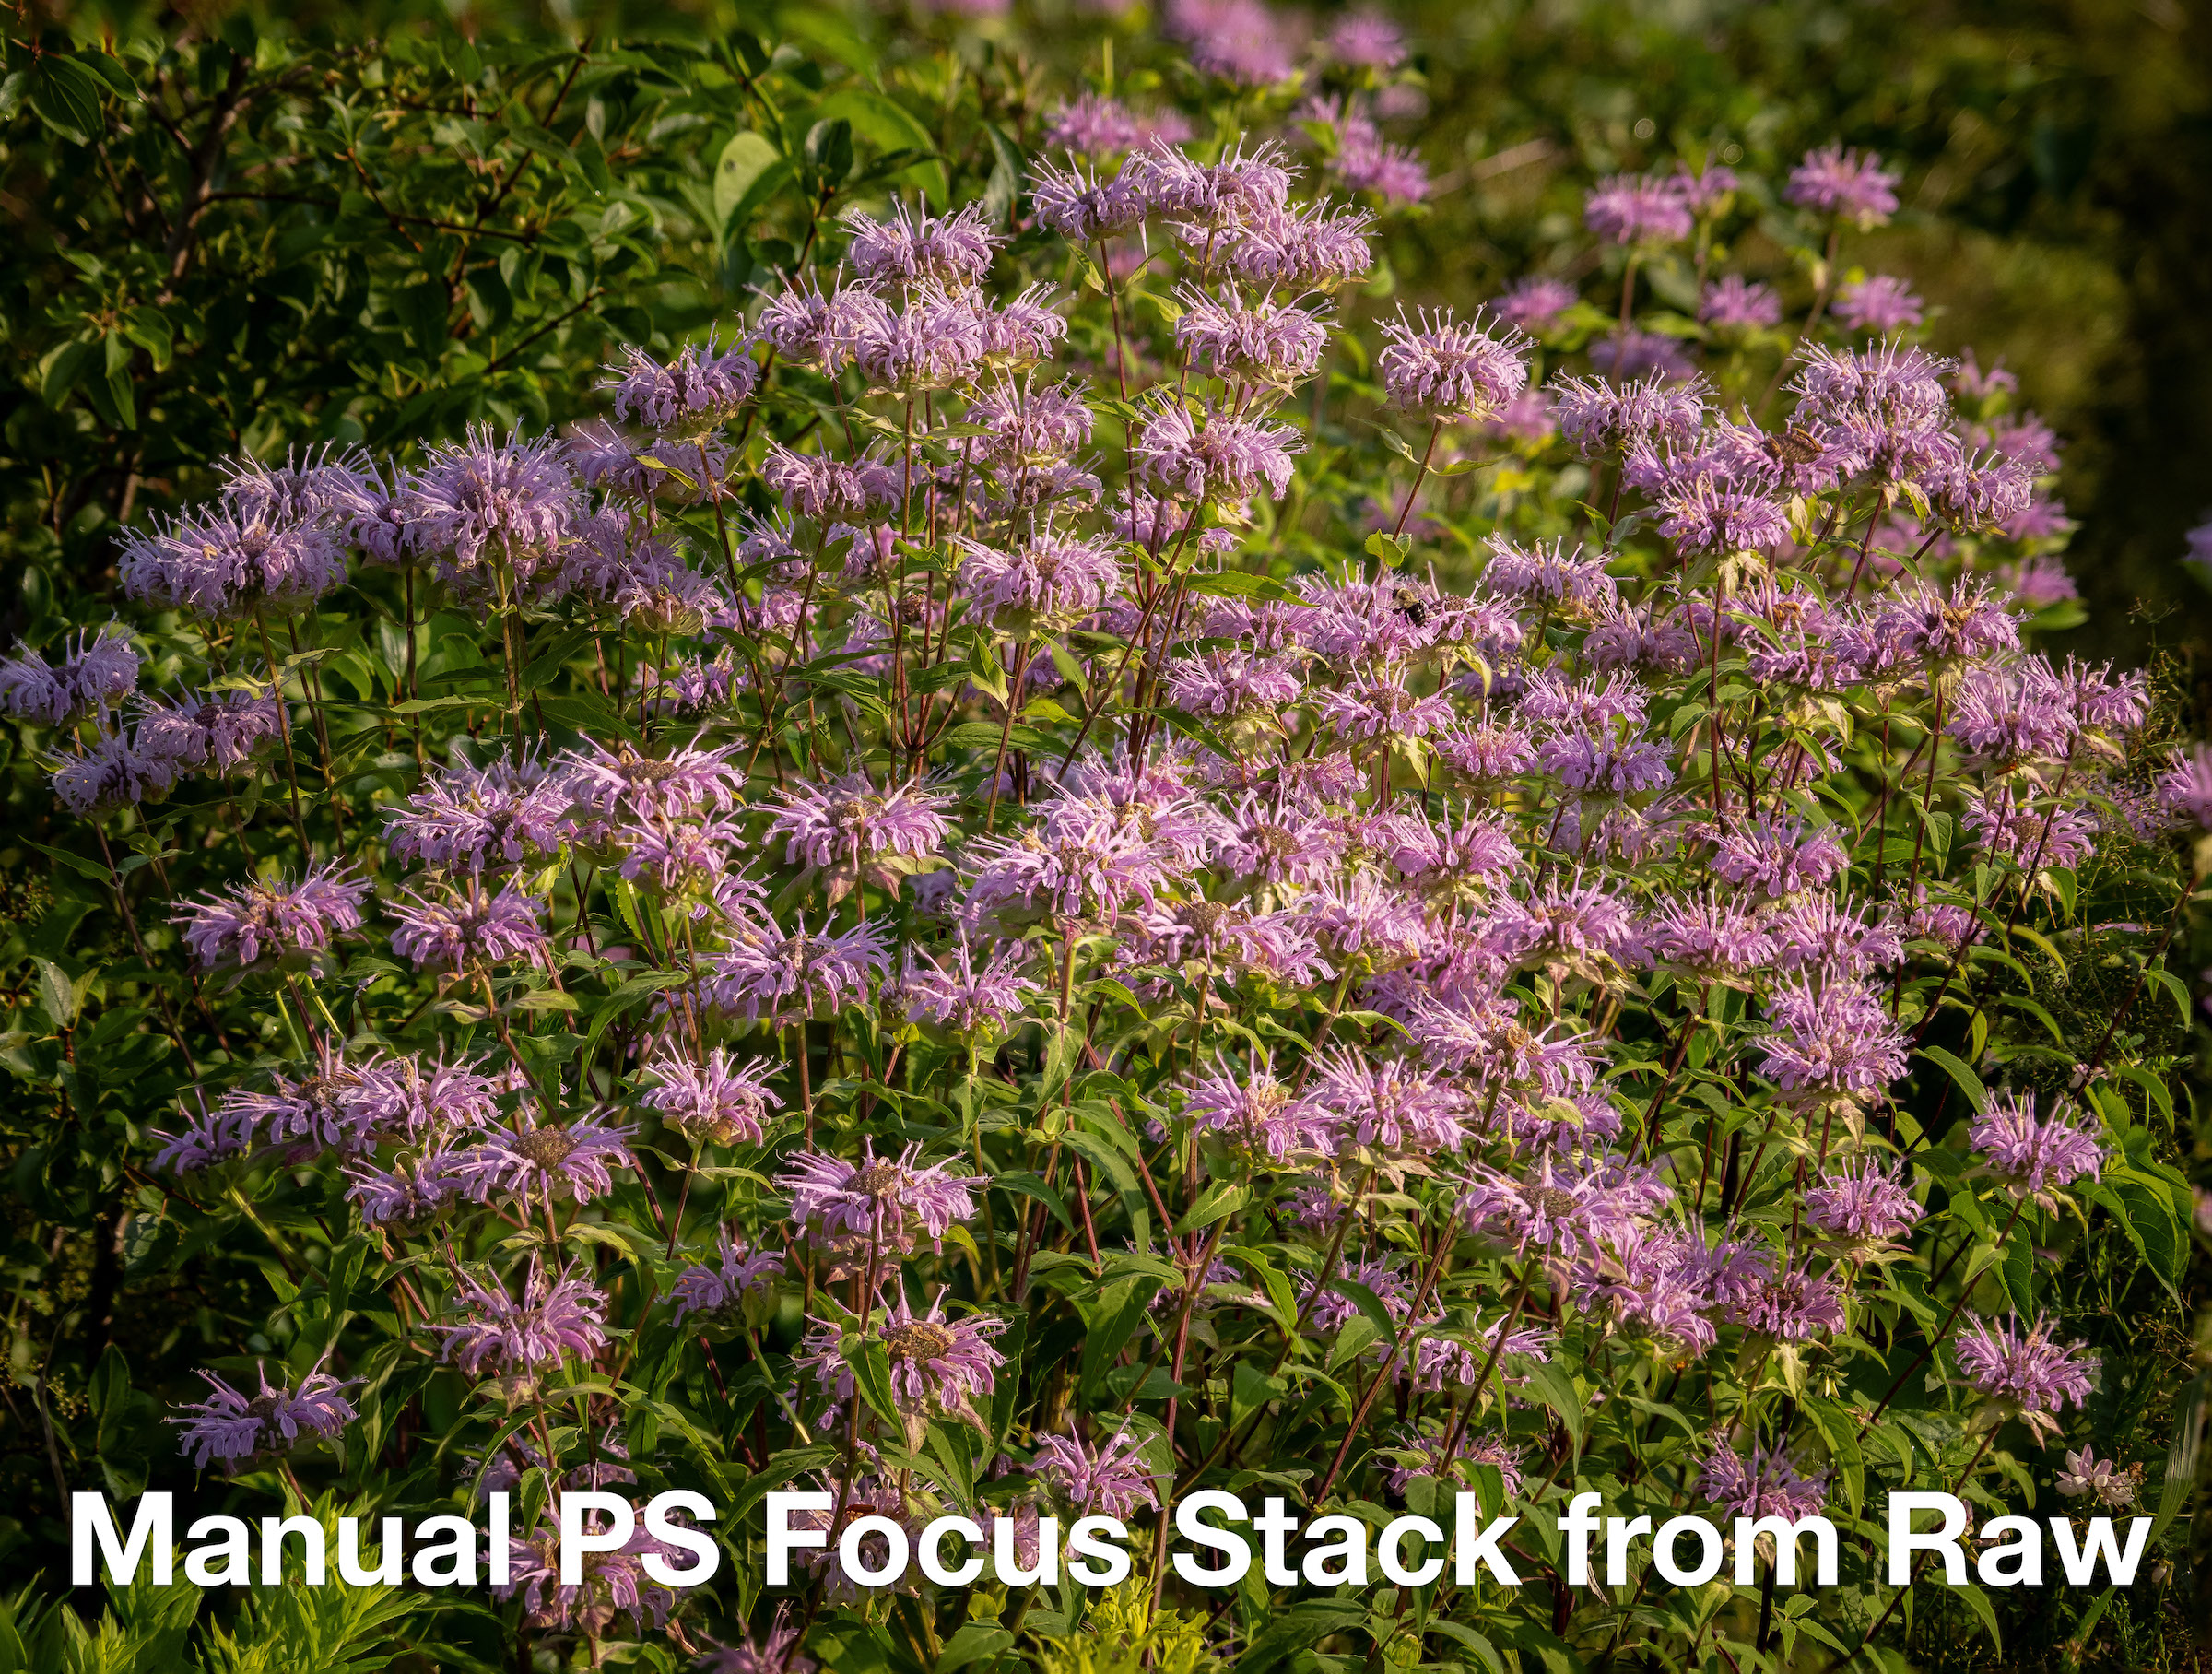
Let’s get to some comparisons. All images were processed in Adobe Photoshop Lightroom Classic. One is a straight shot at ƒ11, the second at ƒ16. Of the two Focus Stacked images, one was made using in-camera Focus Stacking, which is automatically saved as a JPEG; the fourth was created manually in Photoshop using the same series of Raw images the camera used:


Take a moment to have a look at each image:
- Tap or click on on any image above to open the Gallery to that image. I recommend starting with the ƒ11 image.
- Scroll through the Gallery looking at each in turn.
- While the Gallery is open, double tap on an image to see it zoomed in. Then scroll through again, looking at each image zoomed in.
What do you think? What did you notice?
If you’re like me, aside from the JPEG being slightly soft, there is not a lot of difference. The ƒ11 and ƒ16 images look surprisingly good, even zoomed in. All three images made from directly Raw files look perfectly fine when viewed without zooming. And, let’s face it, that’s how most images are viewed – on screen, at screen size or smaller. Here are the same 4 images re-sized to 2400px on the longest side. I think you’ll find the differences virtually disappear; even the JPEG looks great.

A note about the JPEG. In-camera JPEGs from the OM-1 are touted as being some of the best in the business. Originally, my JPEG looked like like crap. I only realized why as I was writing this blog. I have my in-camera ‘Picture Settings’ set to ‘Muted’ with saturation at –2. I never shoot JPEGs, so this is done to get more accurate-looking previews of my Raw files on the LCD, which are only ever shown at JPEGs on the LCD. Originally, the colours of the JPEG did not accurately reflect the quality possible, so the file underwent a little more adjustment than is typical. HOWEVER, perhaps like you, I am disappointed with the sharpness of the JPEG,. Despite having sharpening added in Lightroom, it is not a crisp and lively as the image made from Raw files. I think I will stick with capturing Raw files for the foreseeable future!
JPEG vs Raw aside, upon closer examination with a more critical eye, slight differences between the four images become apparent :
- The manually created focus stack using Photoshop is sharper and more lively-looking. It also includes the whole frame, versus the in-camera JPEG which is cropped, and t appears to have less noise. It is definitely a superior product.
Note: Each of the images that are automatically made and saved as Raw files by the OM-1 were shot at ƒ4 @ 1/800 at the OM-1’s optimal ISO of 200. - The ƒ11 capture was made at 1/100 at ISO 200; the ƒ16 image was made at 1/50. This highlights one of the advantages of Focus Stacking: each image is made at a more optimal (sharper) aperture – ƒ4 – with no fear of diffraction. Furthermore, a faster shutter speed virtually eliminates any concern for blur from camera shake or a wind-blown subject. That being said, focus stacking really must be done with static subjects as subject movement between frames will degrade the stacked image.
- One further advantage of manually stacking the images is the opportunity for fine-tuning. For example, I did not send all 10 images to Photoshop for stacking. Of the 10, I selected only 5 in the middle range that captured the area I wanted in sharp focus. The result shows up in the very top of the image: you’ll note the background flowers and foliage are far more out of focus than in any of the other photographs. Subtle, but there. This is done on purpose to focus the viewer on the grouping of flowers in the foreground. Further editing of the layer masks in Photoshop is also possible, though I can’t see tackling anything like that any time soon.


The images above are re-sized to 1600px on the long side.Tapping or clicking on any one of them will open the gallery.
All three photographs were made in Photoshop by processing the in-camera Focus Stack Raw files. Prior to that, each set of files was processed in Lightroom. The first two are of Wild Bergamot; the third is Culver’s root. With the Culver’s root thoroughly surrounded by a sea of grasses, I would normally try to isolate such a complicated flower from the background, but that was impossible. Going the other way by including that sea of grass seemed like the best option.
So, what have I learned?
- I feel Raw files stacked are still better than the in-camera JPEG, which to me isn’t all that surprising. However, the difference is less than what I expected (see below).
- Using ƒ11 in a “straight” photograph (e.g. without Focus Stacking) provides more than adequate image quality after thoughtful sharpening is applied (even ƒ16 in a pinch), though Focus Stacking provides a consistently higher-quality result;
- Focus Stacking requires:
- a large aperture, such as ƒ4 or even ƒ2.8, which is a good thing, as it allows a faster shutter speed;
- fairly still conditions, though that’s the case for most serious detail work in nature. Shooting full frame at, for example, ƒ22 would have lowered the shutter speed to 1/25, meaning little tolerance for wind.
- Focus Stacking, both in-camera and with Photoshop, struggles with more visually complex scenes such as thin stalks of grass in the foreground. This is an area I will need to explore further, perhaps with a smaller differential and more images being captured. But I also think that with narrow blades of grass in front of narrow blades of grass,Photoshop struggles with identifying what’s sharp and what’s not and masking accordingly.
- I don’t really need to use in-camera Focus Stacking as capturing a series of files using Focus Bracketing is available on the OM-1. That way, only raw images are captured for later assembly using Photoshop. (For some reason, the OM-1 is saving both Raw and JPEG files of each exposure, even though I have Raw only selected as a file type.)
- Focus Stacking allows up to 15 images to be captured; Focus Bracketing is more flexible, allowing up to 999 (!) sequential captures – far more than I could ever imagine working with, but it would certainly make a great future project!
Focus Stacking using Photoshop is a quick and viable way to further increase image quality and to customize the out-of-focus areas of the image. My workflow is very straightforward:
- Import files into Lightroom;
- When dealing with a lot of images, I set-up an Auto-Stack:
- Photo > Stacking > Auto-Stack by Capture Time and set it to 3 seconds as, typically, all the files are created within that time frame;
- Select and delete unnecessary JPEG;
- Choose one of the raw image file for processing and apply the adjustments I typically make to ‘breathe life back into the machine-made file’, including Basic, Colour, Detail, Adjustment Masks, etc.;
- Sync changes to the others;
- Select the Raws to stack;
- Photo > Edit in > Open as layers in Photoshop . . .;
- In Photoshop:
- Select all the layers;
- Edit > Auto-Align Layers > Auto;
- Edit > Auto-Blend Layers . . . > Stack Images;
- Layer > Flatten Image;
- File > Save As . . → Here I replace “Edit’ in the filename with as FS to indicate focus-Stack. The file is immediately visible in Lightroom.
- I select the PSD file and choose Photo > Stacking > Move to top of Stack;
- Photo > Collapse Stack. Job done, usually in a minute or so, after processing.
That’s 12 steps more than my normal workflow, but other than the processing, the steps are all very mechanical. The Photoshop steps could be saved as an Action (which I have done).
Here is another example. The image below is of a very complicated scene for successful Focus Stacking. There are many thin blades of grass overlapping, both in the foreground and in the background. One image is the in-camera JPEG; the other was produced using Raw files and Photoshop. Drag the centre button to compare the two. Which is which? Which one do you like better?


The complexity of the scene above fooled both the camera and Photoshop during stacking. However, the point of showing this image is to demonstrate just how good an in-camera Focus Stacked JPEG can be. I’m impressed. BOTH images have been processed in Lightroom prior to being re-sized to 2400px on the long side. The image on the LEFT is the JPEG produced in-camera; on the RIGHT is the Photoshop-made Focus Stack. Here is a 100% crop to compare more precisely:


I am greatly looking forward to pursuing Focus Stacking, or rather Focus Bracketing and Stacking. The OM-1’s implementation of these features using computational photography provides the necessary precision and repeatability for proper testing and predictable results. Given my interest in natural details and landscape photography, Focus Stacking has become an essential addition to my ‘photographic toolkit’, It is a reliable method of improving image quality with very little increase in effort.
Discover more from luxBorealis Blog
Subscribe to get the latest posts sent to your email.
