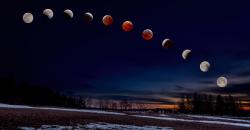
Total Lunar Eclipse—Landscape Composite Photographs around Guelph, Ontario
Or evolution by trial and error . . .
This is the third and final article about the Total ‘Blood Moon’ Lunar Eclipse of 13-14 March 2025. The first, Are you ready? provides background and a series of resources for photographing a lunar eclipse. The second is a First Look at Total Lunar Eclipse Photographs, with a couple of composites of the Moon at different phases.
The photographs presented below illustrate what I had originally envisioned when I was preparing for the Eclipse. Over the years, I have tried a few times to make photographs of a lunar eclipse, but, given the poorer equipment I had at the time and my limited experience, they didn’t turn out too well. I also found that a photo showing an orange-red moon sitting in the middle of the black background of the night sky was cool, but wasn’t terribly engaging. This time, I wanted more.
The biggest advantage of modern sensors, like the one in my Olympus OM-1, is how well they handle high ISO noise. Combined with advances in post-capture processing, including Lightroom’s Enhanced Noise Reduction (or DxO Pure Raw or Topaz Photo Ai or ON1 Photo Raw—I’ve tested them all), the quality of the base raw files and subsequent processed files has greatly improved. Finally, I could work with high quality base files, and it was thrilling!
Capturing the base landscape images
A full day before the eclipse, I went out to scout locations around my home city of Guelph, Ontario. Despite their fast pace and bright lights, I don’t really appreciate city landscapes, preferring to photograph scenes from rural and natural areas. To me, cities are ‘necessary evils’. I appreciate the advantages of city living in not having to drive far for amenities, but at the same time, I long for a quieter life out in the countryside away from the sirens and constant white noise. Oh well . , .
As I was planning the base landscape photos, I felt it was important to maintain a sense of authenticity for each view. Each landscape had to show the correct south to southwest aspect, one that would include all phases of the Eclipse. Each photo should appear exactly as if you were standing in the same location watching for the three hours it took for the Moon to pass through Earth’s umbra.
PhotoPills’ AR mode is essential for this kind of planning. At each location, after centring the PhotoPills Planning map on the app and navigating to the date and time of the Eclipse, I could view the eclipse superimposed on the sky. Perfect!
At sunset, on the evening of the Eclipse, I re-visited each location to photograph it. the view required an ultra-wide angle, so I set up the OM-1 with the 8-25mm set to 8mm (16mm with a 35mm sensor). I would have used my new Panasonic-Leica 9mm/1.7, but it wasn’t wide enough. Mounting the camera on the tripod, I set the aperture to ƒ5.6 and the OM-1’s High Res mode to ‘Tripod’, capturing each scene as an 80mp, 10368×7776 pixel image—plenty large enough for virtually any use. After correcting for wide angle distortion in Lightroom, I ended up with 9526×7145 pixels, or a 68mp image. Not bad for M43!

Each base landscape was processed in Lightroom. I had to switch to my laptop as Lightroom for iPad (still) does not have Enhanced Noise Reduction. The files probably didn’t need it, but I decided to err on the side of caution. Processing also included further reducing the exposure of the sky while keeping and even accentuating the brightness of the foreground. Sky masks and Linear Gradient masks worked their charm. Each landscape was then exported as a TIFF to use later in Affinity Photo.
Processing the Moon shots
Capturing the moon itself was relatively straightforward. I was able to work from the comfort of my driveway, as the view to the south and southwest was unobscured. Between each series of shots, I could go inside, warm up (it was –1 to –4°C) and have 10-minute cat-naps. When there was enough time between segments, i could begin working on images already captured. You can read about the details of the set-up and exposure in the previous article, as well as the initial processing
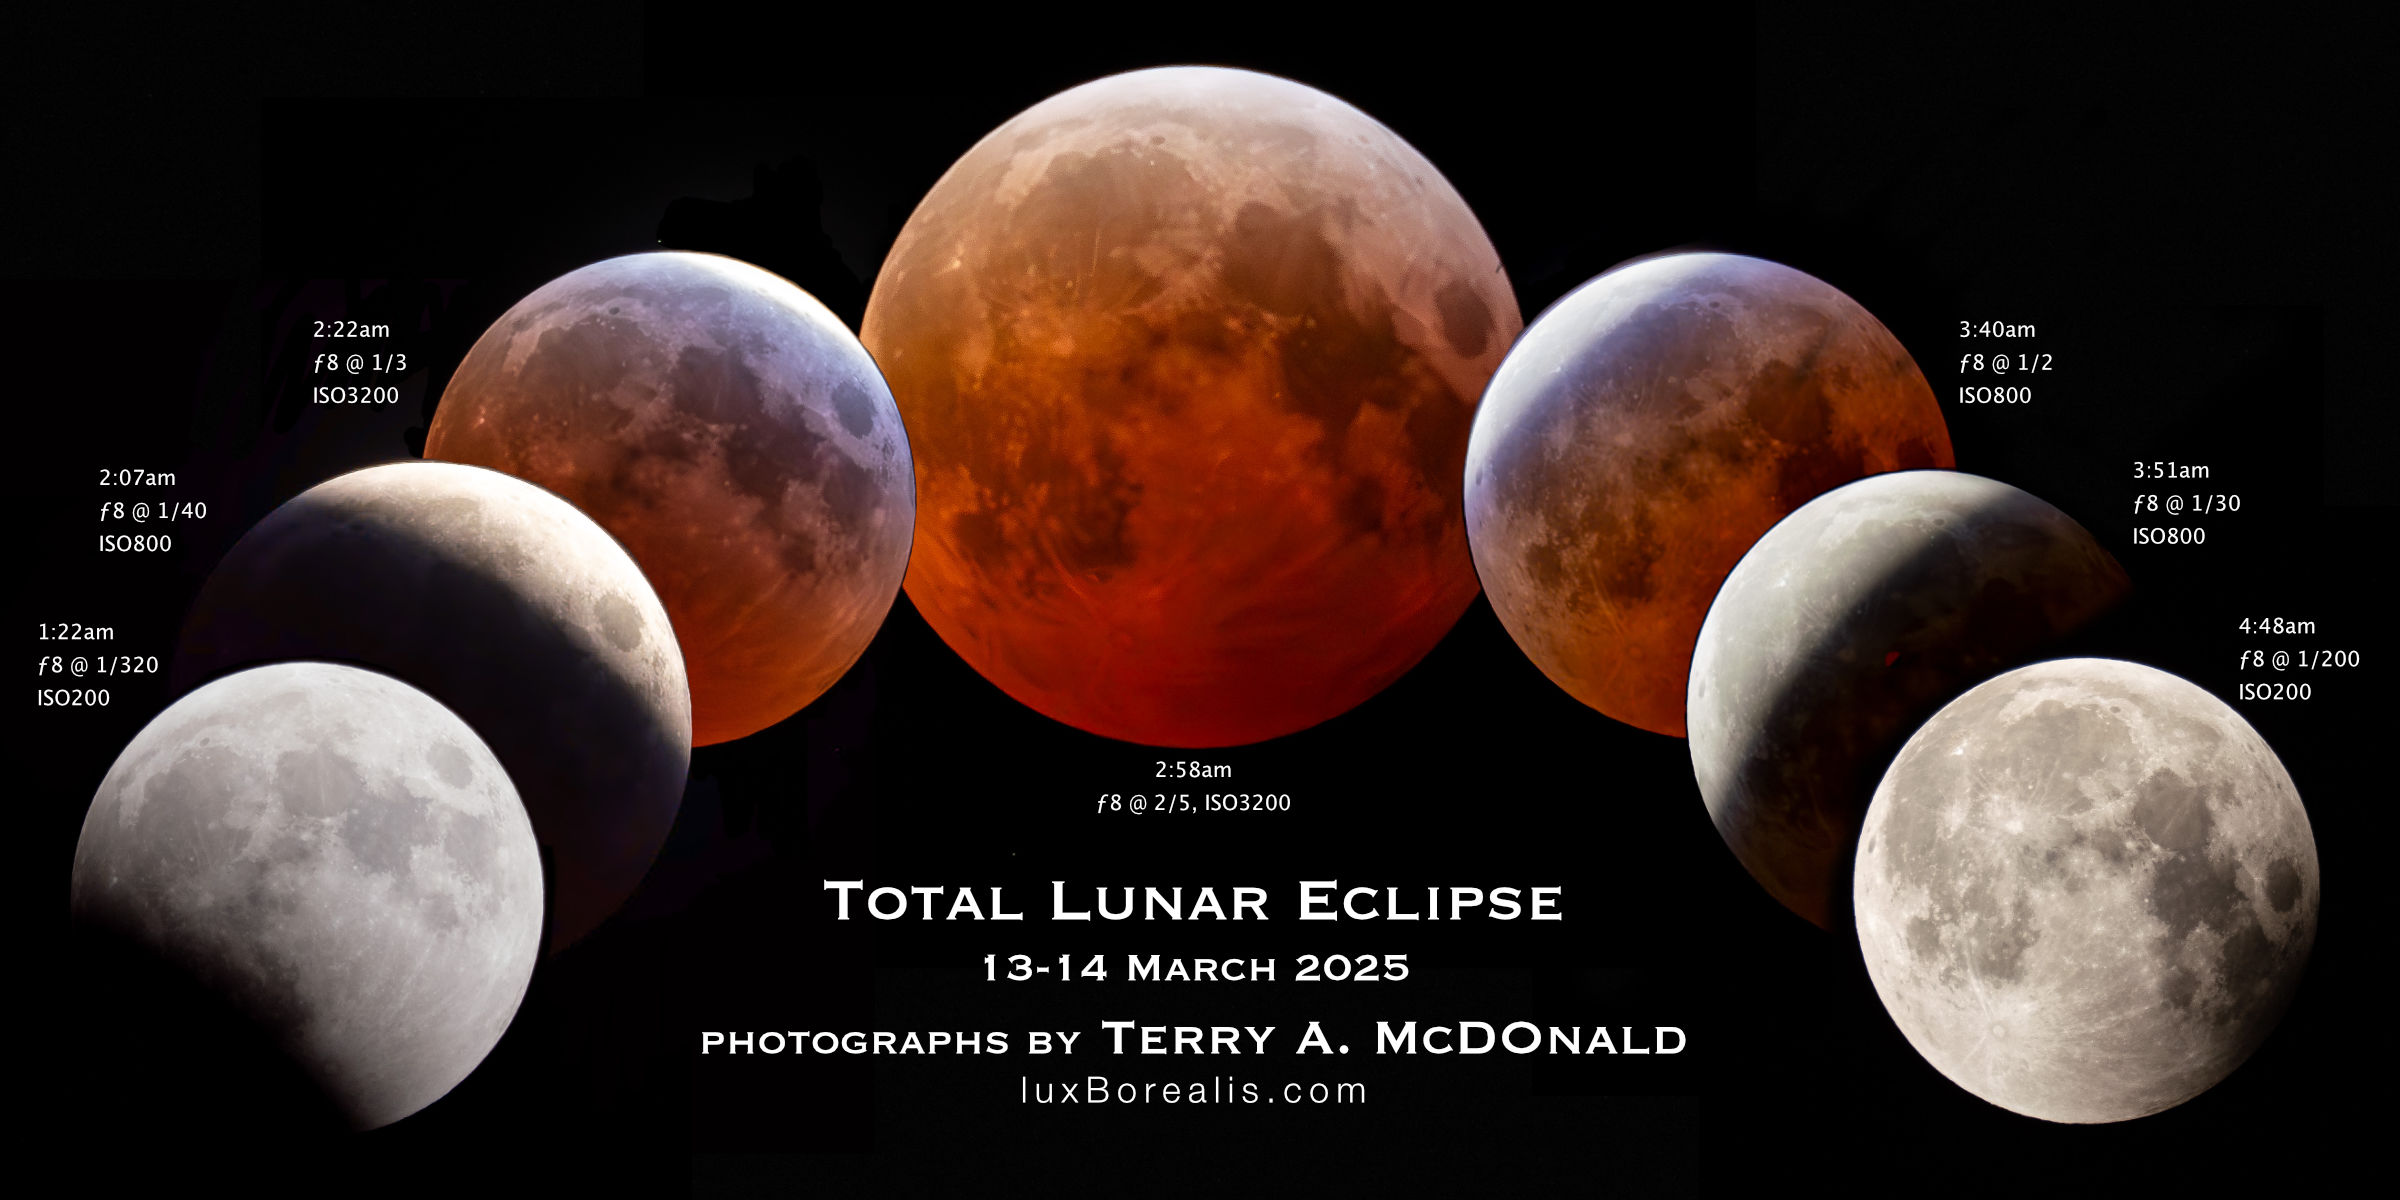
Once each Moon shot was edited, I went through them as a set to balance the exposure, highlights and shadows, and the colour temperature of the moon, reducing the shot-to-shot differences. This tweaking took longer than expected, but was necessary to ensure consistency from phase to phase. I ended up choosing 11 different phases: three are ‘pre-Blood Moon’ showing Earth’s umbra gradually passing over the face of the Moon, three images show Totality, and three more are ‘post-Blood Moon’ as the umbra recedes, with a full moon at each end.
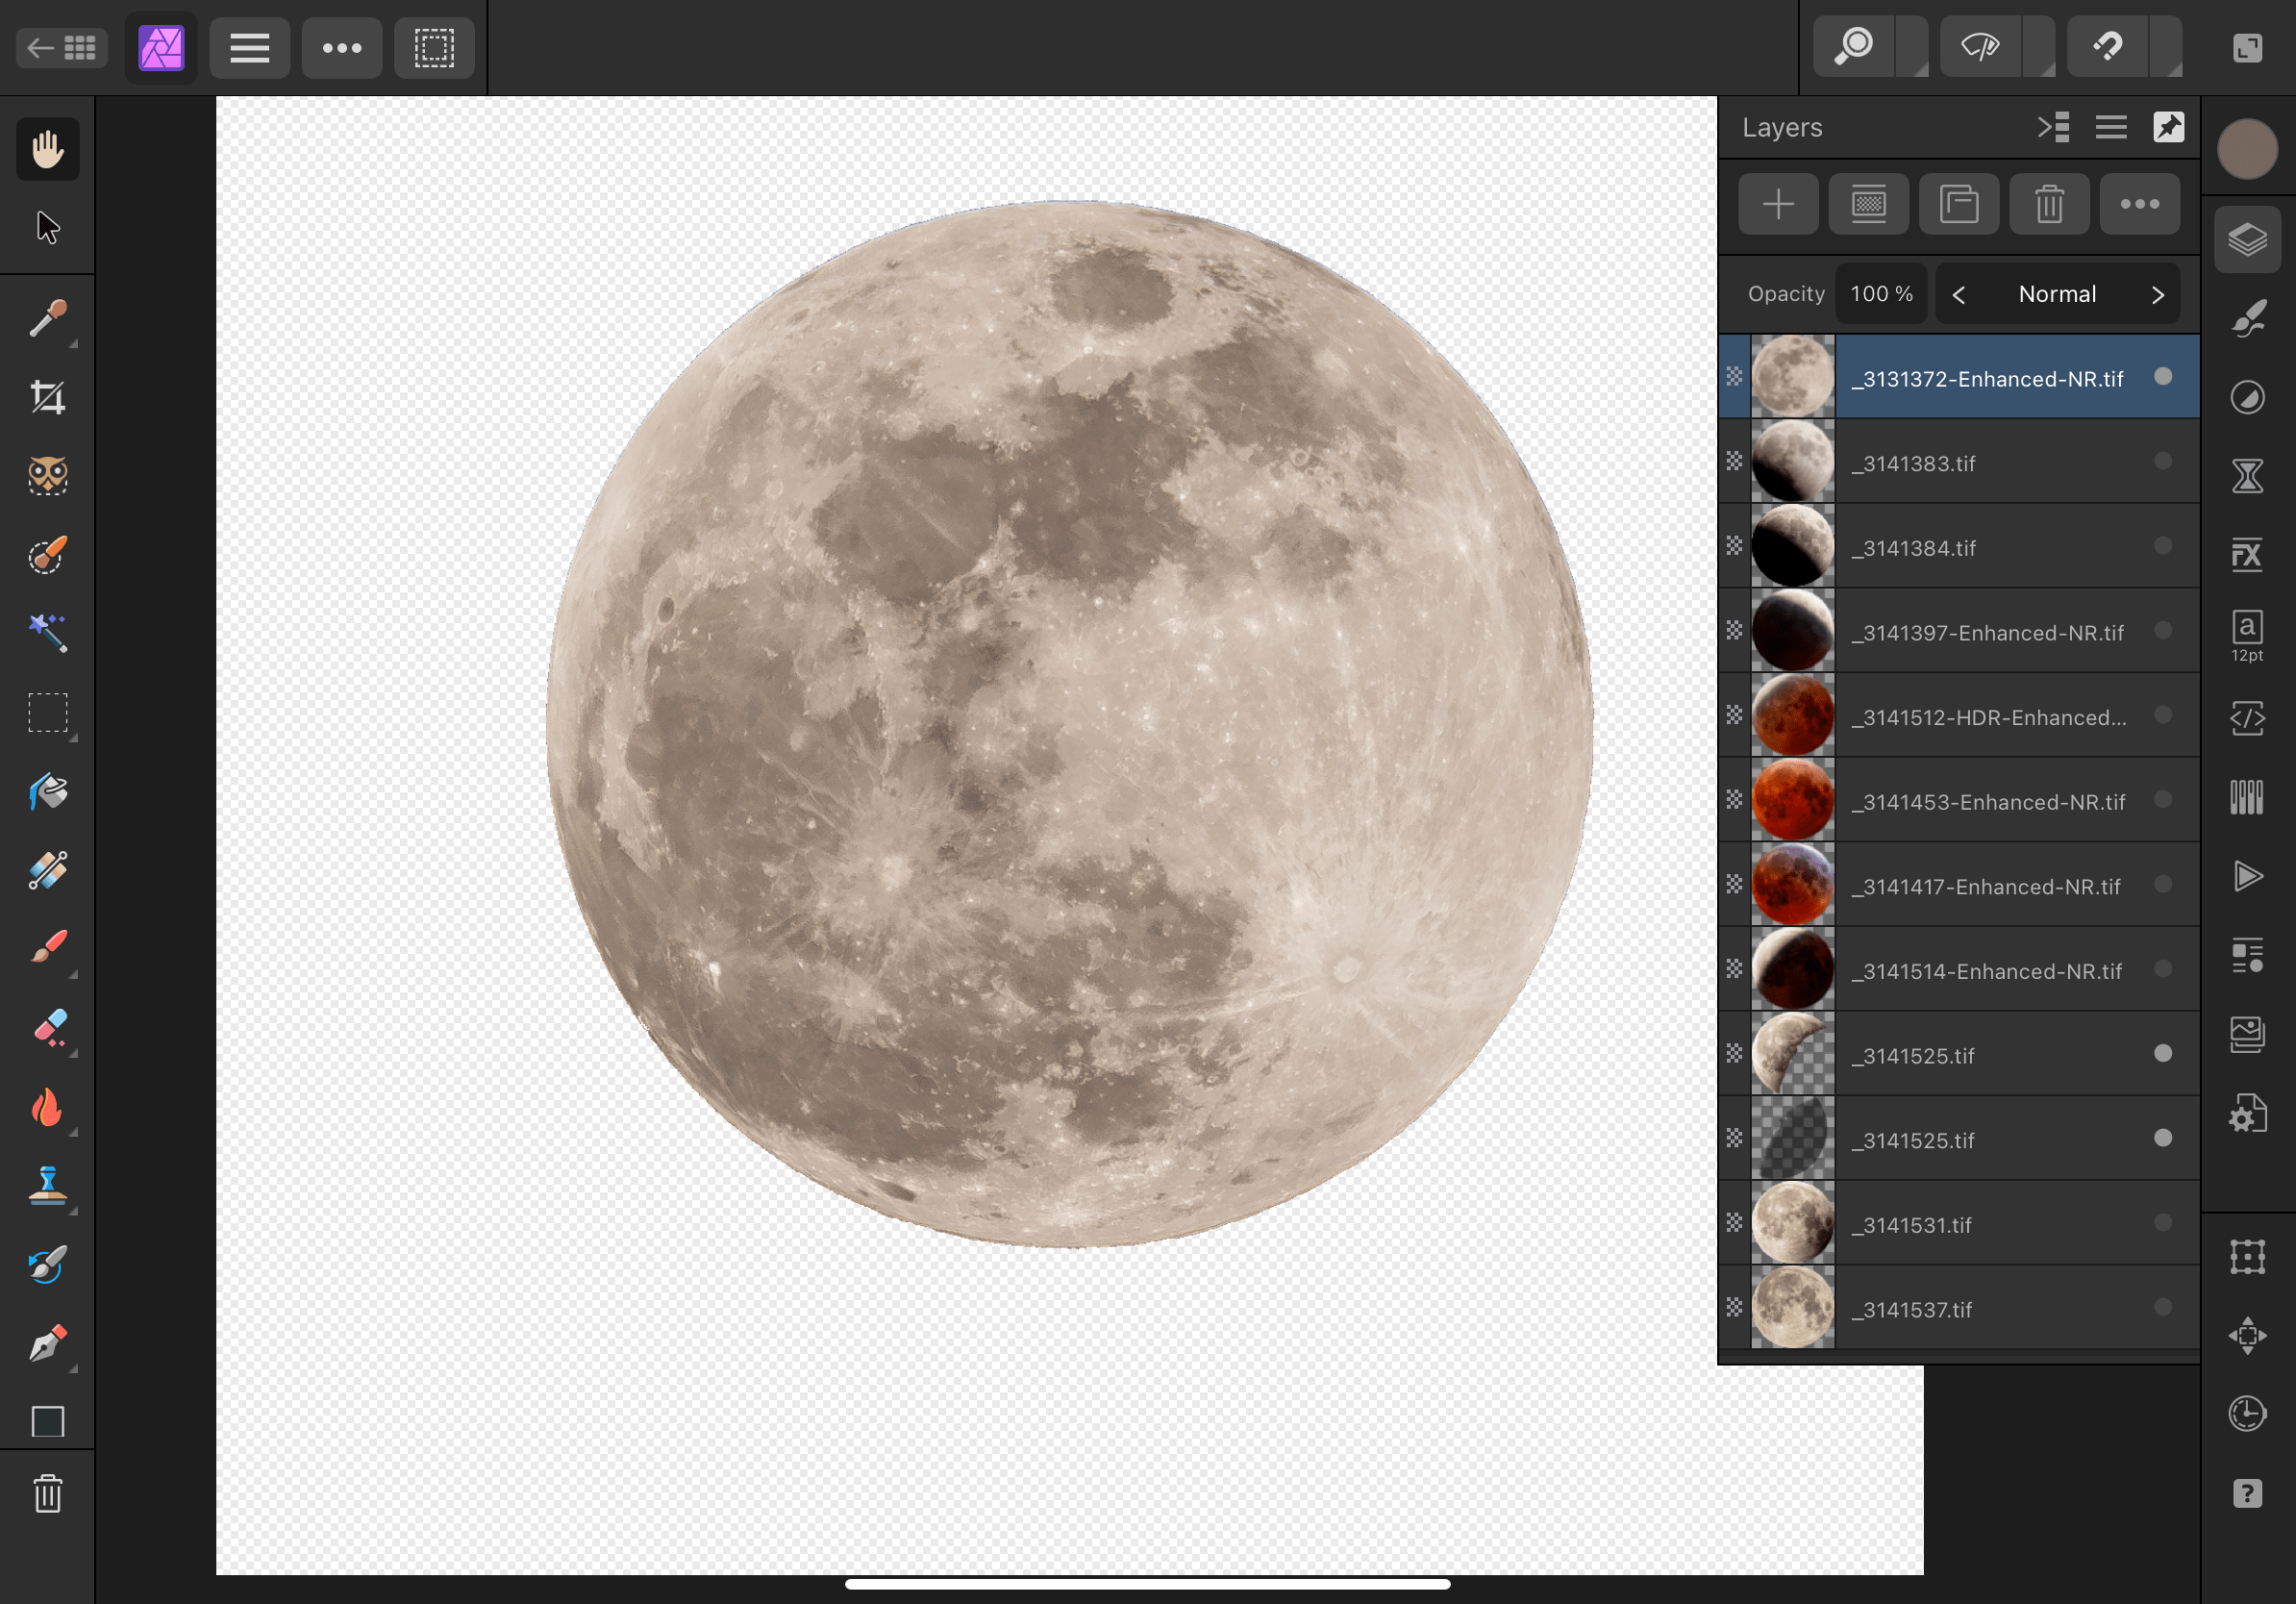
Working in Affinity Photo
At this point, I exported the 11 Moon images from Lightroom as 16-bit TIFF files. I could have used JPEGs but, with compression and sharpening, they reduce overall image quality. The TIFFs were then brought into Affinity Photo as a ‘New Stack’. In Lightroom, I had carefully cropped each photo to centre the Moon and to maintain phase-to-phase consistency, but I wanted the circles of the Moon aligned, so I toggled on ‘Align Source Images’. The app did precisely as directed, and I carried on. The Stack was ungrouped allowing me to work on each layer individually. I could have set them up as 11 different files, but opening and closing each file would have become tedious. Working on them as 11 layers was much easier. My goal was to remove the black background of the sky, leaving just the Moon on a transparent background.
Everything looked great, but something was amiss. It was sometime later that I realized each of the eleven Moon images had been rotated. Affinity Photo had done its job correctly by aligning the various craters and features of the Moon. But something wasn’t right. I literally sat there scratching my head for a moment. It was then the light bulb of understanding flickered on—I realized that, over a period of three hours, our view of the face of the Moon changes in 3-dimensional space. Oops!
Rather than trying to undo all the alignment, I scrapped that set of images and re-imported them as a New Stack, but with ‘Align’ toggled off. Lesson learned. Part of me wonders if anyone would have noticed, though I’m sure the true Skywatchers would have alerted me to my error.
From there, it was one trial-and-error after another. I do this to myself—I set a goal, then learn the the ins-and-outs of an app while trying to achieve that goal. Working through a series of prescribed lessons without a clear and applicable end goal doesn’t keep me engaged. So I try something, then do an online search for a solution, then try it again.
I enjoy working with Affinity Photo, but haven’t used it frequently enough to learn all of its inner workings. I had originally learned many of the techniques in Photoshop and, thankfully, Affinity Photo isn’t all that different. In fact, the iPad version is far more complete than the iPad version of Photoshop. Affinity Photo on iPad is like Photoshop on desktop. It’s brilliant (and much less expensive). Kind of makes me wonder why Adobe knowingly continues to cripple its iPad version of Photoshop. I’m glad I ditched it.
By the way, there is nothing quite as intuitive as editing photos on iPad. With a $25 stylus (pencil), it is it even more so. Tapping and drawing with a fine tip is far more accurate than my pudgy finger or using a mouse/trackpad (apologies to Steve Jobs, who as always pro-finger and anti-stylus—😉)
Now, for the composite—more trial-and-error
Once each of the 11 Moon images was prepped in Affinity Photo, I exported them as 16bit TIFFs. I could have used PNGs to maintain transparency (JPEGs do not), but I also needed to maintain overall image quality.
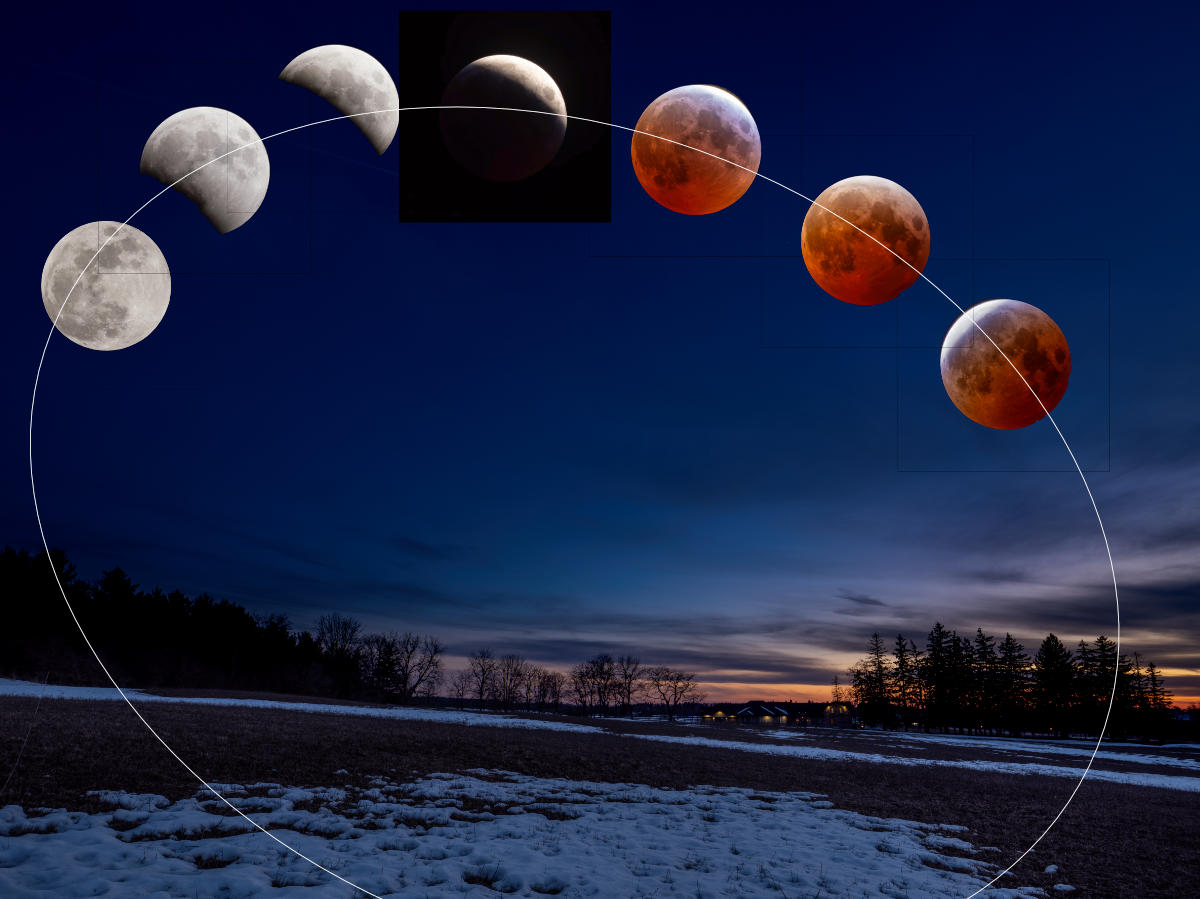
Opening one of the base landscapes, I then copied and pasted the 11 layers of Moon images. In an attempt to maintain realism, I positioned the moons in an arc across the night sky. As a guide, I drew an ellipse to help with smooth positioning and made constant use of Align > Space Horizontally as well as plenty of nudges.
It looked great, but wasn’t quite ‘there’. With coaching from my better half, Laura, we decided each Moon was much too large in the sky. As well, the sky needed to be even darker, while still maintaining that astronomical ‘midnight blue’.
With trial and error, I ended up reducing the size of the Moons to about ½, and repositioned them on the ellipse/arc. After another assessment, we decided it still didn’t look right, so I tried arranging them in a straight line. Nope—it looked too, well, linear to be realistic.
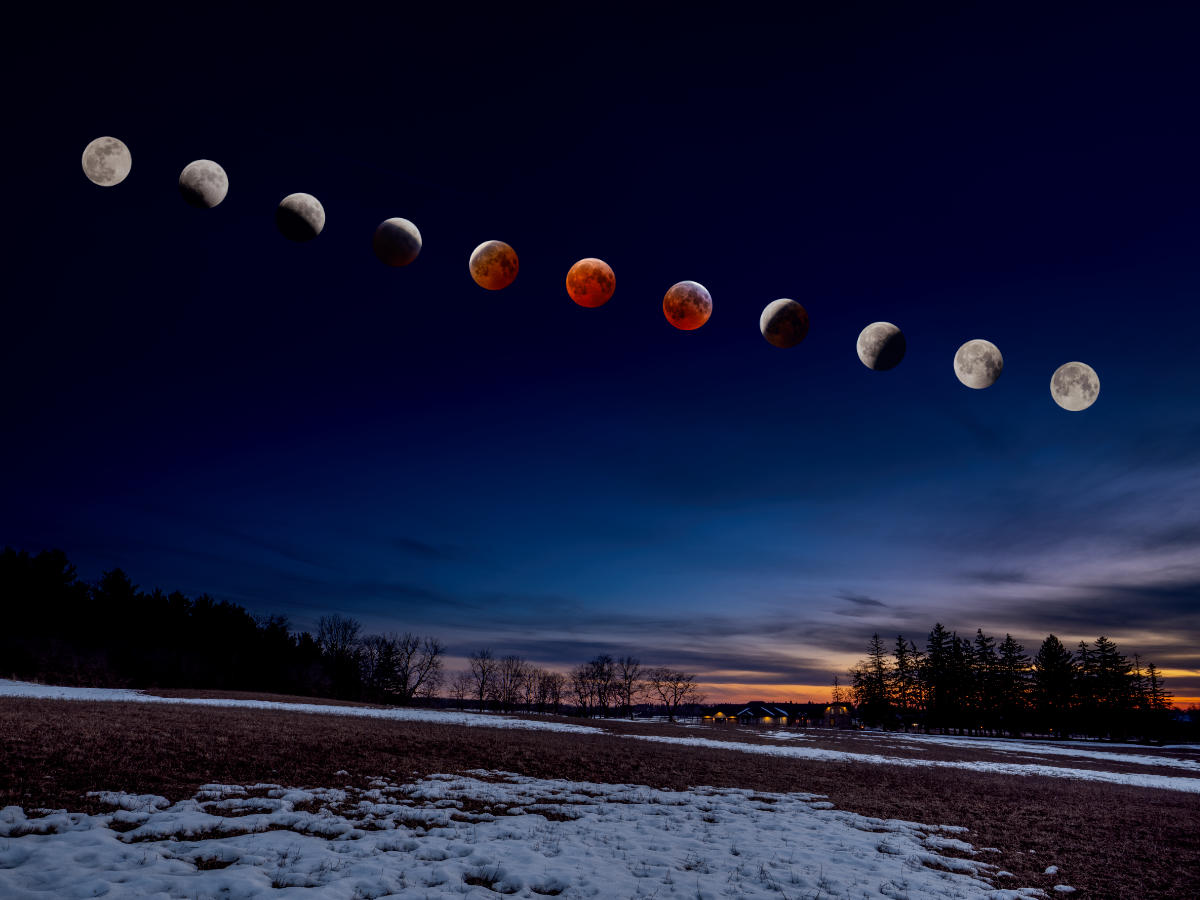
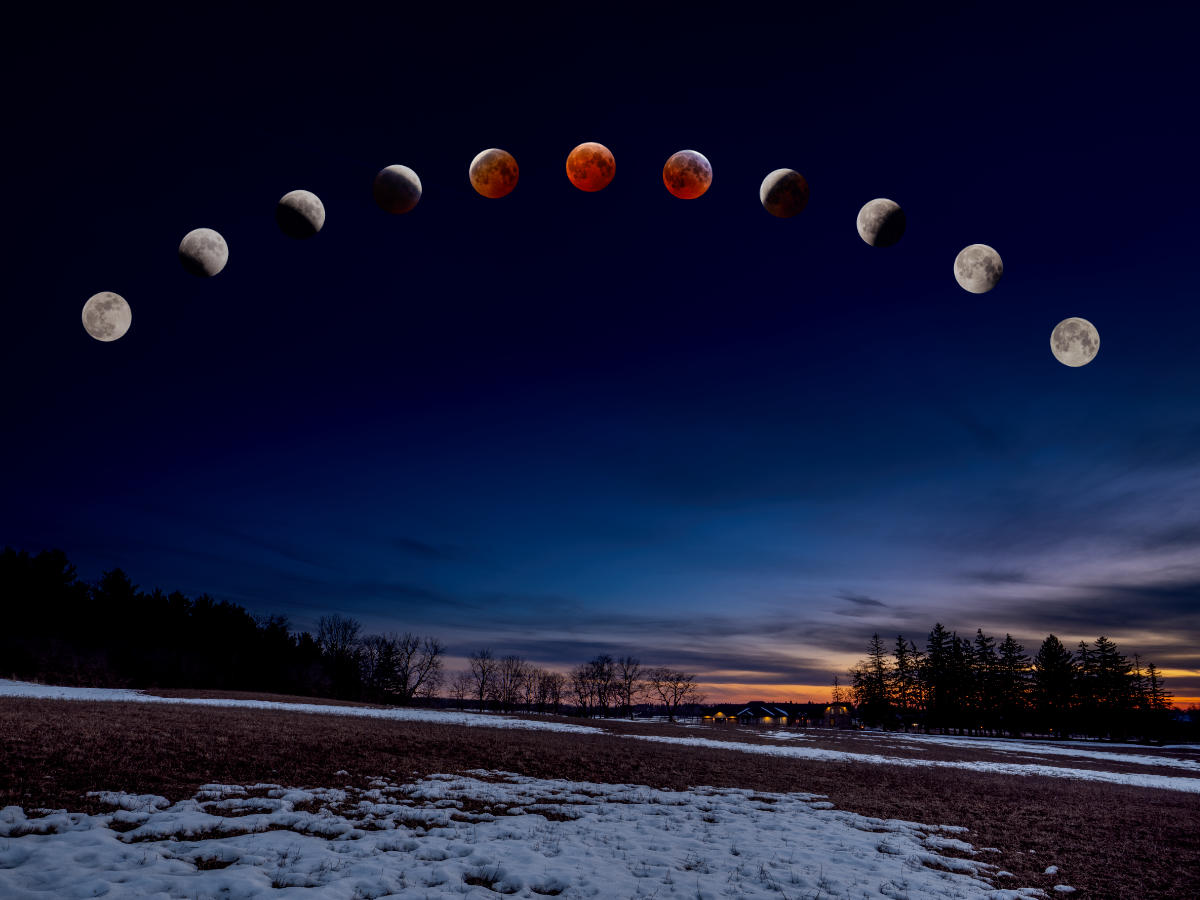
Finally we settled on a gentler arc and that seemed to do it.
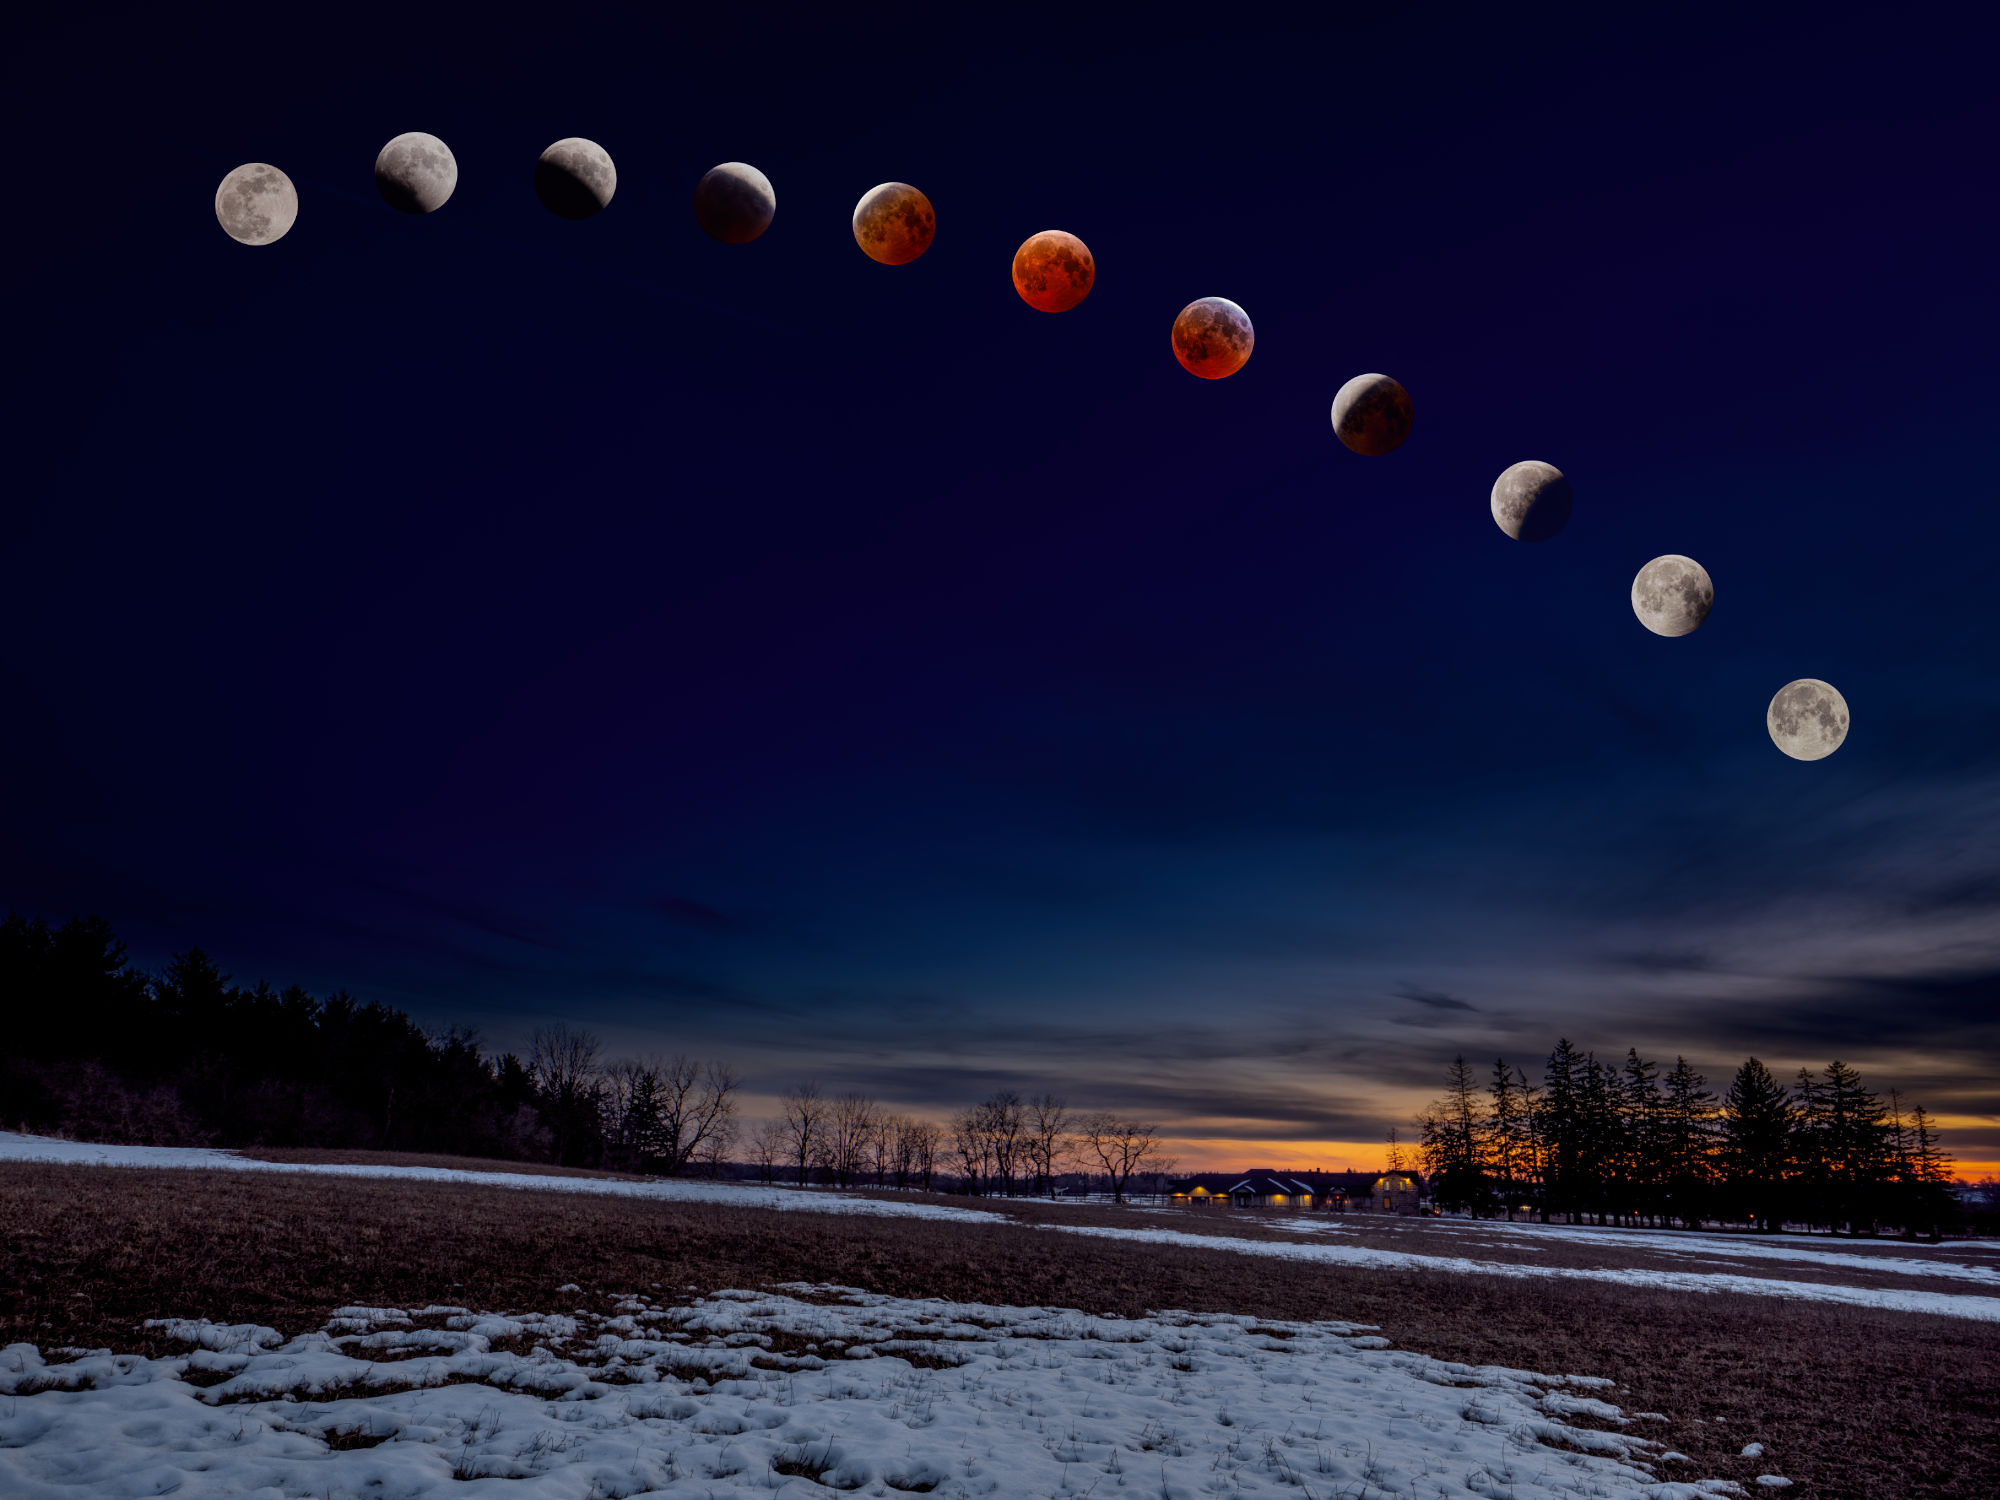
From there, I was able to copy and paste the 11 Moon layers onto each background scene. With further tweaking of each individual photo, I ended up with three landscape composites I was pleased with and one ‘meh’. Sadly, the ‘meh’ view is of one of our favourite places in the Arboretum at the University of Guelph. During the day, there is plenty of detail to draw you in but, at night, it appears too flat-looking compared to the others. Oh well. Live and learn.

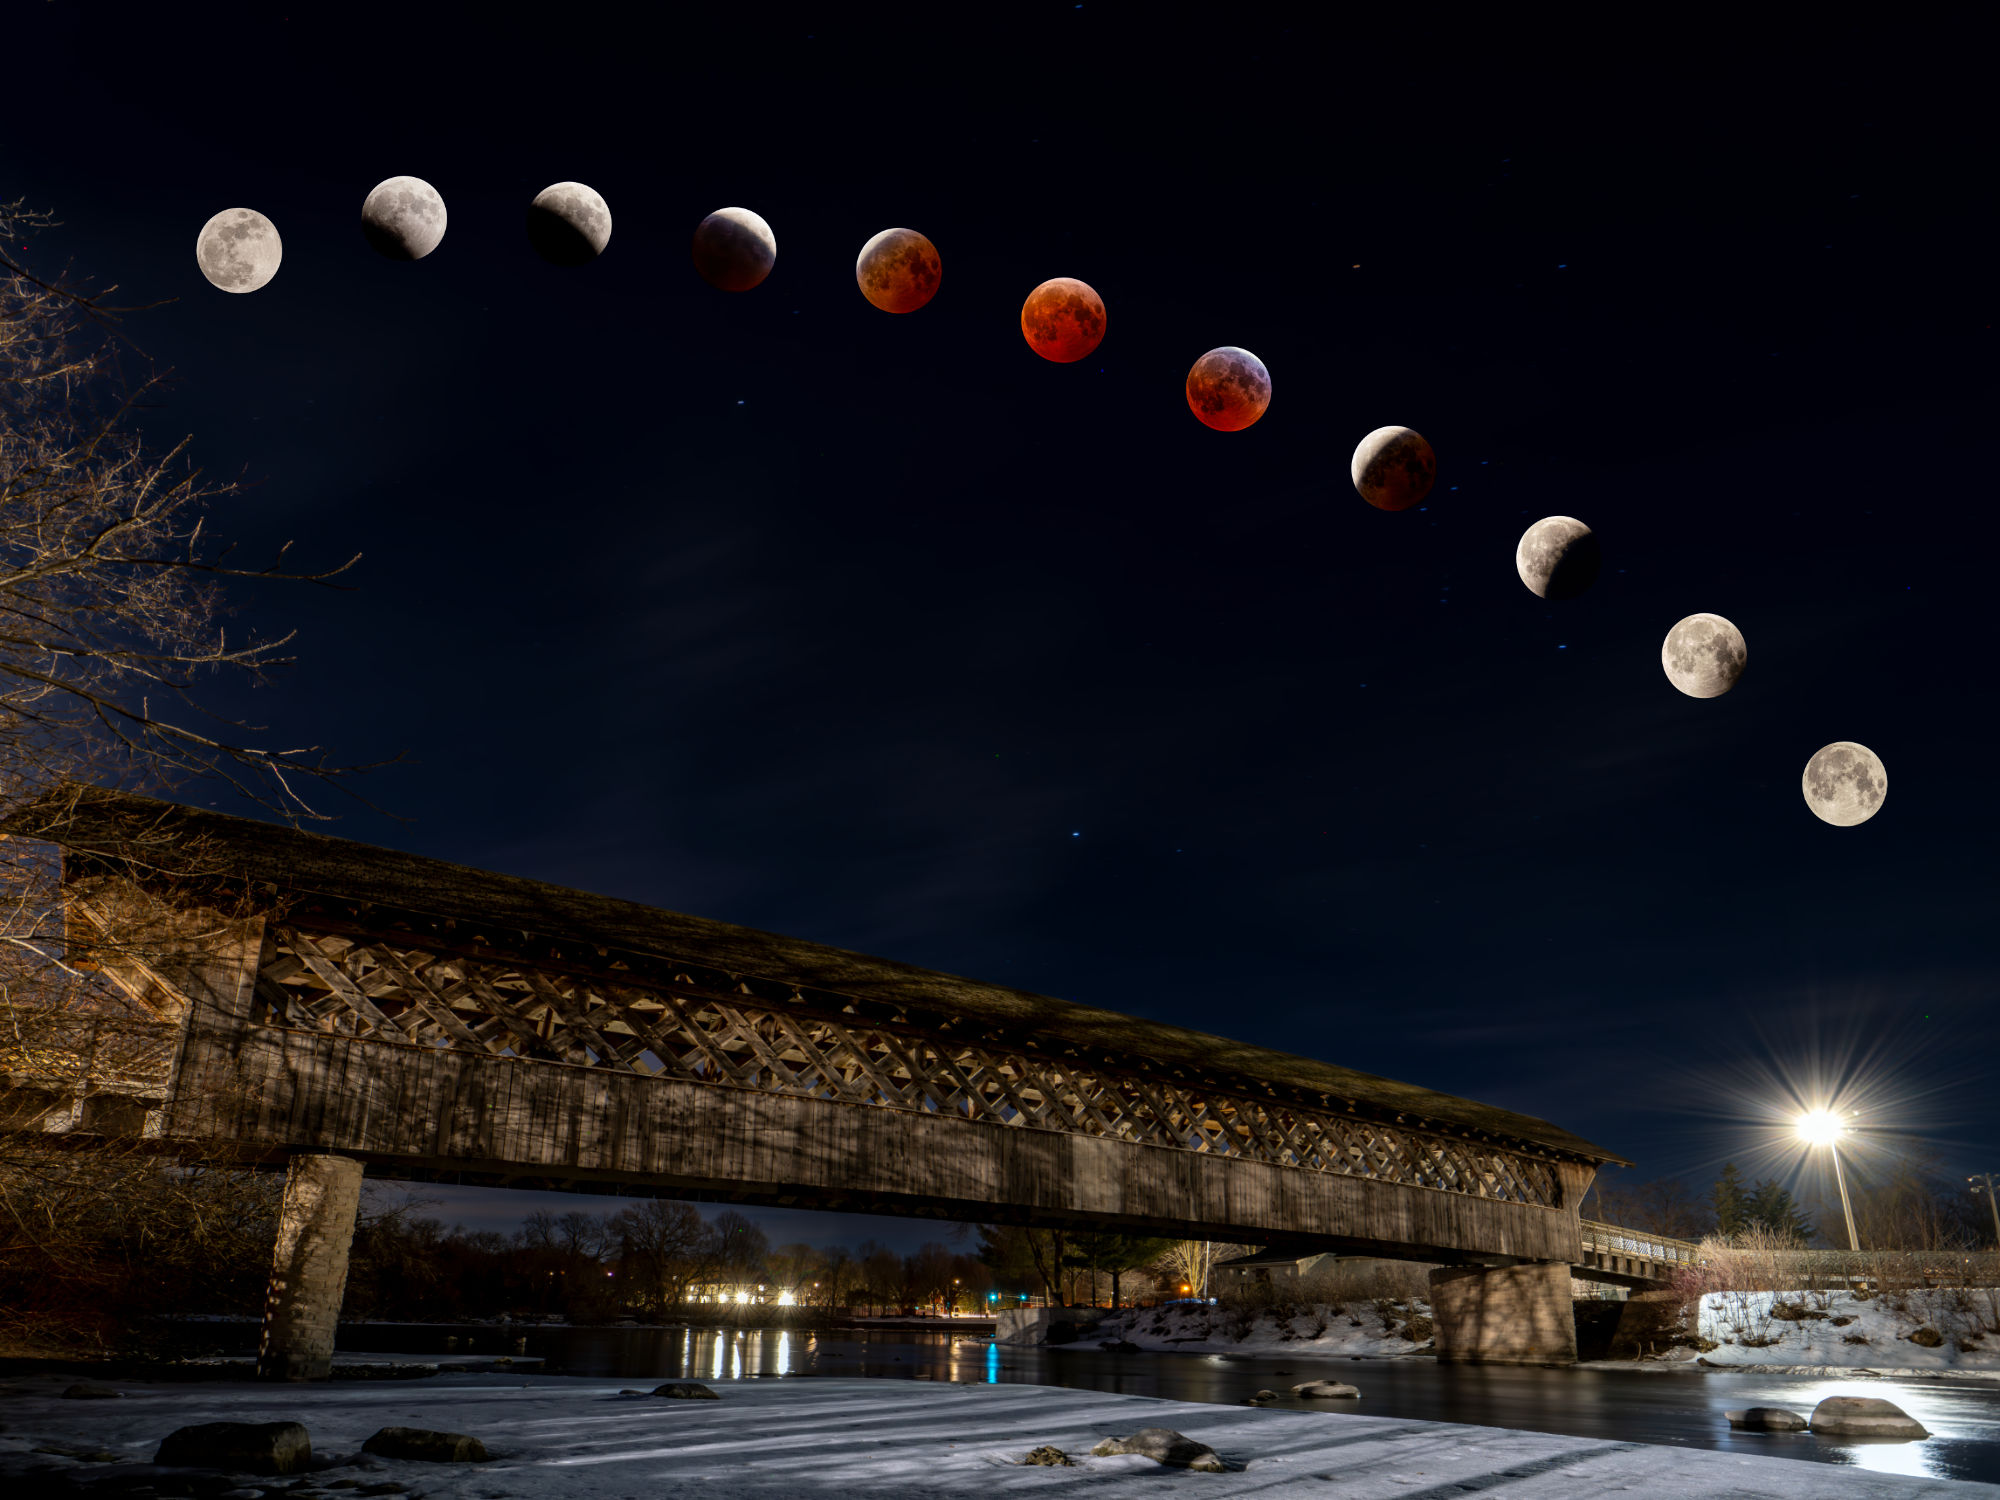
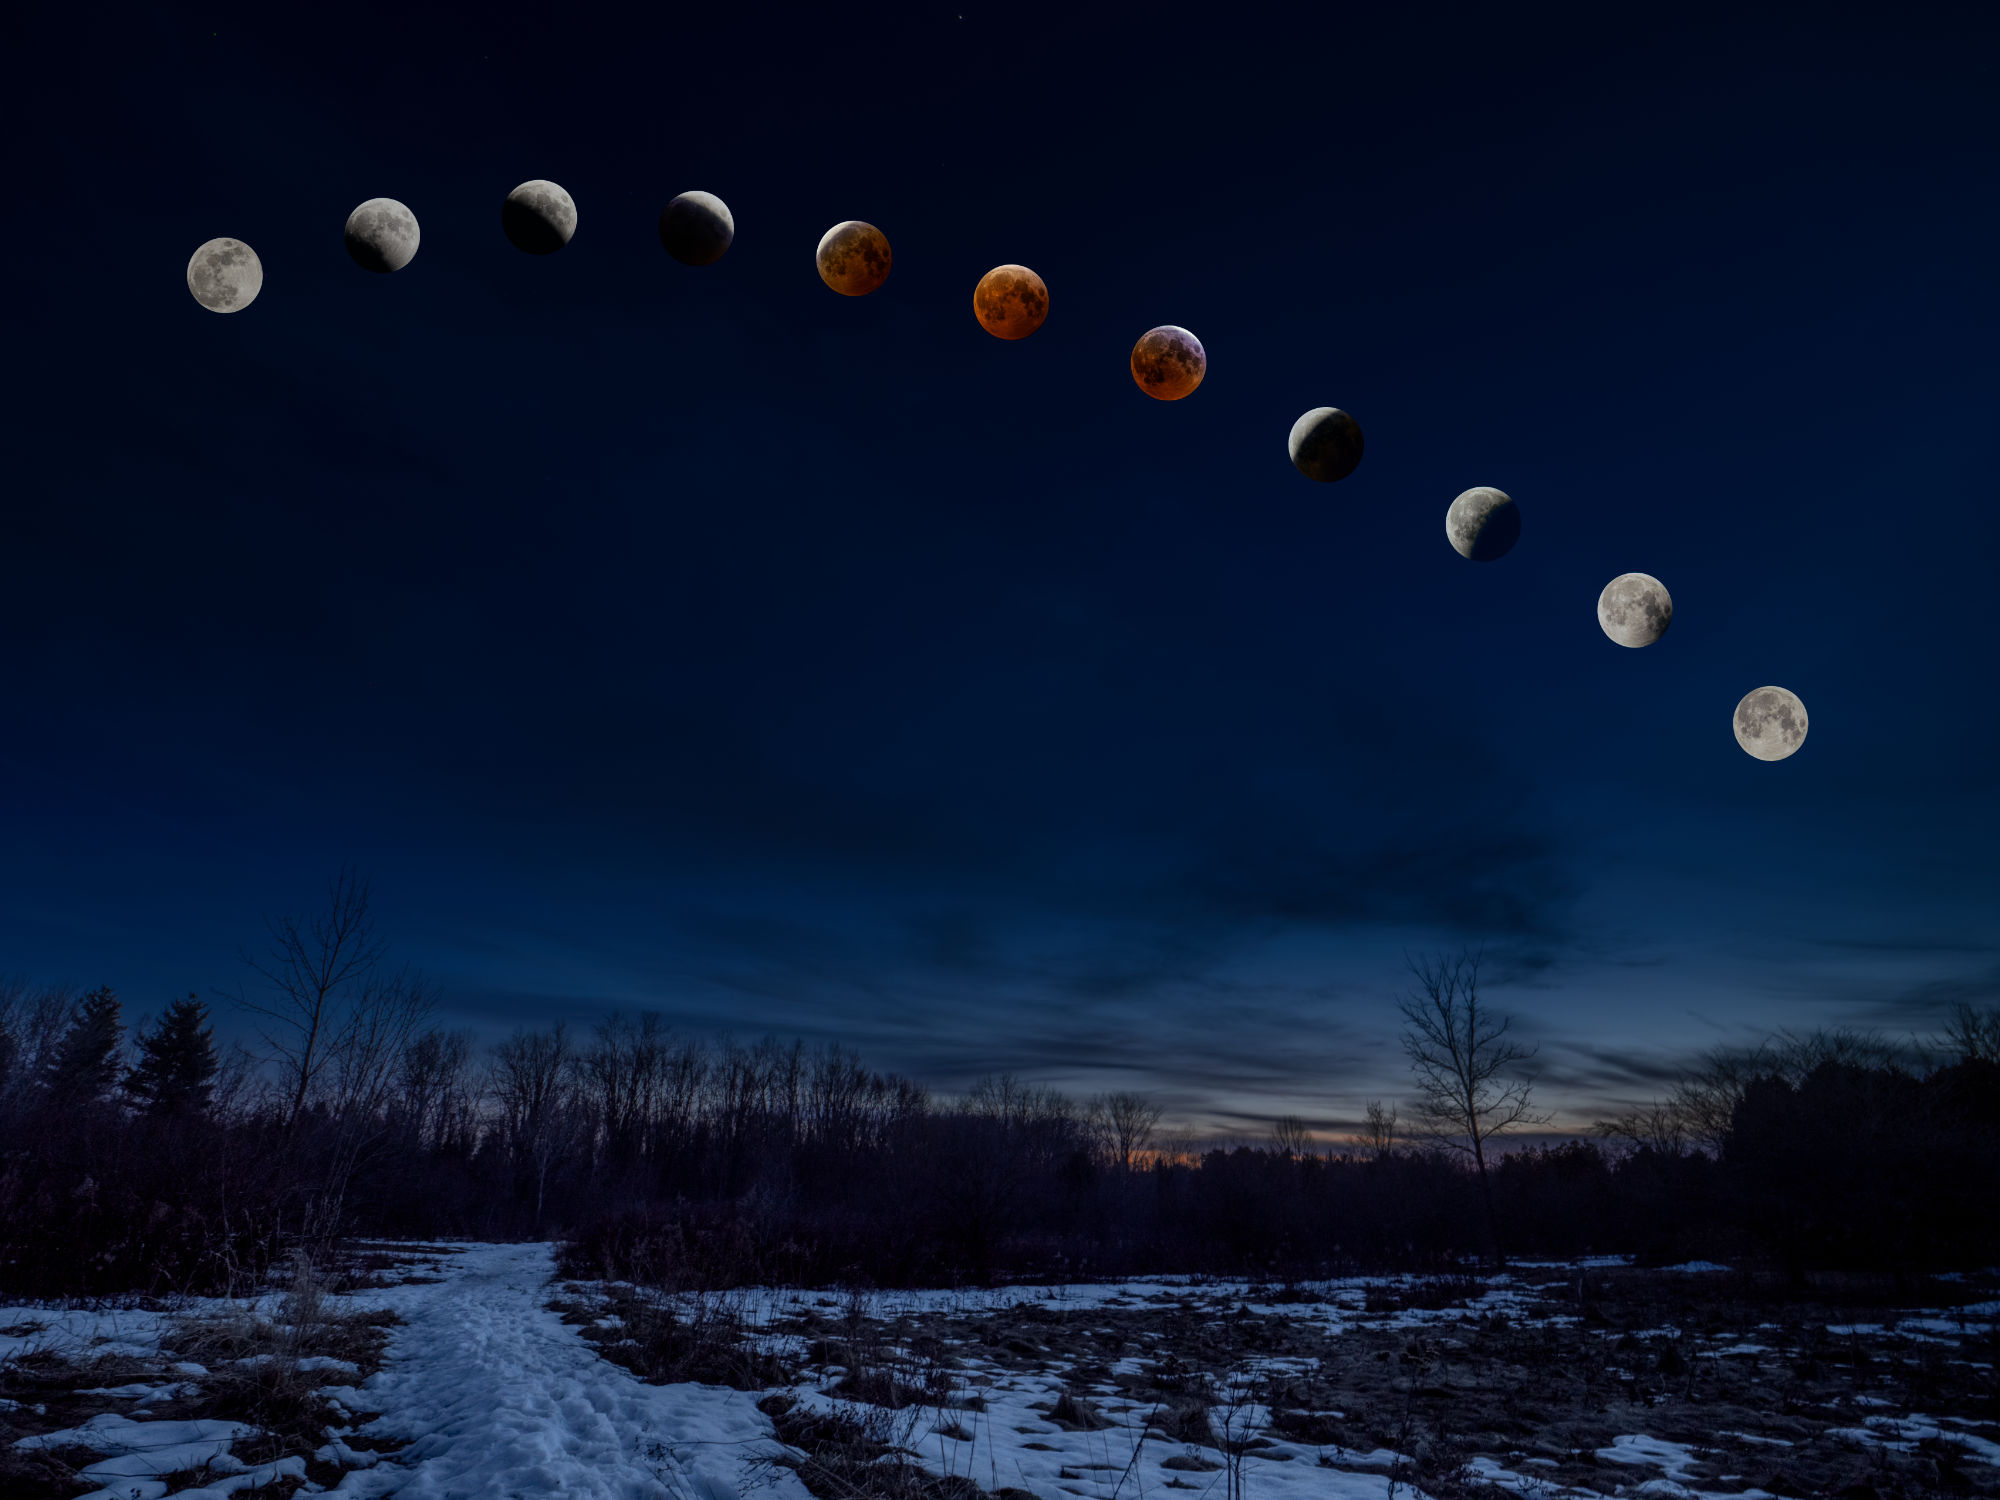
Have a look at each of the four then, down in the Comments, let me know which one(s) you prefer and why.
Thanks for reading! If you have any questions about the equipment, apps or techniques discussed above, be sure to add a COMMENT.
Please take a moment and SHARE this with other photographers or with your camera club.
To receive an email notice of new articles, SUBSCRIBE below.
Text and photos are copyright ©2025 Terry A. McDonald
and may not be reproduced in whole or in part without the written consent of the author.
Have a look at my work by visiting www.luxBorealis.com and consider booking a presentation or workshop for your Nature or Photo Club or a personal Field & Screen workshop at Workshops.
First Look at Total Lunar Eclipse Photographs

. . . and a review of the experience.
Last night was a long one, but well worth it. Over the course of six hours, from before midnight to just before 6am, I took photos every 20 minutes or so, depending on the ‘action’ in the sky above. Some were made 5 to 10 minutes apart. Exciting, yes, but also a real learning experience.
I used my M.Zuiko 100-400mm ƒ5-6.3 IS lens, which is equivalent to a 200-800mm in 35mm sensor terms. It pulled the moon in, but it still did not occupy even ¼ of the sensor. I tried a few shots with the MC-14 1.4x Teleconverter, but I wasn’t entirely happy with the sharpness. With the OM-1 attached, the lens was firmly mounted on a sturdy Manfrotto tripod. As expected, according to the research I did ahead of time, exposure varied widely. Thanks also to a graphic shared on FB by Peter Baumgarten which also showed the variance in exposure over the event.
All metering was done using the OM-1s Spot Meter mode—essential for this kind of work. I altered exposure with each shot—+1EV, neutral, and –1EV, sometime –2EV—but the images that seemed best were at normal exposure for the dim Moon and +1EV for the bright Moon.
Trying to keep the Moon in focus was a problem I shouldn’t have had, but I messed up. When the Moon was bright, I used single-point AF to lock in the focus, then switched to Manual so the AF wouldn’t need to keep focusing. However, twice I inadvertently changed the focus when zooming between 400mm and 100mm and back again—Duh!—and had to re-acquire focus on a decidedly dim Moon near Totality. As a result, some photos are not as sharp as I would like them to be.
Then there is the motion blur to content with. At ISO 3200, the slowest shutter speed occurred at Totality, a measly ⅖ of a second. Not great for a moving target! I could have opened up ⅔ EV to ƒ6.3 and brought the speed up slightly but, as is always the case with photography, I decided to trade a slightly sharper slightly blurred image for a less-sharp, slightly blurred image. Oh well!

The files were processed in Lightroom (not Classic), with the ISO 800 and 3200 shots run through Enhanced Noise reduction, then sharpened. It took a fair bit of work with exposure, contrast, highlights, shadows, white and blacks to nail just the right balance of black sky, shaded details and the over-exposed highlights that occur just before and after Totality—the Japanese Lantern effect, I am told.
The files by themselves look good but, as individual photographs, they don’t really tell the story. I knew I would be making composites; it’s just a matter of deciding whihc photos and how many to add. The composites above were made in Affinity Photo by placing individual files on a background of the night sky—one of the frames I shot at 100mm.
I have plans for a few different composites that are still in the works. Earlier Thursday evening, just at sunset, I went around to five locations in Guelph, shooting ultra-wide landscapes at 8mm, with 80% sky. My goal is create composites with these photographs to put the Eclipse into context that people might recognize. More and more people I’ve spoken with either forgot the Eclipse or didn’t manage to get out of bed for it, so this will help them see what all the excitement was about. The five base landscapes were all shot specifically including the South and Southwest sky, exactly where the Eclipse occurred. PhotoPills AR really helped to ensure correct alignment.
The landscape composites will be fun to do, but will take more work extracting the Moon from each file, without the surrounding black sky—something for this weekend.
If you had a Eclipse experience, be sure to tell us about it in the Comments section below.
Thanks for reading! Please add your questions, comments, or discussion about the Lunar Eclipse, and/or the equipment and techniques used in the Comments below.
This work is copyright ©2025 Terry A. McDonald
and may not be reproduced in whole or in part without the written consent of the author.
Please SHARE this with other photographers or with your camera club,
and SUBSCRIBE to receive an email notice of new blogs.
Have a look at my work by visiting www.luxBorealis.com and consider booking a presentation or workshop for your Nature or Photo Club or a personal Field & Screen workshop at Workshops.
Are you ready? Rare ‘Blood Moon’ Total Lunar Eclipse Thursday night to Friday morning!

Get your sleep now because you might just be up all night later this week. Across all of Canada and down through the Unites States, Central America and South America, if skies are clear, we will be retreated to a Total Lunar Eclipse—a rare ‘Blood Moon’ Total Eclipse.
I do a lot of photography, but rarely have I ventured into night photography. I loved photographing the Total Solar Eclipse in April of 2024, but find that all too often, the night skies here in southern Ontario are either too bright or too cloudy for success.

Lunar Eclipse: March 13-14, 2025
A Lunar Eclipse is different. It happens when Earth’s shadow travels across the face fo the moon, turning our Moon a deep orange-red colour. It is also a much slower process, taking about 6 hours from start to finish. That’s why I recommend getting your extra hours of sleep in now.
Here’s some background about the eclipse from Space.com. this article has some very specific timings and descriptions of what’s happening when.
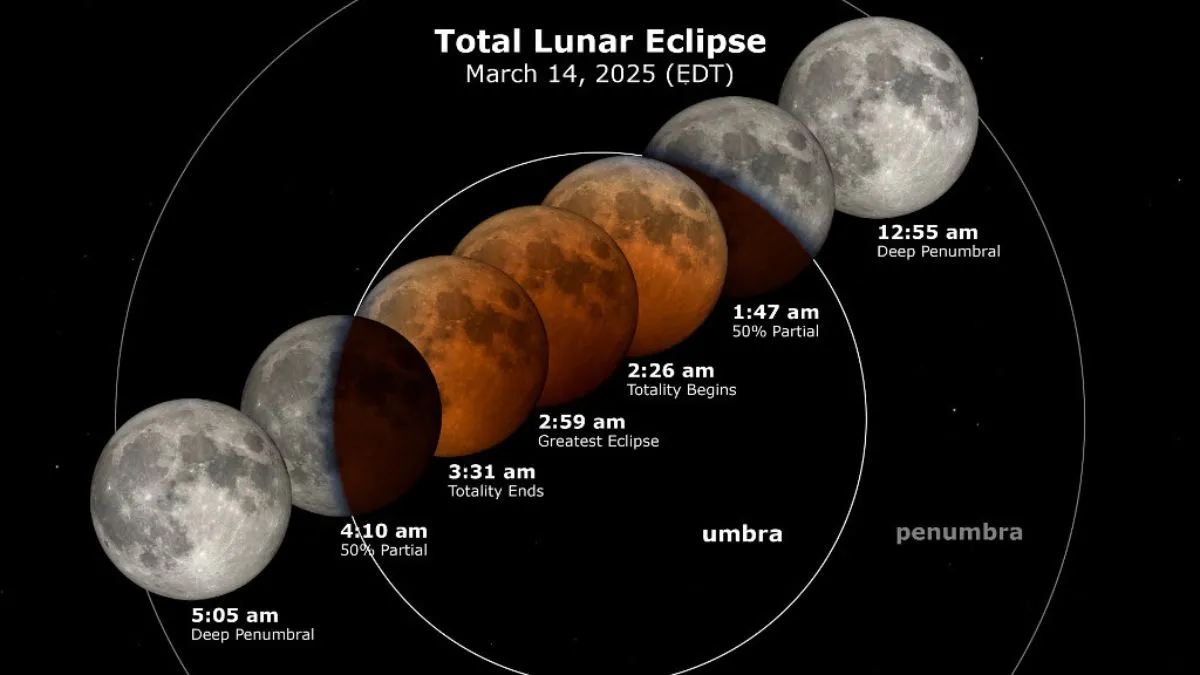
We’ll start with the timings. I pulled these times from TimeAndDate.com and did my best to confirm the times across Canada.
| Pacific | Mtn | Sask | Central | Eastern | Atlantic | Nfld | |
|---|---|---|---|---|---|---|---|
| Start of Penumbra | 8:57pm | 9:57pm | 9:57pm | 10:57pm | 11:57pm | 12:57am | 1:27am |
| Start of Umbra | 10:09pm | 11:09pm | 11:09pm | 12:09pm | 1:09am | 2:09am | 2:39am |
| Start of Totality | 11:26pm | 12:26am | 12:26am | 1:26am | 2:26am | 3:36am | 4:06am |
| End of Totality | 12:31am | 1:31am | 1:31am | 2:31am | 3:31am | 4:31am | 5:01am |
| End of Umbra | 1:48am | 2:48am | 2:48am | 3:48am | 4:48am | 5:48am | 6:12am |
| End of Penumbra | 3:00am | 4:00am | 4:00am | 5:00am | 6:00am | 7:00am | 7:30am |
Next: equipment, composition, exposure and post-processing. You may want a shot showing the moon phases above a particular scene or landscape/cityscape, but you might also want a telephoto shot of the deep red of the moon at totality. If you have two cameras and two tripods, you could do both.
How to . . .
So, you want to photograph the Eclipse . . .
As I said, I am no expert in this field, so I have put together some resources to help you (Note: links below open in new tabs). But first, an overview from Gordon Laing:
- Practical Astrophotography: How to Photograph the March 13th Lunar Eclipse
- Photography Life: How to Photograph a Lunar Eclipse
- AstroBackyard (the most complete): How to Photograph a Lunar Eclipse
- PhotoPills video (8:53): How to Plan a Photo of the Total Lunar Eclipse of March 14th, 2025 | Step by Step Tutorial
A few key things to remember are to:
- Make sure you charge your phone or tablet and your camera batteries!. You will likely be out for a few hours.
- Stay safe. This is happening over night. Go with a friend or at least let someone know where you are and when you expect to be back.
- Use a tripod. Your arms will thank you.
- Switch your camera to spot metering mode. The spot should be over the Moon.
- Bring and wear a small headlamp that can be set to Red/Night Vision. This will allow you to see without disrupting your night vision.
- Keep your shutter speed as close to 1/125 as possible by adjusting the ISO. At slower shutter speeds, the moon will appear blurred—remember you and and the moon are moving relative to each other. Even if it seems to be very, very slowly, there is enough movement to demand as close to 1/125 as your ISO will allow.
- Be prepared to change your ISO as the Eclipse evolves. The Moon will grow more and more dim, yet it is still moving, so you want to keep the shutter speed up. Remember, noise can be cleaned up in post-processing (see Raw File Optimization).
- Head out Wednesday evening to plan where you will be to get the shots you want. Seeing things ahead of time and standing there planning for where the moon will be during the eclipse will provide greater confidence for success on the night of.

Check the weather
I’m not sure where I’ll for this. Much depends on how clear the sky forecast is. Here are some sites to check:
- Windy (online and iOS / Android) has excellent, predictive maps for weather, clouds, etc.
- ClearDarkSky.com: Clear Sky Chart
- ClearDarkSky.com: Light Pollution Map
- TheWeatherNetwork.com: Cloud Map
There are apps for that
An app you may find helpful is PhotoPills. It’s free to download and checkout before forking over any cash. I have not made much use of it other than for planning for the Total Solar Eclipse last year. However, I see they have a very good YouTube video to help you get started. Also, I noticed on the PhotoPills website a number of free downloadable “Guides to Photographing . . .”, once you’ve provided your email. They have a free 143-page Moon Photography: The Definitive Guide (2024) and, most specifically, a 108-page Lunar Eclipses 2025: The Definitive Photography Guide. To get your guide, go to the PhotoPills.com > Academy > Articles and you will see a long list of very helpful guides for a number of outdoor shooting situations.
The other app i use is The Photographer’s Ephemeris (TPE). It is both a native (Desktop / iOS) app and a Web app. I find TPE much easier to use than PhotoPills and it seems photographer John Pelletier agrees in his comparison in 2020.
So, are you ready? The countdown is on—just four days to go! Good luck and all the best of luck for clear skies!
Thanks for reading! If you have any questions, comments, or discussion about the upcoming Lunar Eclipse, be sure to add a comment.
This work is copyright ©2025 Terry A. McDonald
and may not be reproduced in whole or in part without the written consent of the author.
Please SHARE this with other photographers or with your camera club, and consider subscribing to receive an email notice of new blogs.
Have a look at my work by visiting www.luxBorealis.com and consider booking a presentation or workshop for your Nature or Photo Club or a personal Field & Screen workshop at Workshops.
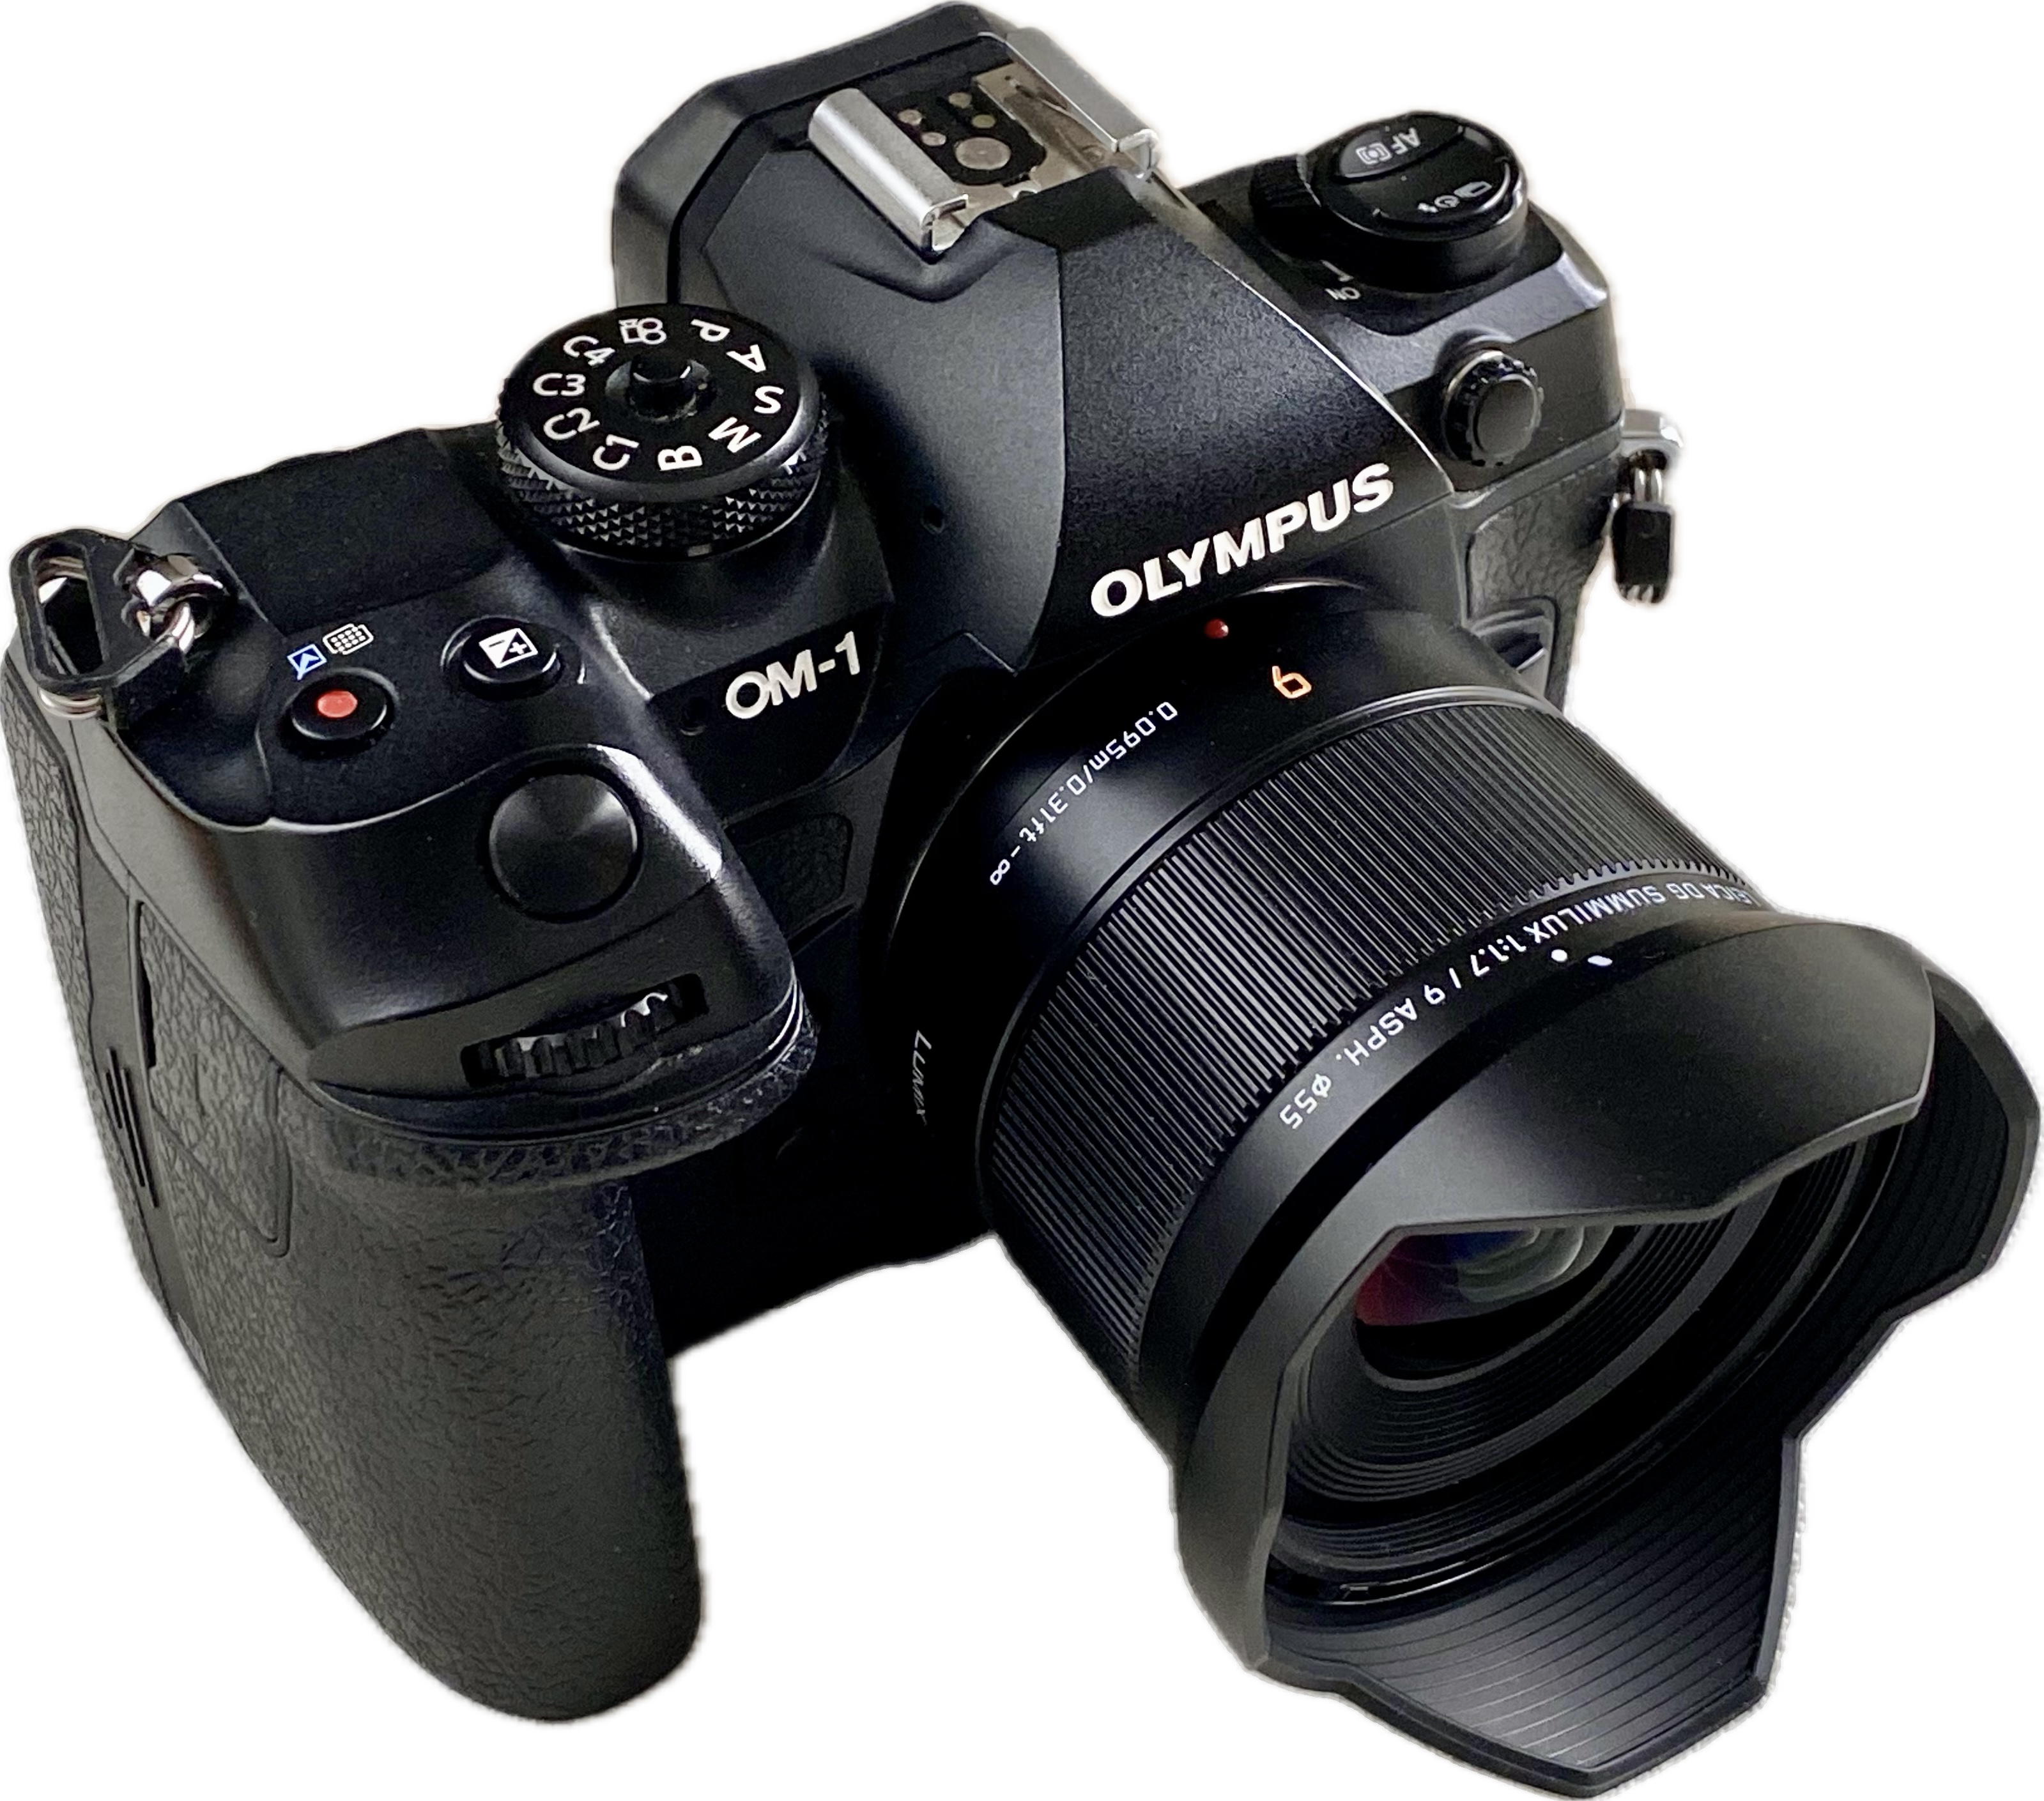
New Lens! 9mm/1.7
Astrophotography, here I come!
For years, I was a prime lens kind of guy. But with the high optical and build quality of the OM System M.Zuiko lenses, their zooms especially, I was thrilled to be able to collapse my lenses down to three zooms which cover every focal length from 8mm to 400mm (16mm to 800mm in full-frame equivalents): the 8-25mm/4 PRO, the 12-100mm/4 PRO and the 100-400mm/5-6.3 IS. I added the 60mm Macro as a specialty lens, much as I’ve just done by purchasing the 9mm/1.7 prime lens.
ƒ4 has never slowed me down. Certainly the OM system zooms are sharp wide-open, something I did not experience with my Nikkor zooms. Shooting in low light situations of dim cathedrals and at the edge of light out in the field, I’ve always found that the OM’s IBIS covers slow shutter speeds and, when needed, I could bump the ISO. Any noise issues are effectively eliminated with Lightroom’s Enhanced Noise Reduction (see my review of the various Raw File Optimization treatments from earlier this year). So why a faster lens?
From what I’ve read and through my earlier attempts at Astrophotography, I’ve learned ƒ4 just doesn’t cut it.
Nikon D800E w/ 18-35mm at 18mm; ƒ4 @ 15 seconds; ISO 3200.
Astrophotography Backgrounder
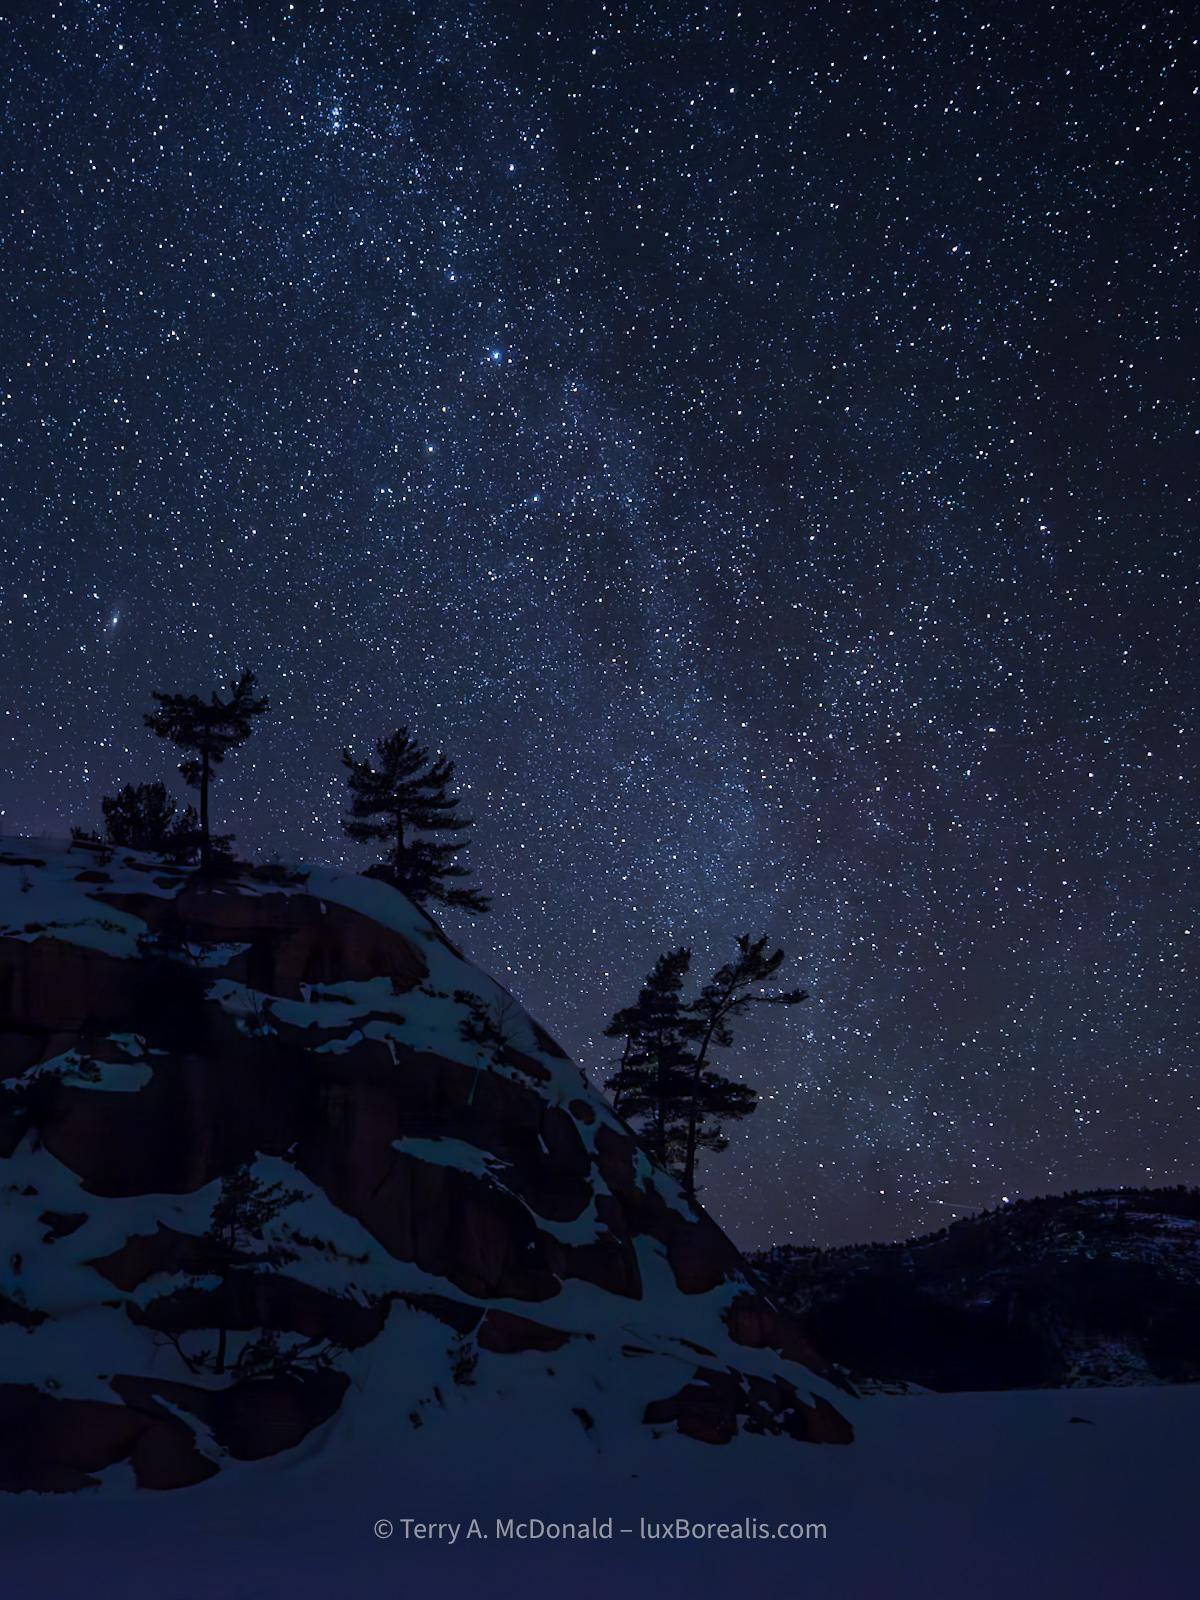
Last month I attended an excellent webinar sponsored by OM Systems (the YouTube is available HERE). While much of it dealt with winter photography, photographer Peter Baumgarten also discussed astrophotography. As it turns out, the Milky Way begins to be visible in the southern Ontario night sky in late February and stays around right through the summer.
I have a lot of respect for Peter. He is a dynamic and very creative photographer, recognized as an Olympus Visionary/Ambassador. OM System includes his instructions for astrophotography in an online article, Astrophotography 101. I plan on having it up on my phone as I venture into this new realm of seeing. For added inspiration, I recommend visiting Peter’s website at CreativeIslandPhoto.com. You should also check out Landsby’s Guide To Stargazing & Aurora Viewing In Ontario and the Ontario Parks Blog. Ontario has a few ‘Dark Sky’ areas that will provide the best viewing conditions. The RASC has a map showing dark sky preserves across Canada and there’s also DarkSiteFinder.com (who just reminded me of the Lunar Eclipse this month).
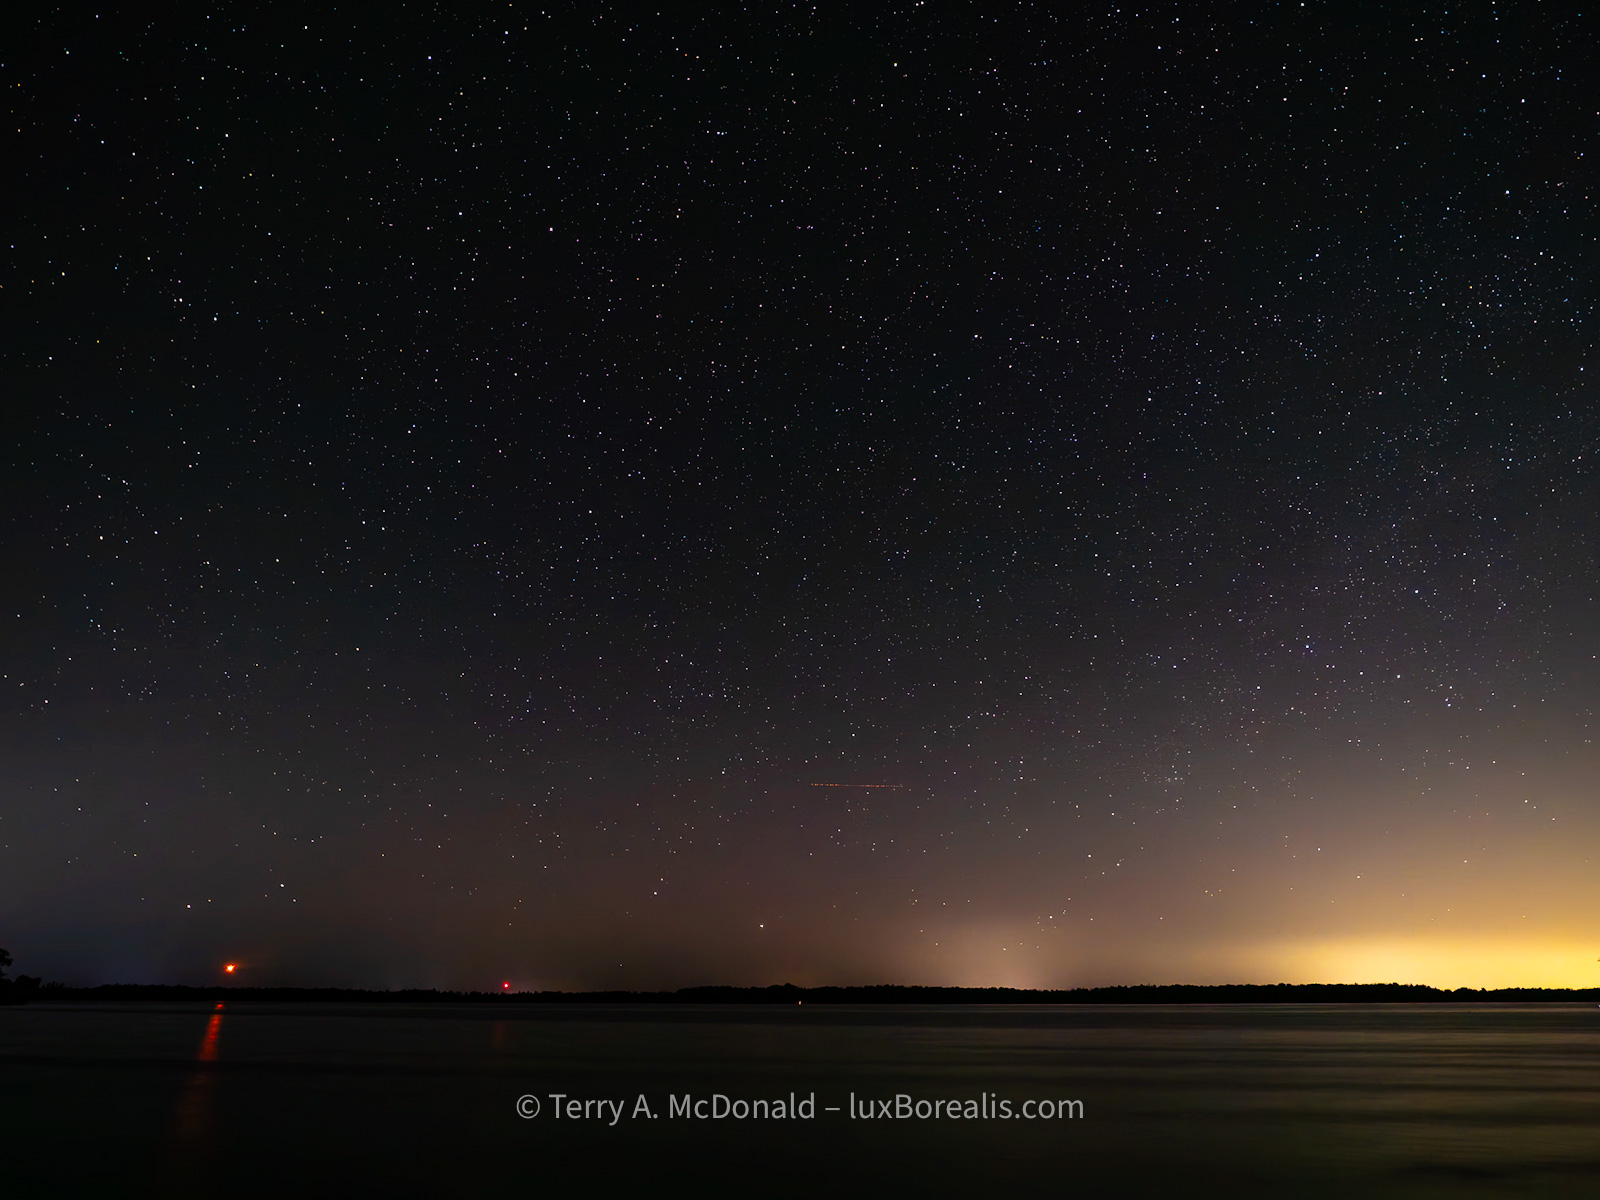
Olympus OM-1 w/ M.Zuiko 8-25mm PRO at 8mm (16mm efov); ƒ4 @ 20 seconds, ISO 400
How did I decide on the 9mm Summilux?
It was helpful that DPReview did some of the leg-work for me. In a 2023 article, they compared four top ultra-wide primes for M43 that fit the niche for astrophotography:
- Laowa 7.5mm F2;
- Meike 8mm F2.8;
- Panasonic Leica DG Summilux 9mm F1.7 ASPH; and the
- Samyang 10mm F2.8 ED AS NCS CS.
Although the P-L 9mm is the most expensive of the four, (tied with the Laowa), it is also head-and-shoulders above the rest in image quality AND it has autofocus. ‘So?’ you ask. ‘What’s the big deal about AF for stars? Do you need AF for astrophotography? Does it even work?’ Surprise! OM camera bodies have this wonderful feature called StarrySky AF!! Have you ever tried focussing on stars? With StarrySkyAF, there is no more guess-work or peering through magnified viewfinders to nail down focus. It’s a great feature!
Additional reading from Amateur Photographer and Photography Life as well as some M43 forum discussions helped to validate my decision, so I ordered the lens.
First Impressions of the P-L 9mm/1.7
I was thrilled that Camera Canada had the lens in stock and was able to ship it at no extra charge, with next day delivery. Talk about service! I have had nothing but excellent service from Camera Canada and can highly recommend them. They are based in London, Ontario, with their two ‘bricks-and-mortar’ locations operating as Forest City Image Centre. It’s the best of all worlds: Canadian-owned small business with online convenience, great pricing, and excellent service.
However, upon opening the box and holding the lens, I must admit to feeling a little underwhelmed, even disappointed, by the feel of the lens itself. Next to my OM System M.Zuiko lenses, the Panasonic-Leica seemed, umm, in a word, cheap—not inexpensive cheap but with a cheap feel to it. In all fairness, nothing rattled, and the focus ring is smooth; it also attached to the camera snugly—all good things. The lens is also a diminutive, which I appreciate, and the poly-carbonate lens body is certainly feather-light. But the lens does not exude the solid build quality, the ‘heft’ and feel of my OM System lenses. Even the plastic used in the lens hood doesn’t feel as robust as the lens hoods of my M.Zuikos. To look at it, and pick it up and feel it, the 9mm is clearly Leica in name only. But, perhaps I’m not being fair; it may well be Leica-quality in optics, which is the most important thing, but that remains to be tested.
So why didn’t I purchase the OM System M.Zuiko equivalent? Simple. There isn’t one. And worse, it’s not on their Lens Road Map. Why? Why? Why? OM Systems makes superlative, industry-leading, sharp, fast primes—why not at 9mm or 10mm?? Both 18mm and 20mm are such common focal lengths amongst the serious FF crowd. I loved my Nikkor 20mm/2. But, M.Zuiko primes skip right over from the 8mm/1.8 PRO Fisheye to the 12mm/2. Both are excellent lenses, but I didn’t want a fish-eye and 12mm is too narrow for the kind of coverage I wanted for astrophotography. OM System does offer the excellent M.Zuiko 7-14mm/2.8 PRO zoom, but it is big, it’s bulky, and it overlaps my existing and more useful zoom range of 8-25mm. And, at $1550, the 7-14mm it is also beyond my means.
So, the 9mm it is and the proof, they say, is in the pudding. Bring on the clear nights! 3am alarm here I come!
Thanks for reading! If you have any questions, comments, or discussion about M.Zuiko lenses, the OM-1 or the Panasonic-Leica 9mm/1.7, be sure to add a comment.
This work is copyright ©2025 Terry A. McDonald
and may not be reproduced in whole or in part without the written consent of the author.
Please SHARE this with other photographers or with your camera club, and consider subscribing to receive an email notice of new blogs.
Have a look at my work by visiting www.luxBorealis.com and consider booking a presentation or workshop for your Nature or Photo Club or a personal Field & Screen workshop at Workshops.
Navigating the AI Juggernaut—A Photographer’s Perspective
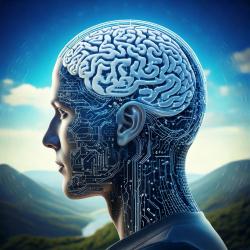
AssistiveAI, GenAI, Internal, External—Where’s the Authenticity?
NOTE: This article was published simultaneously on the Luminous-Landscape.com
AI is not photography! Or is it?
Let’s get once thing out of the way right off the top—the argument regarding AI should not be about ‘honesty’. Photography lost that battle decades ago. It has never truly been ‘honest’, though many still perceive it as so. Take a picture of your family and you get a reasonable facsimile on screen or in a print—complete with goofy looks, hair sticking up and that spare tire you’re carrying around.
But photos have been faked forever, and it’s not just Bigfoot and the Loch Ness Monster. From Abraham Lincoln’s portrait, to National Geographic’s Pyramids cover, even World Press winning photographs, hoaxes, misrepresentations, and alterations have existed for almost as long as the medium itself. Have a look at The Hoax Museum Photo Archive and you’ll get the idea.
So, AI doesn’t really change things, or does it?
Maybe we need to reframe how we think of AI. To my mind,
AI is to authentic photography as ultra-processed foods are to real food.
Ultra-processing reduces costs and make life more convenient, but a regular diet of it makes us lazy and less healthy.
AI is much the same. AI reduces costs and makes life more convenient. And, yes, it will also make photographers lazy and possibly less healthy.
Any foodie will understand the difference between real food and the ultra-processed stuff that has crept into our grocery carts. Think about all those artificial ingredients and the unnecessary fats, sugars and starches that are added to food to make you crave more of it. To the average consumer, UPF is convenient and it tastes great. The fact that it leads to health problems, such as the obesity and diabetes, doesn’t seem to matter to most people. AI in photography is much the same.
Assistive AI
To be fair, not all AI is a problem in photography. Various types of Assistive AI are commonplace. Most phone and camera manufacturers have incorporated Assistive AI and machine learning in some way, most often for AF-assist, but also for in-camera processing and up-scaling. Algorithms, such as Adobe’s Sensei, help you find photos in Lightroom without keywording. Other apps analyze photos and suggest keywords. Assistive AI also streamlines many tasks like creating background and subject masks. And, for high volume photographers of sports teams, events, grad photos, etc. it’s a real time-saver. But Assistive AI is not what people are concerned about. There is another aspect to AI that is raising concerns.
Generative AI
The difference with GenAI is that it creates new pixels in an image. But even GenAI comes in two flavours: internal and external. Internal GenAI analyzes the pixels within the image, then uses them to create pixels, kind of like cloning but more automated and on steroids. On the other hand, External GenAI uses AI algorithms to create pixels entirely new to the image, taking them from third-party photographs—photos that are not your own.
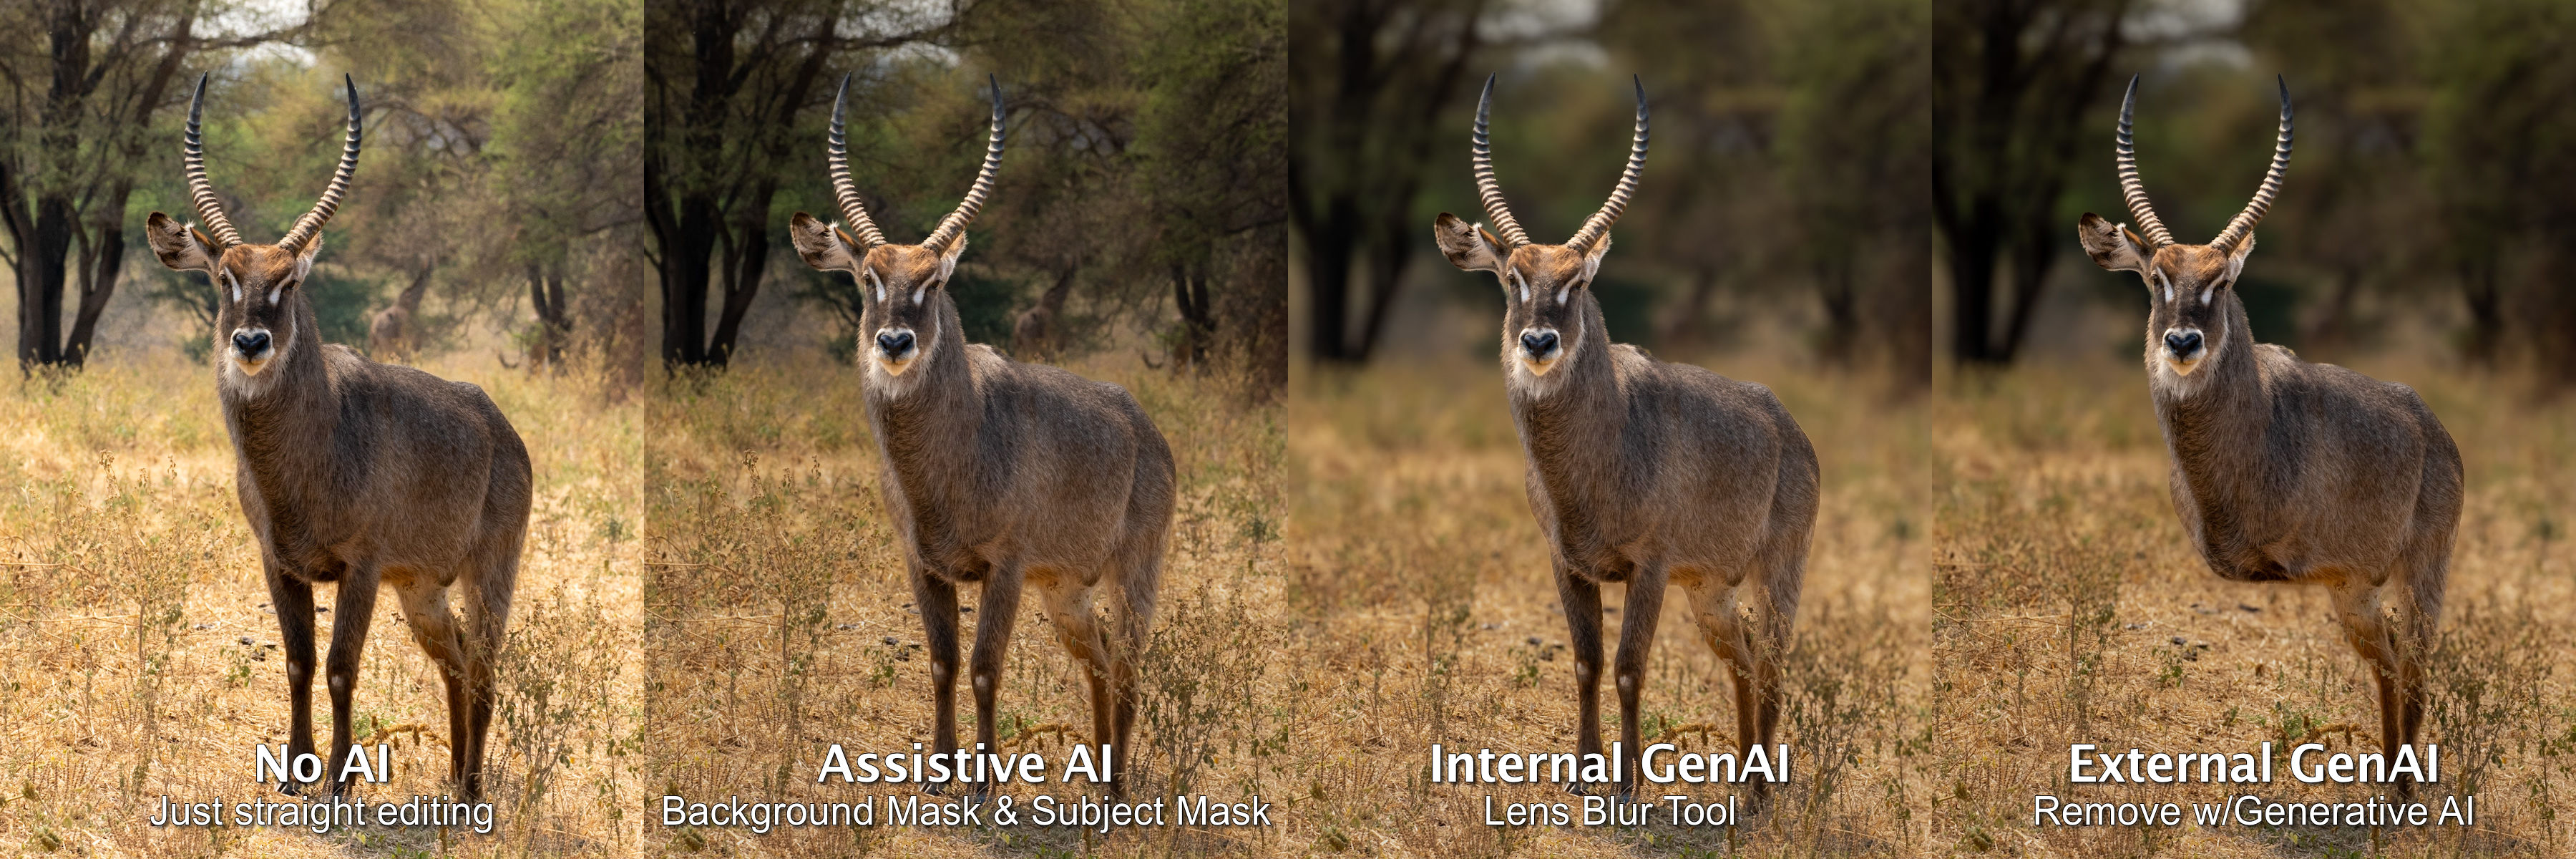
illustrating different uses of AI—only External GenAI introduces new pixels from third-party images.
You’ll know this from Photoshop’s Generative Fill. It uses pixels from other photographers’ work to fill in backgrounds and skies, to remove objects, and to fill in gaps and edges. You may have noticed ‘Generative Credits’ as part of your subscription. Those are to ‘pay for’ External GenAI services. Topaz Labs clearly labels and promotes their PhotoAI app as one that will generate pixels to fill in missing details. They also offer the option of using Cloud Rendering, for which they will sell you credits. And Luminar Neo boasts its GenErase, GenSwap and GenExpand.
With GenAI creeping into our processing, photographers need to be aware of exactly what their tools are doing and how GenAI is working, especially when selling work, copyrighting it, or entering photo contests and competitions. In most cases, especially for personal use, it’s no problem at all—full GenAI ahead. But for other uses, it’s important to know which GenAI is permitted and which is not.
Part of the confusion lies with a lack of clarity in labelling. As mentioned above, Internal GenAI assesses the pixels within an image to make adjustments. You may be familiar with Adobe’s new ‘Distraction Removal – Reflections’ option. It works entirely internally, by analyzing existing pixels using internal AI algorithms, so it is not introducing any new pixels to the image. Many Denoise and Sharpen adjustments work internally as well, for example DxO Pure Raw and Lightroom’s ‘Enhance’ feature. Adobe’s Neural Filters are another example, but only some of them use Internal GenAI, for example, ‘Colorize’, ‘JPEG Artefact Removal’, and ‘Skin Smoothing’. So while all of this is GenAI, it is not using third-party images, so they are all ‘safe’ to use.
But is it ‘yours’?
The confusion begins as some of Adobe’s Neural Filters use External GenAI, introducing entirely new pixels to your photograph based on the works of other photographers. These include ‘Back Drop’, ‘Deep Blur’ and ‘Make-up Transfer’, to name a few.
So, the question arises, if you drop in a background taken from another photographer’s photo** is it still ‘your’ photo? After all, the new pixels aren’t your pixels—it was all done by computer algorithms based on photos you didn’t make. Copyright is based on ‘original works’ created by a ‘human author’. Is it original? Is it even human? ‘But—’ you might say, ‘it was my idea, my concept, right?’ Unfortunately, ideas can’t be copyrighted, only the physical expression of an idea.
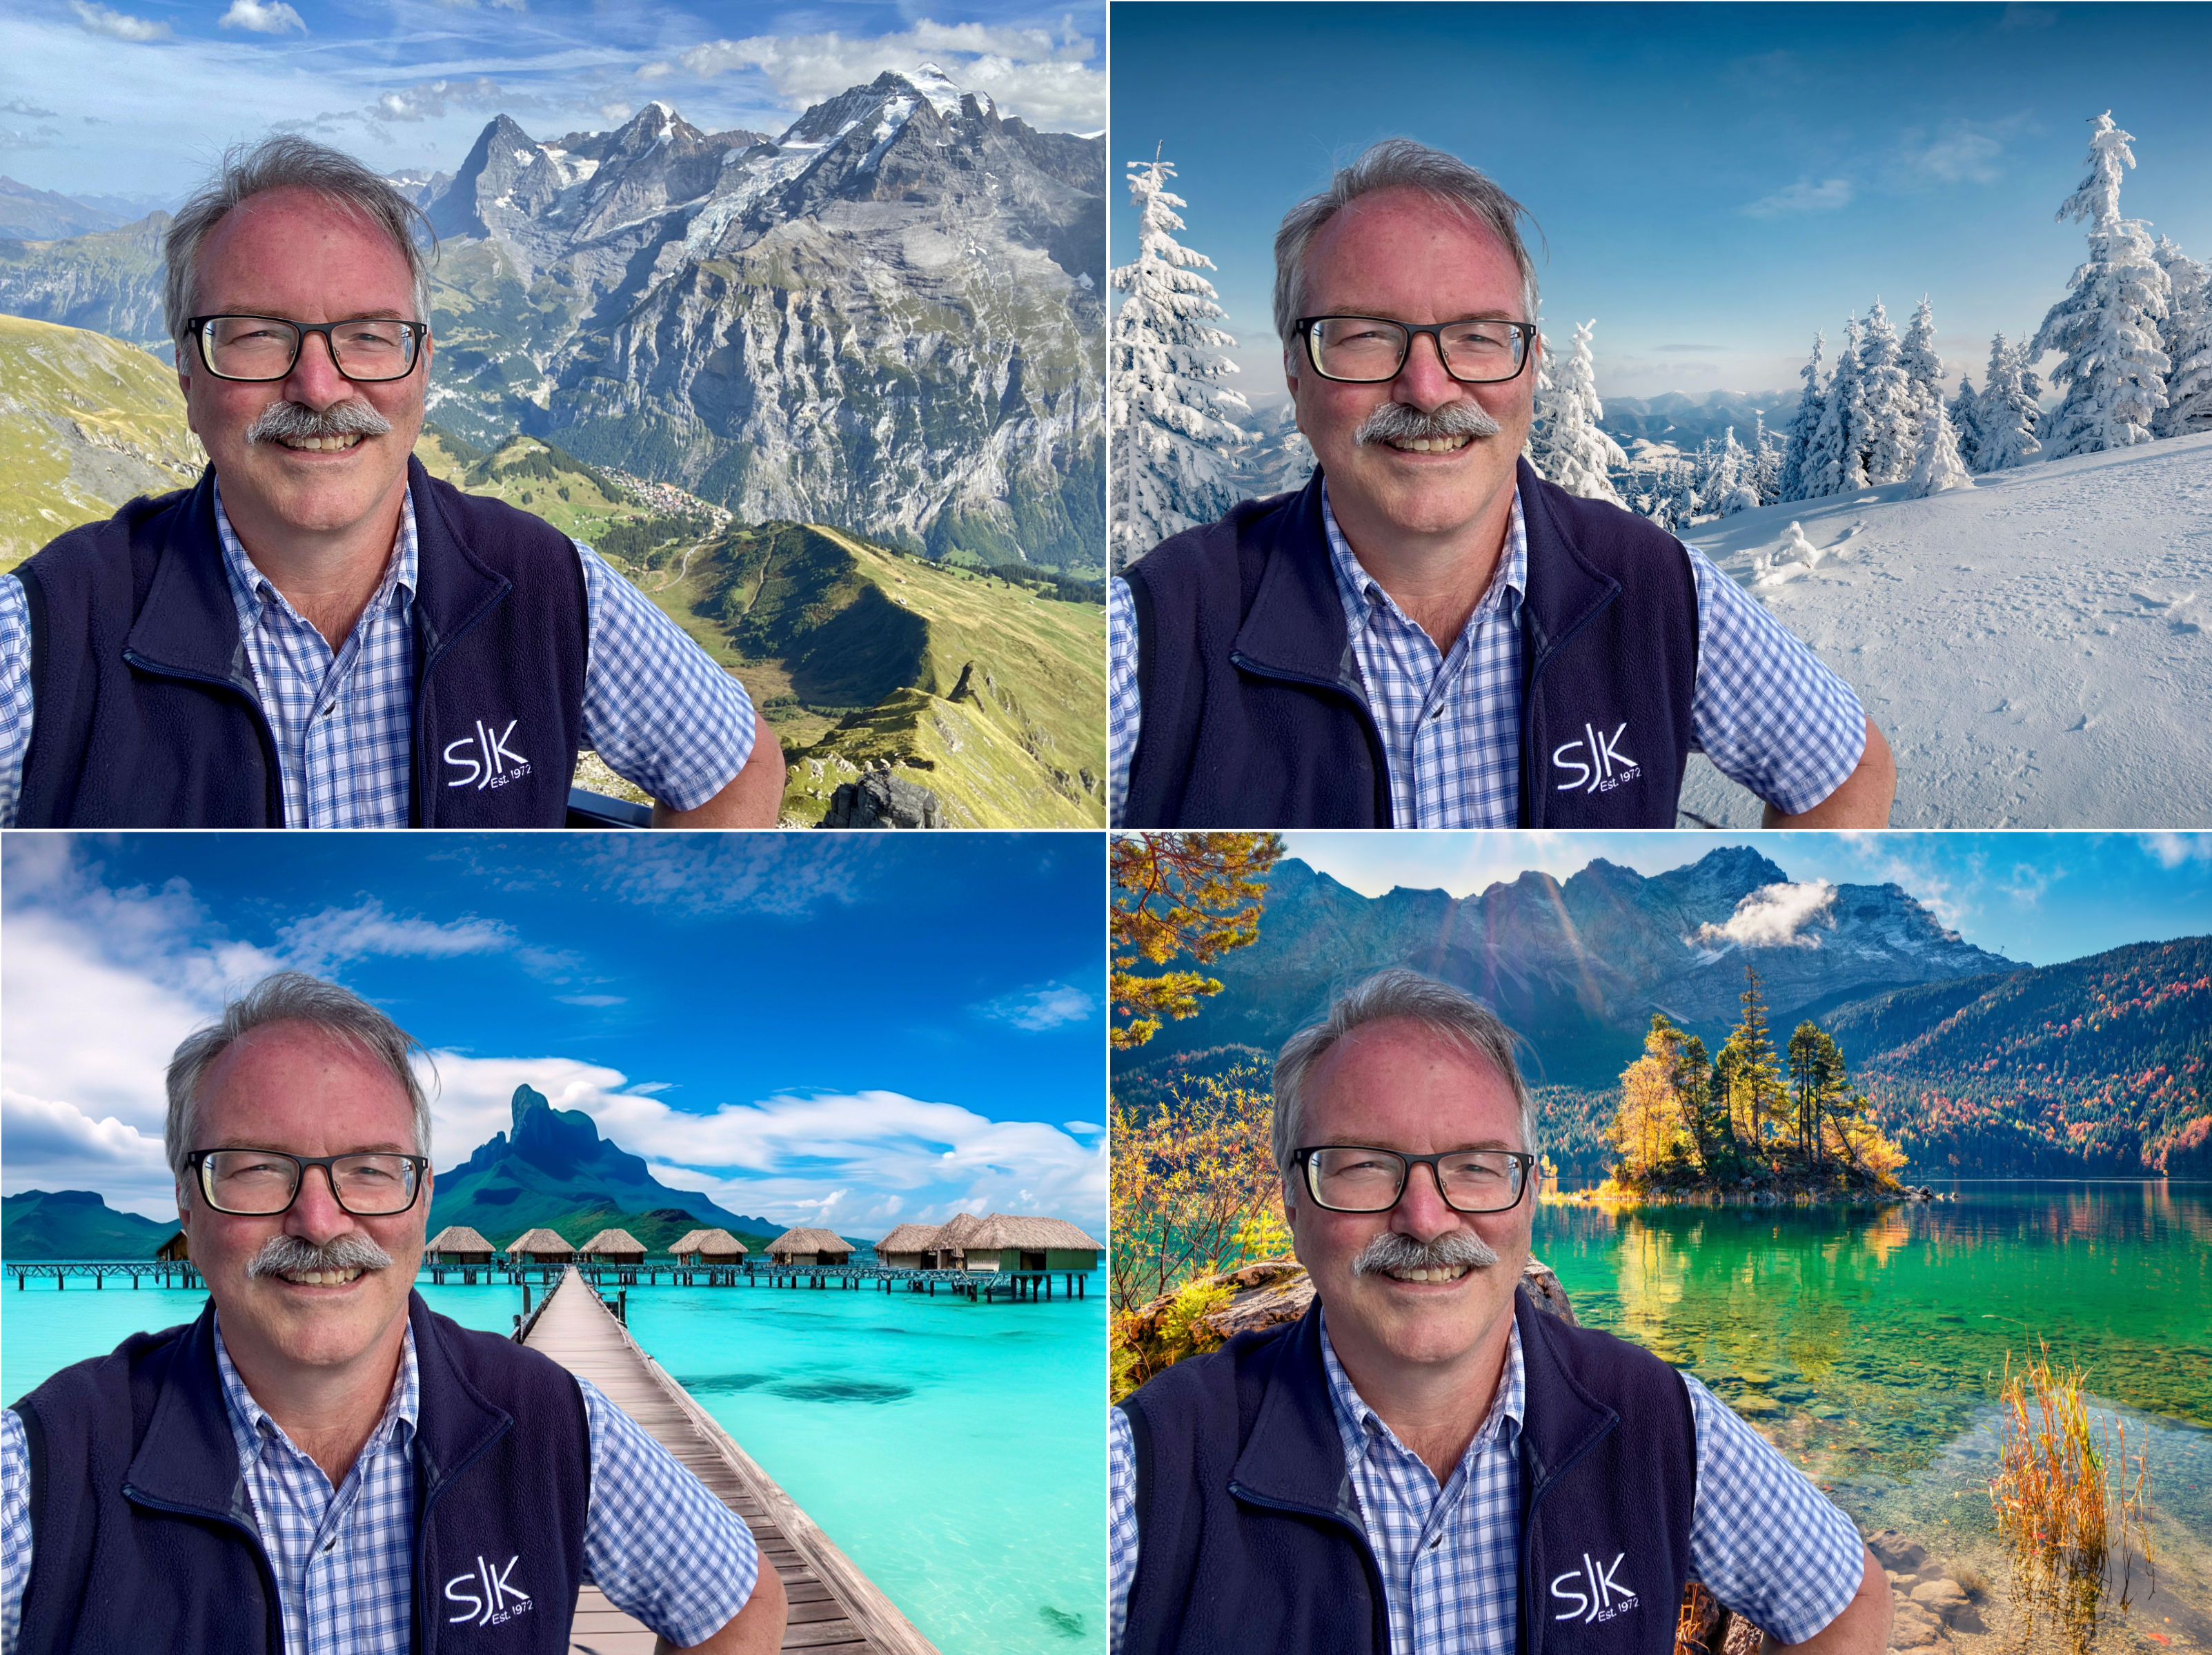
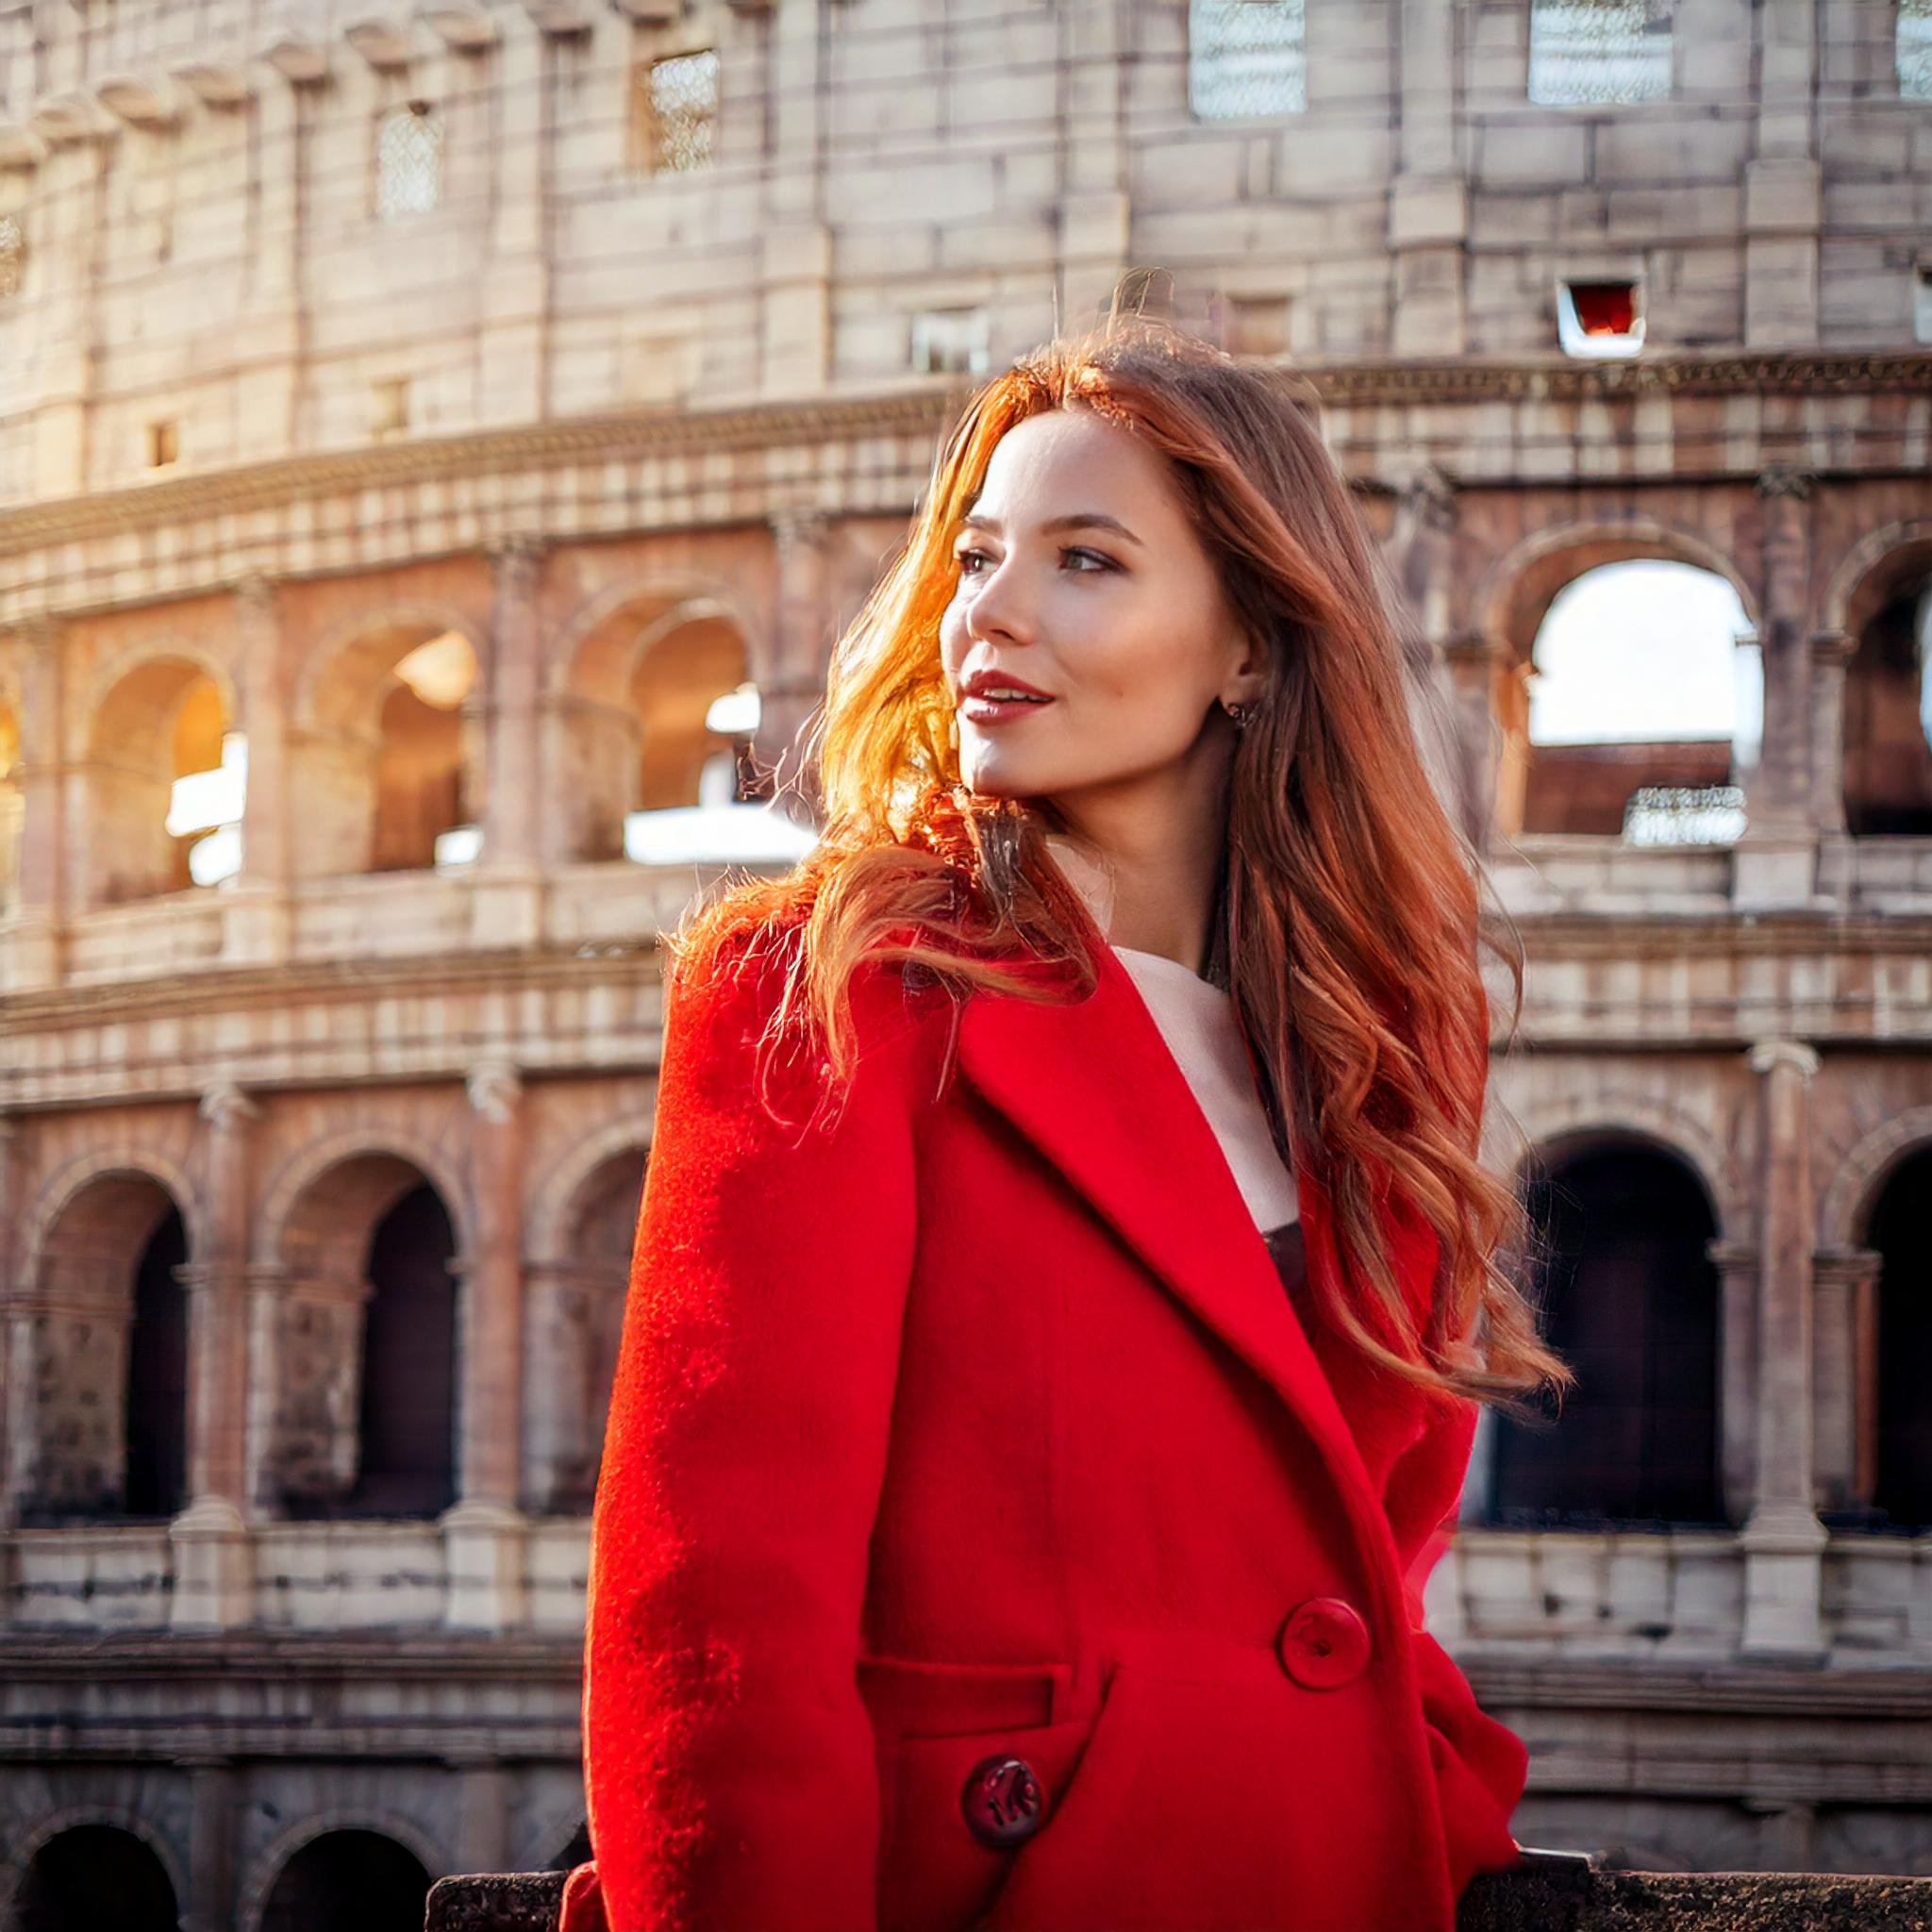
Three of the four photos have a background replaced by Adobe Express. Of course the hair and lighting are the usual give-aways, but this was done for FREE taking only 20 seconds per image and with no post-processing. Imagine what could be done with high-end AI generators in the hands of people who know hat they are doing.
**BTW: This reality of ‘taken from another photographer’s photo’ opens up another hornet’s nest of controversy. GenAI has to ‘learn’ and it needs a ‘pool’ of images to work with and ‘borrow’ from. Programmers have used photos from all over the web to do that, usually without the direct permission of photographers. In the wild west of fine print in user agreements, your photos are likely part of that learning (LINK).
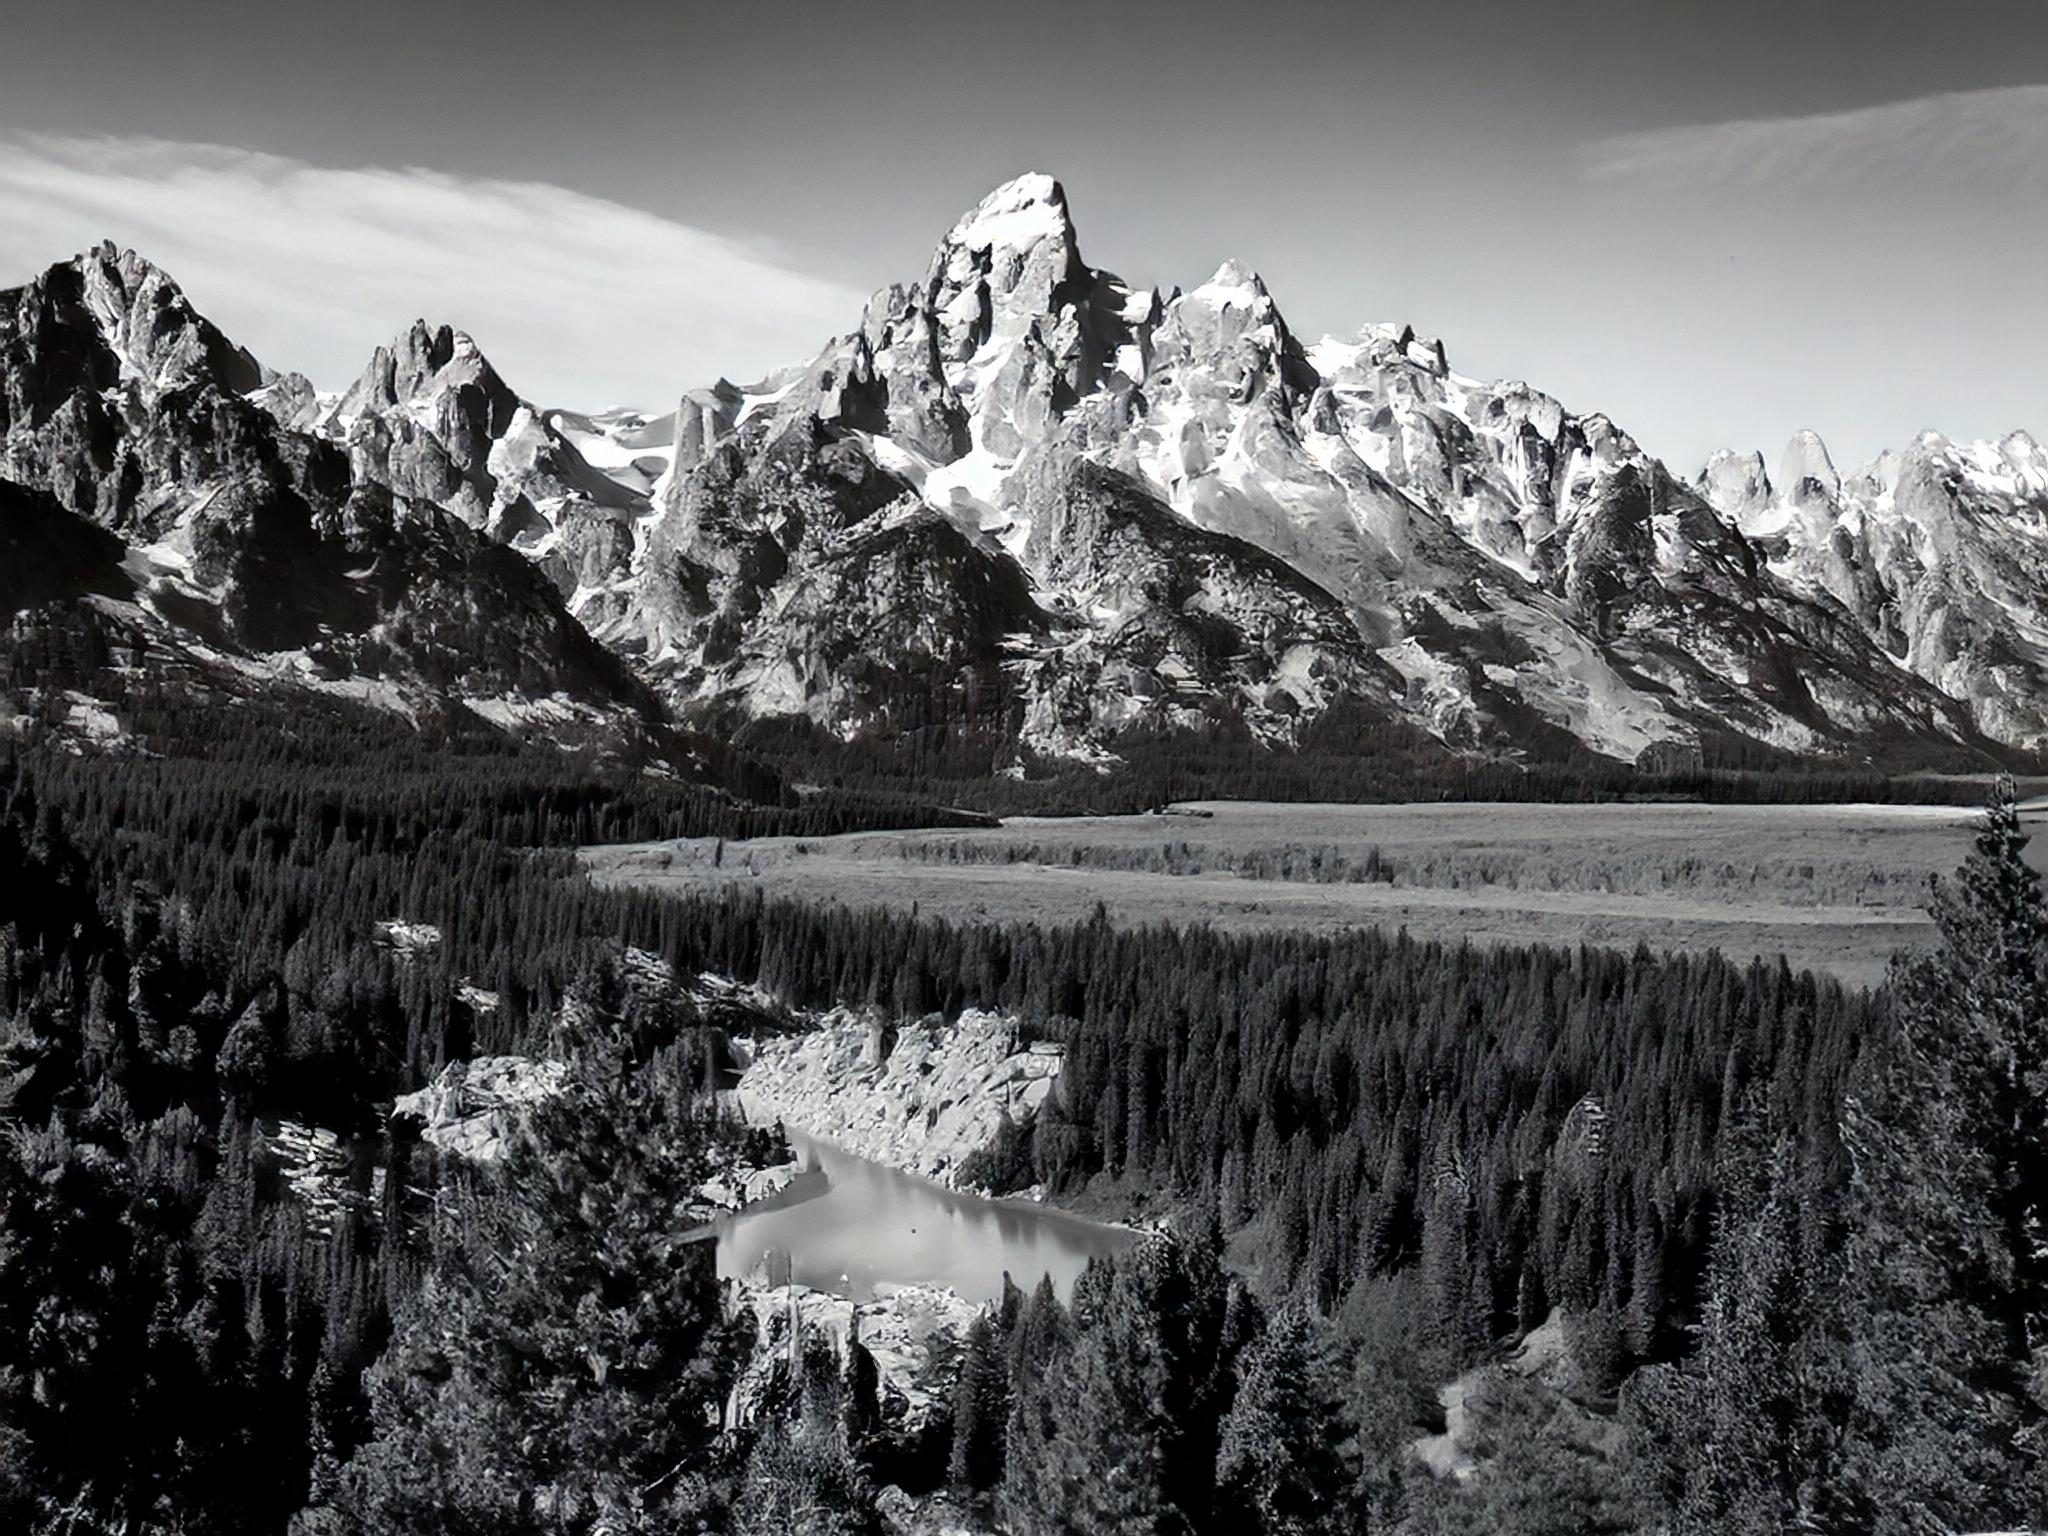
Grand Tetons from Snake River Overlook.
This 2048x2048px image was generated by Adobe Firefly in 15 seconds, using the command “black-and-white photo of the grand tetons from snake river overlook”. From there it was cropped to a 4×5 aspect ratio.
If the image you produce isn’t entirely yours, nor was it generated completely by you, should you be taking the credit for it? Are you faking ownership if you put it forth as ‘your’ work? In once sense, it’s similar to ‘Made in Canada’ versus ‘Product of Canada’. ‘Made in’ only needs 51% of the content to be Canadian. ‘Product of’ requires 98%.
Recently the US Copyright Department has tried to clarify things. Interestingly, a hundred years ago, photographs themselves had to battle to be accepted for copyright. At the time, many felt that because photographs were machine-made they should not be. Now that we’re long over that hurdle, it seems the human touch remains a contributing factor. A human-made photograph is copyrightable; a machine-generated image, even if made using human commands, is not. The jury is still out on photographs that use GenAI to create parts of the image. Time will tell.
Incongruencies
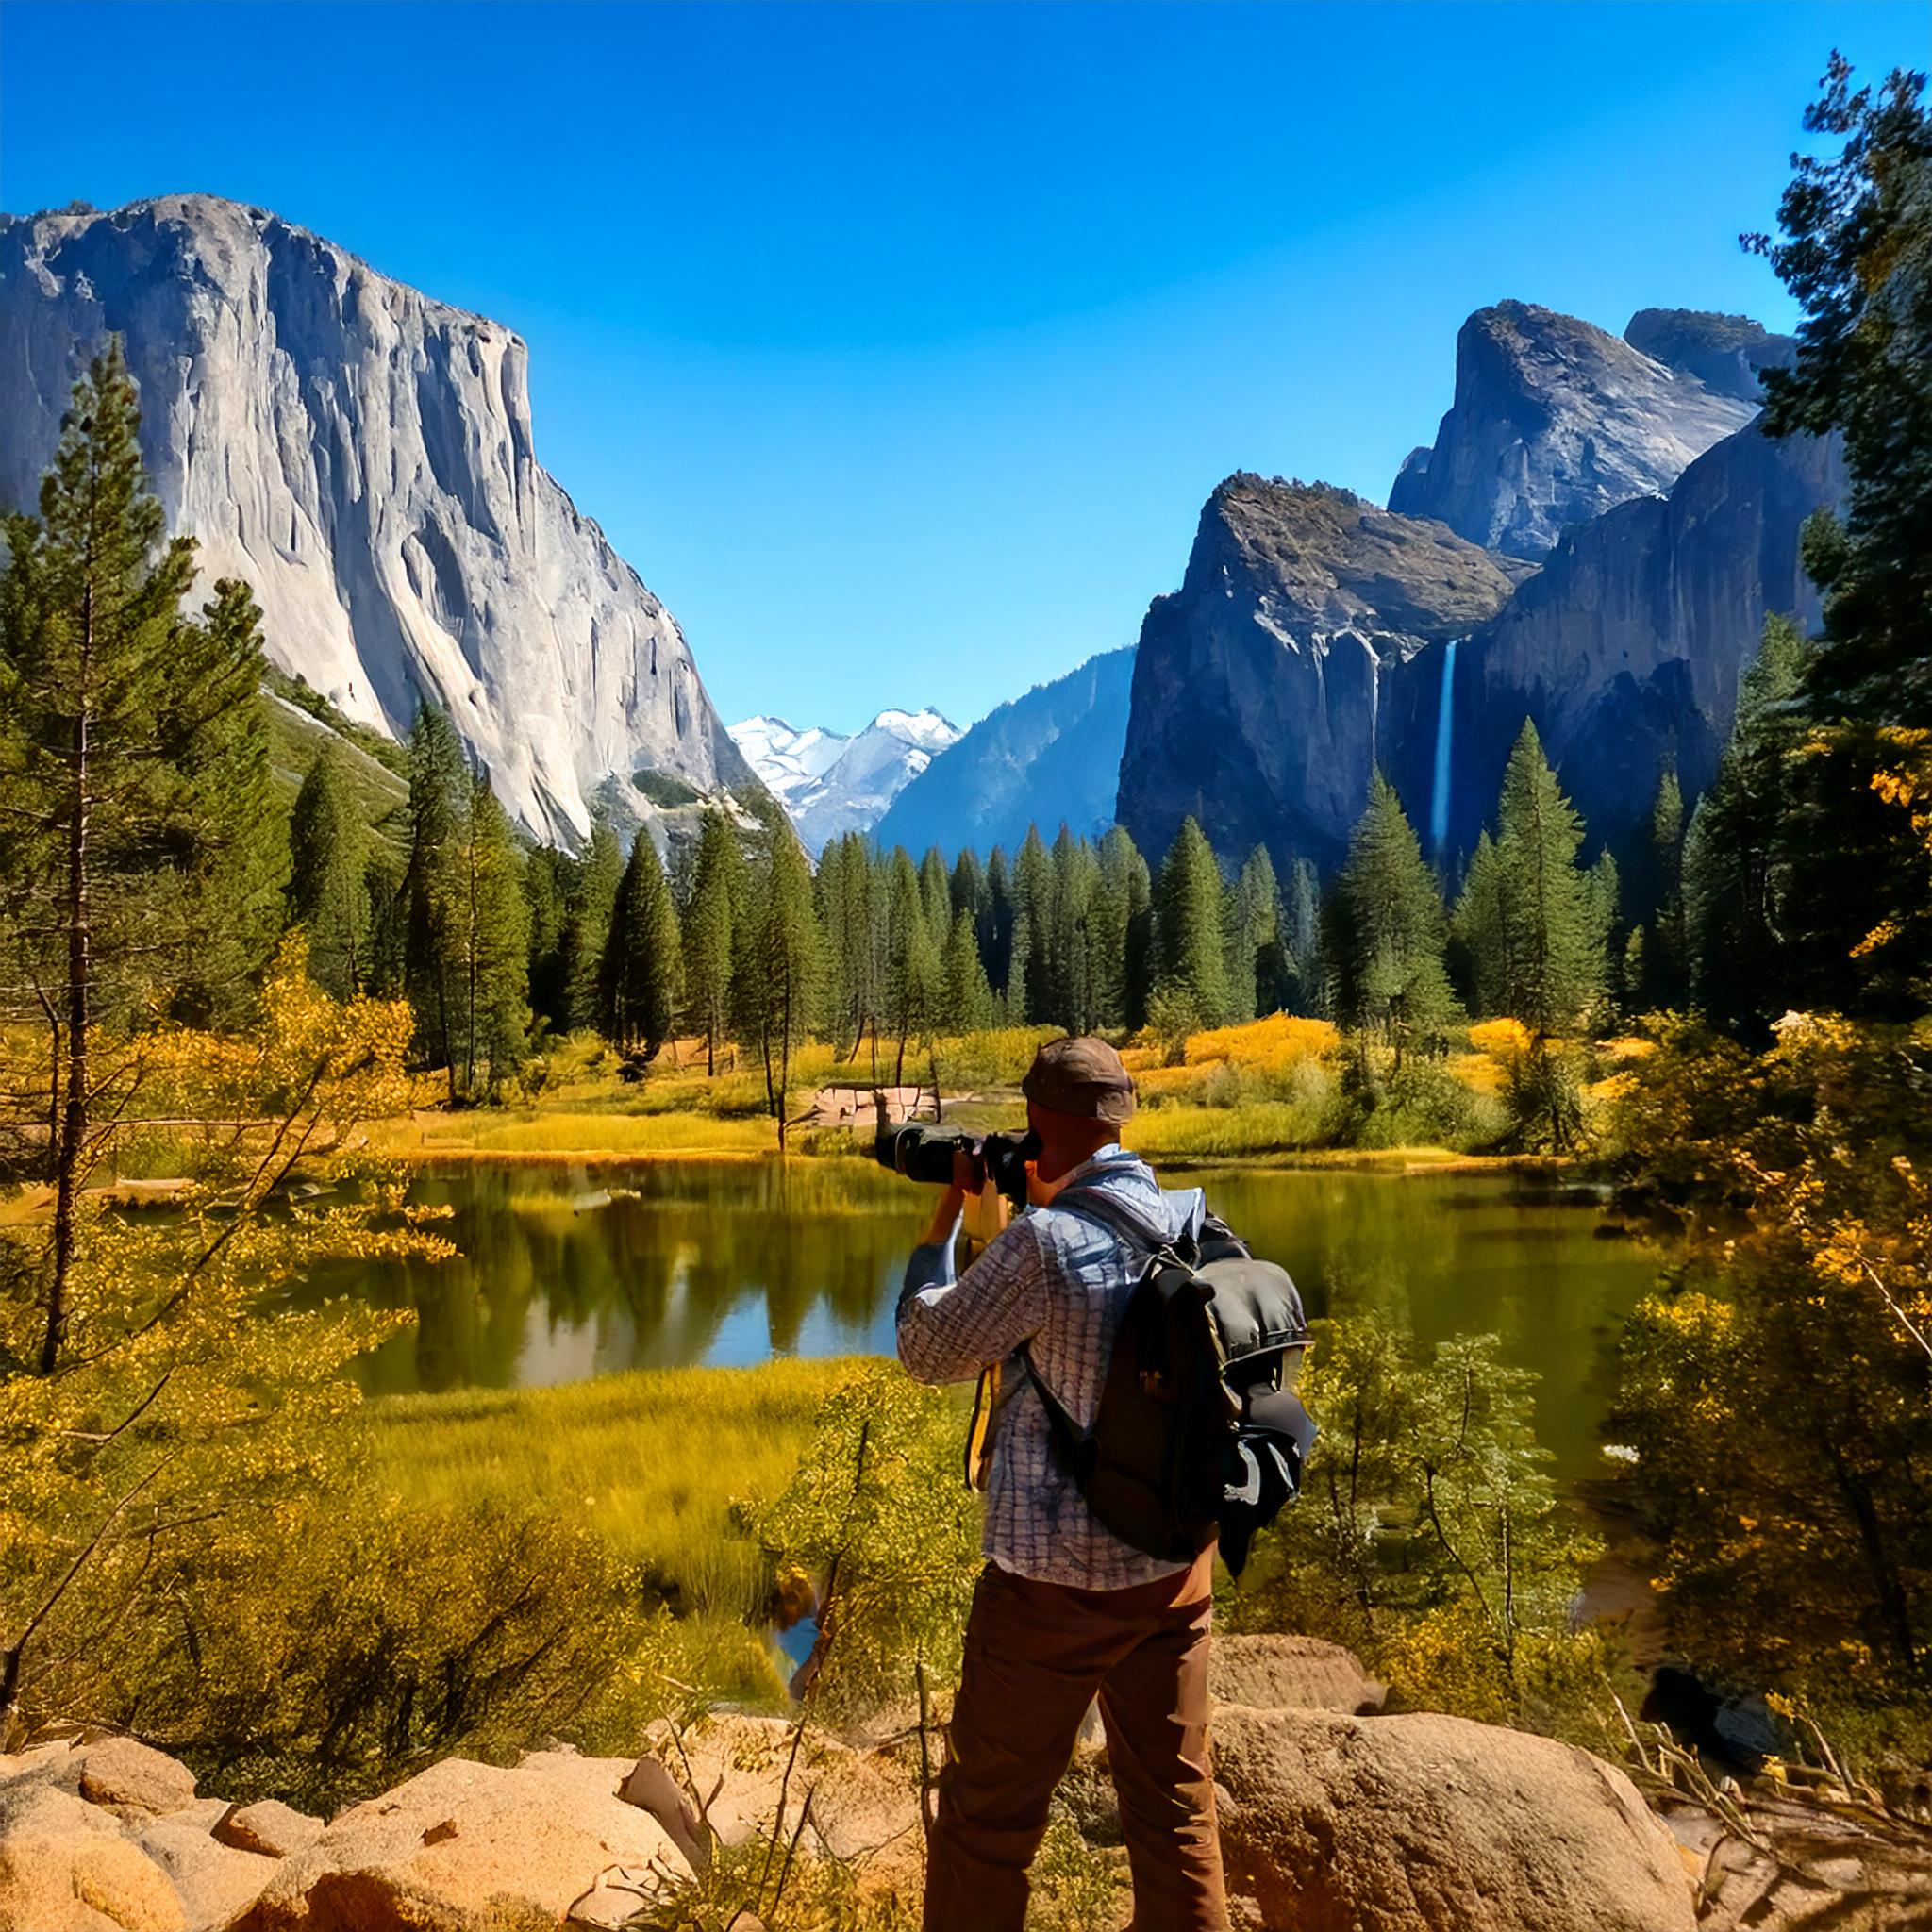
Image generated by Adobe Firefly in less than 15 seconds. While far from perfect, imagine what could be done with more time and a high-end GenAI suite.
Then there is the visual impact. There has always been poor photography and there are times when GenAI doesn’t quite hit the mark. And worse, there are instances when the user thinks, “Wow! This looks amazing!”, but others can see right through the attempt at making something from nothing. Remember the HDR craze?
I notice incongruencies most often with lighting and colour alterations: while the sky is an early morning or late evening bright orange, the gloss on the bird’s feathers lack that warmth. Nonconformities also show up in overly-sharpened crisp, clear fur and feathers which are far more perfect than one would ever see in nature. I call them hyper-realistic. Another common AI error which is often missed, are shadows in the wrong place or shadows without anything there to cast the shadow.
User Beware
Perhaps the biggest problem with GenAI involves entering photos in contests or competitions. Photographers must read the fine print. You must be aware of which AI tools are ‘internal’ and which are sourcing pixels from elsewhere. Competition organizations, especially those dealing with nature photography, are very strict on what processes can and cannot be used.
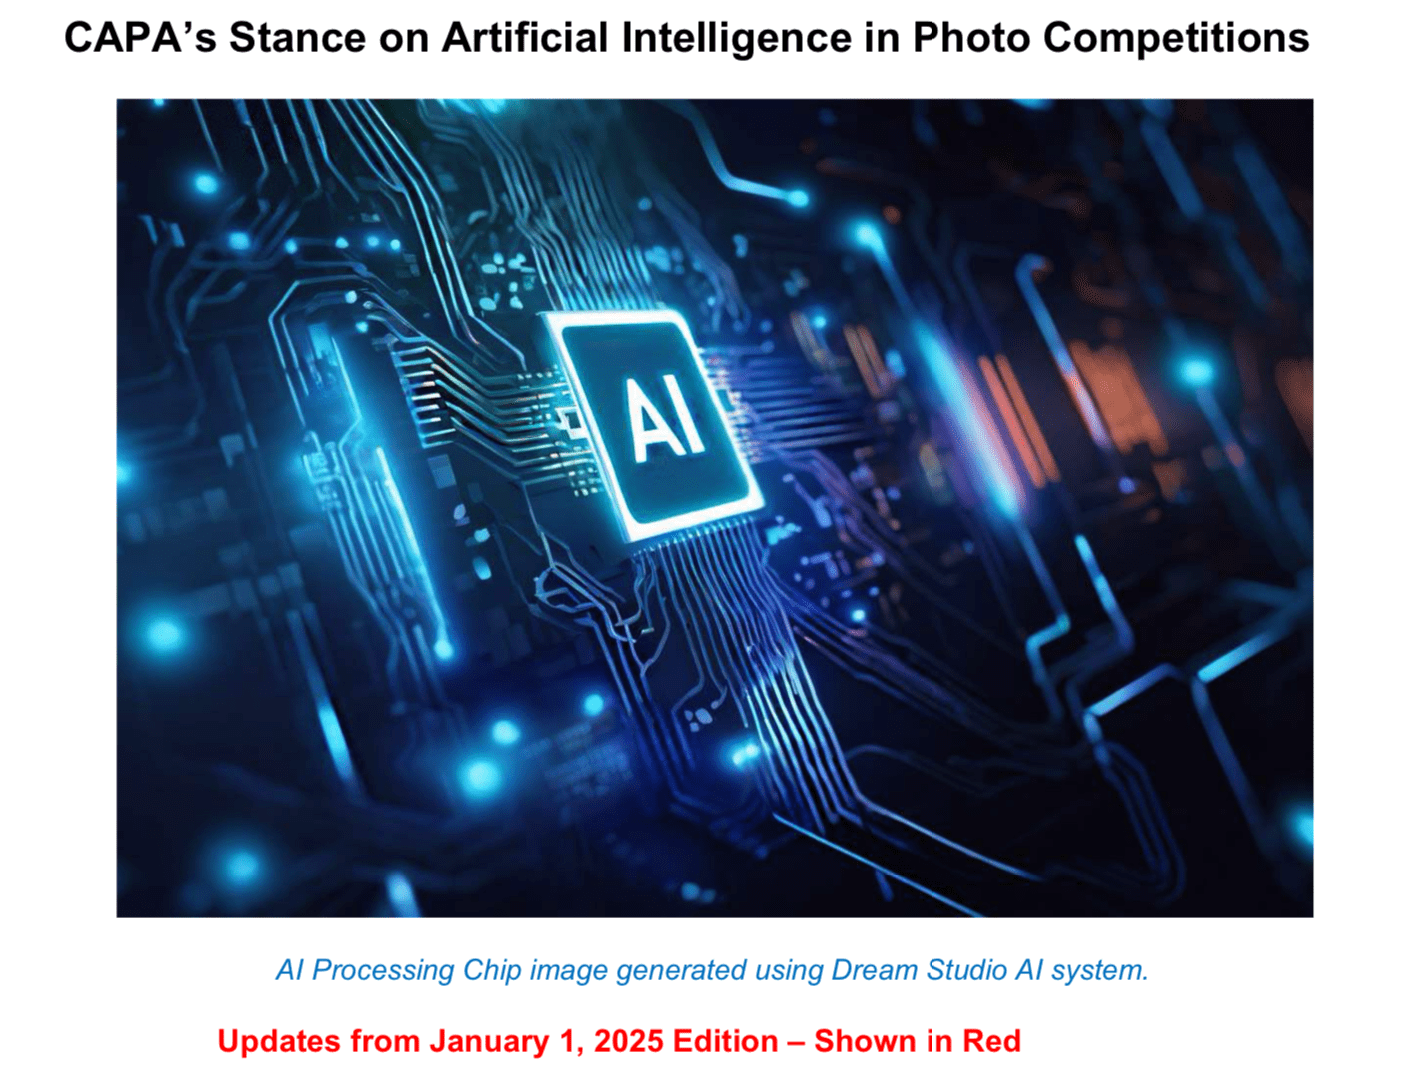
Case in point: the Canadian Association of Photographic Arts (CAPA) has gone to great lengths to create a detailed, 15-page document (LINK) which specifies exactly what tools can and cannot be used within a number of commonly-used editing apps. For example, with Lightroom, you may use the ‘Remove’ tool, but not with ‘Use Generative AI’. With Photoshop, you may use some Neural Filters, but not all, as pointed out above.
But then you may think—how can the judges tell? That depends on three things:
- how honest the photographer is;
- how realistically the AI is applied, and
- how closely the photos are scrutinized.
See this Audubon article about AI in nature photographs, and this CNET article to test your powers of discernment. Nowadays, before winning photographs are announced, each photographer must submit their original JPEG or raw image file for comparison to the submitted image. If the judges are suspicious, they can and will revoke the award, as happened with a Wildlife Photographer of the Year award winner in 2017. (LINK)
“The photographer, Marcio Cabral, denies he faked the scene and claims there is a witness who was with him on the day.” Still, his photo was checked by five independent scientists and all came to the same conclusion: a stuffed anteater from a nearby lodge and the anteater in the photo were one and the same. The award was revoked. In this case it wasn’t AI that was used, but AI can easily be used in the same way.
Authentic Photography
2048x2048px image generated by Adobe Firefly in about minute.
To me, it’s all about authenticity. If any part or pixel of a photograph has been generated using External GenAI, one needs to ask: Is it still a legitimate photograph or should it be deemed something else, such as digital art? CAPA uses the definition: “a captured image on a light-sensitive device (e.g. film camera, digital camera, smartphone, tablet, etc…) and recorded on film or in a digital format.” (LINK) If the pixels originated from another image, e.g. by using External GenAI, then it is not permitted. Is it still a photograph? Perhaps, but not an ‘authentic photograph’.

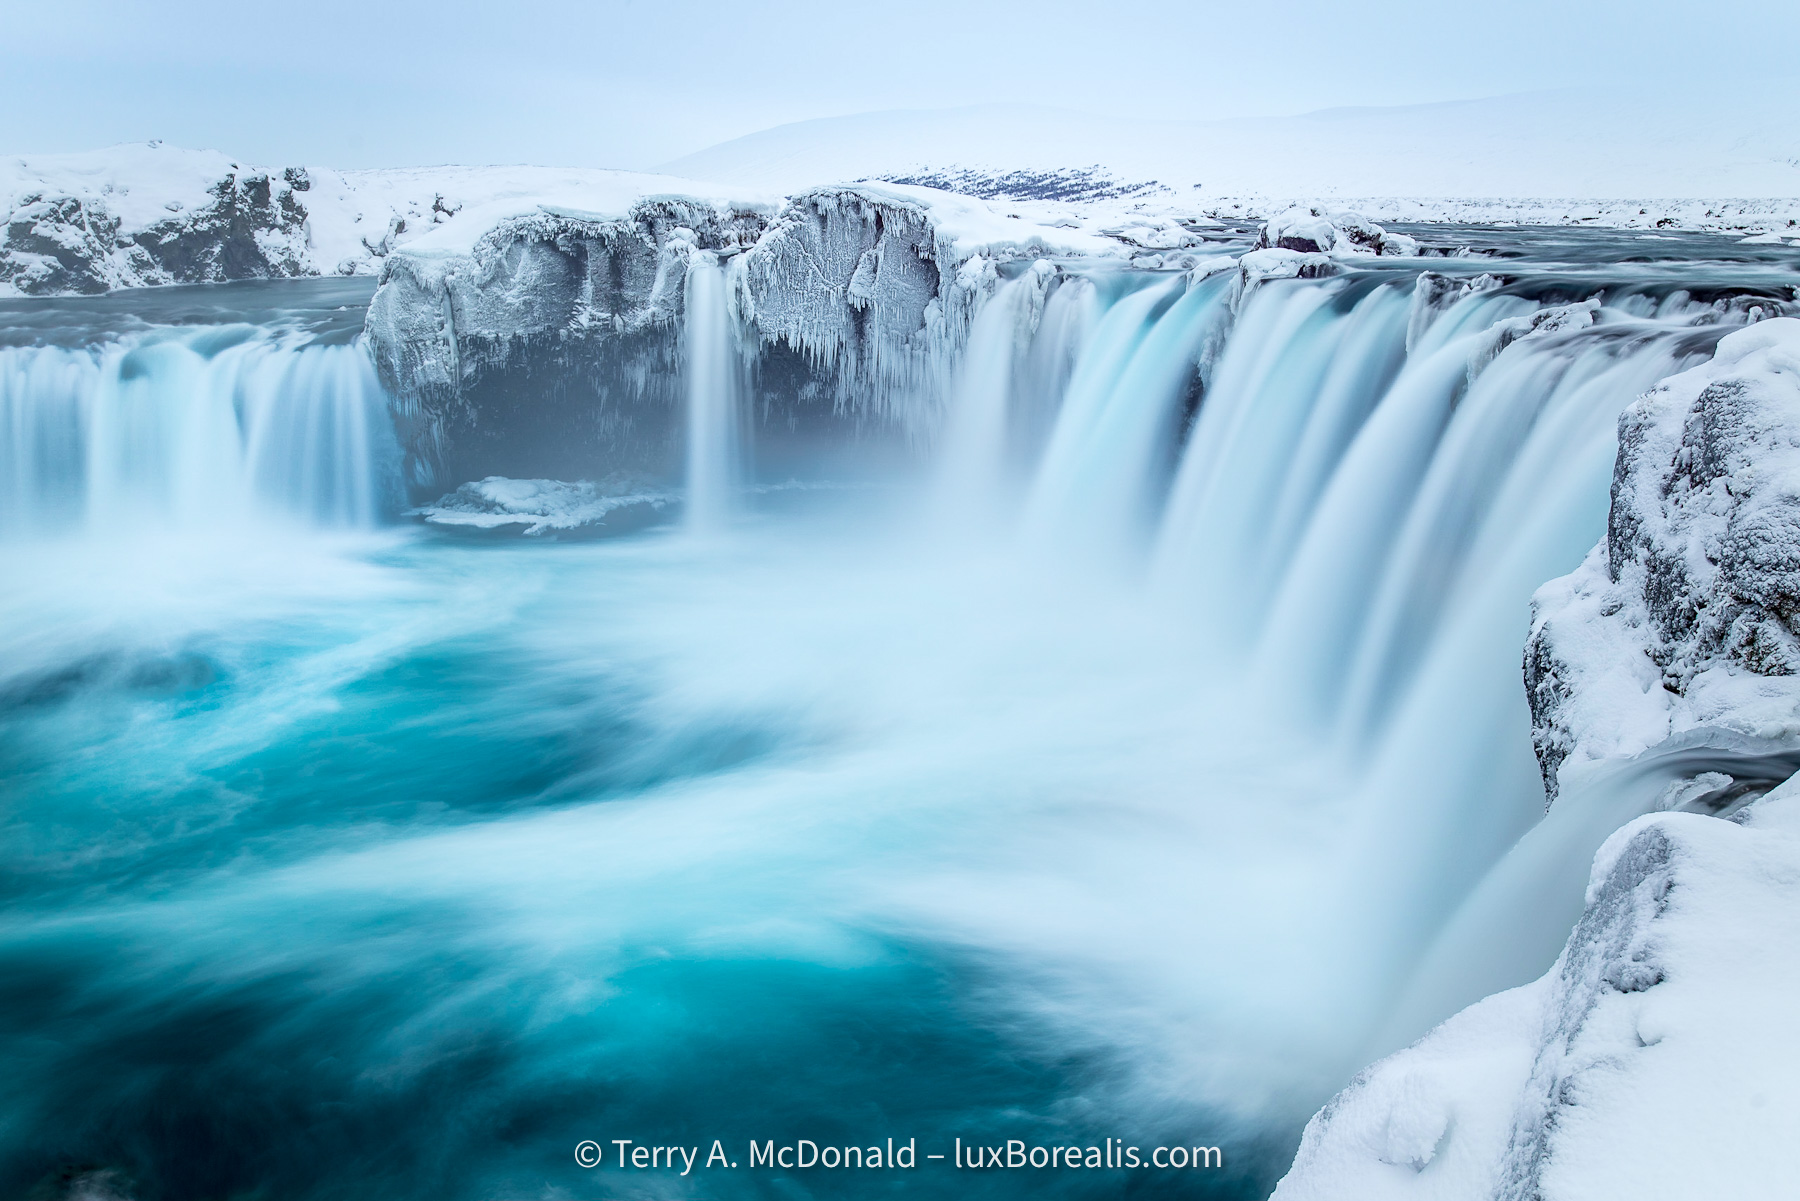
The real thing—an authentic photograph by the author, which was NOT used as a reference image for the AI image above!
A definitive definition of a photograph is difficult at best, and is likely irrelevant. Historically, we’ve accepted when photographers had their prints and negatives retouched, thereby changing the original capture. Is Lightroom’s Remove tool any different? It is when a GenAI algorithm introduces new pixels from another photographer.
Perhaps we need to become more declarative, as in ‘This is an authentic photograph made entirely by the photographer’ or simply, ‘No part of this image was generated using External GenAI’. This is similar to the growing pressure for clear labelling of ultra-processed food. Perhaps when GenAI is used in a photograph, it needs to be labelled as such, which is beginning to happen, e.g. in Facebook and Instagram.
This may well make room for an ‘Authentic Photography’ movement, similar to the ‘Real Food Movement’. Note: this is different from the Straight-out-of-the-Camera folks (SOOC) who renounce editing of any kind. There needs to be space, a distinction, for those who choose not to use External GenAI in their workflow. Along those lines, Radiant Image Labs has declared that their software, Radiant Photo 2, uses only Assistive AI, not Generative AI and they have committed themselves to authenticity in photography. There is some talk of Serif Affinity going the same route. One may think, ‘That’s economic suicide—everyone is going AI.’ Not true. Niche marketing is alive and well.
Will ‘authentic photography’ become a niche medium, one that may earn a premium? Again, time will tell. Radio was deemed dead once TV became popular, but radio is still with us, and despite the onslaught of digital music, vinyl LPs are still being pressed, and, of course, gelatin silver prints are still made along with palladium prints, cyanotypes, etc.
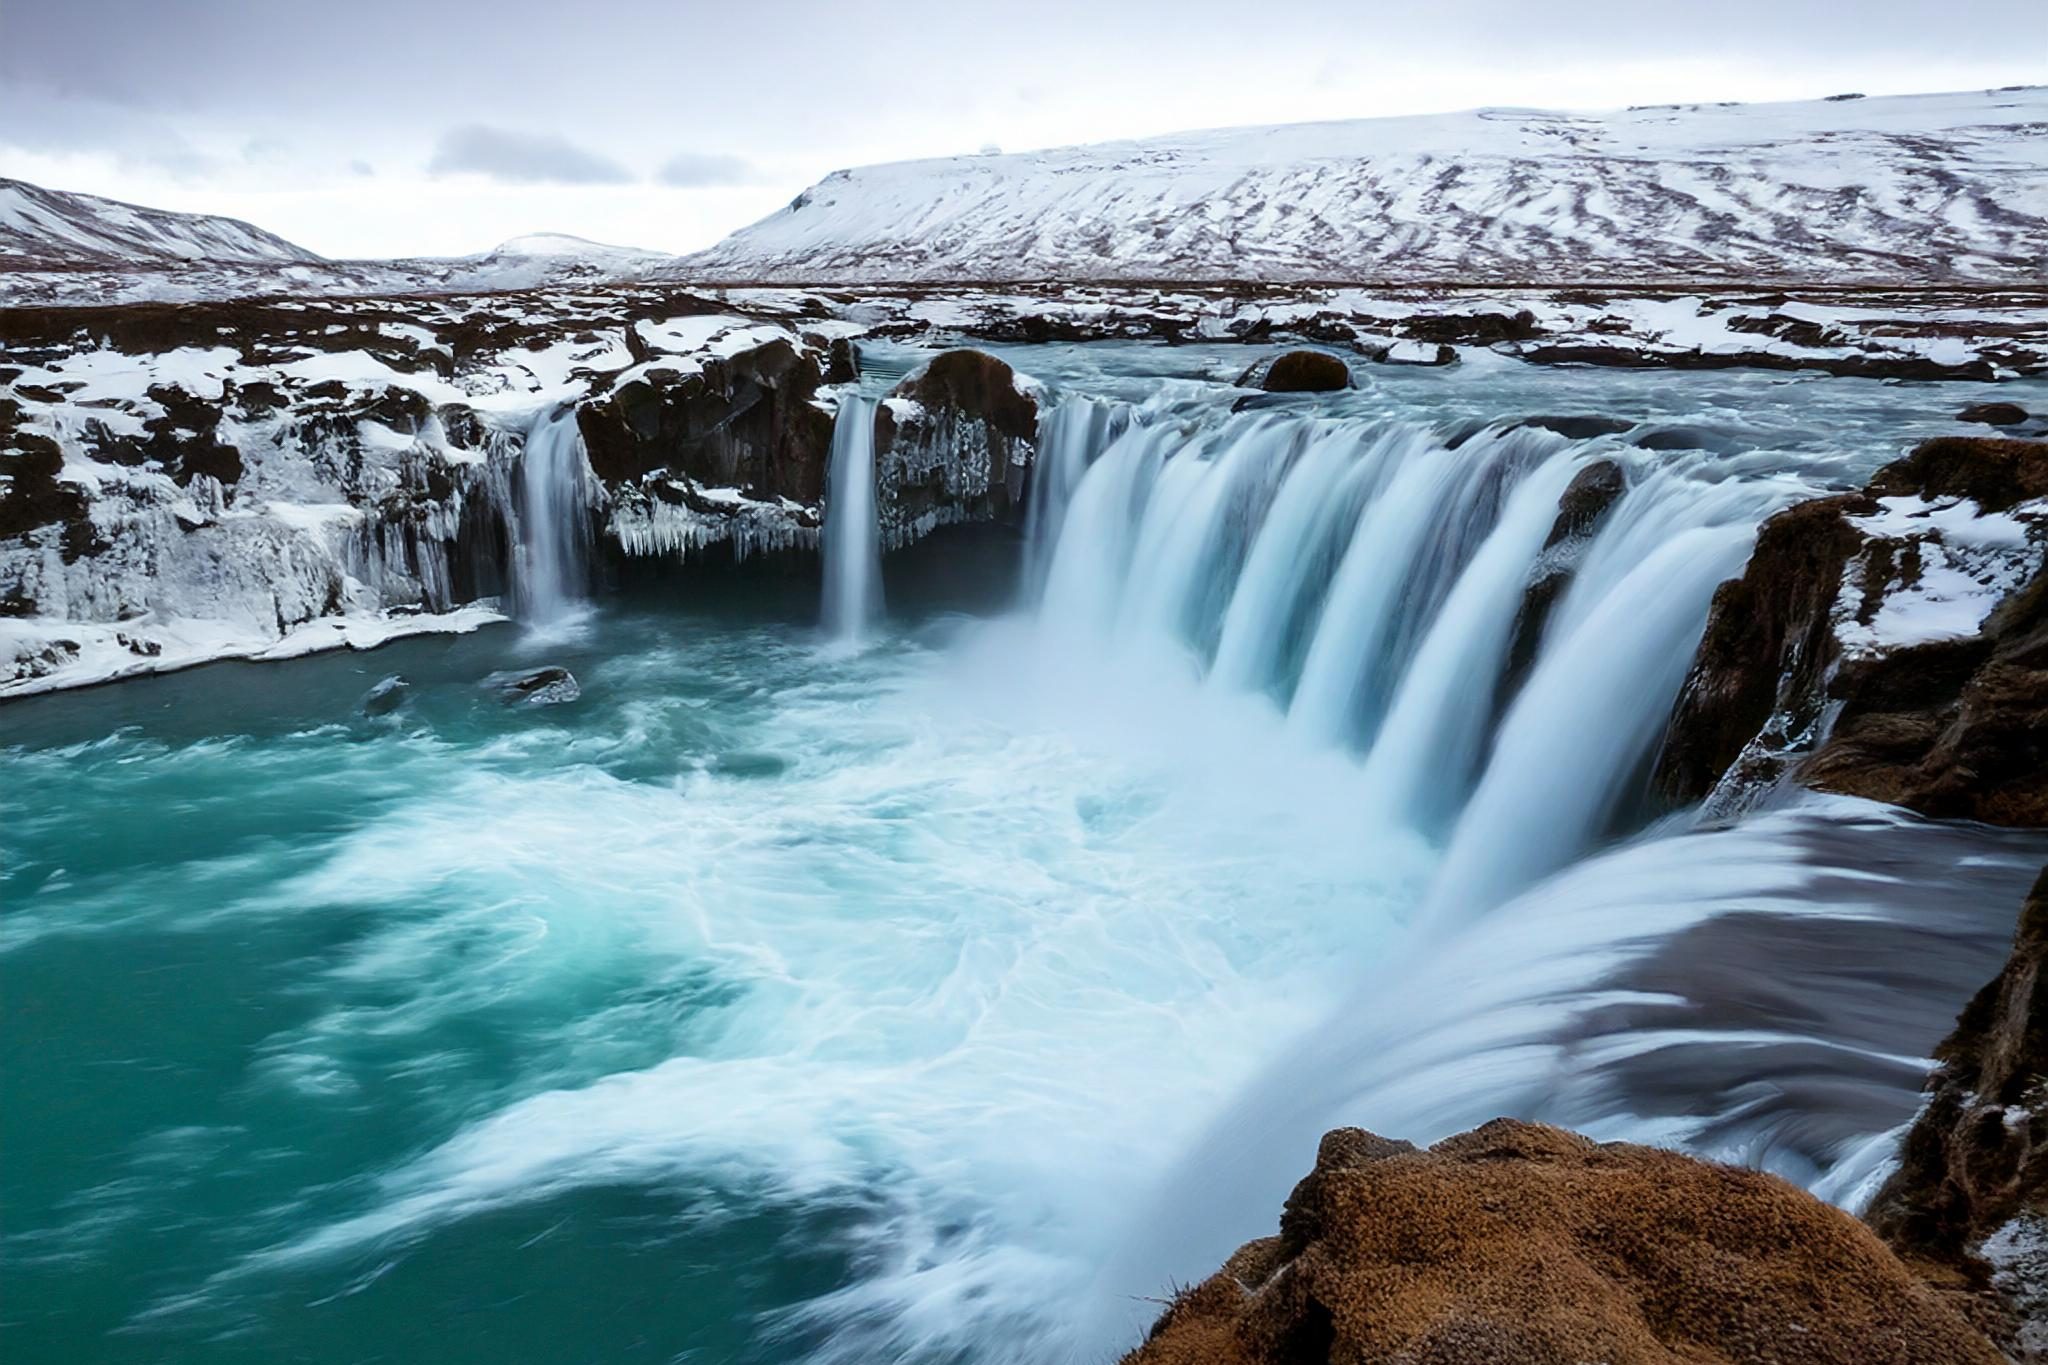
An authentic photograph.
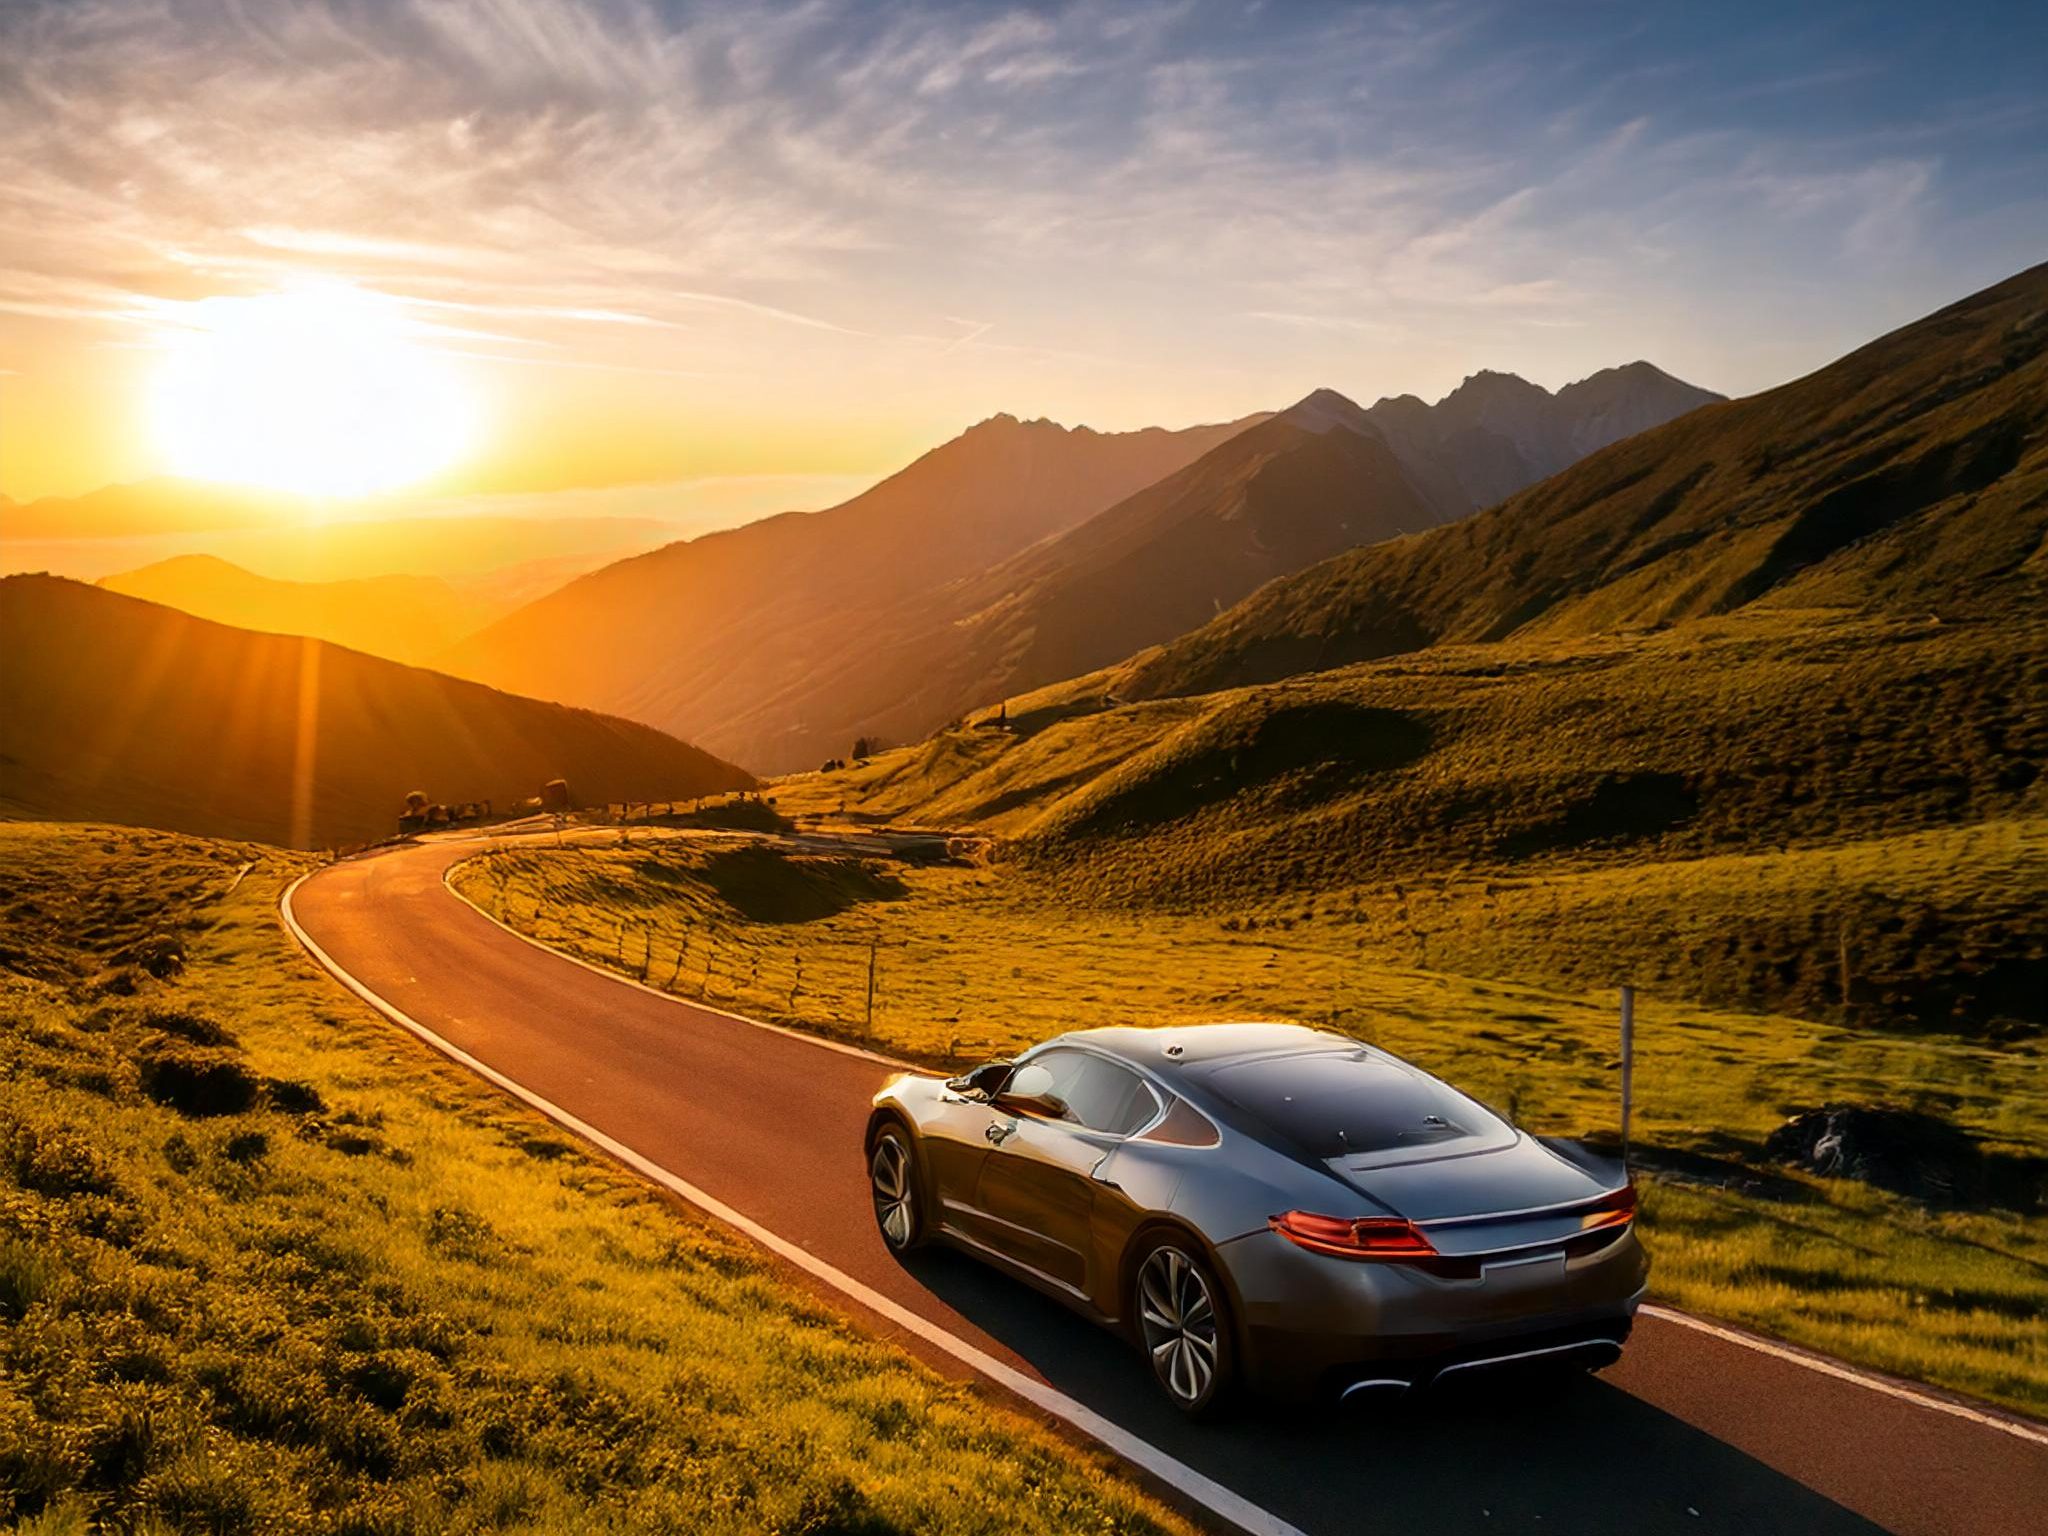
How much travel photography will end up being AI-generated?

AI Photography
So, as photographers, where does AI leave us? Will we become flabby and suffer ill effects from Generative AI just like we do with ultra-processed food? Yes. And no. Generative AI is convenient and convenience itself breeds laziness. Many in our society are far less healthy simply due to the convenience of ultra-processed foods combined with the lack of activity spawned by TV remotes, drive-thus, and cars. Reduced health in car-oriented societies is conclusive.
Will photographers will become lazy in their pursuit and execution of photos simply because they can generate what need with GenAI? Consider this: whatever lousy sky they get in a spur-of-the moment shot, can be replaced. Some would argue, ‘Why get up at stupid o’clock in the morning, when I can adjust the lighting and colour effects of what ever photo I take to turn it into a Golden Hour beauty?’ As Luminar Neo tells us, “Twilight photos without waiting for the magic hour.”
As many point out, ‘We’ve been Photoshopping out imperfections for decades—what’s the big deal?’ ‘Besides, who would ever know?’ They have a point. The general public isn’t very discerning and much of commercial photography, especially in media and advertising, is throw-away—used once and gone. It’s the look that counts, not how you produce it. Isn’t it?
AI is here to stay. In fact it’s becoming better and better at creating photo-realistic images. Did you look at those photos from CNET? Already, you can give plain-English descriptive commands to software, such as Midjourney and Adobe Firefly, to generate images that can be further tweaked as you wish. And this is just the beginning. The time is not far off when the result will be fully photo-realistic—client- or printer-ready images at the specified output resolution. Photographers may well be out of a job simply because someone with better language skills will be doing a more efficient and effective job with AI. And, the lighting, the mood, the whole feel of the image can be changed with a few clicks. Art Directors will have all the creative freedom and control they’ve always sought.
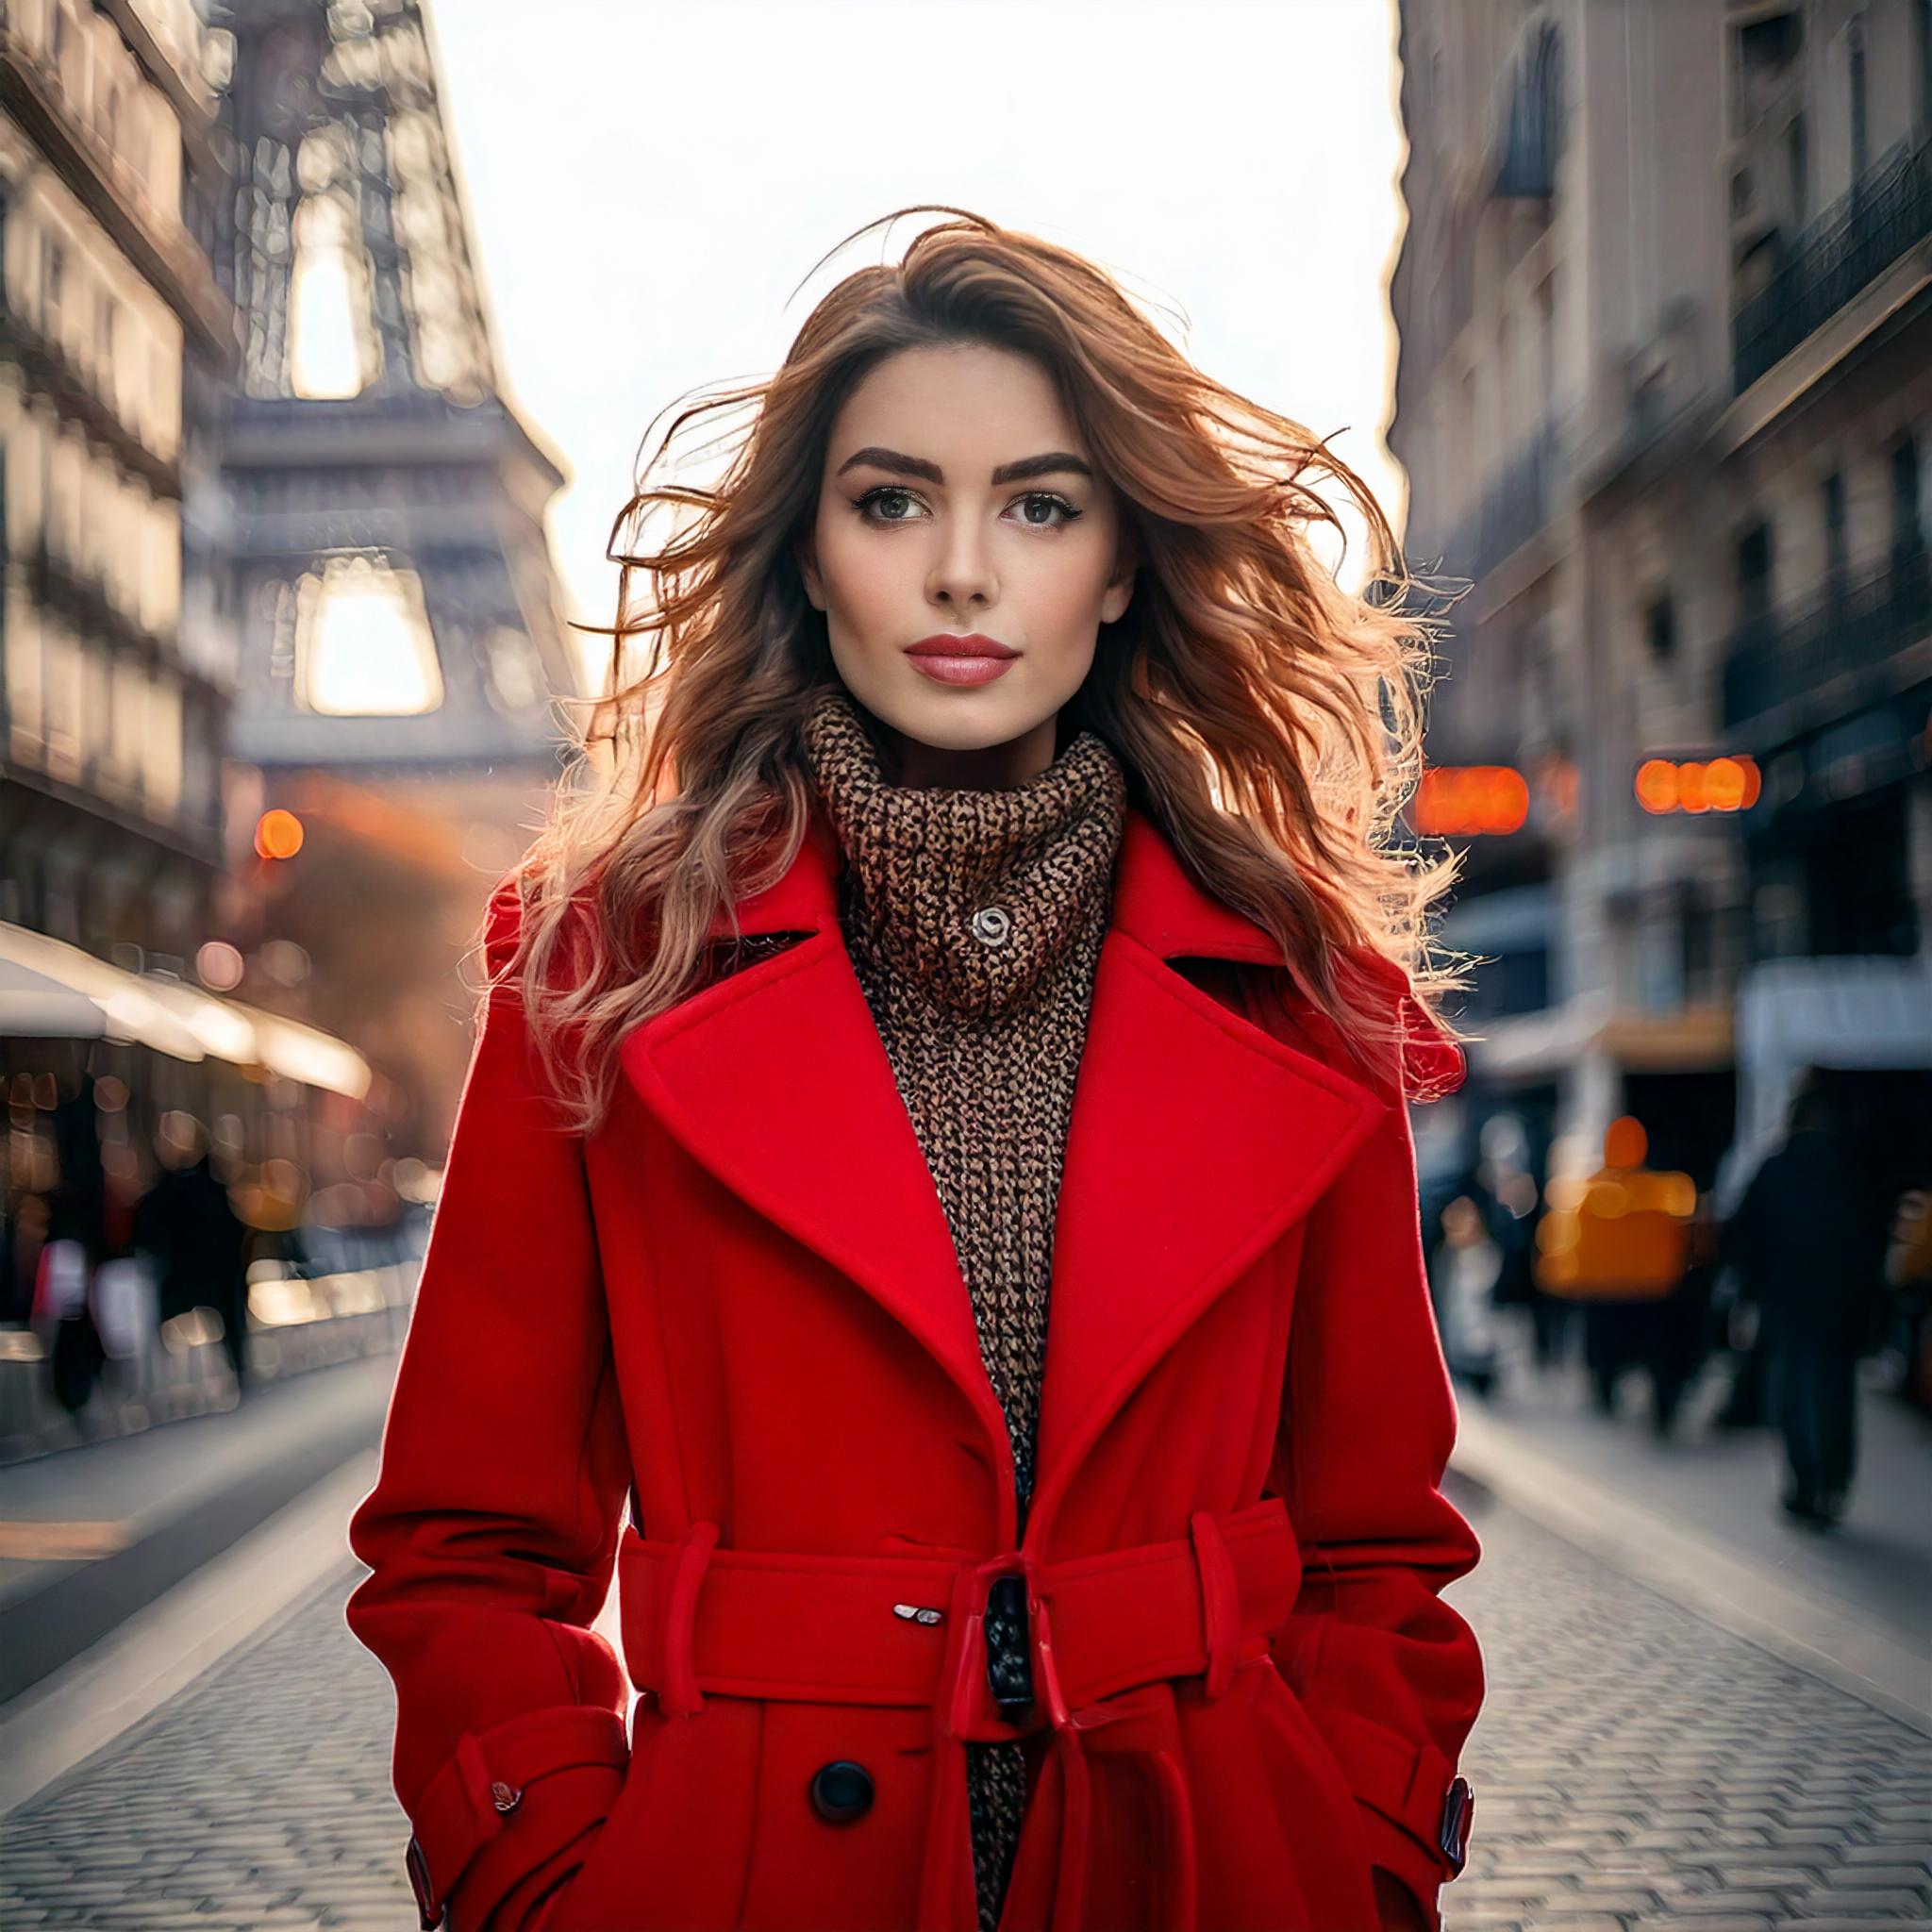
Each photo was generated in Adobe Firefly in about 10 seconds.
It’s all down to economics
As always, the bottom line is economic. In an era of fast fashion and 24-hour news cycles, the convenience of GenAI has the potential for reducing production costs. The economics of GenAI images produced on the spot without the time and cost of hiring photographers and models will make GenAI photos commonplace in media and advertising, a cost-saving that simply can’t and won’t be passed up. Photographers may still be needed to photograph the item, but after that?
Will AI photography end up like ultra-processed foods—a quick fix for the masses? Definitely, yes. It’s already built into phone cameras. Serious photographers will continue to be more discerning. However, most consumers couldn’t care less if what they’re looking at is real or AI’d. It may sound flippant, but it’s true. And, let’s face it, for many run-of-the-mill commercial images, it wouldn’t matter one way or the other. What ever looks good, right?
But also, no. There will always be room for those who appreciate story-telling by humans, and the art and craft of making fine, authentic photographs. Authentic photography will likely become niche, like vinyl records and gelatin silver prints, but it will still exist.
In the meantime, it comes down to, ‘photographer beware’. Choose and use your tools wisely. Use GenAI all you want, but, if you plan to submit photos for contests or competitions, or simply want to work within the limitations of authentic photography, then be careful of the apps you edit with and the tools you make use of.
Thanks for reading! If you have any questions about AI and Authentic Photography, be sure to add a comment.
This work is copyright ©2025 Terry A. McDonald
and may not be reproduced in whole or in part without the written consent of the author.
Please SHARE this with other photographers or with your camera club, and consider subscribing to receive an email notice of new blogs.
Have a look at my work by visiting www.luxBorealis.com and consider booking a presentation or workshop for your Nature or Photo Club or a personal Field & Screen workshop at Workshops.
