BOLO! Upcoming Presentations
522 words; 4 photos; 3-minute read
Next week I have two evening presentations lined up:
- Monday 15 Sept., Hamilton Camera Club, “Just Photography” — an exploration of the grey area between authentic photography and digital art. At what point does the use of third-party editing and Generative AI turn your photographs into digital art?
- Wednesday 17 Sept., Guelph Photographers Guild, “iPhoneography”—how great photographs can be made with phone camera
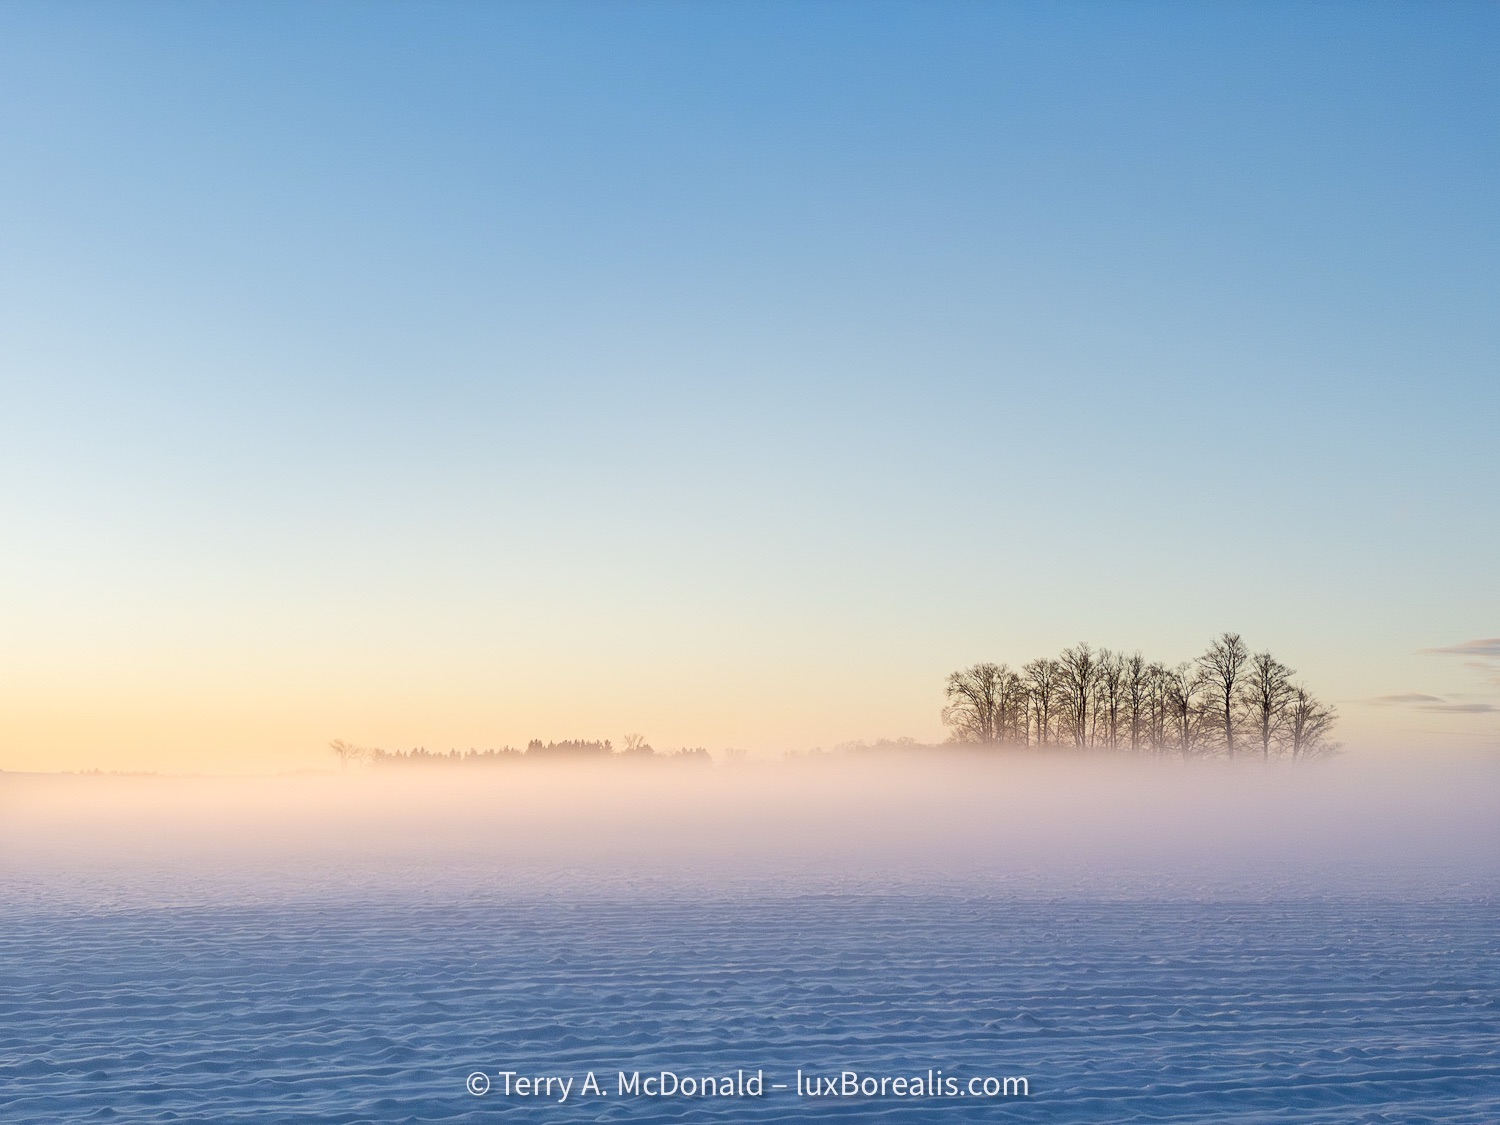
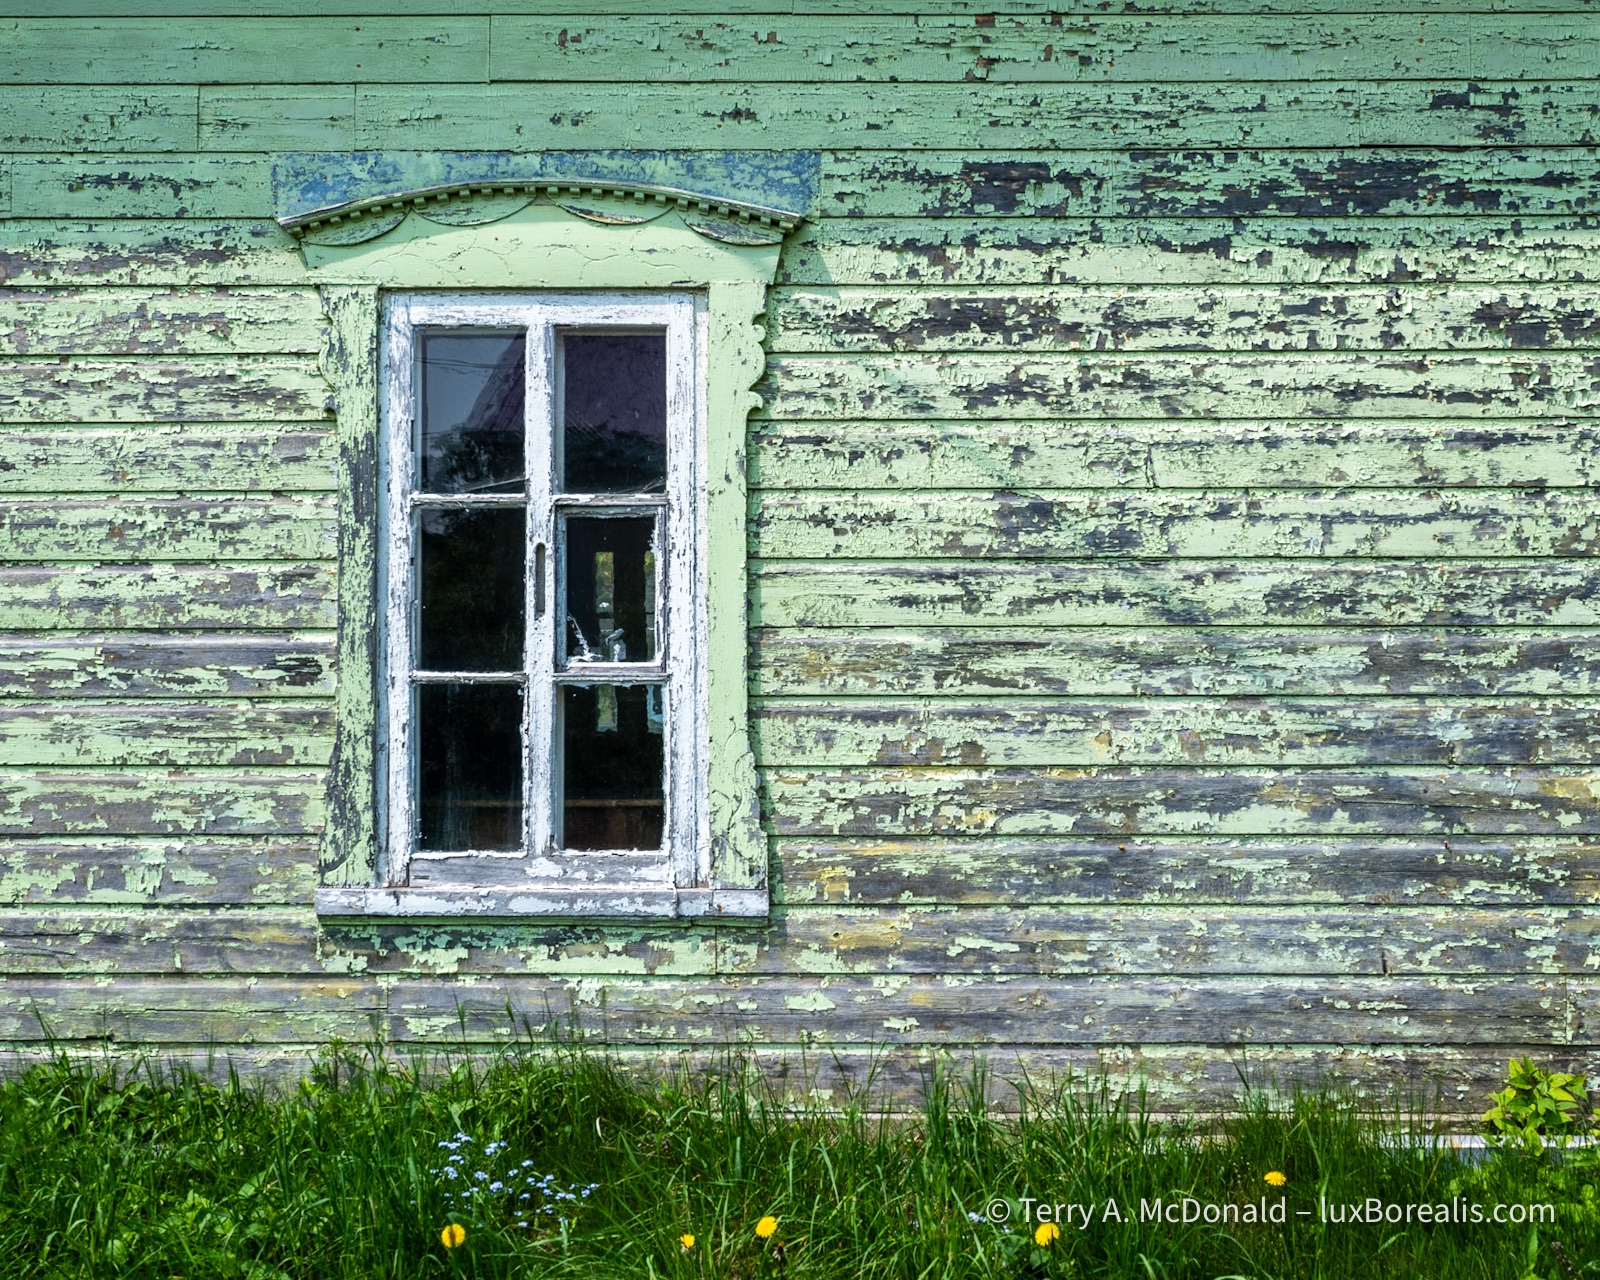
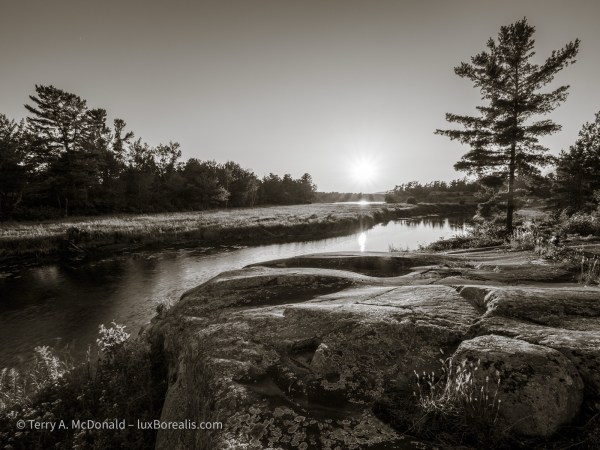
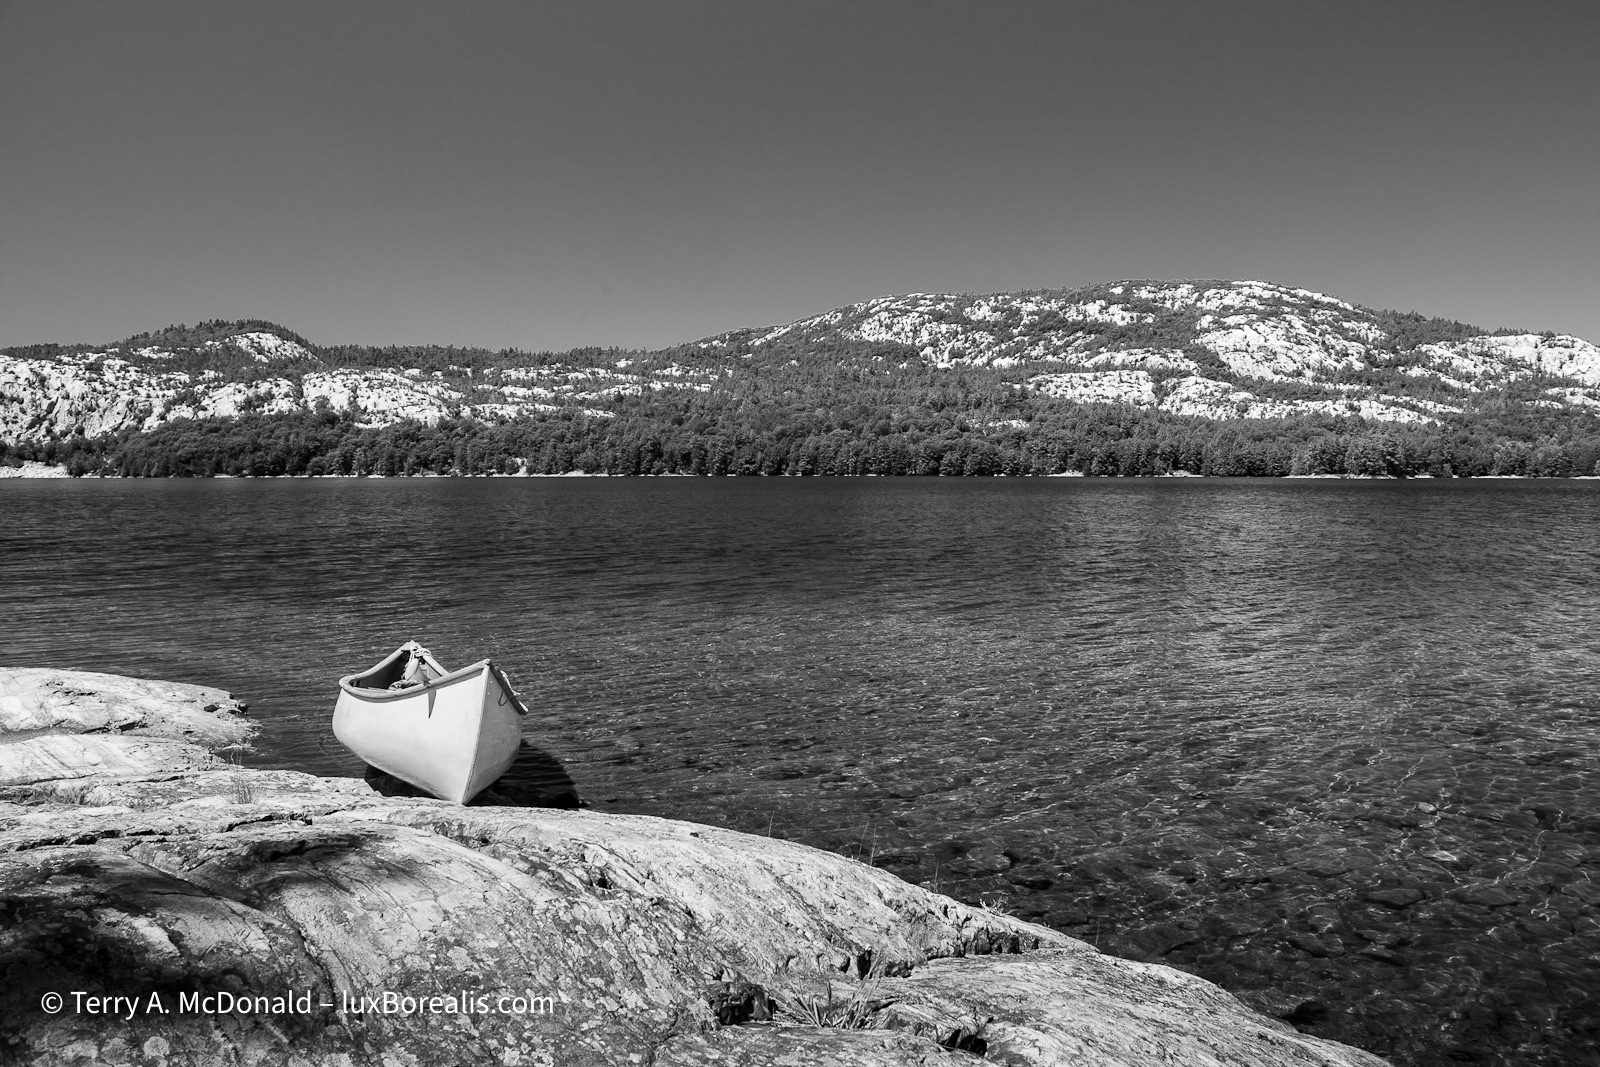
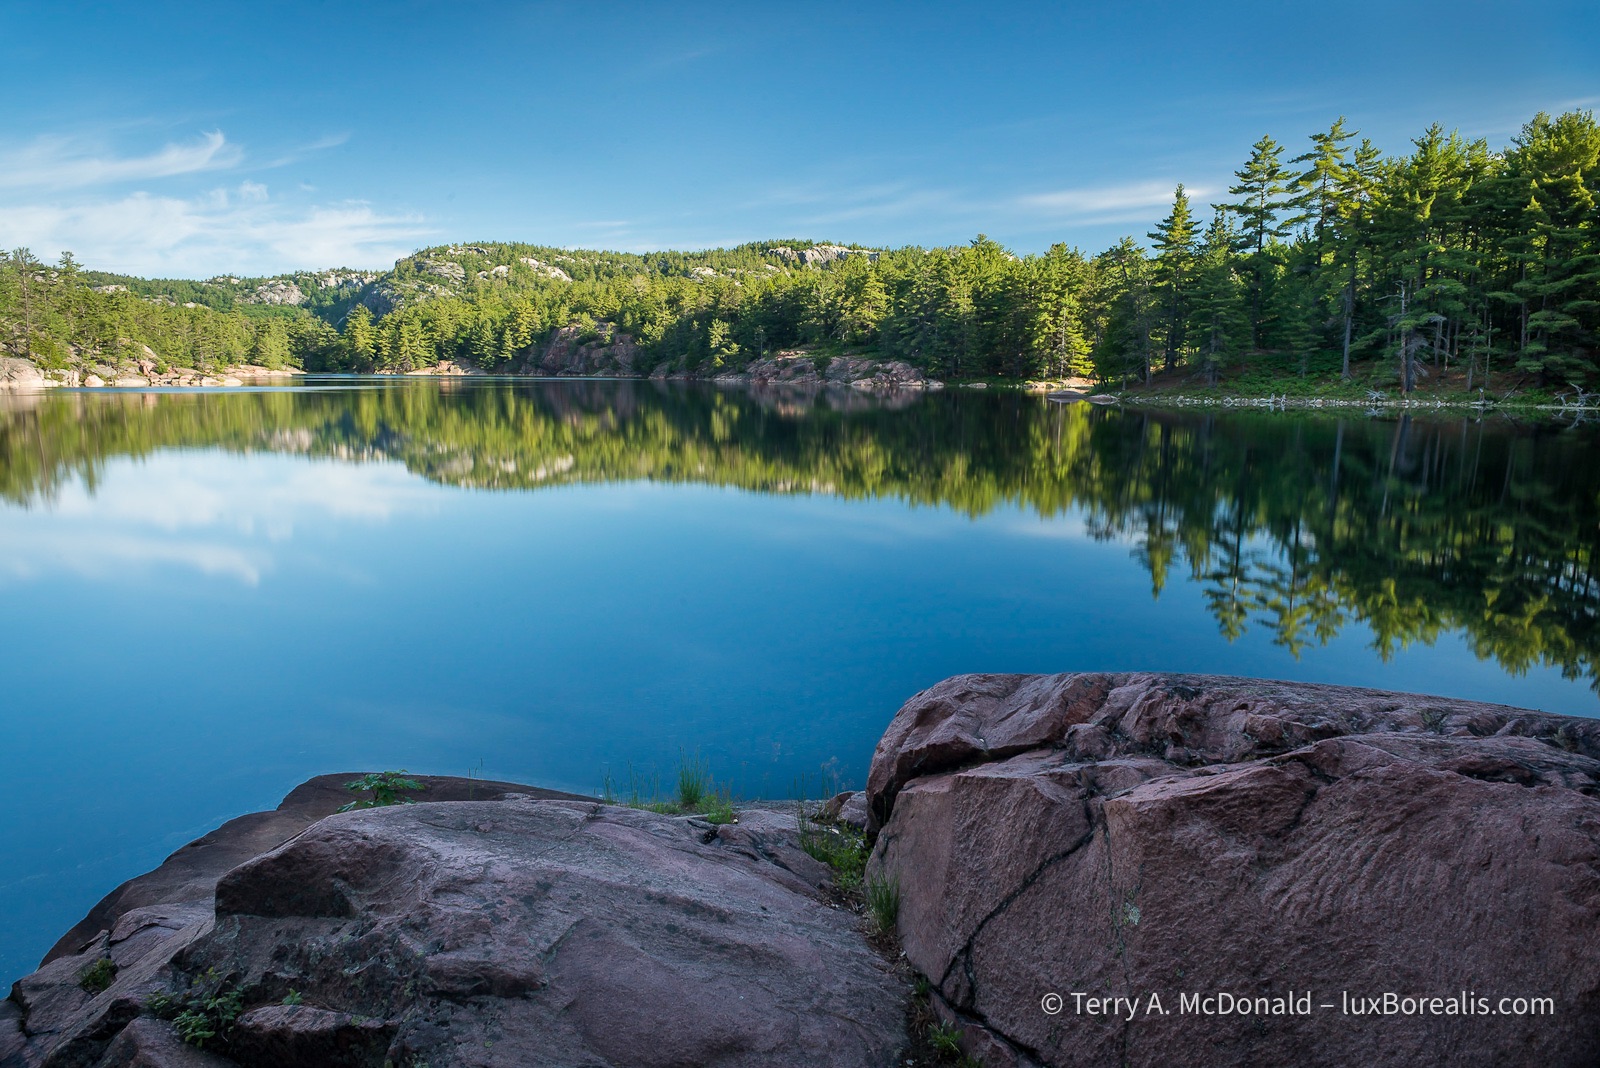
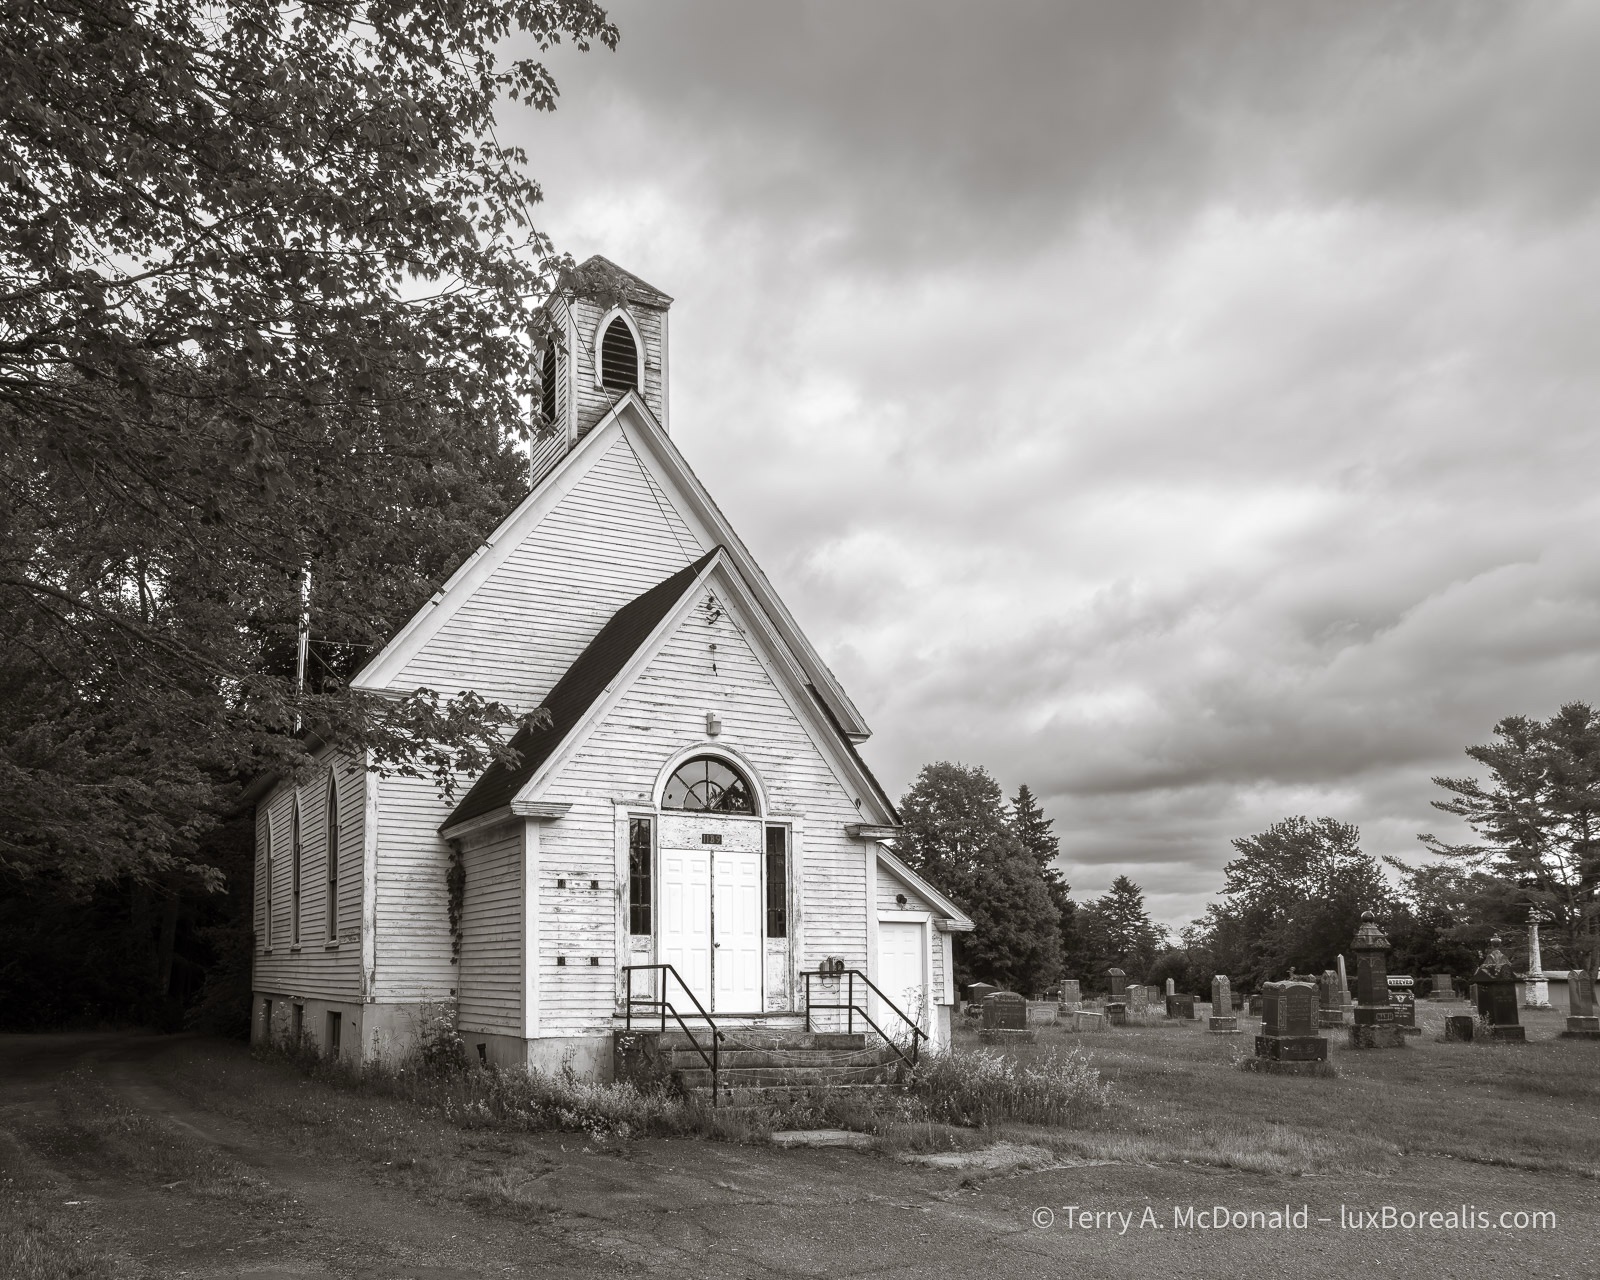
Just Photography—Pure & Natural
As I wrote in an earlier blog post (Navigating the AI Juggernaut), there is no escaping AI these days. Along with Third-Party Pre-Sets, the two technologies are speeding up the editing process while providing unlimited creative freedom. But, are AI and Pre-Sets also eroding the authenticity of photography?

If it is not acceptable to judge AI images and photographs in the same competition, how much AI or Third-party editing should be permitted?
It seems everyone and every photo app company has jumped on the AI bandwagon creating this unspoken expectation that we accept and adopt these push-button editing solutions because they will make our life easier. I’m asking the question, should we?
What might be ideal for commercial photography is playing havoc with competition photography. And what about decorative photography—to what extent are AI-users willing to divulge to clients their use of AI and Third-Party pre-sets in making a photograph they claim to be ‘theirs’?
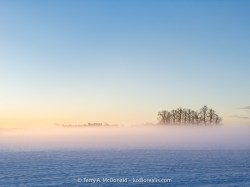
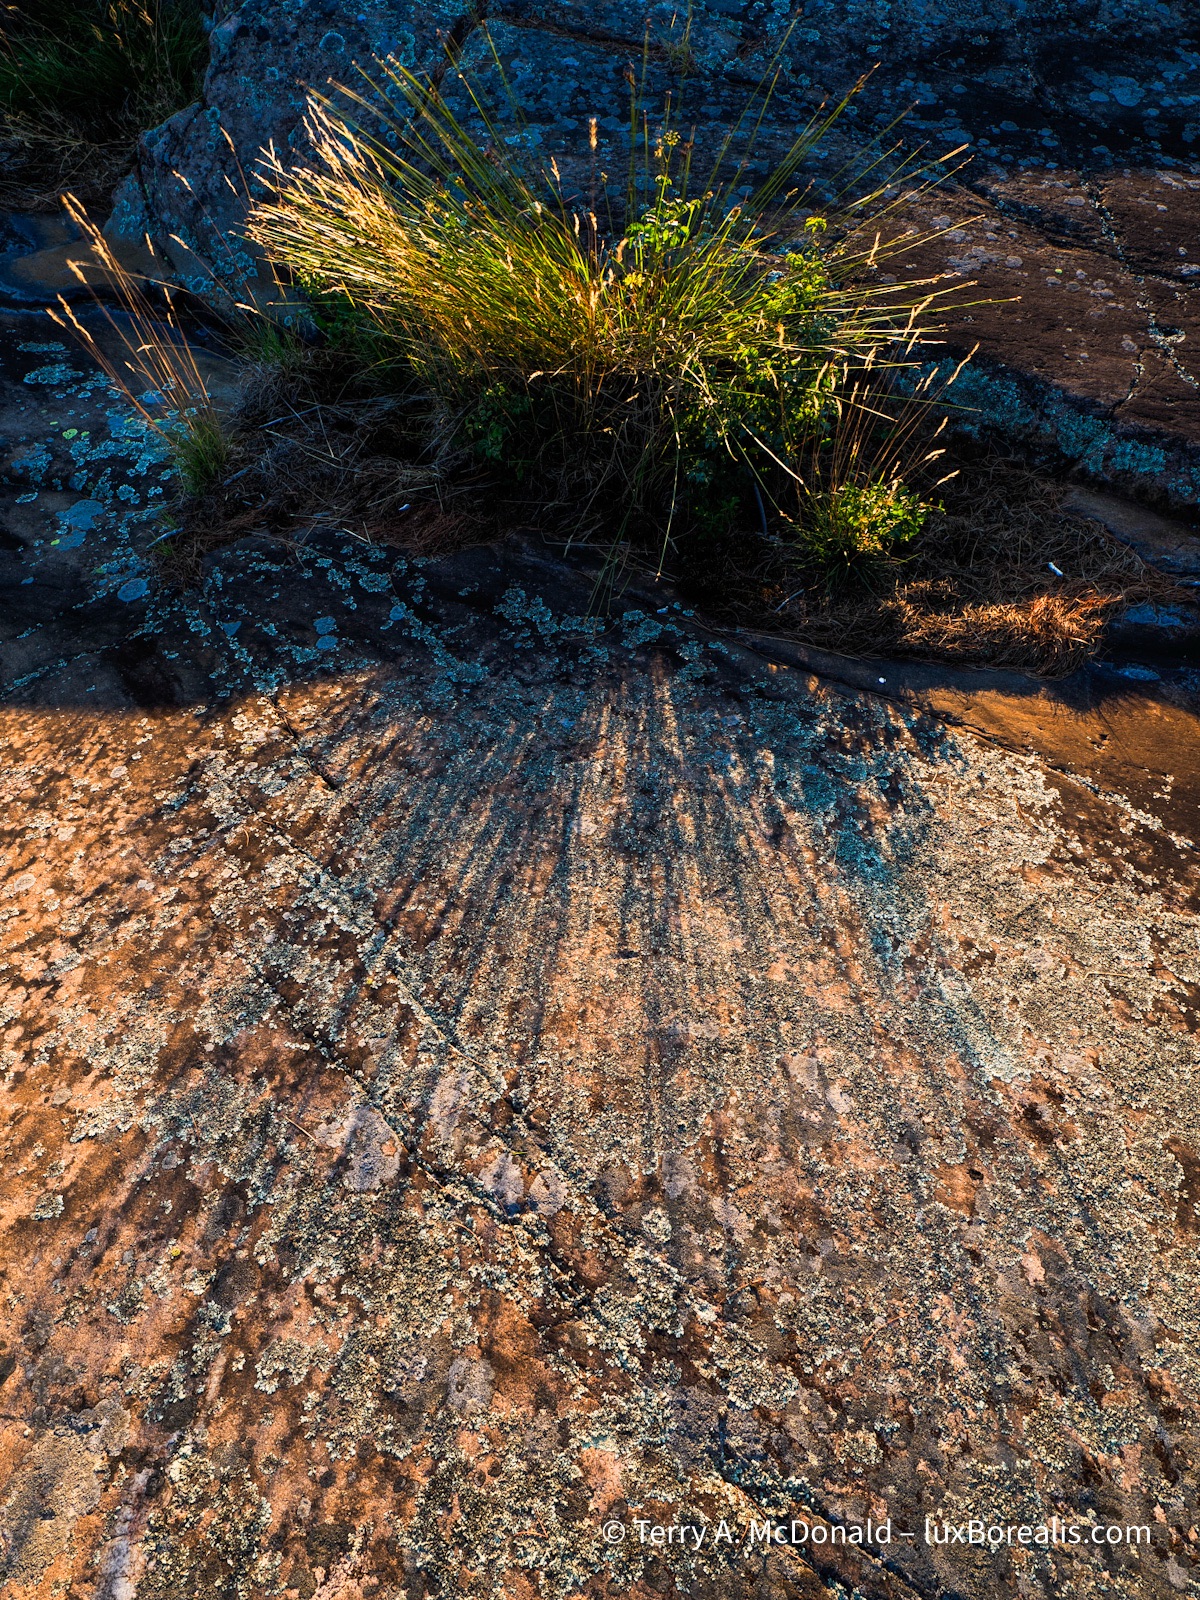
28mm | ƒ5 @ 1/80 | ISO 100 | Lightroom | #AuthenticPhotography (made without the use of third-party pre-sets or Generative AI)
With blue hour and golden hour pre-sets, generative fill, expand and replace, at what point does the photograph stop being a photograph and become digital art? Can digital art be called photography? Is it possible to carve out a space for Authentic Photography? What, exactly, is Authentic Photography?
Many photographers are grappling with these questions everyday. The blurred lines created by these advances represent the grey areas we will be exploring on Monday evening with the Hamilton Camera Club.
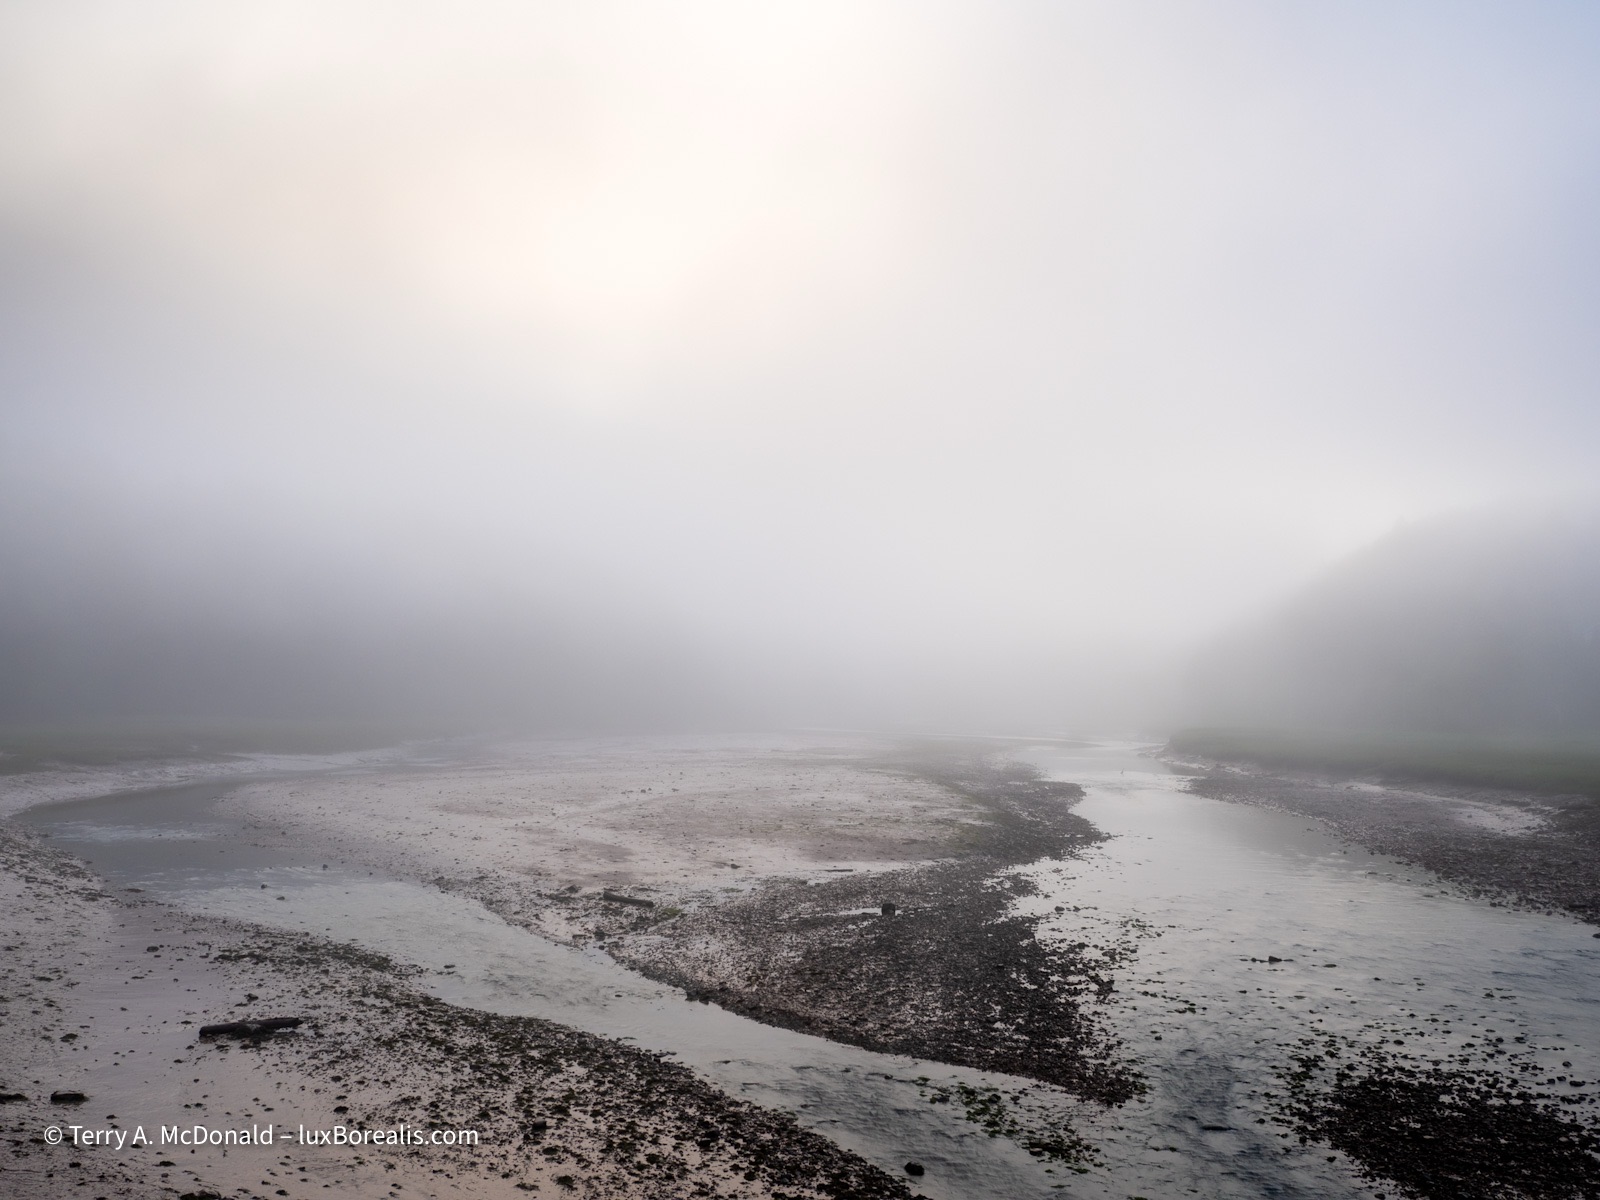
iPhoneography
The ubiquitous phone camera. With us everyday and every waking moment of our 21st century existence. Though we often treat them as such, they are far beyond the Instamatics of last century. Are we really taking full advantage of the cutting-edge technology sitting in our pocket or purse?
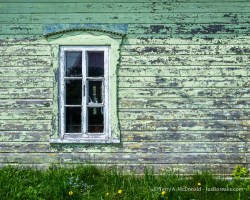
iPhone 8 Plus — the camera that’s always with me.
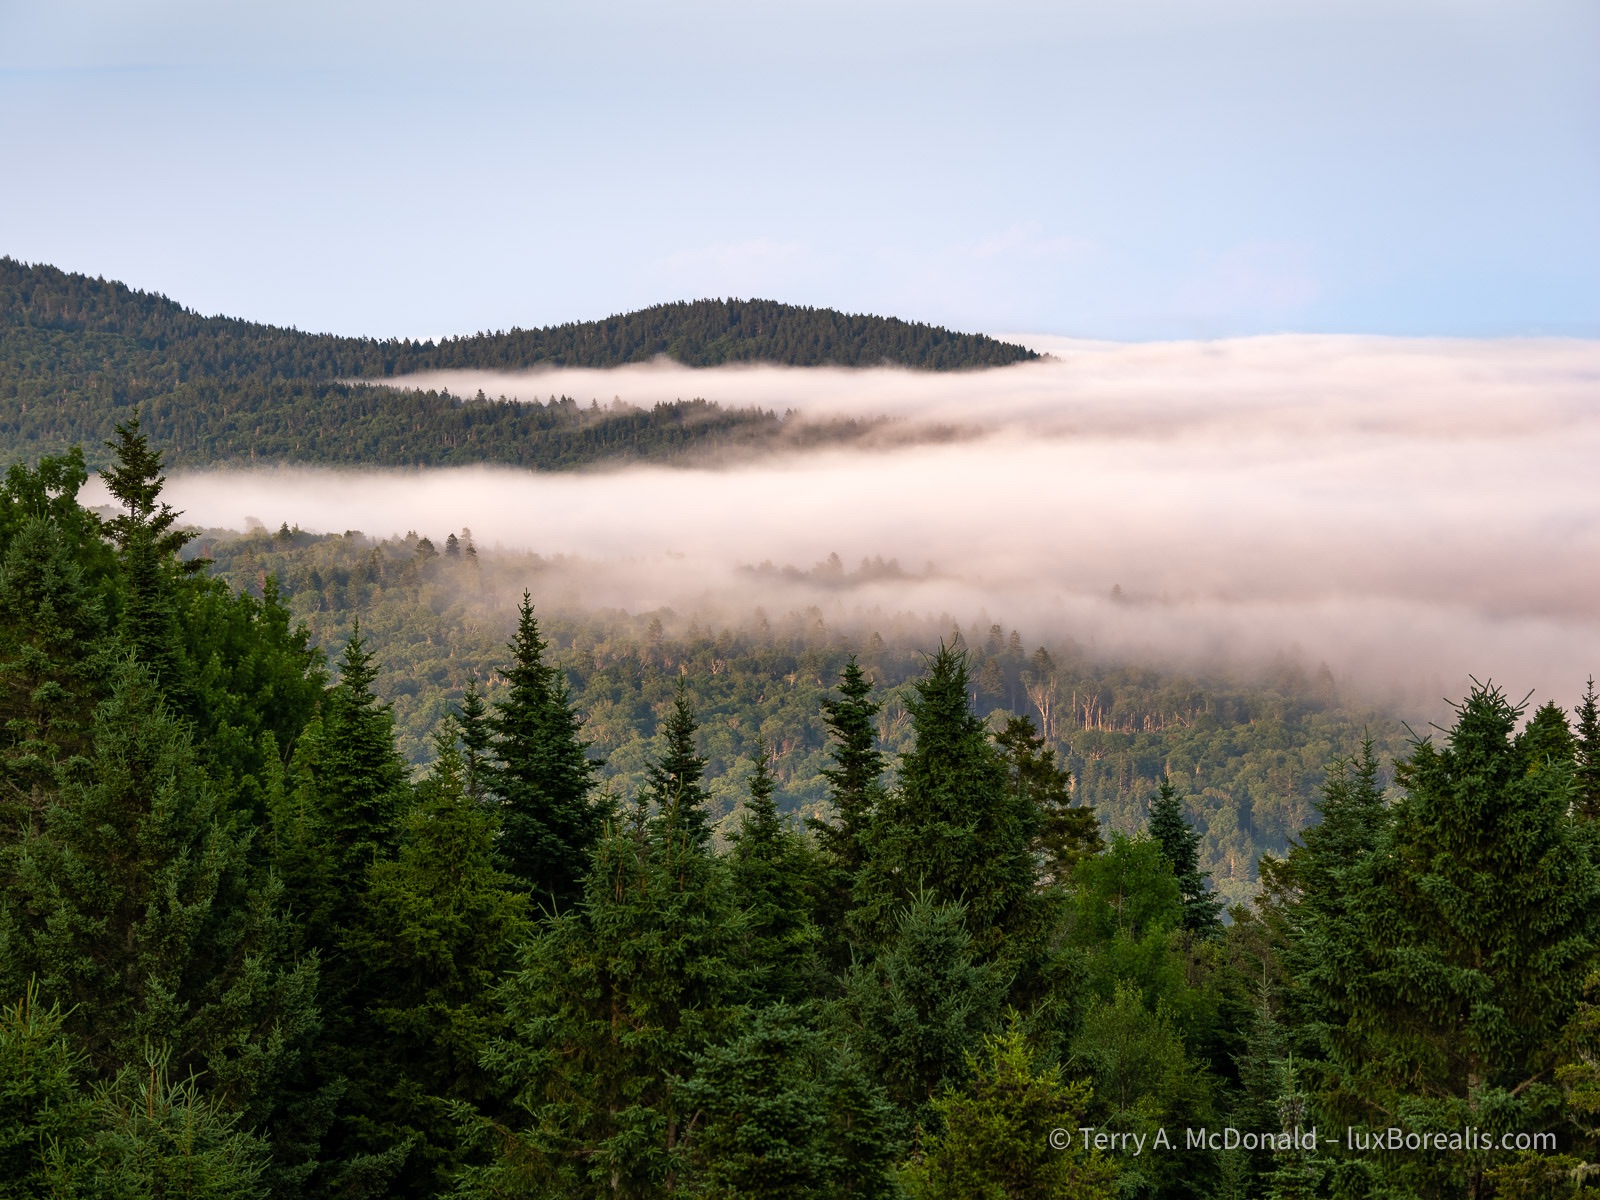
Like you, I shoot with a ‘real’ camera. But my camera and sensor agnosticism has led me to explore and unlock some of the potential built into phone cameras. I’ve learned that the versatility of phone cameras, despite the limitations of sensor size and lenses, can result in some truly remarkable photographs. Especially when, as Ansel Adams once said, “the most important component of a camera is the twelve inches behind it.”
Join me Wednesday evening with the Guelph Photographers Guild for what I hope is an inspiring presentation unlocking the true potential of the ubiquitous phone camera.
iPhone 11 Pro | 6mm (50mm efov) | ƒ2 @ 1/950 | ISO 20
Looking forward to meeting you next week!
The subscription plot thickens
Topaz Labs enters the subscription fray.
681 words; 4 photographs; 3-minute read
As a ‘founding customer’, I received an email today from TopazLabs, stating that they will be moving to a subscription model. If you use Topaz, you may have received the same email. I was assured that my current desktop version of PhotoAI would remain valid in perpetuity with the standard caveat of free updates being available for up to 1 year after purchase.
So, in some ways, things haven’t changed: buy PhotoAI desktop for USD $199 and use it forever with 1 year of upgrades. Renewals are USD $119 unless you choose to auto-renew which is discounted to USD $99/year.
OM-1 | 60mm Macro )120mm efov) | ƒ8 @ 1/125 | ISO 200 | Lightroom
All of this is confirmed on TopazLabs website. However, a little digging turned up some interesting reading.
A Monthly Subscription has been introduced for each of their desktop apps (PhotoAI, Gigapixel and VideoAI). Photo AI will be USD $35/month. I choked when I saw the price. Why so much? For 12 months, it would be $420!! I just rechecked the website and, sure enough, it really is $35/month. And that does not include additional ‘Cloud Credits’ for faster AI processing.

Huh? What am I missing here? Why would someone pay $420 each year for software that is $200 + $100/year thereafter?
OM-1 | 60mm Macro (120mm efov) | ƒ4 @ 1/80 | ISO 1600| 10-shot in-camera Focus Stack | Lightroom
Currently, I’m paying CAD $16/month (USD $12/mo) for Lightroom Mobile and desktop + Lightroom Classic + 1 TB of Adobe cloud space. It’s easy to forget that this subscription also comes with the highly useful Lightroom Camera for iPhone (with hdr-raw capture), Adobe fonts and a highly customizable Adobe Portfolio website—the platform I use for luxBorealis.com. Adding industry-leading Photoshop (mobile and desktop) puts the monthly cost up to CAD $26/month (USD $20/mo).
You can do the math as well as I can—$35 for PhotoAI versus $20 for Lightroom + Photoshop. It’s a no-brainer. To be fair, Topaz offers WebTools, a series of apps that are similar to, though not as complete as the various desktop modules in PhotoAI, (denoise, sharpen, upscale, etc.). But even they are, collectively, $20/month for an annual commitment of $200. Even Capture One, as industry-leading as Lightroom, is USD $25/month. What’s with TopazLabs?

OM-1 | 60mm Macro (120mm efov) | ƒ4 @ 1/100 | ISO 1600 | Lightroom
Earlier this year, I did a fairly detailed direct comparison of Topaz with Lightroom and DxO: how well could each demosaic, denoise and sharpen raw files? I found the three were almost indistinguishable. So, in my eyes, it seems more than a bit unreasonable for Topaz Labs to be charging as much as they are for software that may match Lightroom in basic image quality, but lacks the complexity and depth of Lightroom as an almost complete editing suite.
Anyway . . . I’m still shaking my head.
On a related note . . . Earlier this week I was approached by DxO HQ in France to evaluate DxO PhotoLab 9. They assured me that it would remain a standalone app and would not be transitioning to a subscription model. I figure it will take me a few weeks to put together a thorough review in the context of someone who is well-entrenched in Lightroom—so stay tuned!
OM-1 | 23mm (46mm efov) + POL| ƒ5.6 @ 1/500 | ISO 200 | HHHR | Lightroom
My hope is that DxO has come through with an editing suite that will be a solid standalone competitor for Lightroom, along the lines of Capture One, if only to make the switch away from subscriptions closer to reality. Interesting, last week Fstoppers had an article The End of Adobe’s Monopoly? Why Creatives Are Switching which has generated much discussion. Perhaps with Topaz’s pricing challenges and a new DxO PhotoLab 9, we may be one step closer to ditching subscriptions.
Thanks for reading! Add your COMMENTS below or your questions. Hit the SUBSCRIBE button to receive notice of each post and be sure to SHARE this with others.
A Week in Killarney Provincial Park—2.4 billion years in the making
1114 words; 14 photographs; 6 minutes
For the past week, I’ve had the pleasure and honour of being the Friends of Killarney Park Artist in Residence.
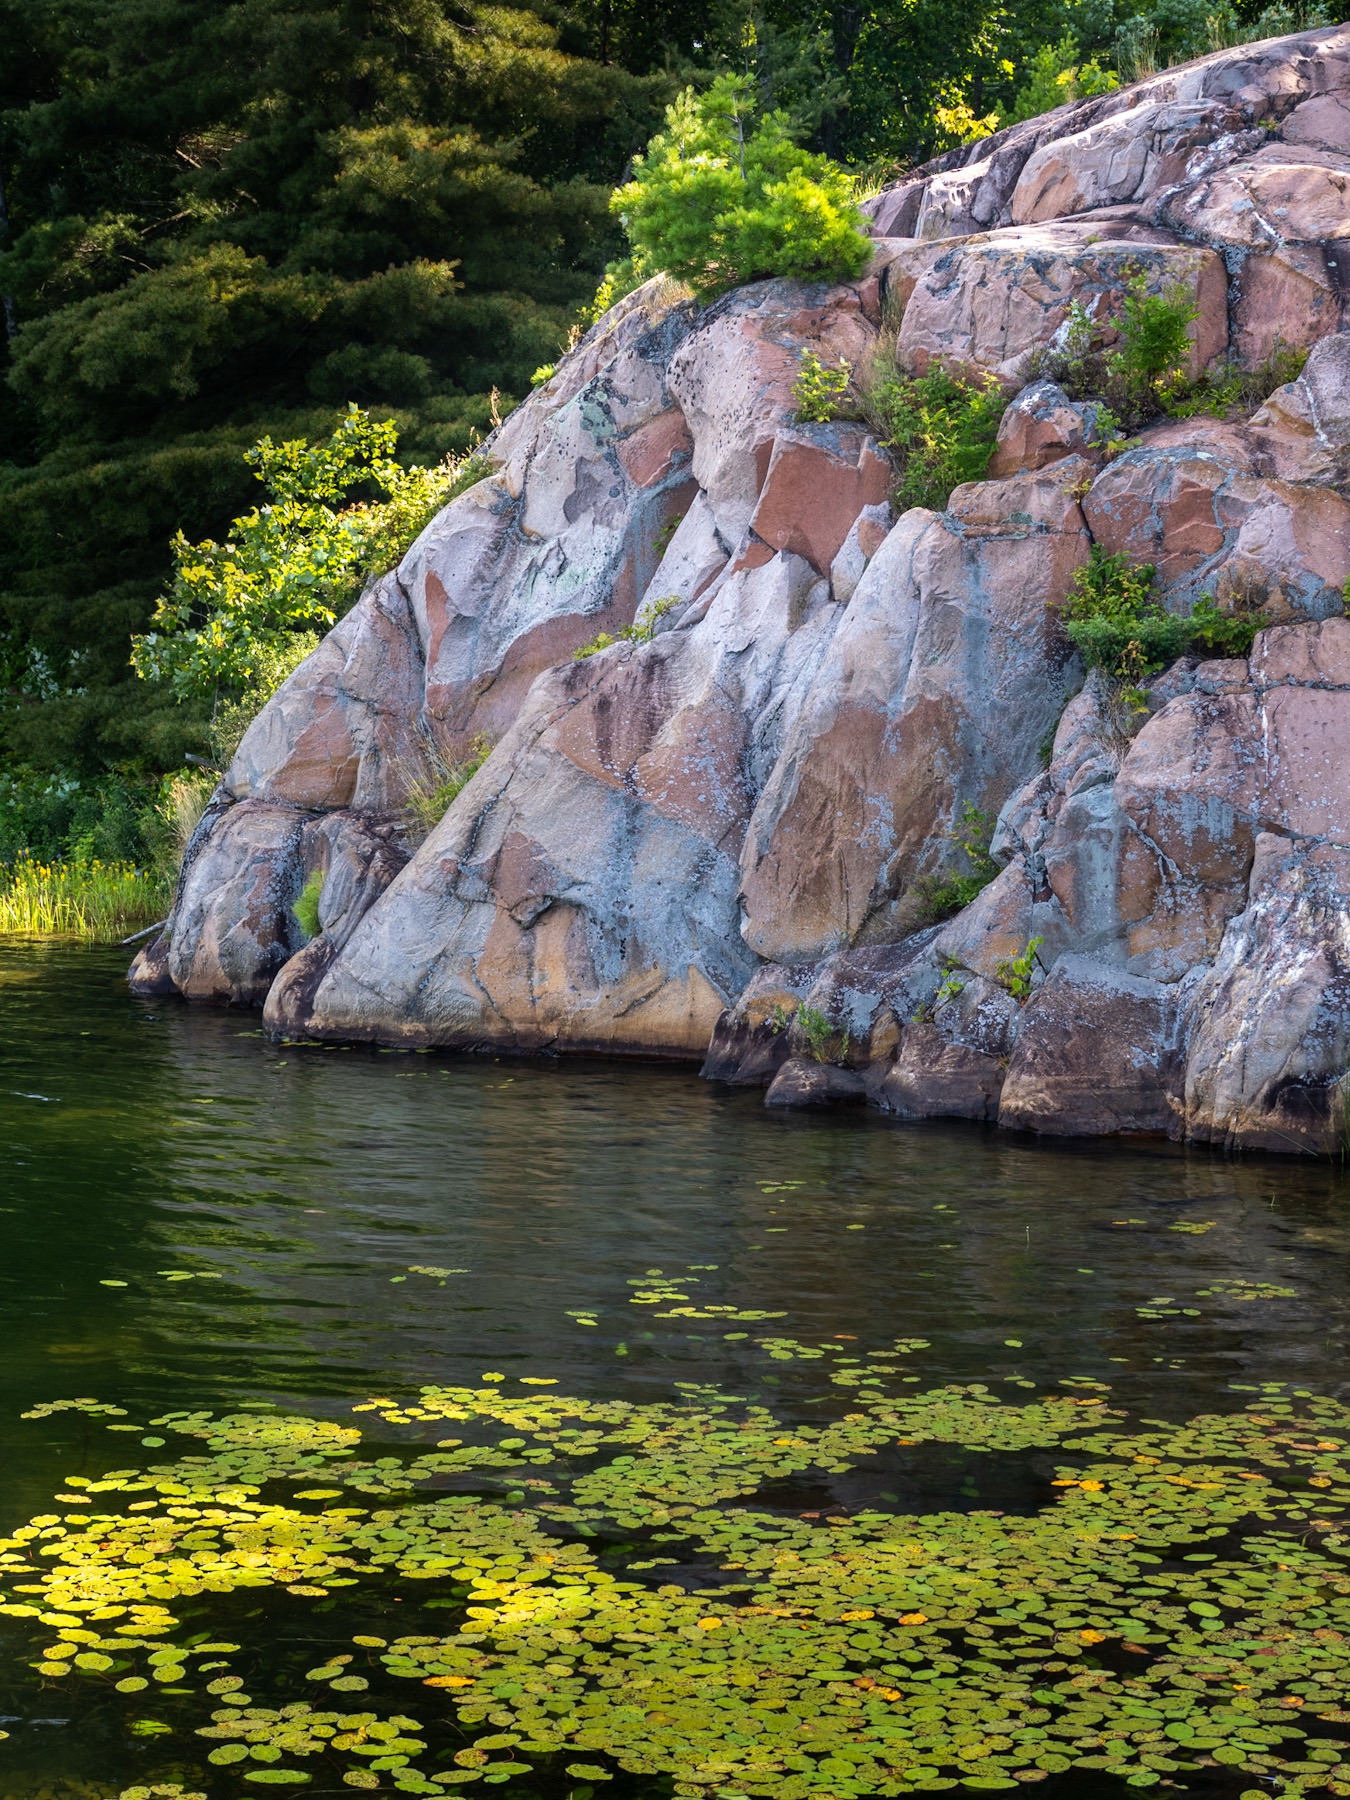
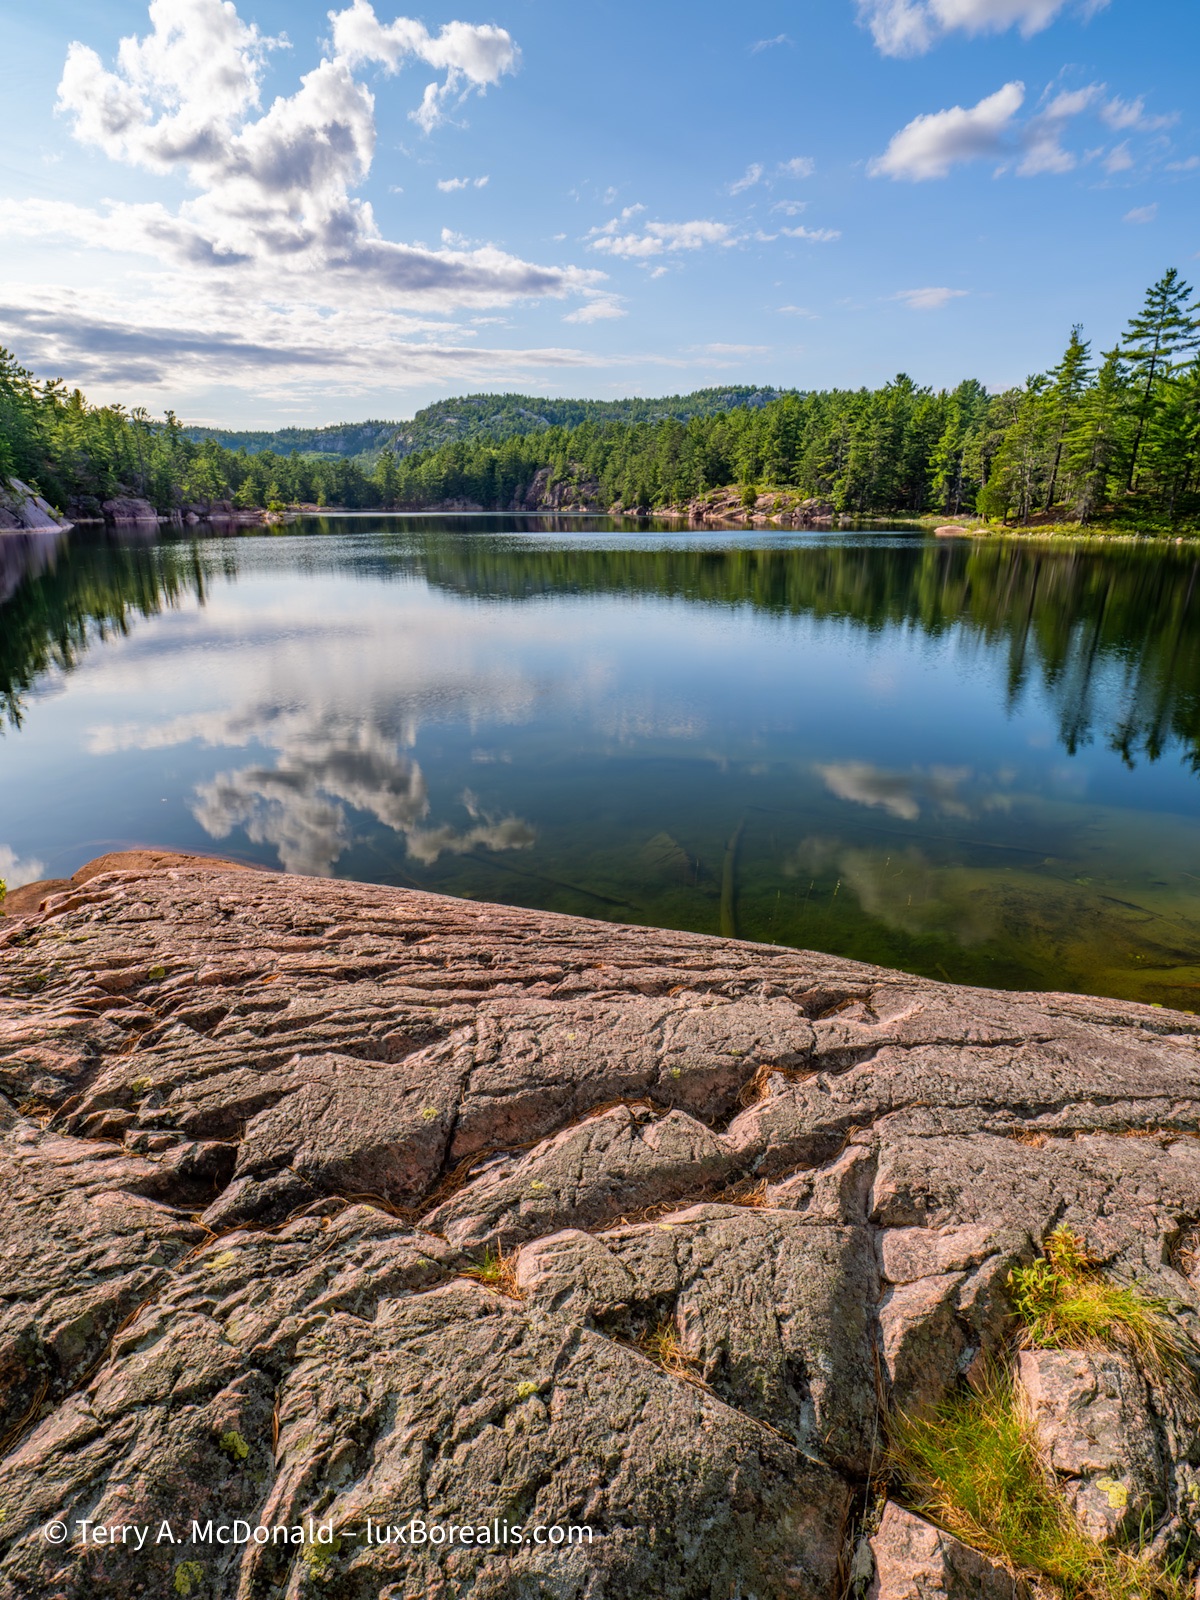
Killarney Provincial Park is truly a gem in the crown of Ontario Parks. From a landscape photographer’s perspective, the unique juxtaposition of the pink granite of the Killarney batholith and the white quartzite La Cloche Range mean more than simply colourful rocks. The two rock types are crucial in determining the biology going on at the surface as well.
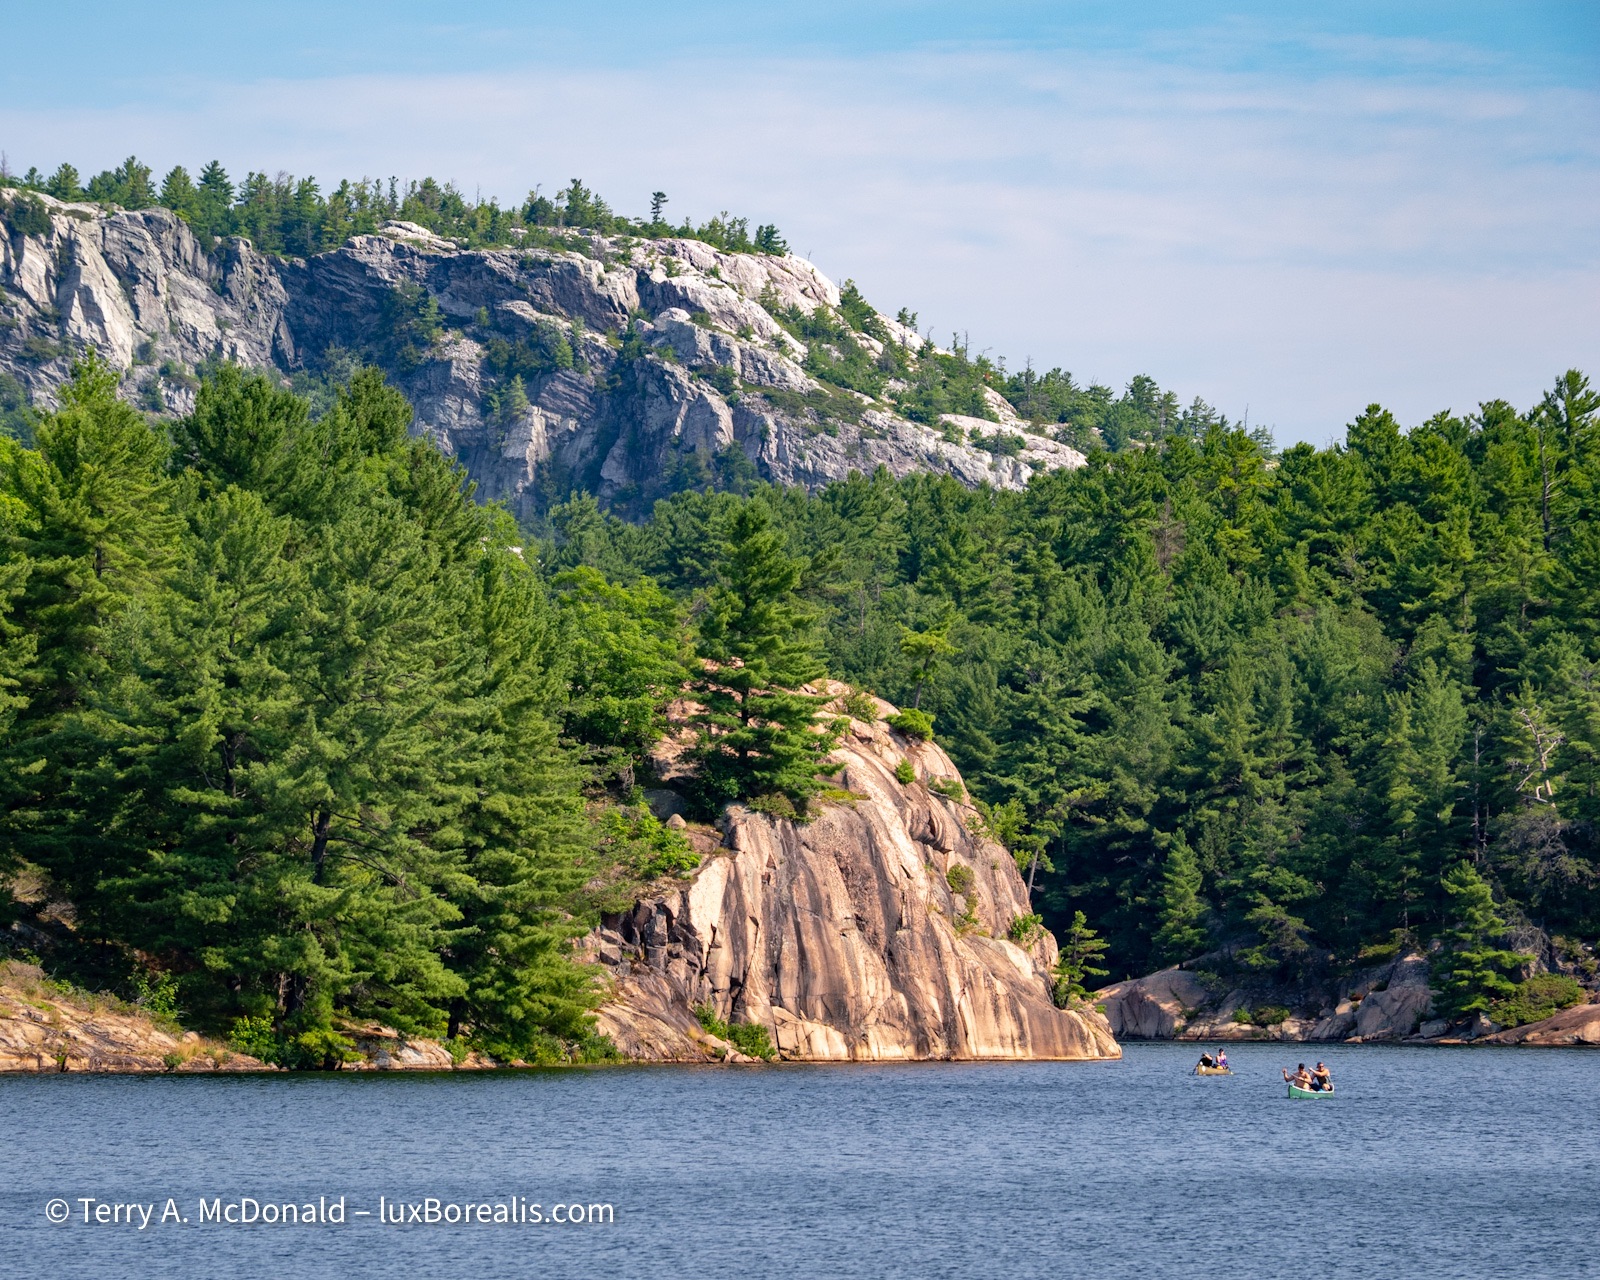
Scale, perspective, juxtaposition, and timing make this the quintessential view of Killarney Provincial Park: billion-year-old pink granite backed by 2.4 billion-year-old white quartzite.
OM-1 | 100mm (200mm efov) | POL | ƒ5.6 @ 1/125 | ISO 200 | Lightroom
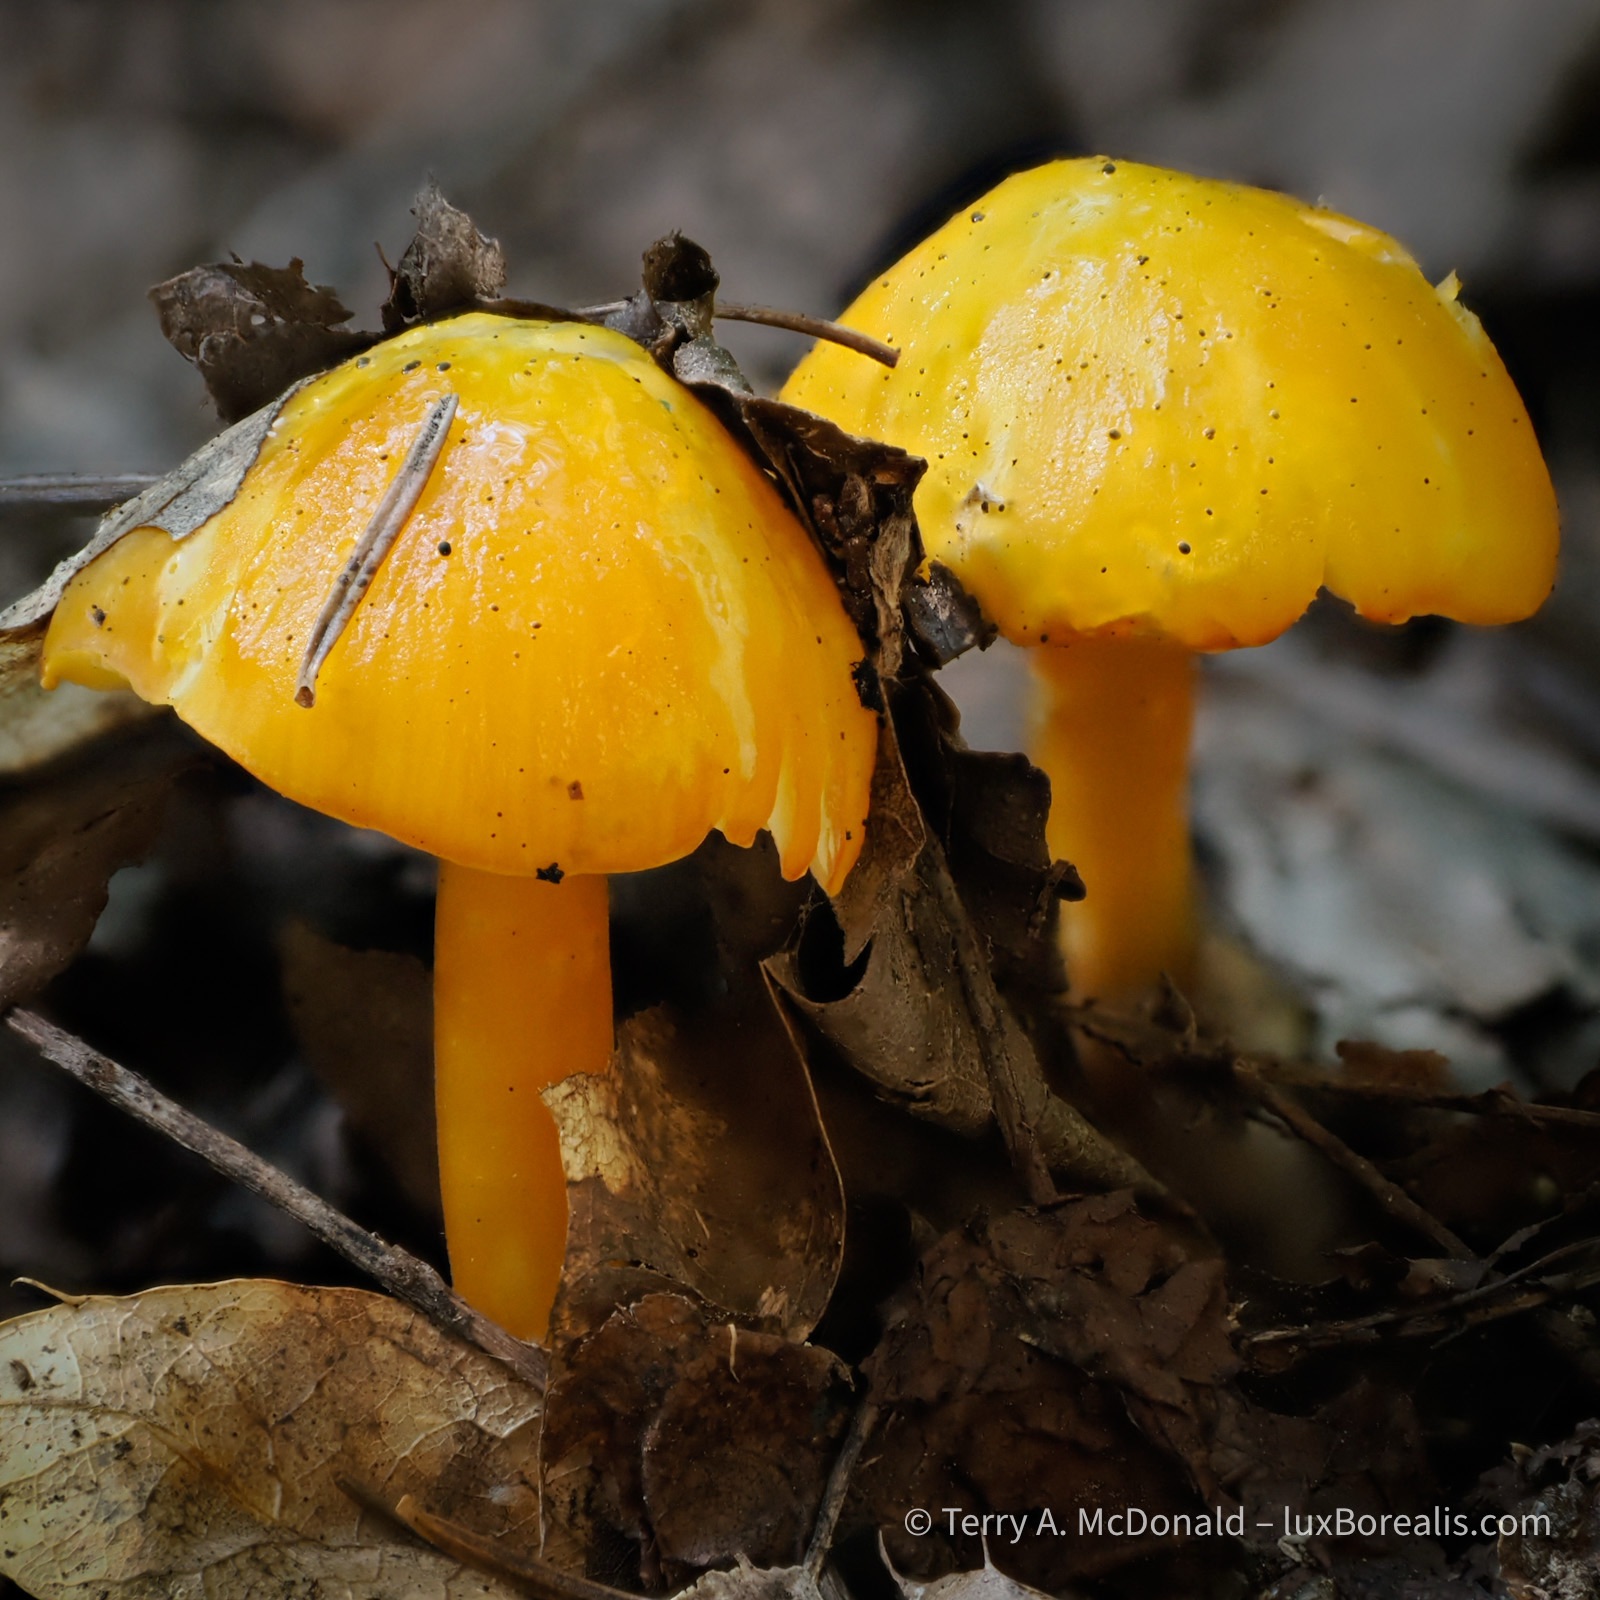
This week, I was overwhelmed by the variety of colourful fungus/mushroom species on display along all of the trails. Rain from the previous week must have triggered them as many were new emergents. My 60mm Macro lens teamed up with in-camera focus-stacking were essential for capturing the depth necessary for clear, crisp photographs.
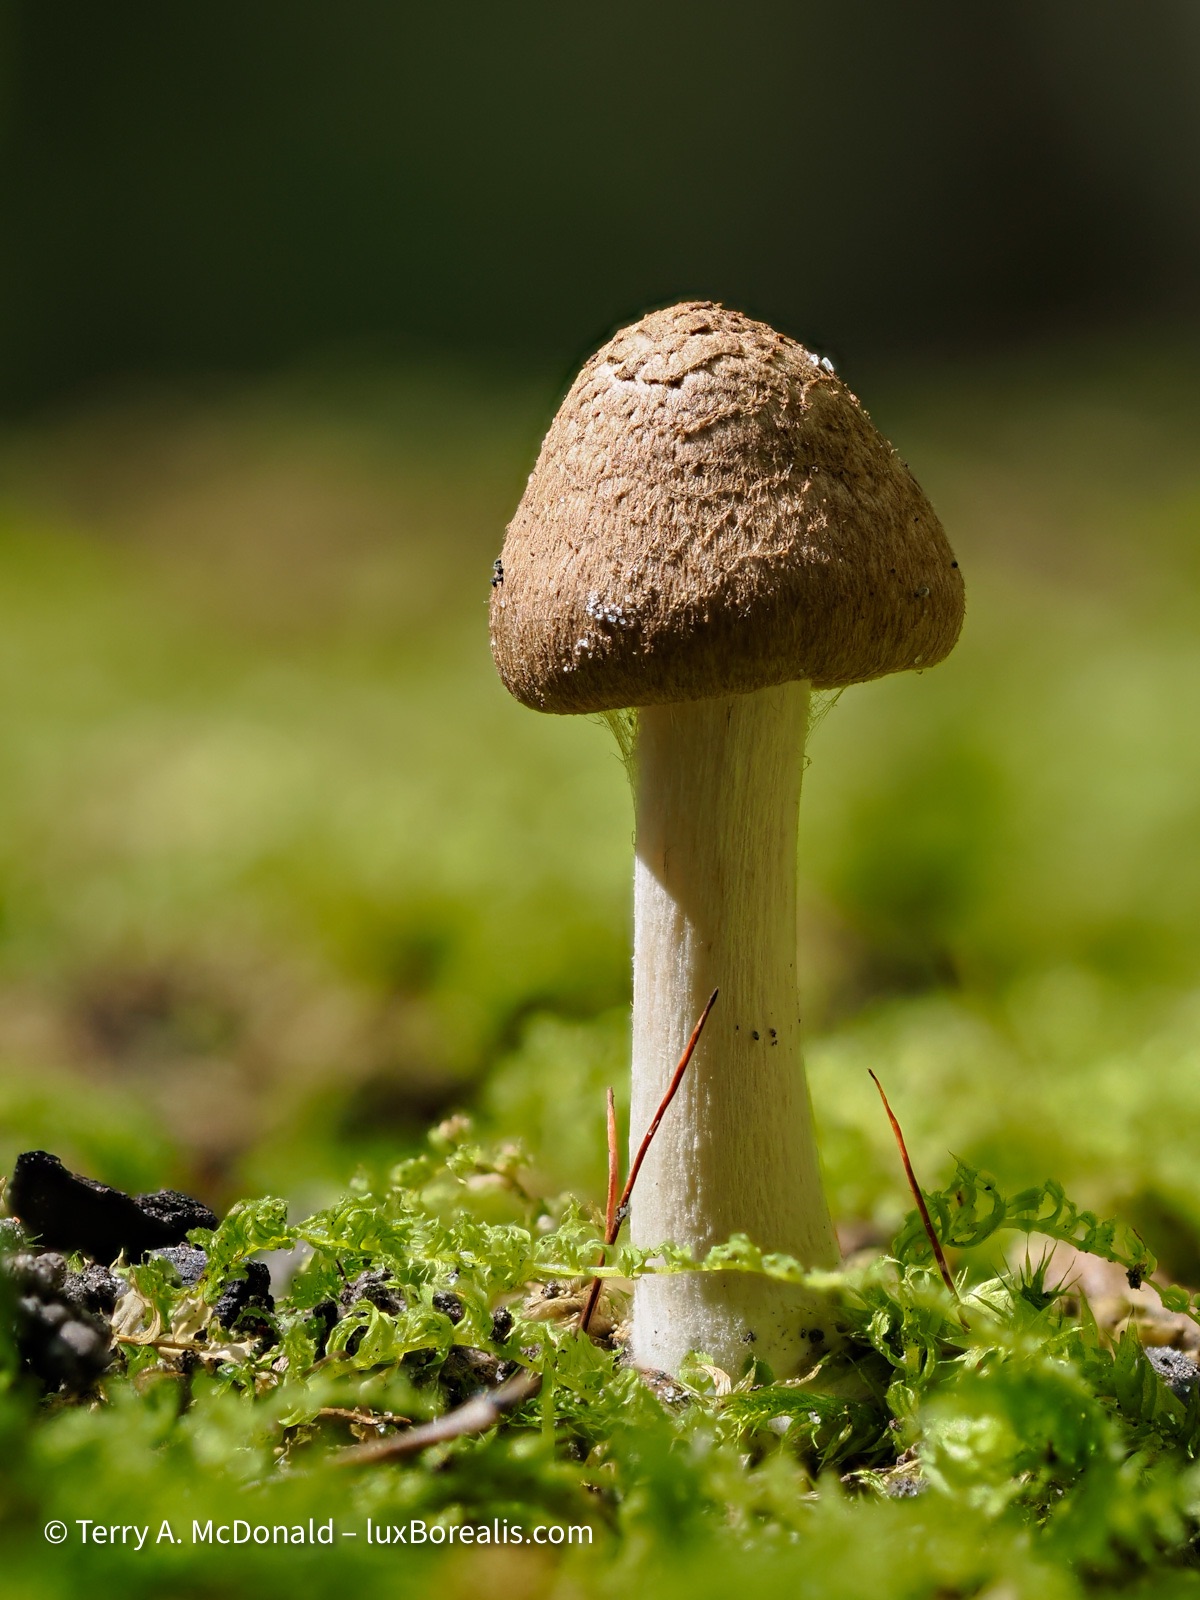
At just 3cm high, this diminutive mushroom was right in my campsite.
OM-1 | 60mm Macro (120mm efov) | ƒ4 @ 1/60 | ISO 200 | 10x in-camera focus stack | Lightroom
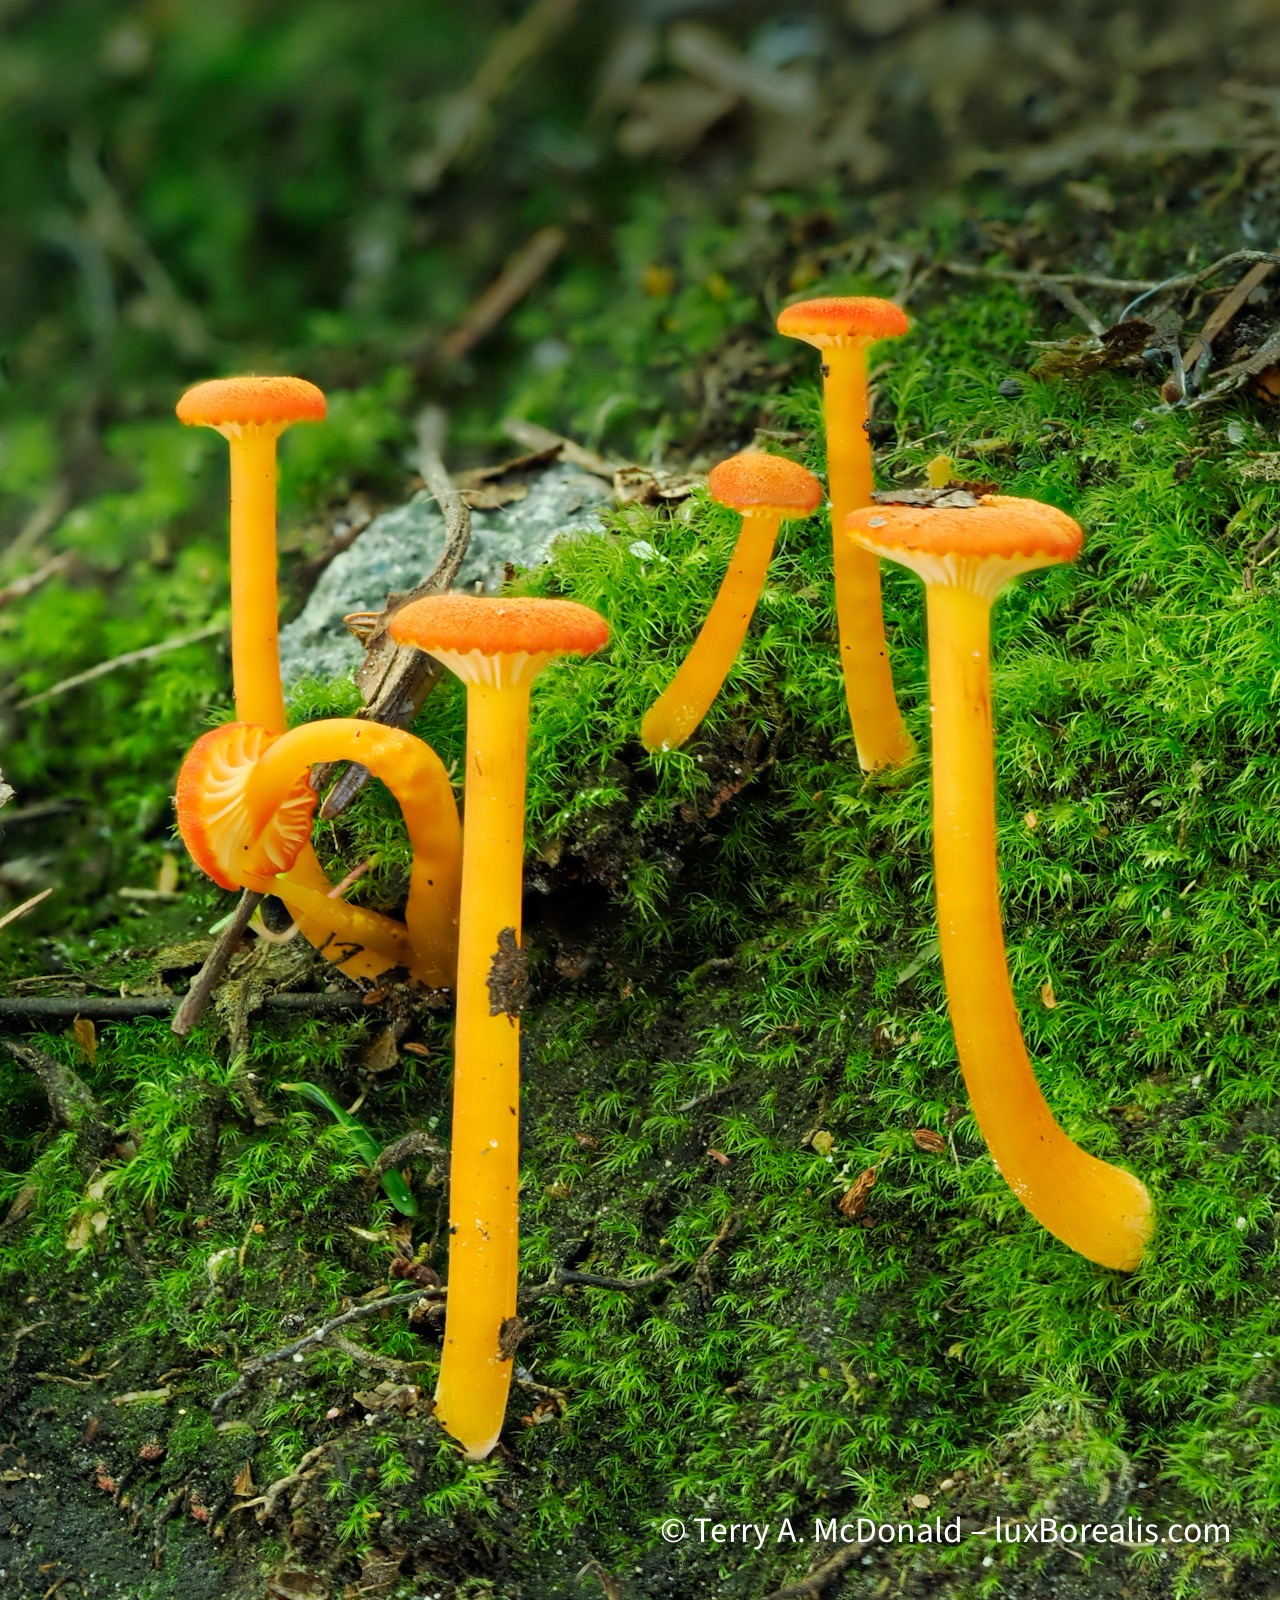
These long, slender mushrooms, found along the campground road, were just 4 to 5cm in height.
OM-1 | 60mm Macro (120mm efov) | ƒ4 @ 1/6 | ISO 200 | 10x in-camera focus stack | Lightroom
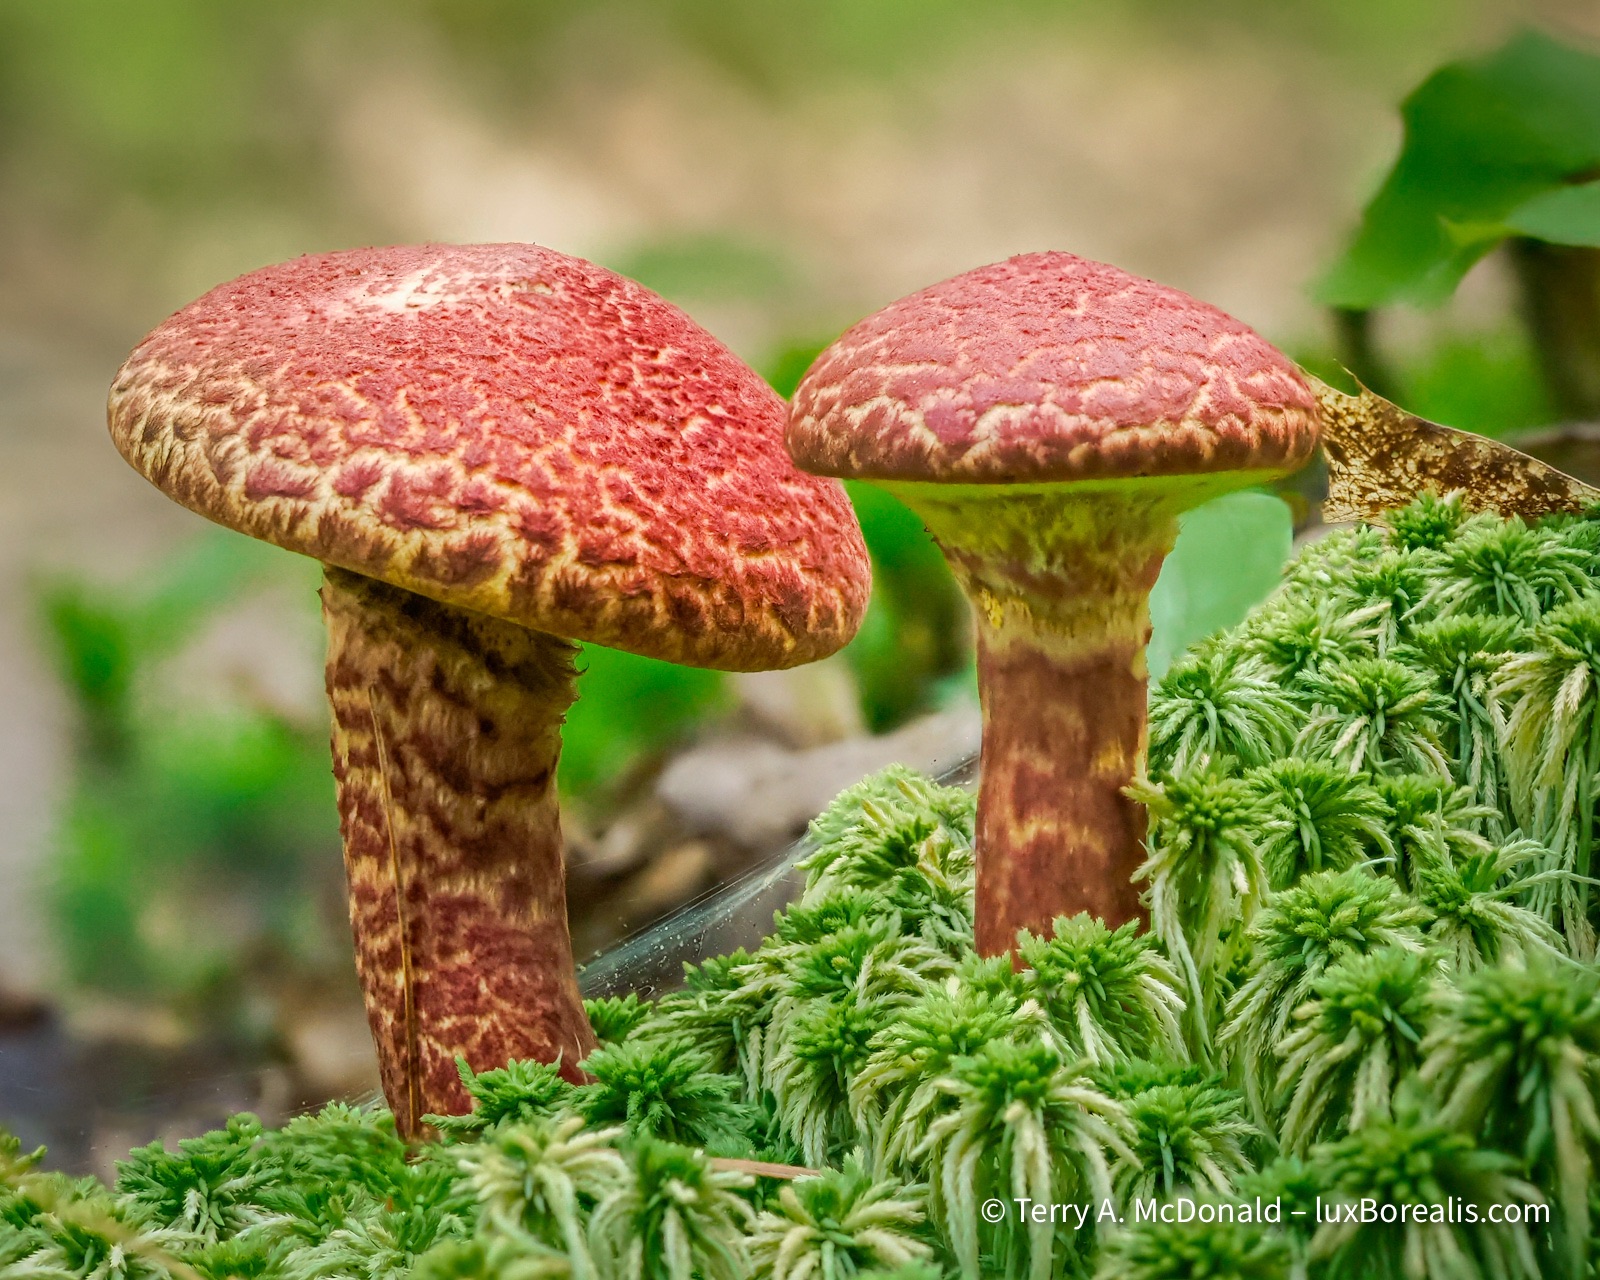
Found in the deep shade along the trail to A.Y. Jackson Lake.
OM-1 | 60mm Macro (120mm efov) | ƒ5.6 @ 1/60 | ISO 200 | 10x in-camera focus stack | Lightroom

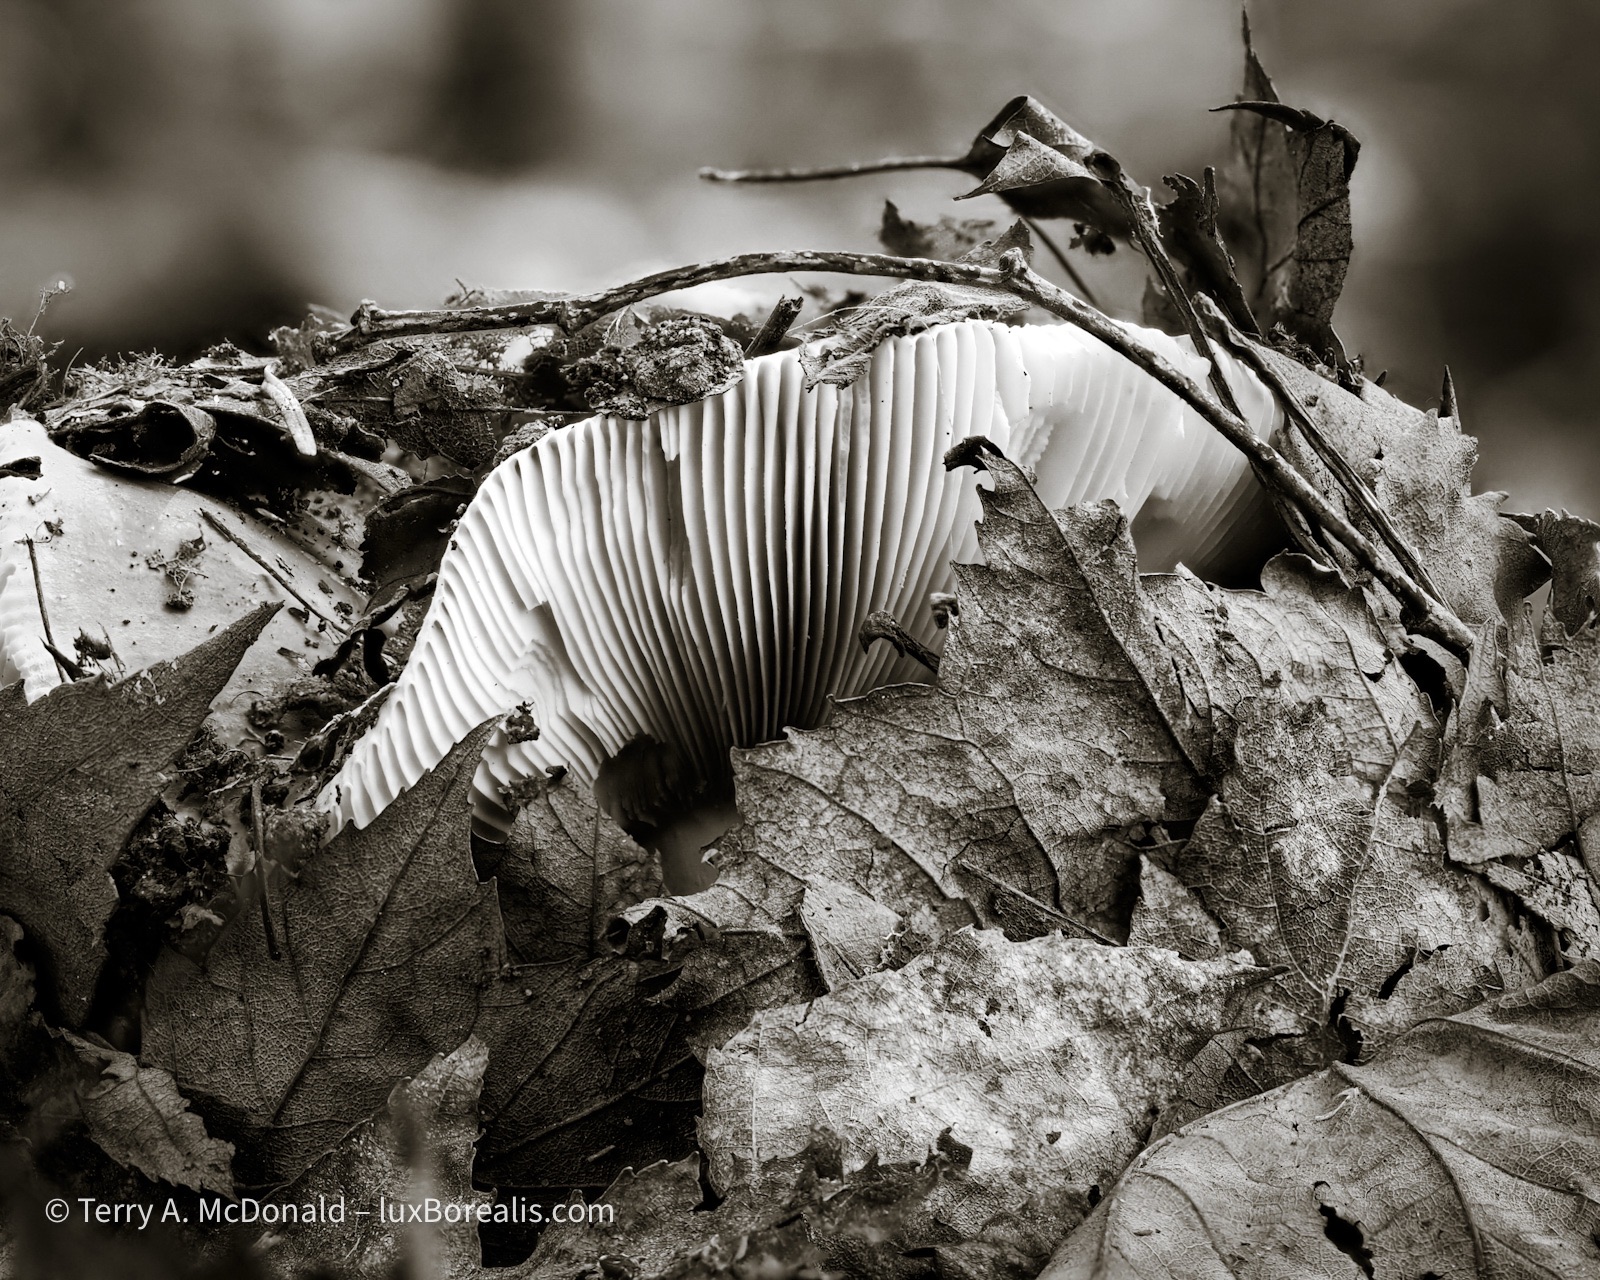
I found these unique fungi along the Lake of the Woods Trail and the Cranberry Bog Trail.
OM-1 | 60mm Macro (120mm efov) | ƒ4 @ 1/50 | ISO 1600 | 10x in-camera focus stack | Lightroom
Aside from determining the names of the different mushroom, the difficulty with mushrooms is that they are at ground level. Despite having a ground sheet, my knees and elbows took a beating. Then, keeping still for 10 consecutive exposures while crouched on all fours isn’t easy! For some, I improvised, resting my hands and the camera on my waist pack camera bag, using it like a bean bag on the ground for support. I’m sure people passing by had a good laugh at this old man with his butt in the air looking at mushrooms!
Using a tripod was certainly an option, but, in the summer heat, I was feeling lazy and didn’t feel like lugging it around with me. Once again, I was pleasantly surprised, shocked even, at how well the internal stabilization of the OM-1 worked. I realize now that I could have (should have) bumped the ISO up for focus stacking to at least 400 if not 800.
OM-1 | 60mm Macro (120mm efov) | ƒ4 @ 1/25 | ISO 200 | 10x in-camera focus stack | Lightroom
Landscapes lagged behind somewhat. In the early part of the week, we were plagued with high temperatures and humidity, turning the blue skies milky, rather than filling them with fair-weather cumulus. Smoke from western wildfires also contributed to the haziness.

OM-1 | 8-25mm at 10mm (20mm efov) | POL | ƒ5.6 @ 1/250 | ISO 200 | HHHR | Lightroom
From a workshop perspective, things were slow at the beginning of the week. However, after my slide presentation Wednesday evening—Ontario’s Natural Gems: Nature photography in our own backyards— attendance picked up for the Thursday and Friday programmes. We had a great range of abilities—from beginners to seasoned photographers—and cameras—phones, point and shoots, DSLRS and mirrorless—and ages—from under 10 to over 70. The best part was everyone was patient, inquisitive and wanting to put into practice new techniques and new ways of seeing.

OM-1 | 60mm Macro (120mm efov) | ƒ4 @ 1/125 | ISO 800 | 10x in-camera focus stack | Lightroom
I presented each ‘Walk, Talk & Shoot” as an outing dedicated to sketching. Our goal was not to make masterpieces, but rather to discover and make photographic sketches of how light creates shape, texture and colour, and how perspective changes from standing to crouching to putting the camera right down on the ground for a worm’s eye view; how vertical can be made horizontal or even square, and how to zoom using your feet to get closer and closer and closer. I related how I came to this idea of sketching after viewing a sketch book of renowned artist Robert Bateman, during a presentation of his many years ago; it has stuck with me since.
OM-1 | 12-100mm at 28mm (56mm efov) | ƒ5.6 @ 1/40 | ISO 200 | Lightroom
OM-1 | 8-25mm at 9mm (18mm efov) | POL | ƒ8 @ 1/320 | ISO 800 | HHHR | Lightroom
We worked on techniques for phone cameras, as well; for example, rotating the phone upside down to place the camera right at ground level; switching on the Rule of Thirds grid; and using Live Photos set to Long Exposure to capture moving water.
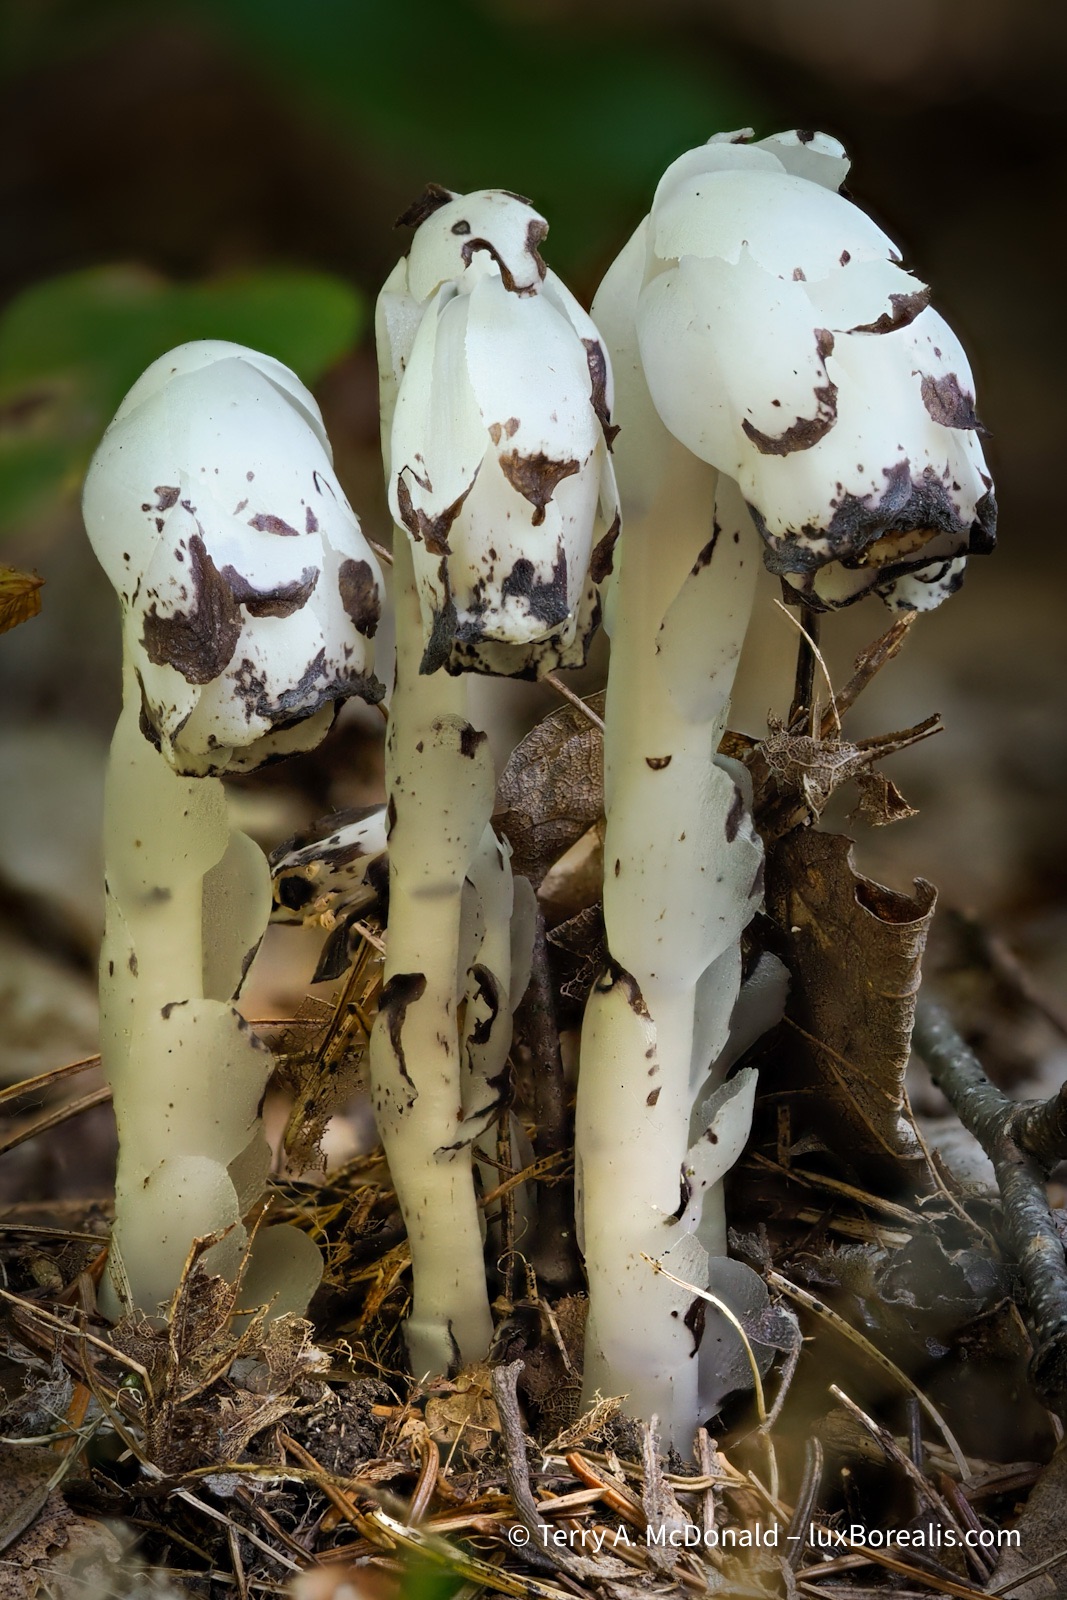
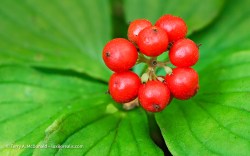
I find it impossible to visit the north and not photograph these unique plants. (Yes, they are plants, not a fungus!)
OM-1 | 60mm Macro (120mm efov) | ƒ4 @ 1/30 | ISO 200 | 10x in-camera focus stack | Lightroom
The added value of the Artist in Residence programme is that it also gives each artist plenty of time on their own to explore the park and their art. I pre-hiked each of the trails my programmes were using, plus I got out to a new trail to me, Lake of the Woods, off the Bell Lake Road.
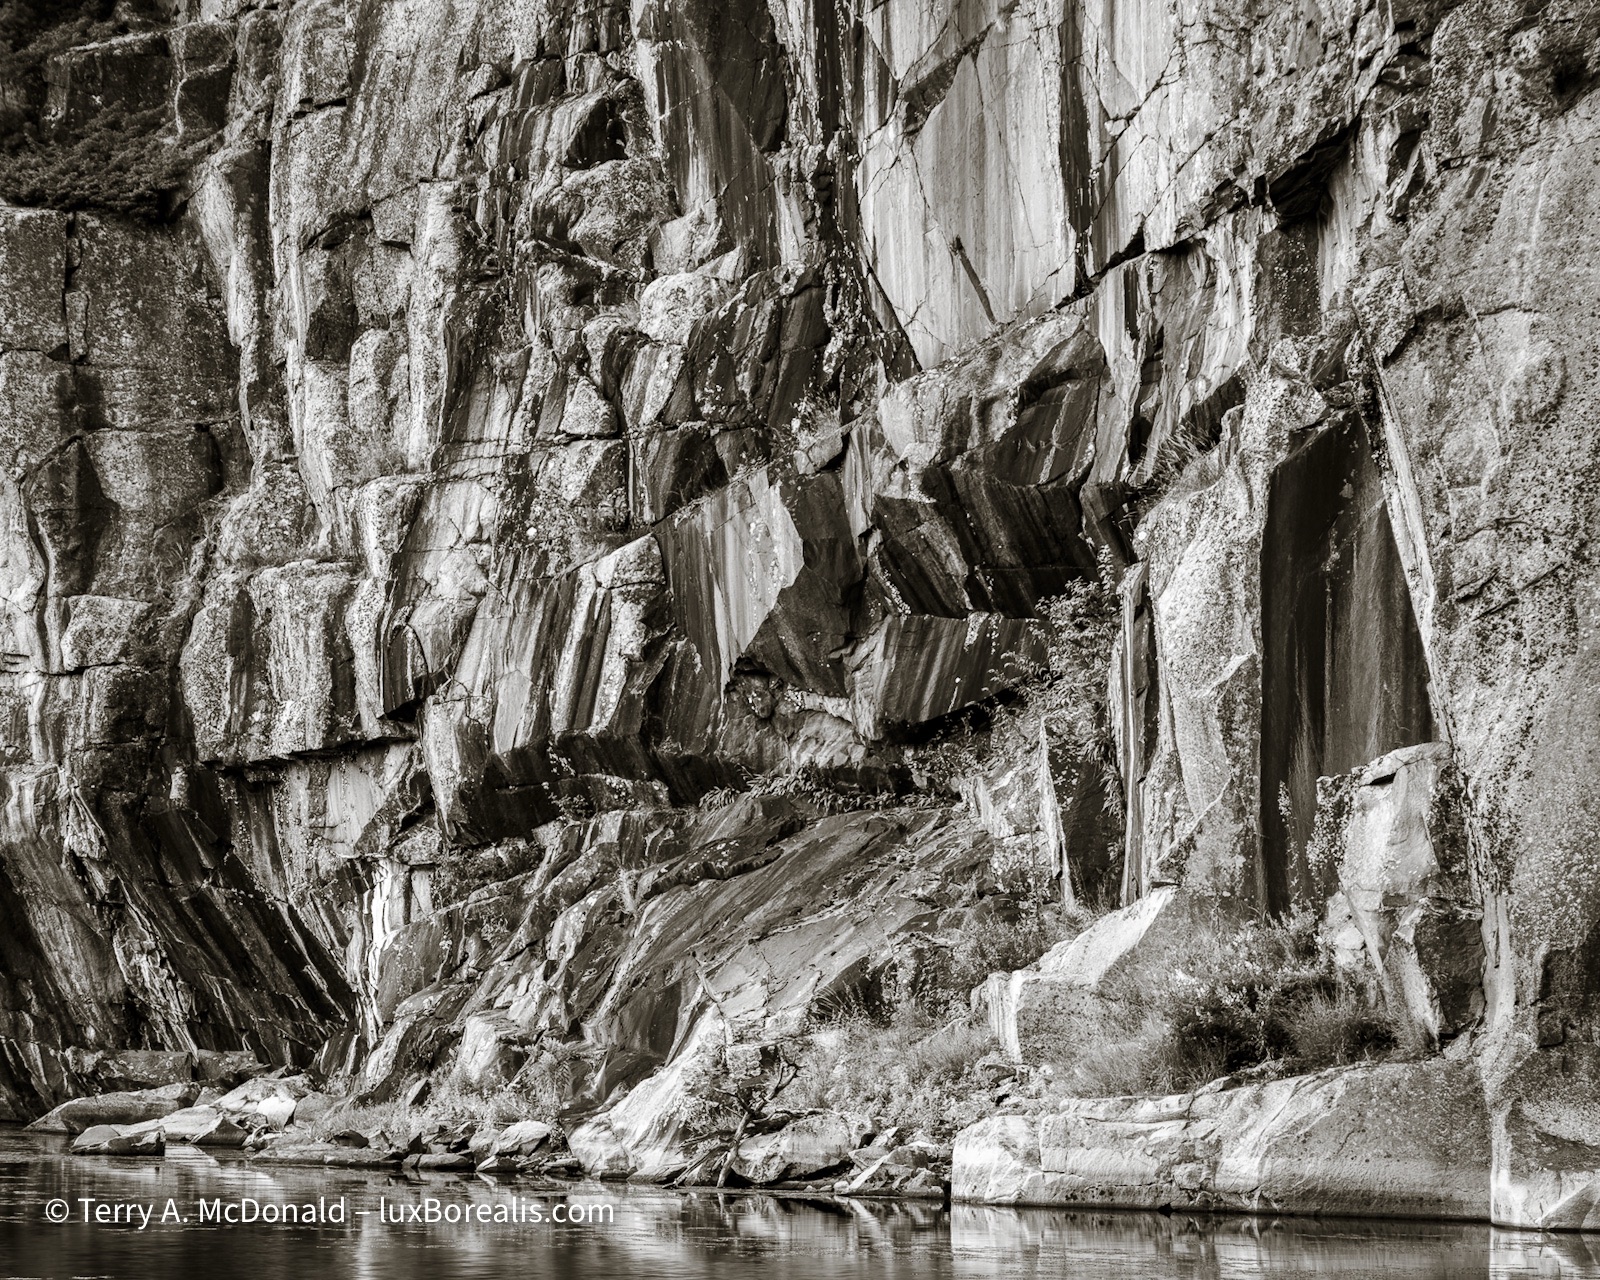
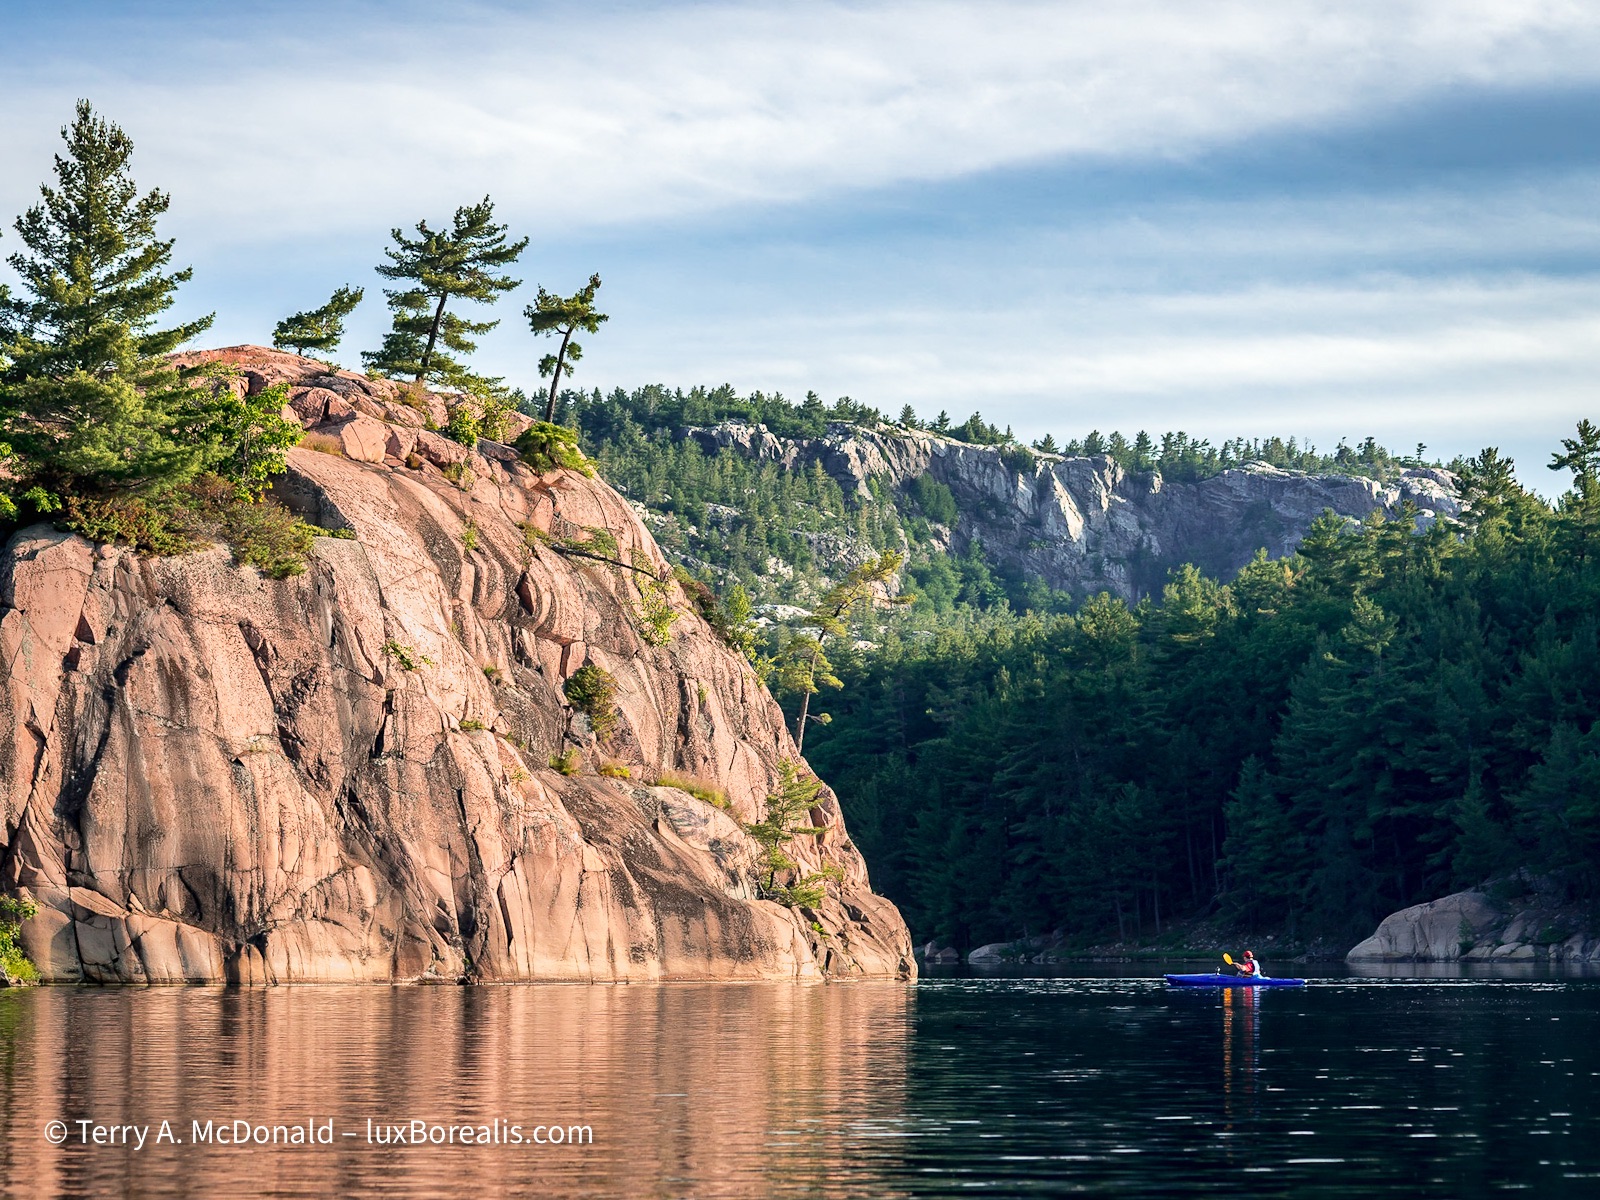
I also returned to a couple of favourite places: a late evening dash down the Chikanishing River Trail to catch the sun over the water, as well as an evening spent paying homage to A.Y. Jackson at his namesake lake and nearby Lake Sheguiandah, whose cliffs come alive in the late day sun.
OM-1 | 8-25mm at 9mm (18mm efov) | POL | ƒ11 @ 1/125 | ISO 200 | HHHR | Lightroom
OM-1 w/ 12-100mm at 80mm (160mm efov) | POL | ƒ5.6 @ 1/80 | ISO 400 | Lightroom
Many thanks to Ontario Parks staff and the Friends of Killarney staff for a great week in Killarney Provincial Park and for your helpful insights and guidance. I’d name each of you, but I’m afraid of leaving out one or two, so suffice it to say, each of you made meaningful contributions, for which I am grateful.
OM-1 | 8-25mm at 8mm (16mm efov) | POL | ƒ8 @ 1/2500 | ISO 800 | HHHR | Lightroom
Thanks for reading! Be sure to add to the discussion with a question or COMMENT about equipment, techniques or locations.
Killarney! Artist in Residence
As of Monday 28 July, I’ll be taking up my post as Artist in Residence for a week at Killarney Provincial Park in Ontario. Organized by the Friends of Killarney Park, I am thrilled and honoured to be their first photographer in the programme.
24mm | ƒ11@30sec | ISO 100 | Lightroom
Killarney is one of Ontario’s true gems of a provincial park. It is classic Canadian Shield: ancient rock billions of years old, hundreds of lakes and rivers with a mix of rocky outcrops and hills covered in northern Great Lakes mixed forest, verging on coniferous boreal in places. Killarney began life billions of years ago with what is now the LaCloche range of low white quartzite hills, once the core of mountains higher than Everest is today. A couple of billions years later, the Grenville Orogeny (mountain-building) shoved the pink granite into place along the southern edge of the park, providing the startling contrast of billion-year-old pink granite and 3-billion-year-old white quartzite.
105mm | ƒ 5.6 @ 1/200 | ISO 200 | Lightroom
In the billion years since then, there have multiple and long periods of glaciation which further shaped Killarney: carving deep valleys, polishing the rock smooth in some places and etching the rock in others with chatter marks, deep gouges and smoother scour marks caused by flowing water.
24mm | ƒ11 @ 1/125 | ISO 200 | Lightroom
I’ve visited Killarney a number of times over the decades, twice in the depths of winter. Between the biota and the landscapes, there is always more than enough to keep an outdoor photographer busy. This goes right back to the Group of Seven. A.Y. Jackson along with members of the Ontario Society of Artists lobbied the Ontario government for protection, which was achieved in 1964.
24m | ƒ16 @ 5sec. | ISO 100 | Lightroom
Sadly, some of the lakes still feel the effects of ‘Acid Deposition’ (a.k.a. Acid Rain) from the 1960s and 70s. Emissions from the Sudbury Superstack and coal-fired generating stations wreaked havoc throughout the region. The lakes are perfectly clear and blue due to the lack of biota and fish in the lakes.
35mm | ƒ11 @ 1/160 | ISO 100 | Lightroom
Artist in Residence
Each of the outings (see below) will be an informal “Walk, Talk & Shoot” session. We’ll take advantage of photo ops along the way for instruction and guidance, with a bent towards nature, outdoor and landscape photography. The goal won’t be finishing the trail but rather capturing some engaging photographs. We may go 500m, we may only go 5m—it all depends on what there is to photograph.
The programme is as follows:
- Monday, 10am to Noon: We’ll meet at the Nature Centre and have a look along the Trout Creek Trail + bridge over to start of La Cloche Trail;
- Tuesday, 10am to Noon: We’ll meet at the Main Gate and Walk, Talk & Shoot along the Granite Ridge Trail
- Wednesday, 7pm at the Amphitheater: I’ll be presenting Ontario’s Natural Gems: Nature and Outdoor photography in our backyards—an inspirational look at photographing the beautiful places close to home
- Thursday, 10am to Noon: We’ll meet at Second Beach to discover photographic gems along the Cranberry Bog Trail
- Friday, 10am to Noon: We’ll meet at the Nature Centre and have a look along the Trout Creek Trail + bridge over to start of La Cloche Trail;
Everyone is welcome, though I’m sure there is a sign-up list at the Park Office. On a personal note, I’m greatly looking forward to meeting people who want to take their photography further. Photography is all about seeing, so, whether it’s a phone camera, a DSLR, mirrorless or a point-and-shoot, the best camera is the one that’s with you!
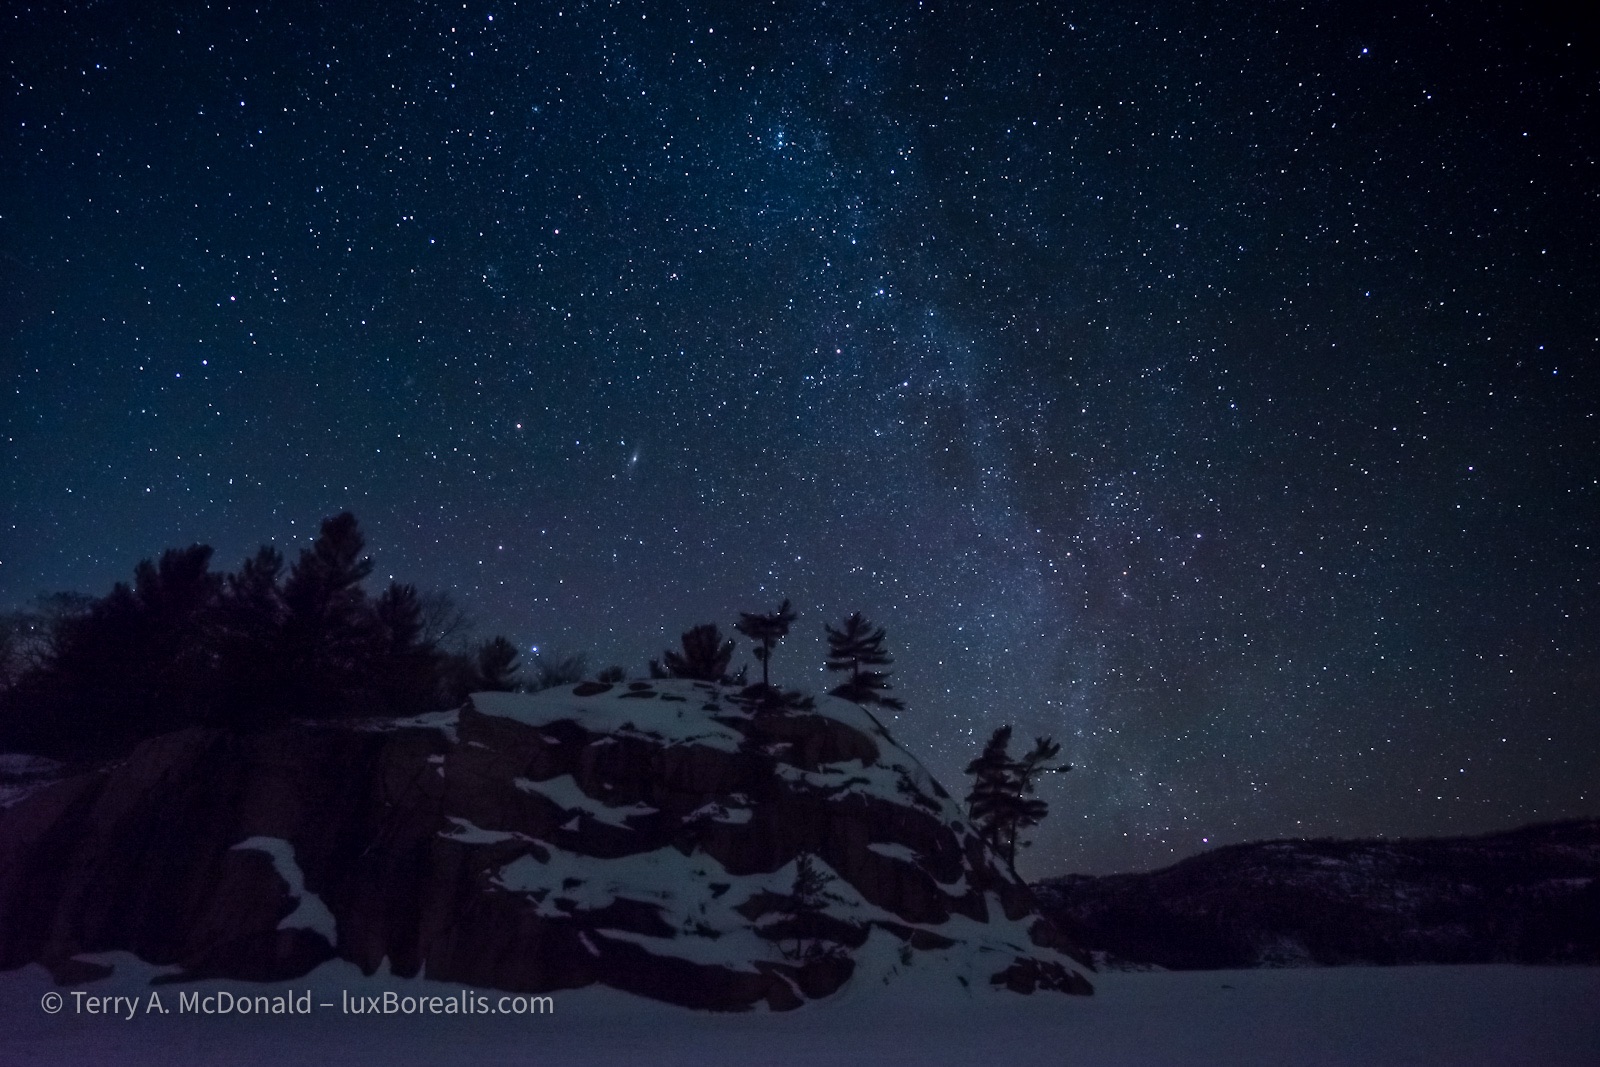
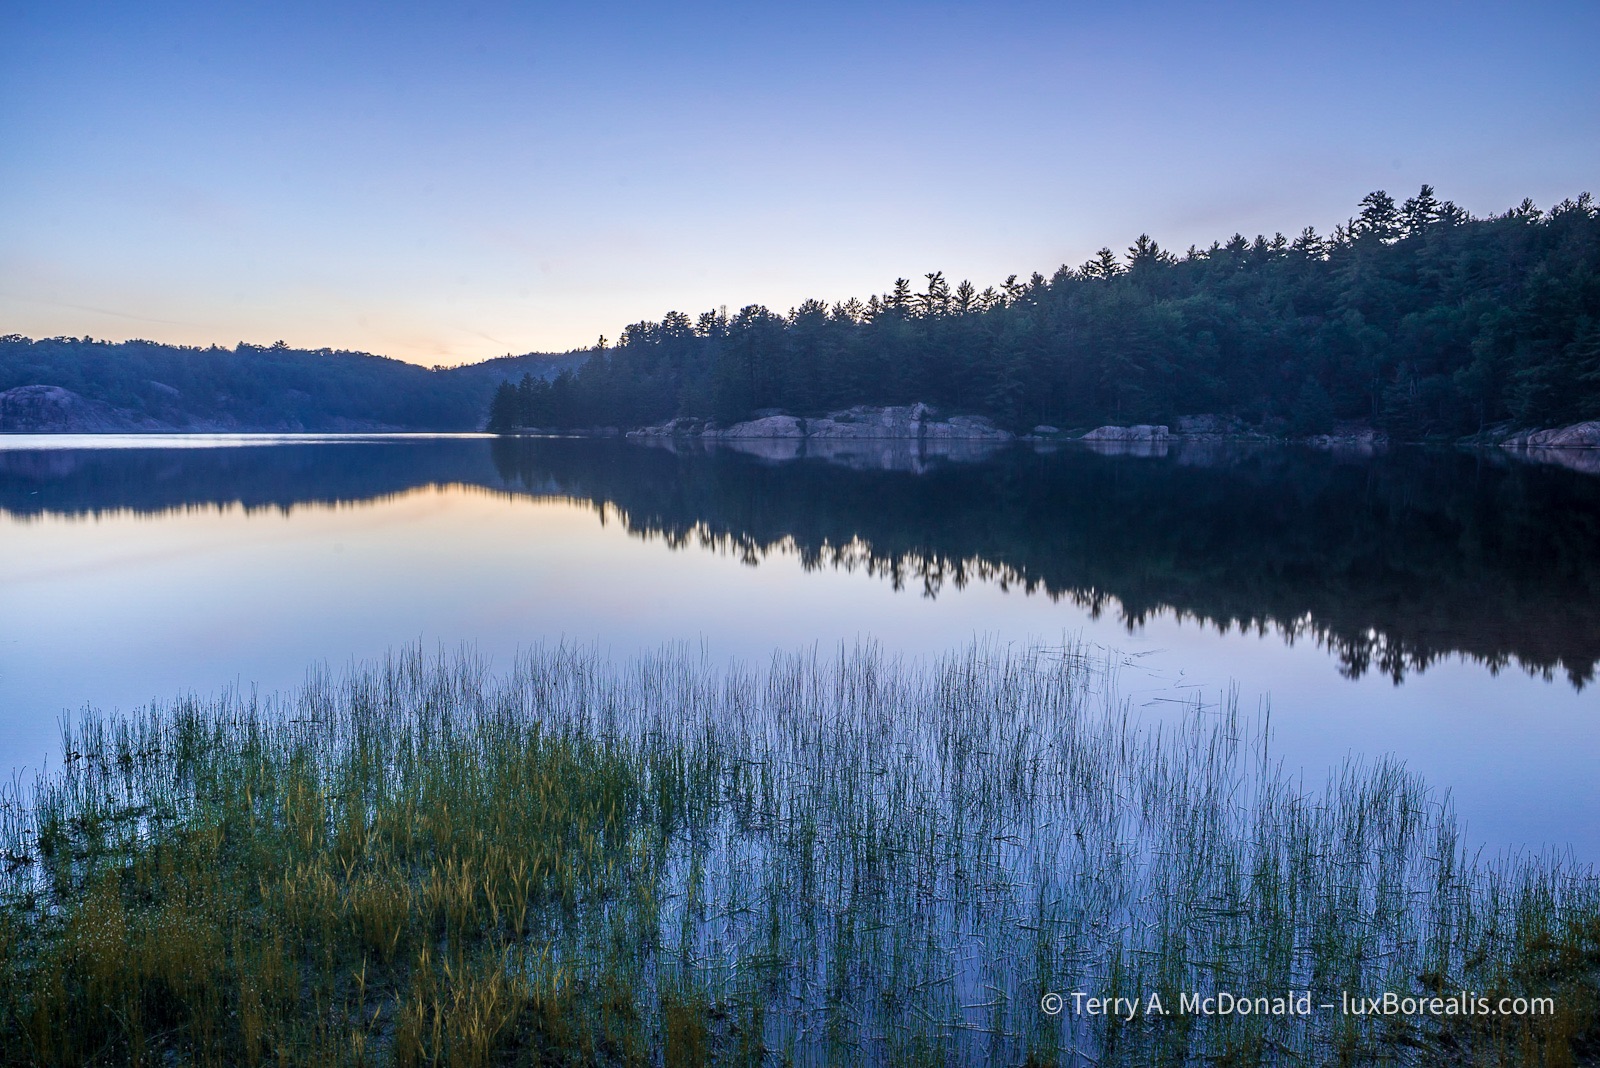
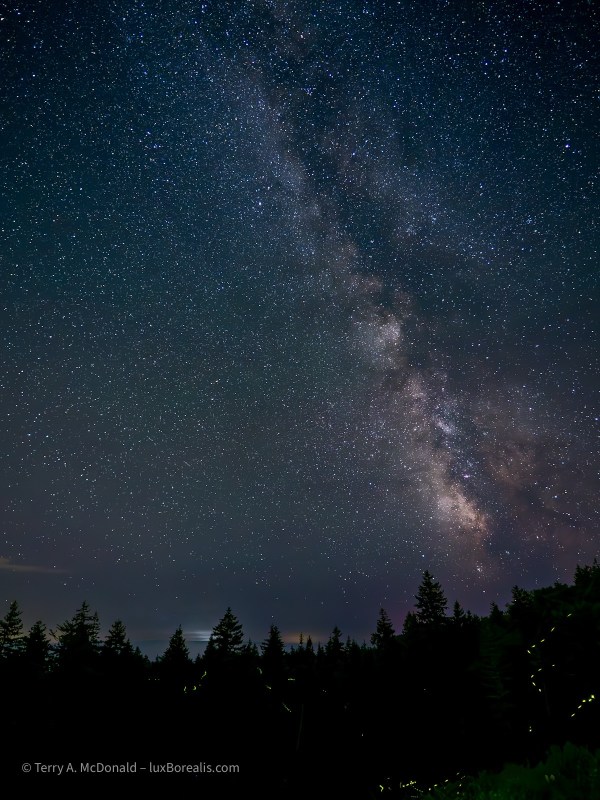
18mm | ƒ4@15sec. | ISO 3200 | Lightroom
I’m also looking forward to discovering Killarney in the summer, from the early morning blue and golden hours, right through to the dead of night. Yes, that includes working on some astrophotography. I’ll be working on both colour and black-and-white photographs, as always, trying to capture the essence of place and the art inherent in nature.
So, join me at Killarney!
Recommended reading:
Killarney GeoTour (OMNRF PDF): I find that the more I know about the place I’m photographing, the more meaningful and informed my photographs are. This an excellent overview of how the landscape of Killarney became what it is today.
Killarney’s Beating Heart: The Park Which Painters Saved: Blog Post by Zac Metcalfe
PhotoGeo Trip Down East: Part 6 – Fundy
2453 words; 13-minute read
My trip is winding down. This is the last ‘photo stop’ and it has proven to be a good one.
Fundy National Park is yet another gem of a Canadian park. Thick Acadian forests, sheer cliffs plunging into the Bay of Fundy, vast tidal flats, sometimes fog, and always, the world famous tides—the highest in the world. Given the twice daily rise and fall of 10m or more, you can imagine much of life here is driven by the tides.
OM-1 | 25mm | ƒ8 @ 1/200 | ISO 200 | Lightroom
OM-1 | 21mm | ƒ5.6 @ 1/250 | ISO 200 | Lightroom
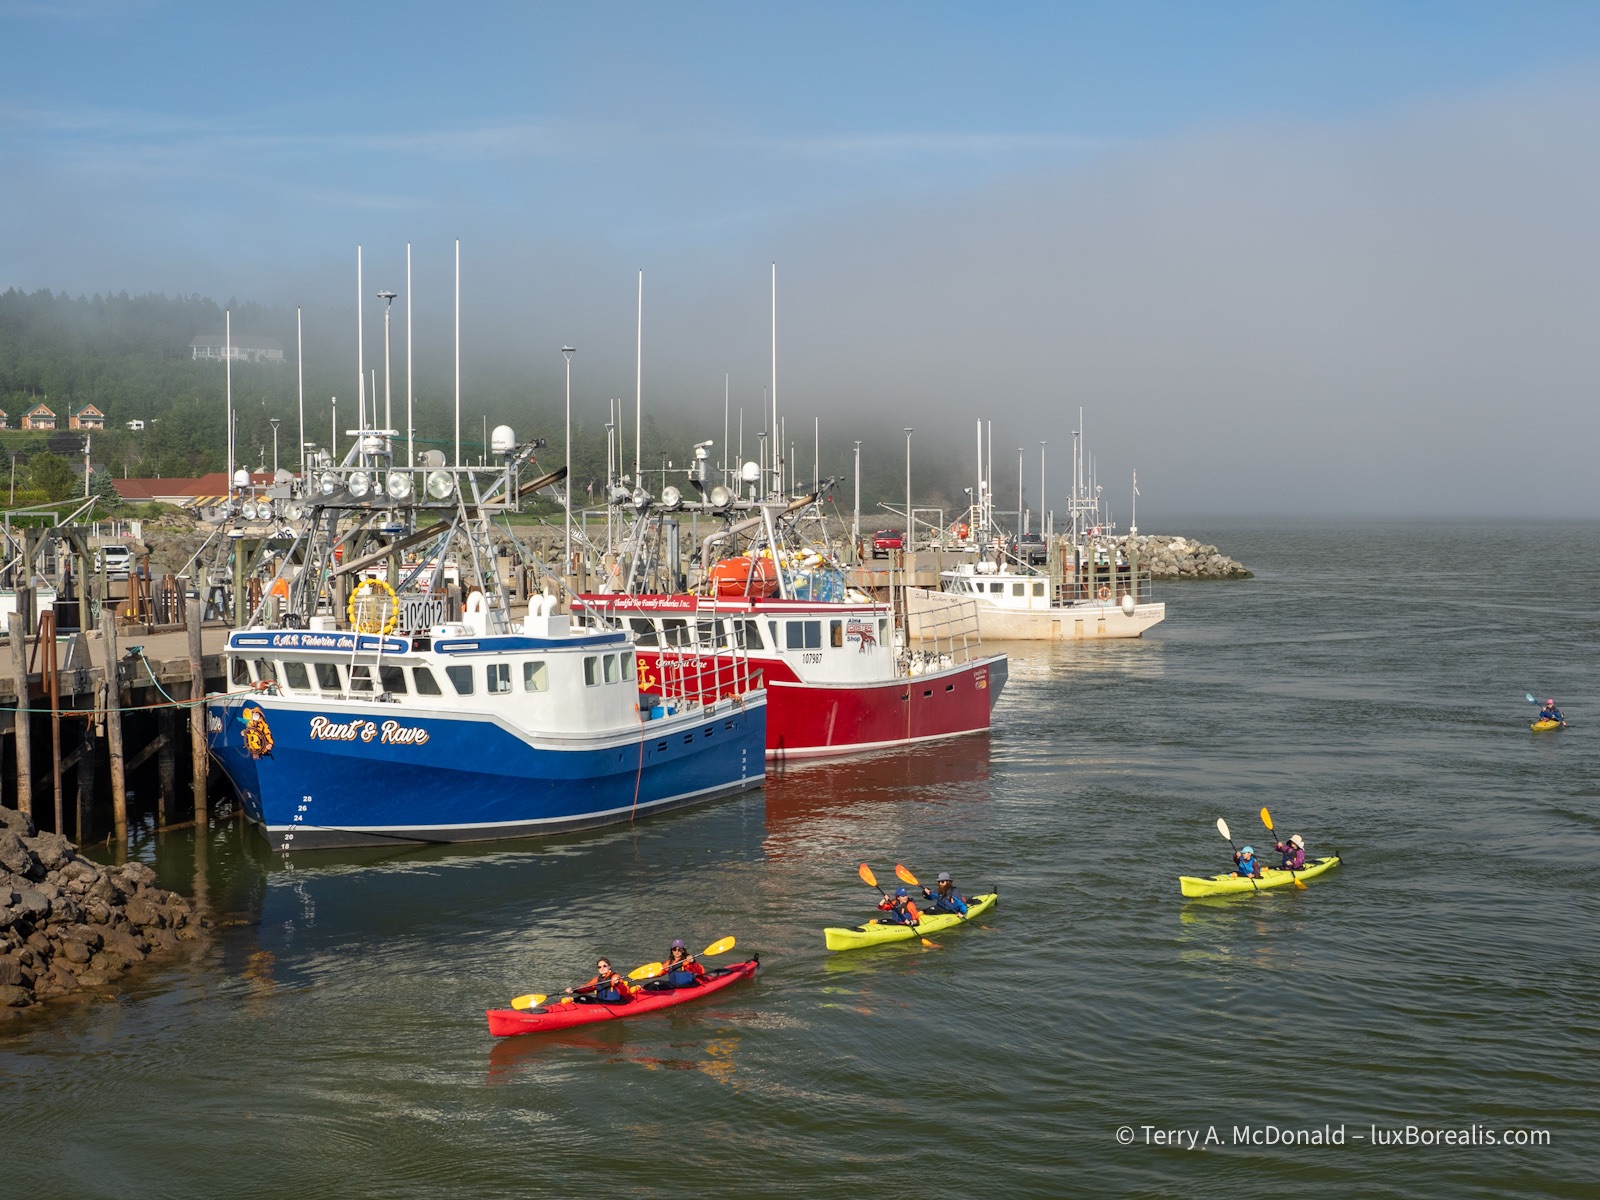
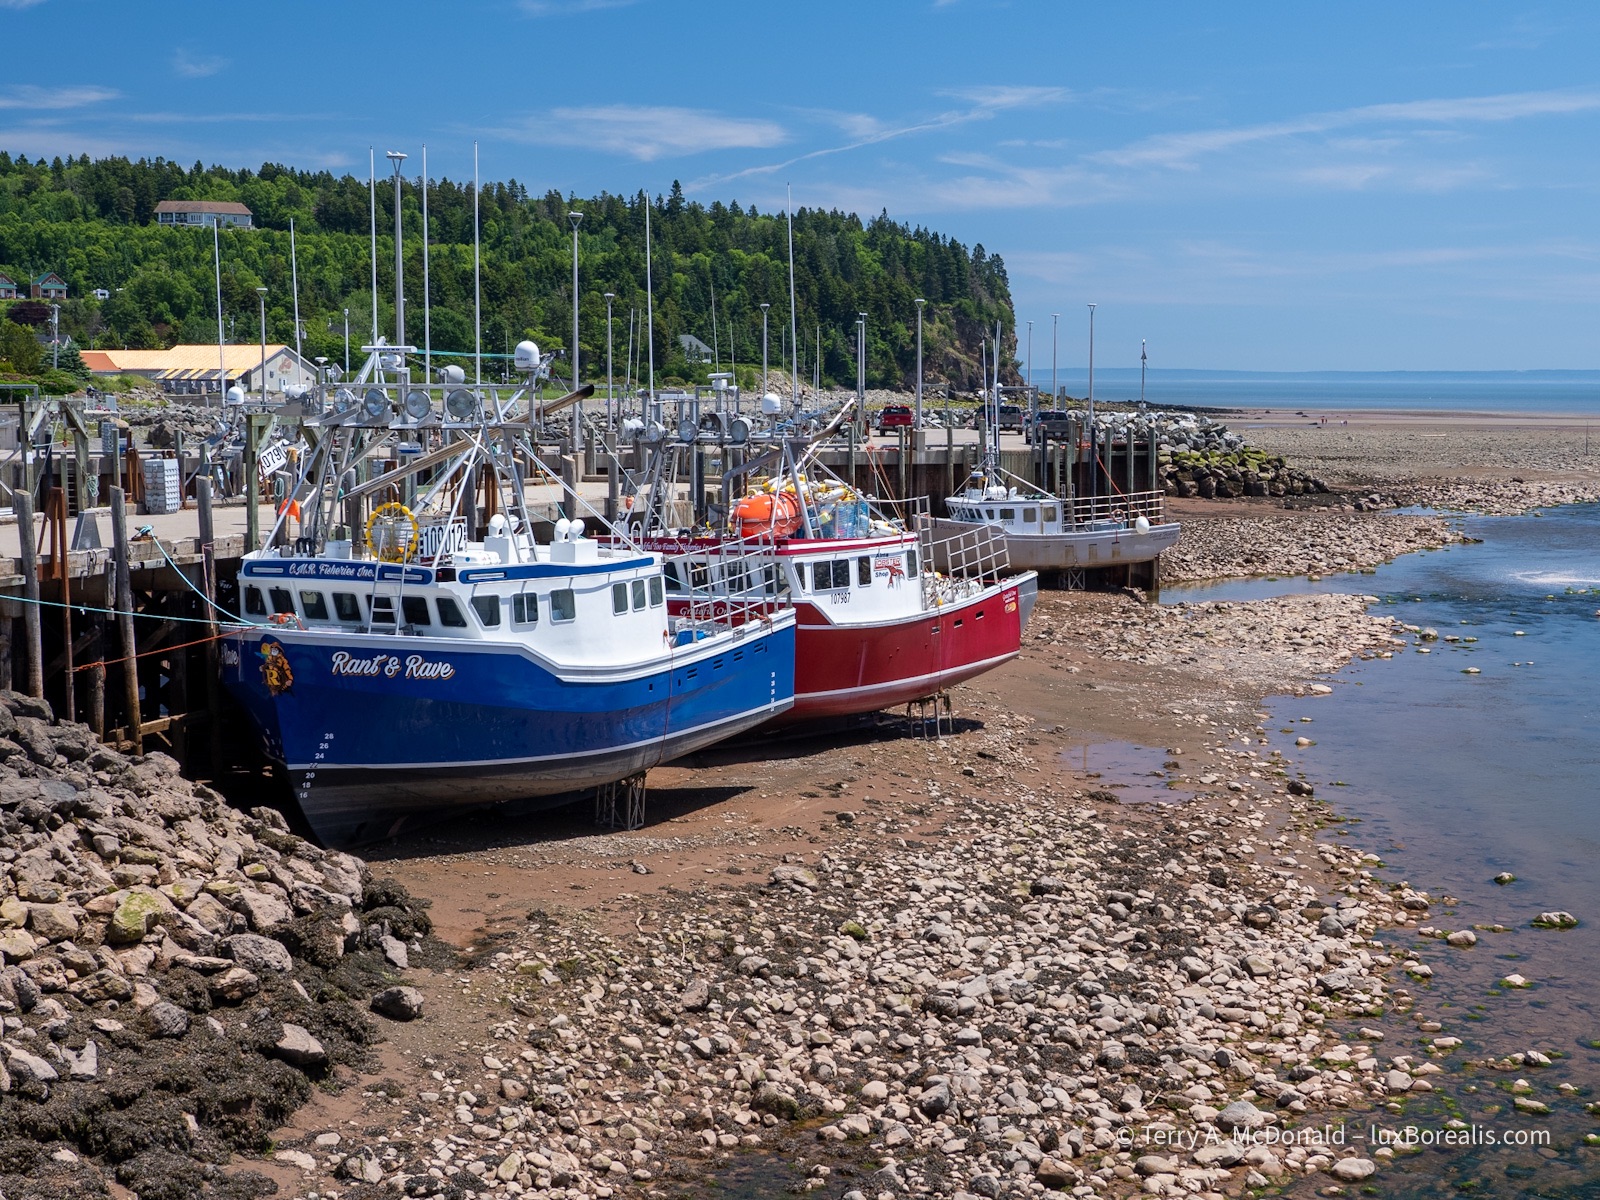
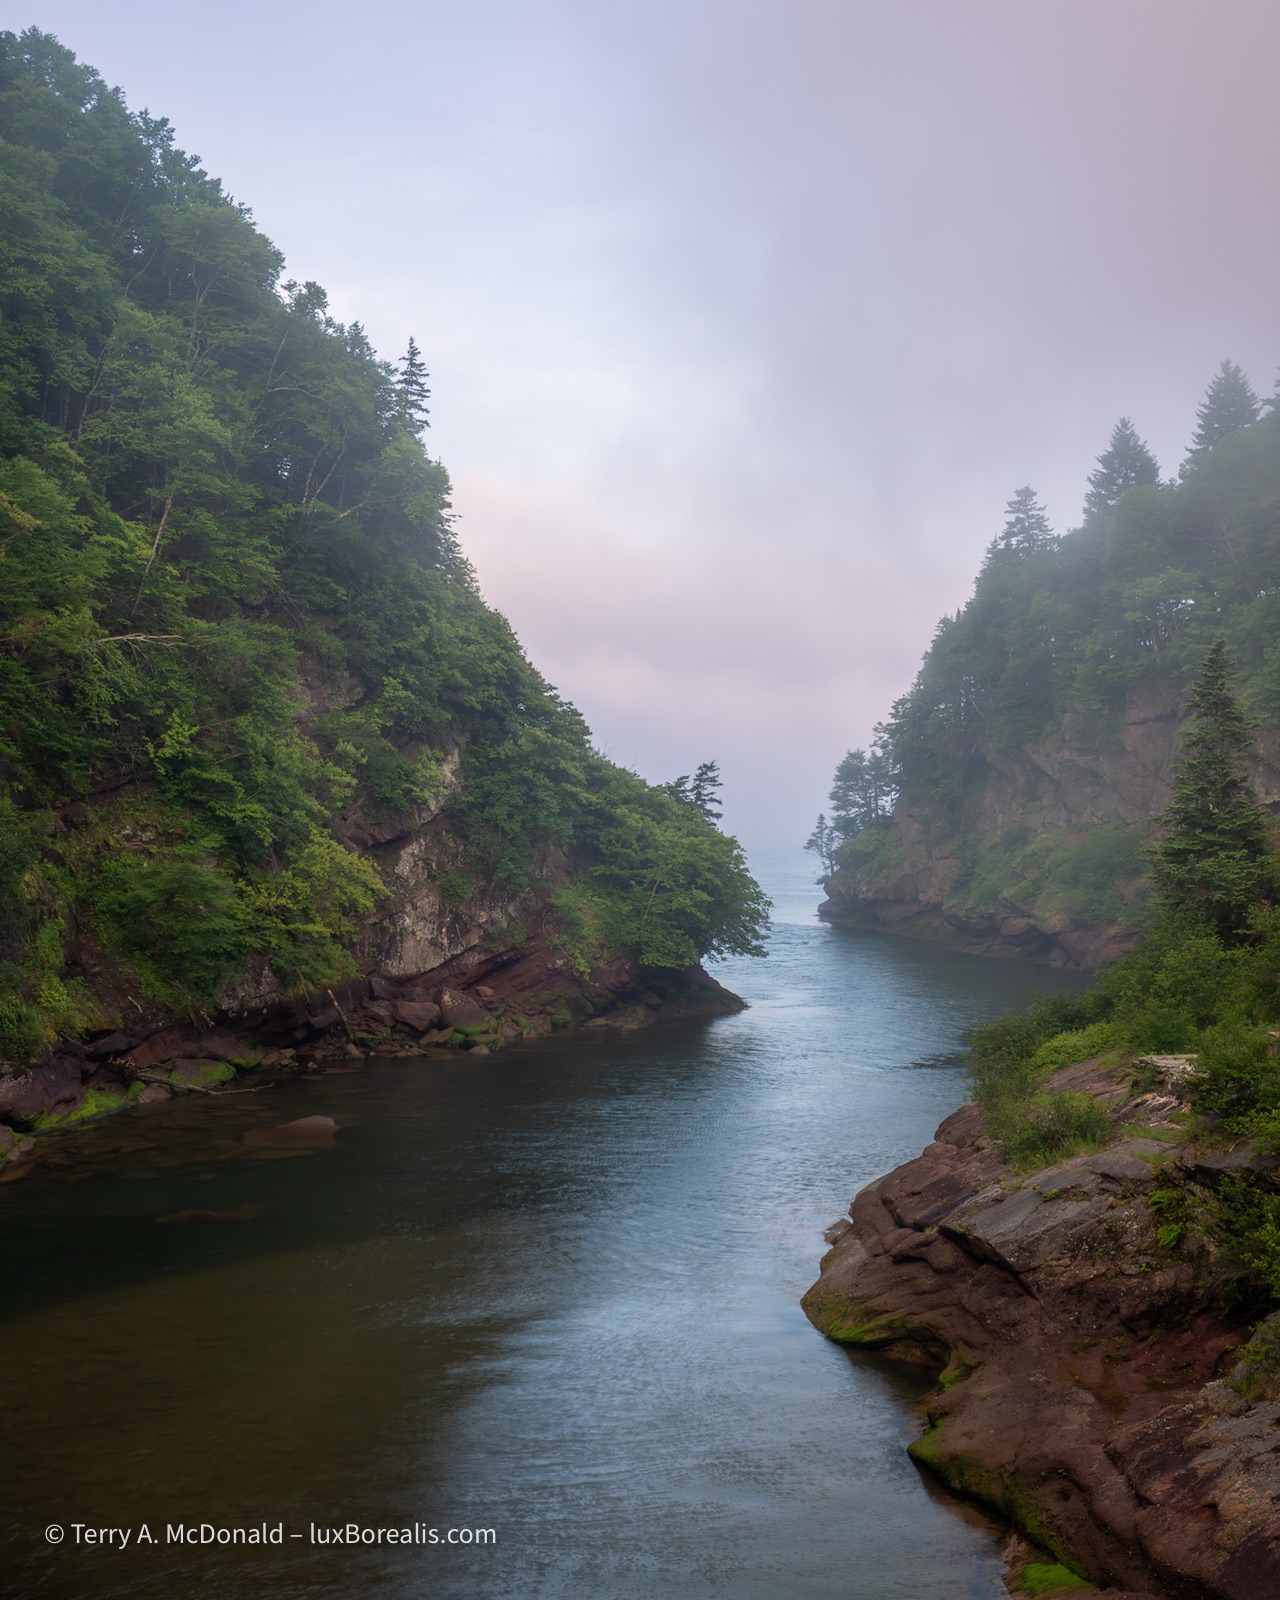
Just like the changes from summer to winter and back again, tides dramatically change the landscape. As the tide recedes, wide, muddy-brown rivers become narrow, clear streams with lots of empty real-estate on either side. Beaches can completely disappear at high tide only to be converted to hundreds of metres of red mud flats at low tide.
OM-1 | 25mm | ƒ8 @ 1/500 | ISO 800 | HHHR | Lightroom

OM-1 | 34mm | ƒ5.6 @ 1/640 | ISO 400 | TripodHR | Lightroom
For photographers, this daily change is both a blessing and a curse as much depends on how the tides line up with state of the weather and the time of day. You can make your luck, but as the photos will show, the stars aligned on my behalf.

OM-1 | 17mm | ƒ5.6 @ 1/500 ISO 200 | Tripod HR | Lightroom
Sackville Waterfowl Park
On my way to Fundy, I stopped overnight in Sackville at the old and charming ‘Marshlands Inn’. In its heyday, Marshlands catered to the well-heeled. As I messaged back home, “Given its dated furnishings and decorations (our grandparents would approve), I was thinking it would be a great place for a murder mystery à la Jessica Fletcher, but I may be the only guest at dinner!” And sadly, I was. They have a wonderful, plush restaurant that served the best seafood platter I had the whole trip.
The next morning, down at the Waterfowl Park, I was curious to see how things changed over the few weeks since Dan and I had visited. How is the grebe nest doing? Are the songbirds still as active?
OM-1 | 400mm | ƒ8 @ 1/800 | ISO 3200 | Lightroom

OM-1 | 400mm | ƒ8 @ 1/250 | ISO 3200 | Lightroom
OM-1 | 400mm | ƒ8 @ 1/640 | ISO 3200 | Lightroom

OM-1 | 400mm | ƒ8 @ 1/640 | ISO 3200 | Lightroom
The grebe nest was doing quite fine with five hatchlings that are already taking to the water. Mom and dad are very busy going back and forth finding food and feeding the youngsters.
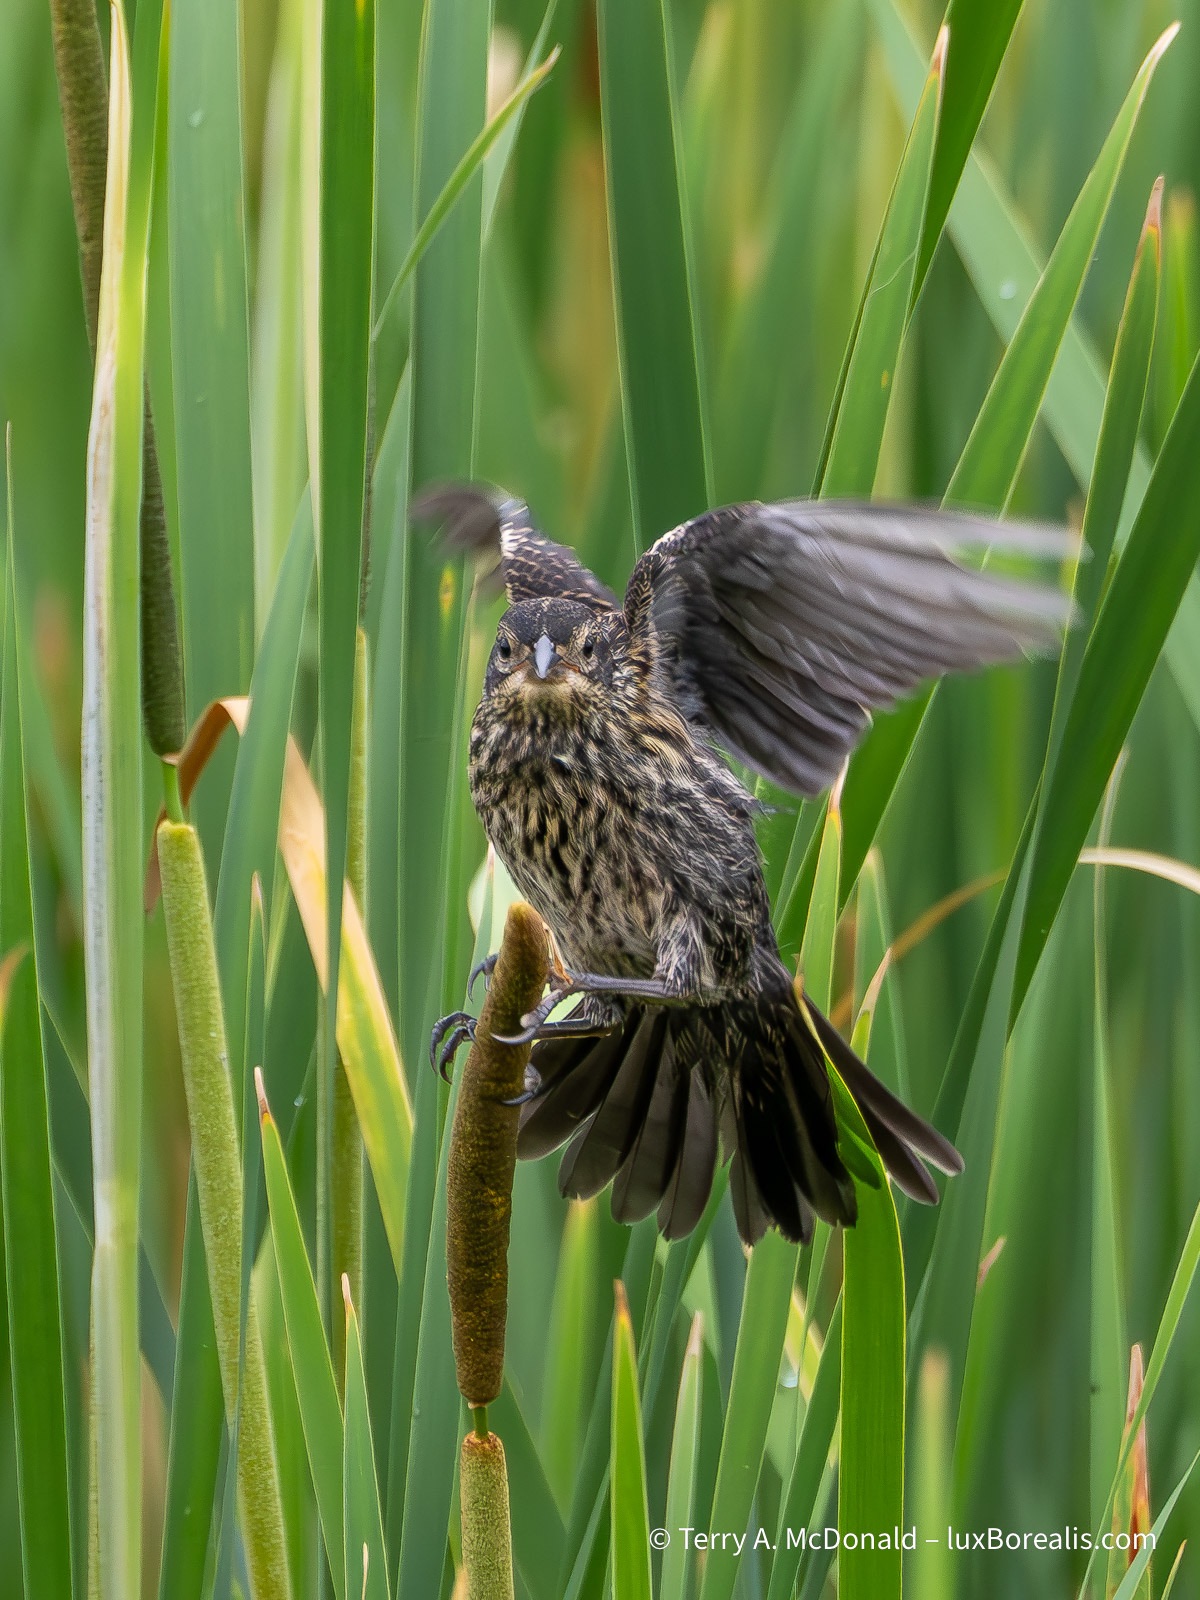
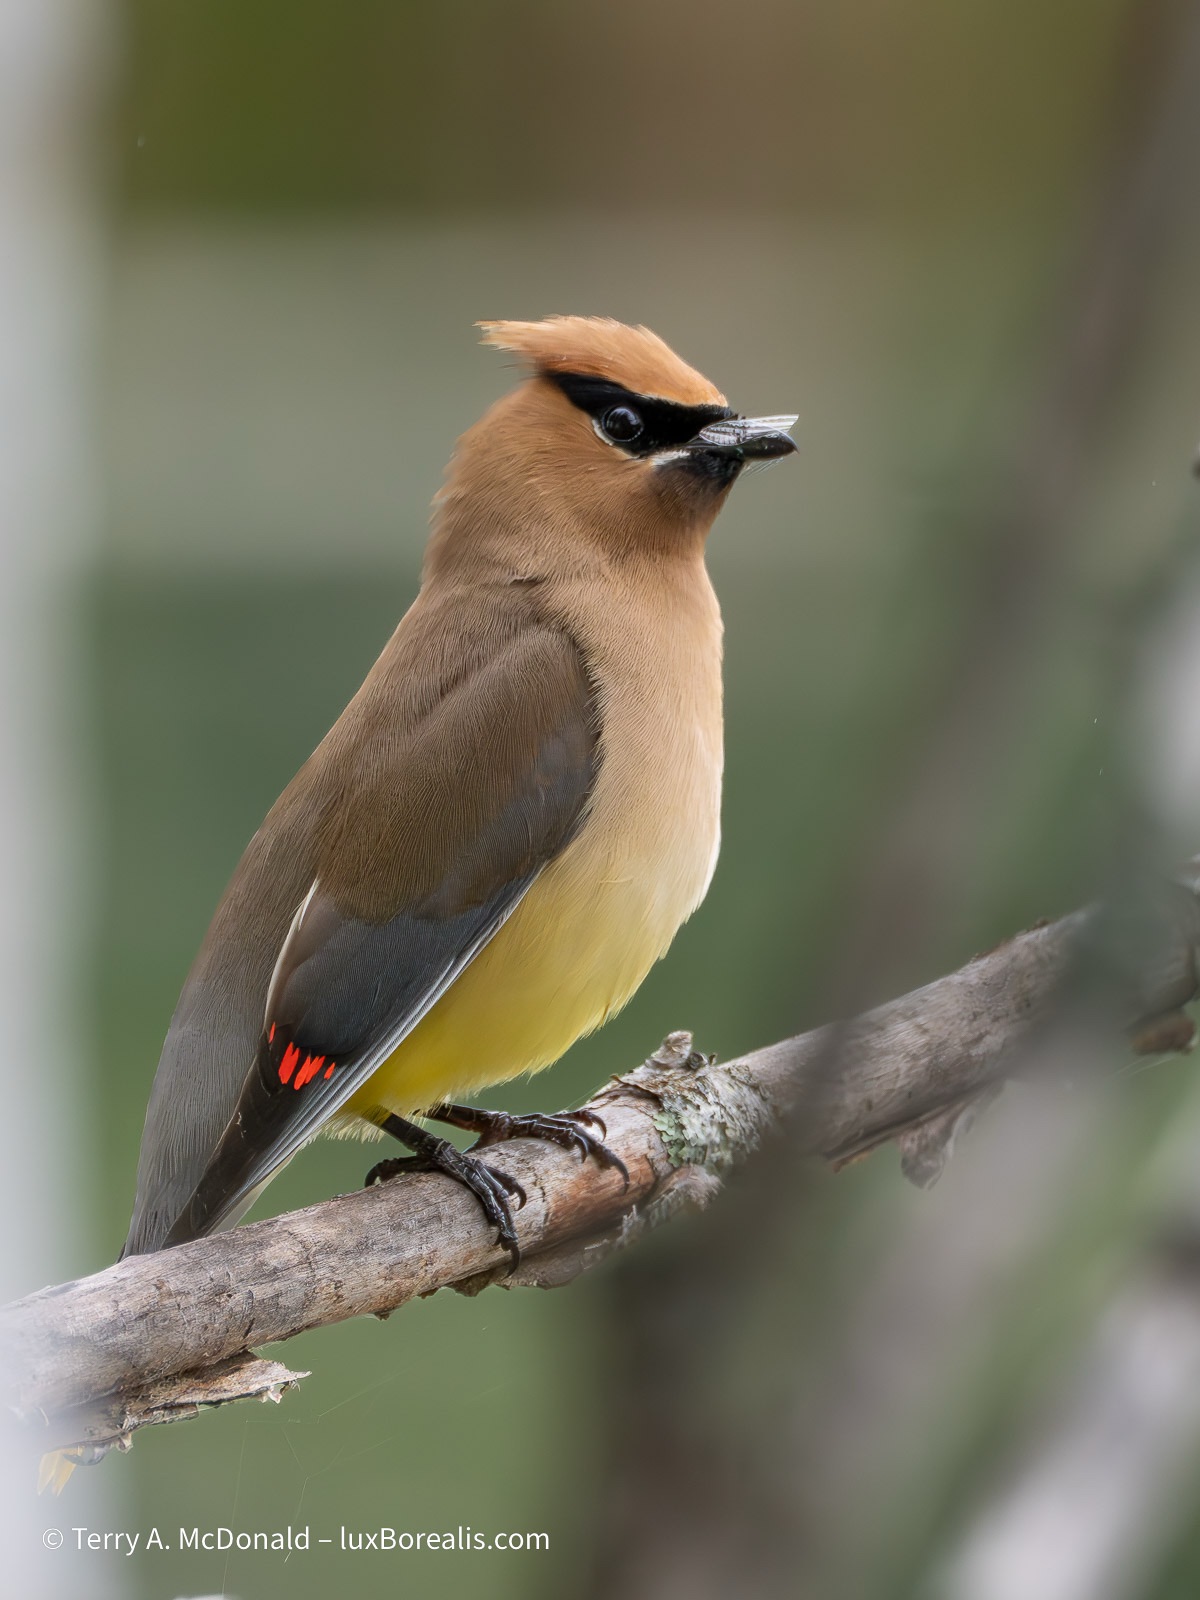
The swallow was equally busy, but the songbirds were more elusive, with only a Cedar Waxwing and fledgling Red-winged Blackbirds putting on a show.
Cape Enrage
In the afternoon, I arrived at Hopewell Rocks Provincial Park, one of the premiere places on the east Coast to get a real sense of how significant the tides are. It’s billed as a place to ‘Walk on the ocean floor’ and you can, twice a day, provided low tide occurs during opening hours. Wisely, the entrance ticket is for two days, so you can come back and see Hopewell at high tide.
However, it is 30 June and it is a gorgeous day. The multiple parking lots, while not full, indicated the heaving mass of people that were enjoying the park. I took a pass, reserving it for tomorrow, Canada Day, even busier, yes, but I doubt first thing in the morning. Low tide is at 11:38am, so arriving by 8:30 should place me on the sea floor before the crowds.
Instead, I headed for Cape Enrage, about halfway between Hopewell and Fundy. How could I not visit Cape Enrage. The name alone is worth the drive. I had visions of monstrous waves pounding the shore cliffs, sending huge sprays of sea foam skyward. Sadly, that wasn’t the case. I guess it helps to have an imagination.
Not only was it a $10 charge to go into the private park, it was late in the day and I was feeling too cheap to pay that much for an hour of photography. So I went to the cobble beach outside the park and was not disappointed. While there were no huge breakers, there were still dramatic cliffs and boulders, which inspired me to get out the tripod and get my feet wet.
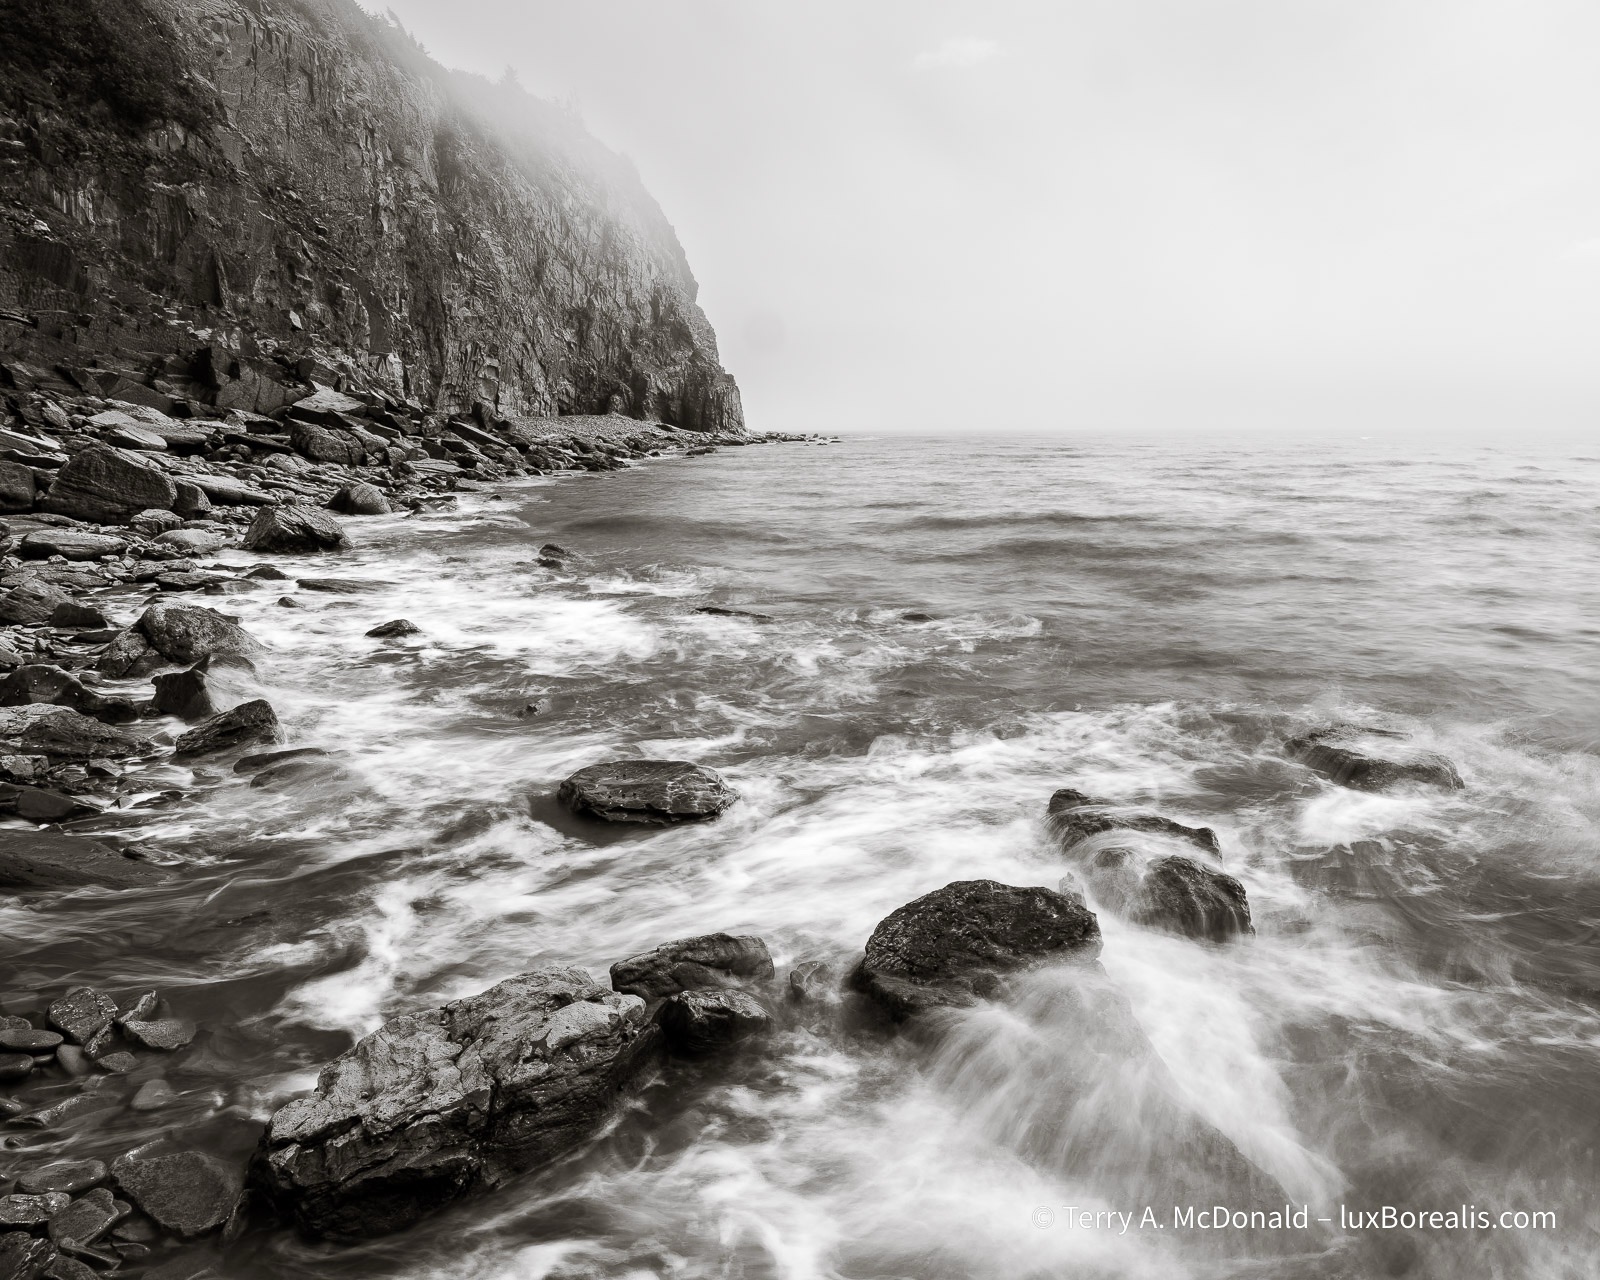
OM-1 | 12mm | ƒ11 @ 1.3sec | POL | LiveND64 | Tripod | Lightroom
I used the polarizing filter to reduce sky glare from the water. ISO 100 was chosen to reduce shutter speed further than ND64 allowed.
That’s the thing about high tides—they rise very quickly. After all, a 10m tide still has only 6 hours to come in—that’s about 1.5m an hour or 9” per minute! No sooner had I set up and made a few exposures, trying to catch the movement of the water at just right instance, when the waves, pushed by the rising tide, were suddenly around my feet and covering the very rocks I was photographing. Even when I took into account the rising waters, I was still caught short two or three times! Oh well, good fun!
Behind the multiple mounds of cobbles, built up as raised beaches from the various heights of tides, I found an oasis of green in these beach peas. The greens seemed so bright and full of life compared to the masses of grey cobbles along the beach.
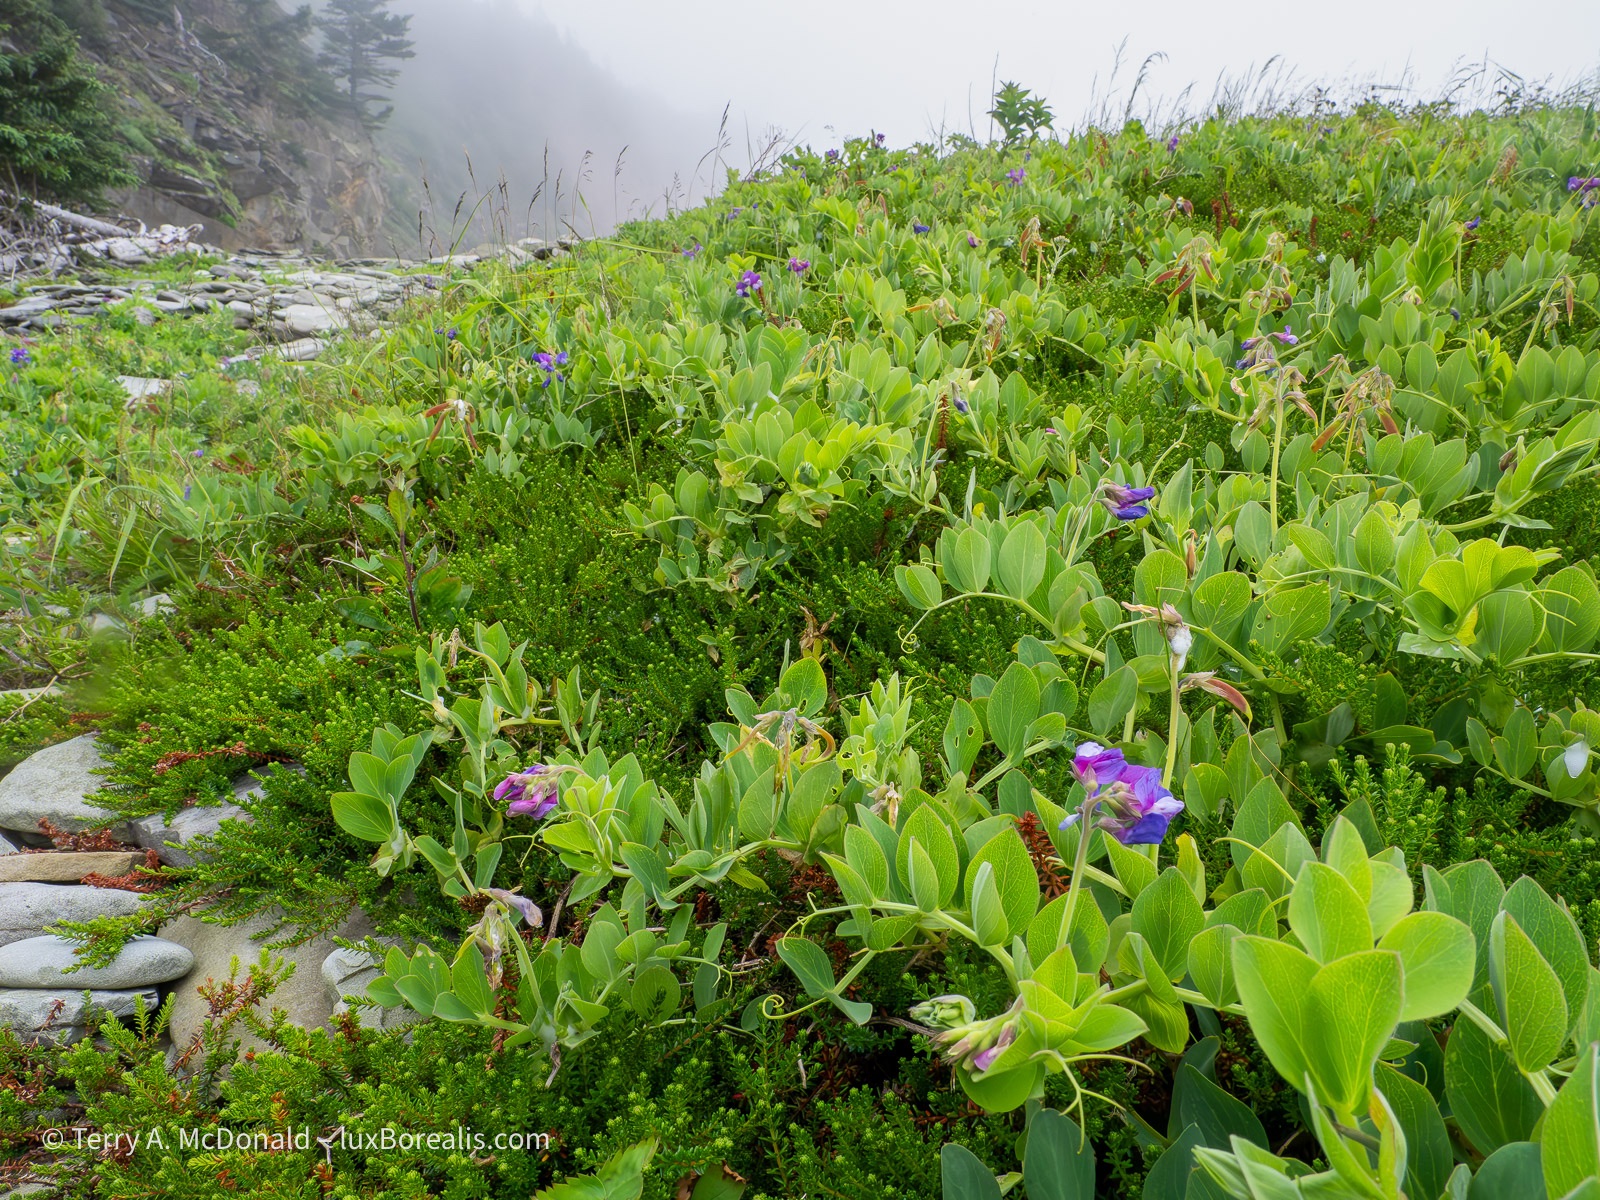
OM-1 | 12mm | ƒ11 @ 1/400 | ISO 3200 | Lightroom
The photographer’s conundrum: this scene demanded a great depth-of-field, yet I couldn’t use focus stacking because of the wind. ƒ11 covered the depth, but at ISO 200, a shutter speed of 1/25 was too slow. In the film days, this shot would have been an impossible 1/6 using ISO 50 Fujichrome Velvia! Enter the amazing quality of OM-1’s sensor producing superb quality even at ISO 3200, helped along with Lightroom’s Noise Reduction. Problem solved.
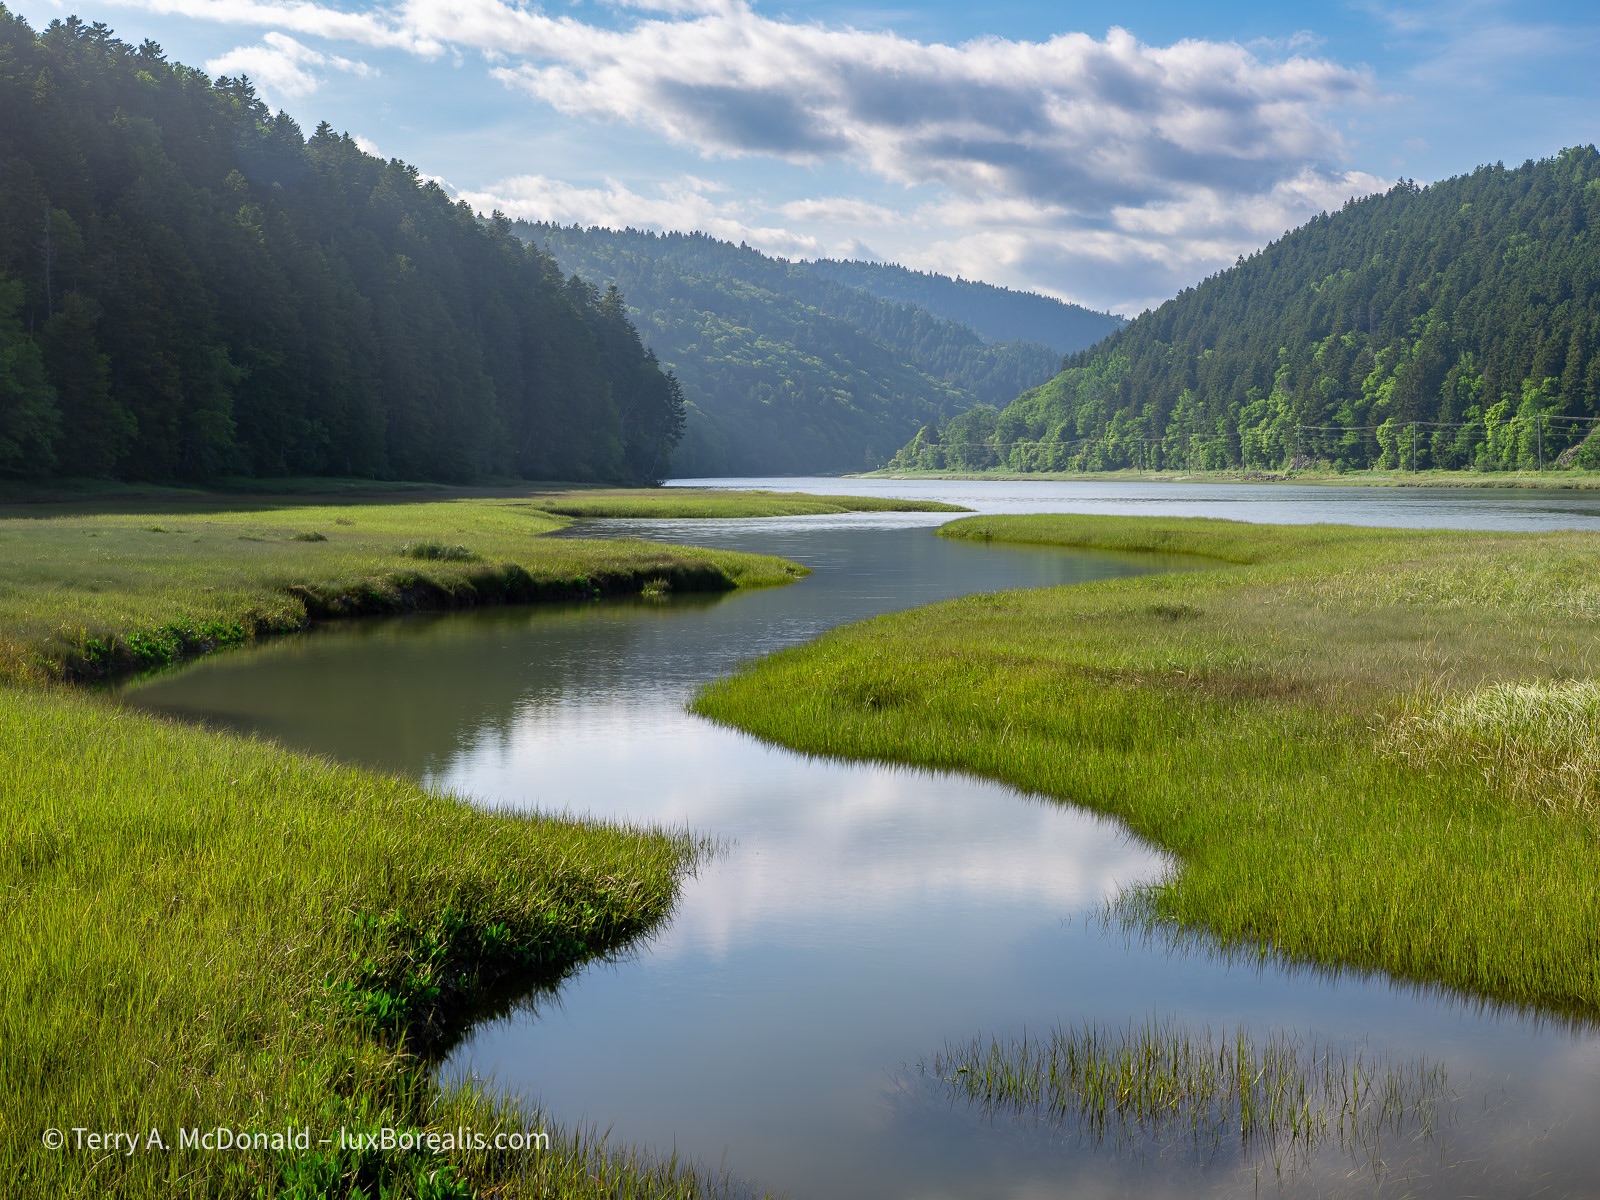
On the way to Fundy, I found a couple of scenes that captured my imagination.
OM-1 | 12mm | ƒ8 @ 1/500 | ISO 800 | TripodHR | Lightroom
This is not a reflection of the East Coast in general as there are plenty of new builds in, for example, Moncton, near where this photograph was made. Rather, my intent was to capture the change in the region as people leave the more rural areas behind for towns and cities.
OM-1 | 17mm | ƒ5.6 @ 1/400 | ISO 800 | TripodHR | Lightroom
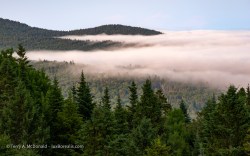
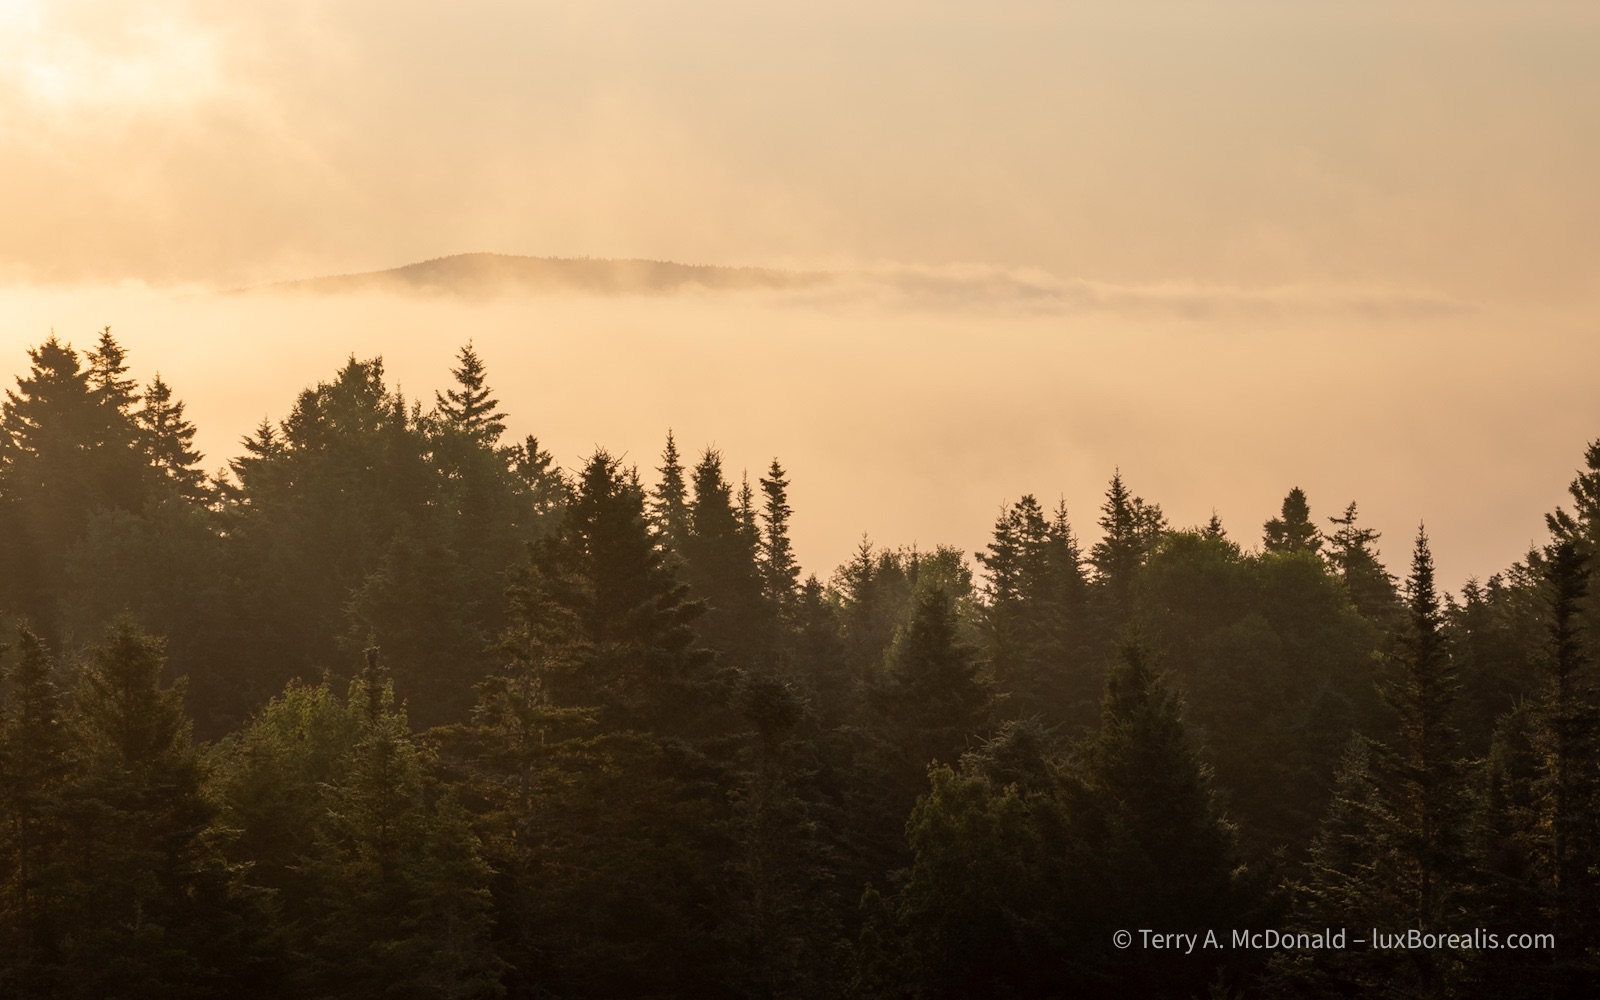
I will never turn down fog for creating mood. Add in the sun, in its attempt to break through, and a whole new dynamic is created. All I needed was a foreground, supplied by the Salmon River at Alma.
After setting up my campsite, I went back down into Alma for a delicious seafood dinner at The Boathouse —highly recommended, not as fancy as some of the other restaurants, but great food. I made a few evening photographs along the river then packed it in early, hoping the clear skies above the fog would continue through the night.
OM-1 | 100mm | ƒ5.6 @ 1/250 | ISO 400 | HHHR | Lightroom
Fingers of Fundy fog reach inland, up the valleys between the hills.
Canada Day

OM-1 | 100mm | ƒ9 @ 1/2 | ISO 200 | LiveND | Lightroom
I’m beginning the celebration of my 63rd Canada Day at Fundy National Park by capturing some iconic Canadian landscapes. My day started at 1:30am to pursue some Astrophotography. Arriving at the Fundy Viewpoint, I was bewildered by hundreds of fireflies, their bright green pulses lighting up the field below. They were magnificent and I knew they had to be a part of what ever photograph I made.
OM-1 | 9mm | ƒ2 @ 15sec. | ISO 3200 | Tripod | Lightroom

OM-1 | 9mm | ƒ2 @ 40min | ISO 400 | LiveComp | Lightroom
The red chairs? They are a trademark of sorts of Canada’s National Parks. Red chairs have been brought into a number of significant viewpoints in all the parks and have become an icon.
After a few hours of sleep, I was up again, at 6am, this time to the sound of two of our favourite songbirds: a Junco, who spends every winter with us in Guelph, and a White-throated Sparrow, known for its song, “Oh, sweet Canada, Canada, Canada”
Then I was back to the Fundy Viewpoint enjoying brilliant sunshine gleaming over a fog-filled Bay of Fundy.
OM-1 | 100mm | ƒ5.6 @ 1/2000 | ISO 200 | HHHR | Lightroom
The heavy fog didn’t bode well for the sea coast, which was my next destination. By 6:30, I was down at Wolfe Point to check out the covered bridge where the views were just opening up. With the fog playing tag with the morning sun, the conditions were hit-or-miss. I managed a couple of ‘hits’.

OM-1 | 25mm | ƒ5.6 @ 1/320 | ISO 800 | HHHR | Lightroom
OM-1 | 24mm | ƒ5.6 @ 1/400 | ISO 800 | HHHR | Lightroom
By the time I reached Herring Cove the fog had receded somewhat, giving way to direct sunlight—a real challenge, which demanded careful exposure. Knowing there was additional dynamic range with HHHR mode, I was able to tame the brightness and maintain open shadows while keeping the offshore fog in balance. Too many internet pundits just don’t understand how versatile and capable the OM sensor is!
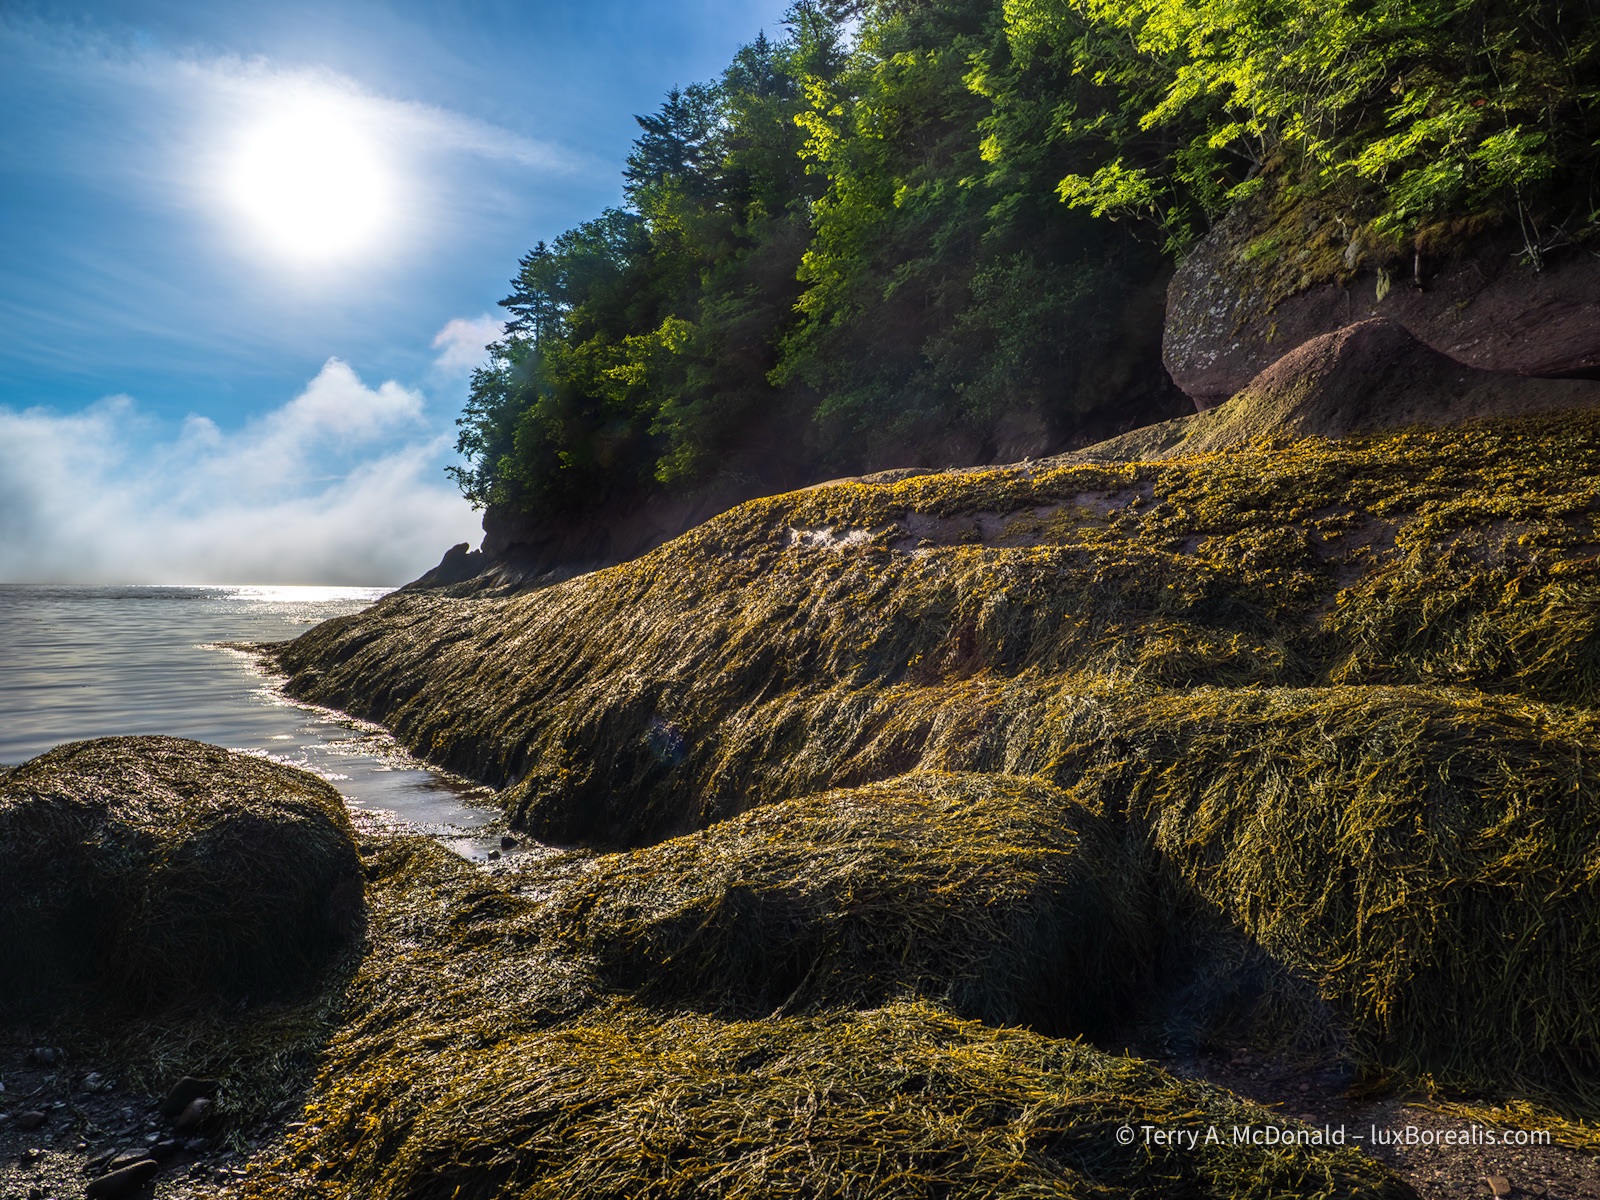
OM-1 | 12mm | ƒ8 @ 1/640 | ISO 200 | HHHR | Lightroom
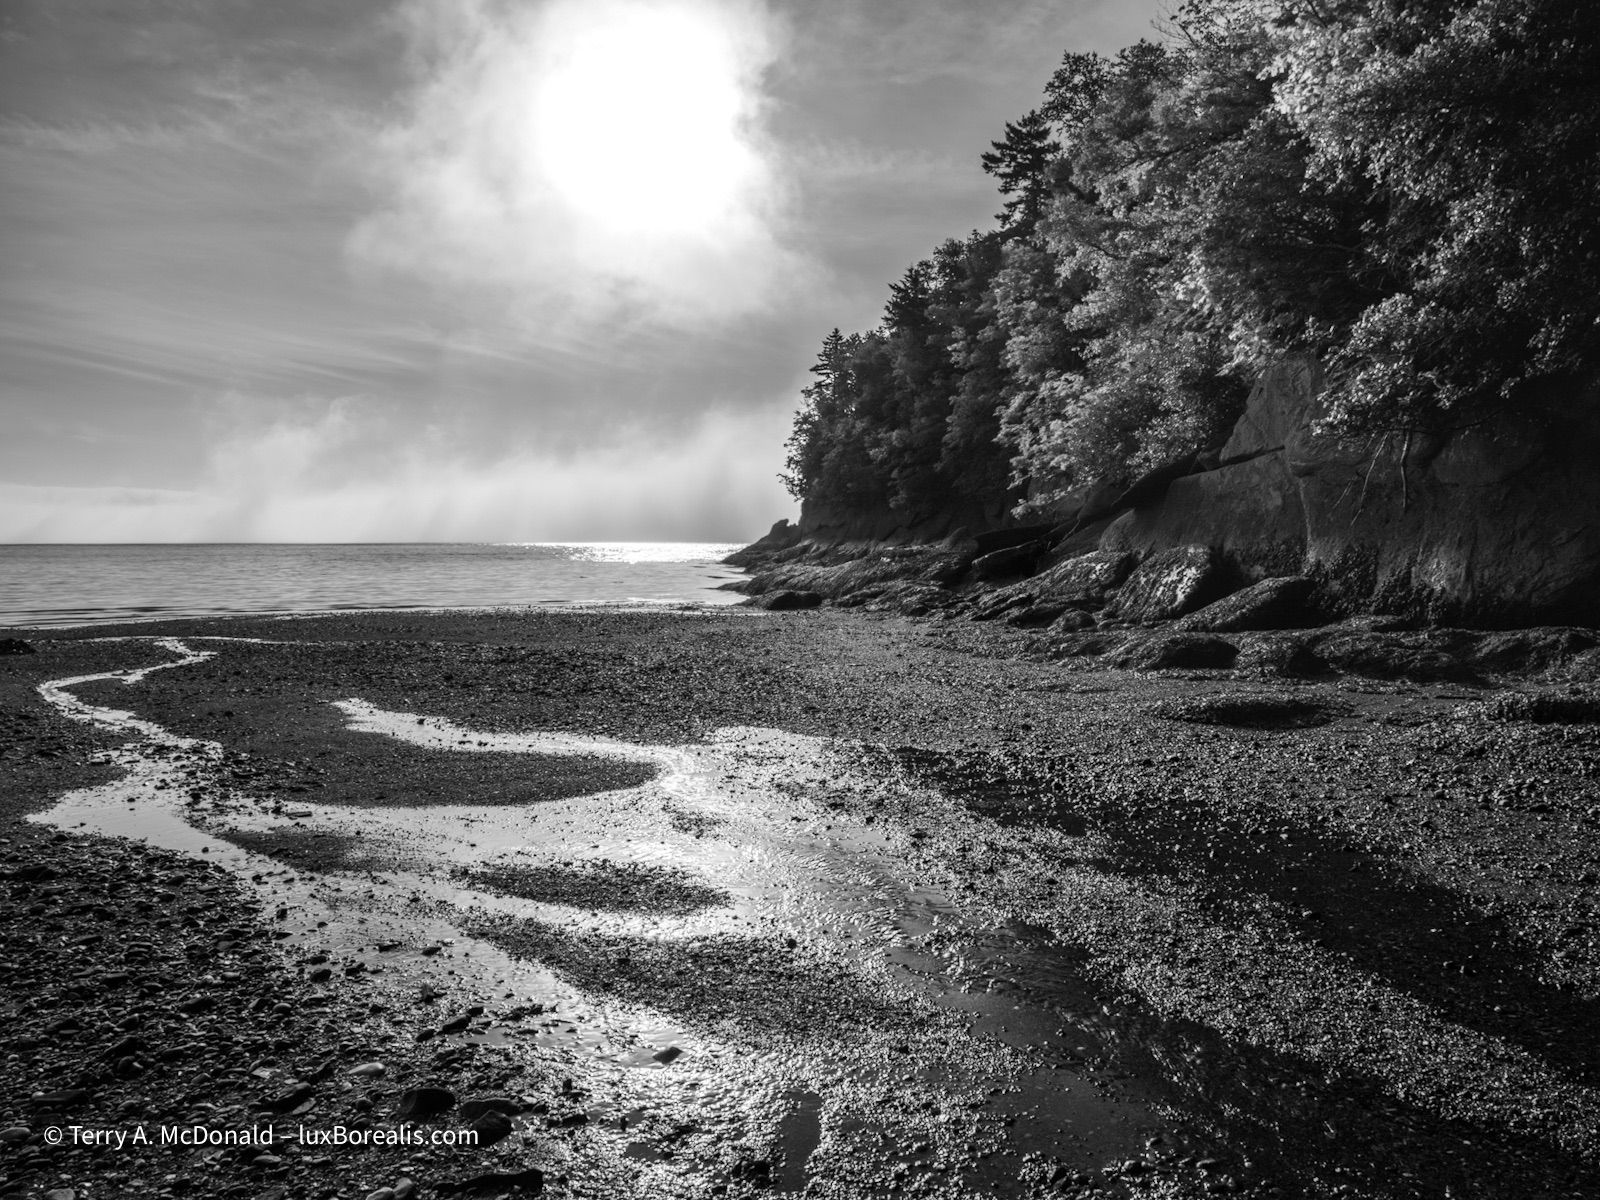
OM-1 | 12mm | ƒ8 @ 1/1250 | ISO 200 | HHHR | Lightroom
By now, the tide was receding quickly—about 20m of beach was exposed in half an hour—so I decided to forego breakfast and head straight to . . .
Hopewell Rocks
I arrived around 8:30am, not long after opening but before the Canada Day rush. Hopewell is such an engaging place. It’s a unique experience wandering around one of the wonders of nature, seeing first-hand the erosive force of the tides and the fascinating sculpted sea stacks. The provincial park is well-organized to receive thousands of visitors without feeling overly touristy. Credit for that goes to the wide stone dust paths (not paved!) and the excellent interpretive centre which provides geographical and geologic context to the tides, the sea stacks and the Bay of Fundy itself.
Along the 750m trail from the entrance to the grand staircase down to the sea floor, there were a few view points. This photo is from one of them. And yes, they really are Peregrine Falcons.

OM-1 | 100mm | ƒ5.6 @ 1/640 | ISO 200 | HHHR | Lightroom
Unexpectedly, one of the first images I made down on the sea floor was almost identical to one I made 15 years earlier: the ‘classic view’, I guess.
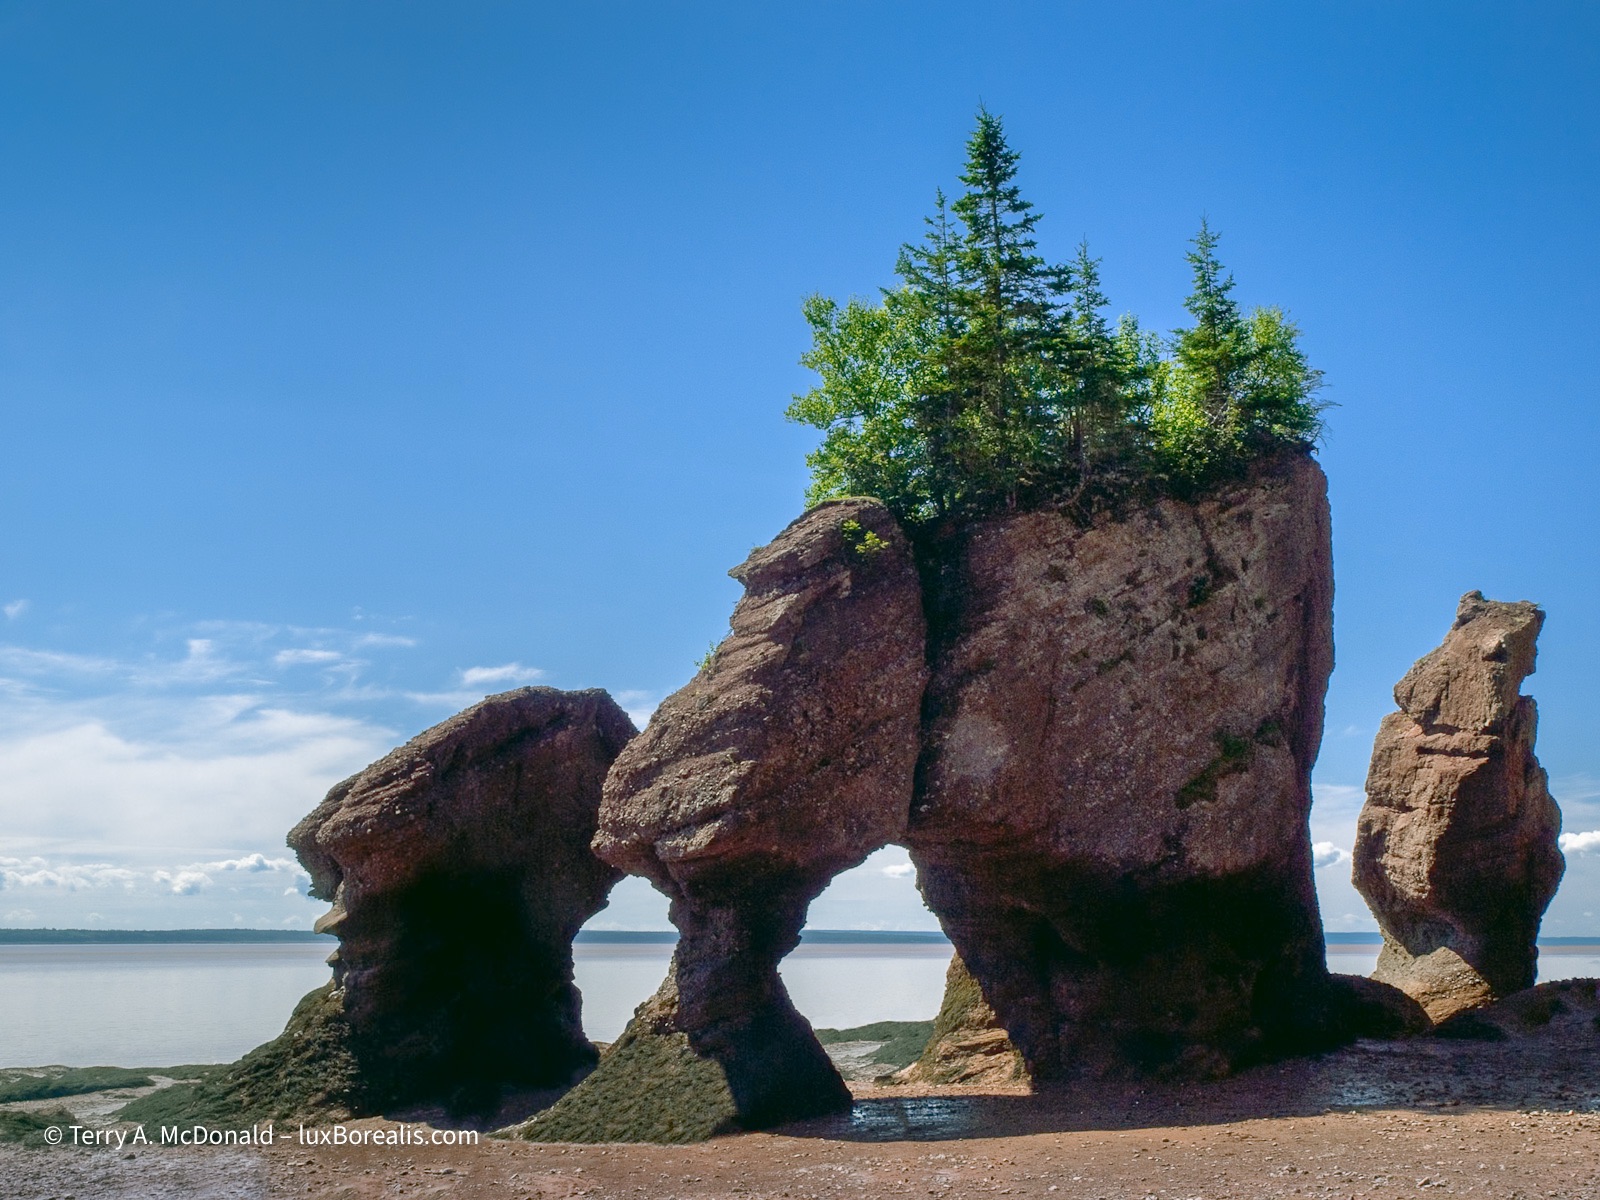
Olympus E-30 | 20mm | ƒ11 @ 1/100 | ISO 200 | Lightroom (12MP file).
Despite being a few techno-generations old, this file stands the test of time.
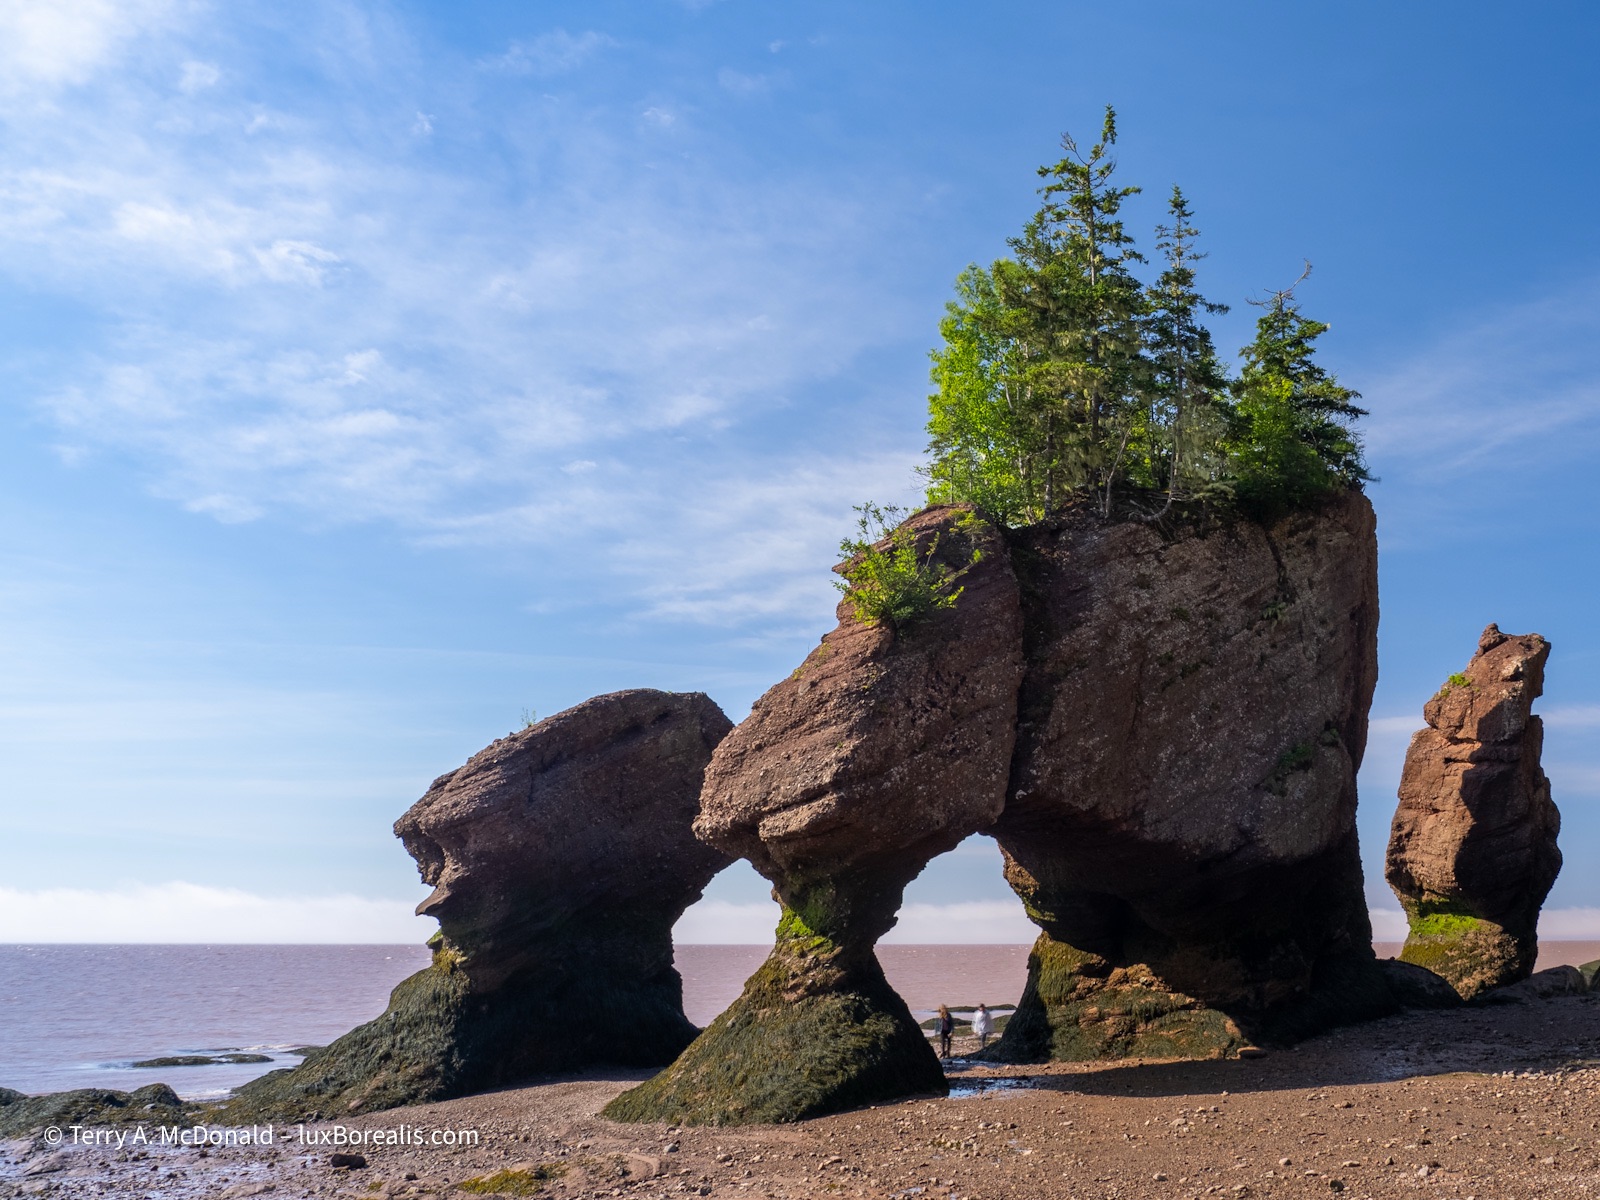
OM-1 | 12mm | ƒ5.6 @ 1/800 | POL | ISO 800 | HHHR | Lightroom (25MP file cropped from 50MP)
Importantly for me, I managed to make a number of significant landscape photographs before and after the fog had lifted and before the crowds forced me back up the stairs. It was still hours before the rising tide would close over the ocean floor, forcing everyone back up.
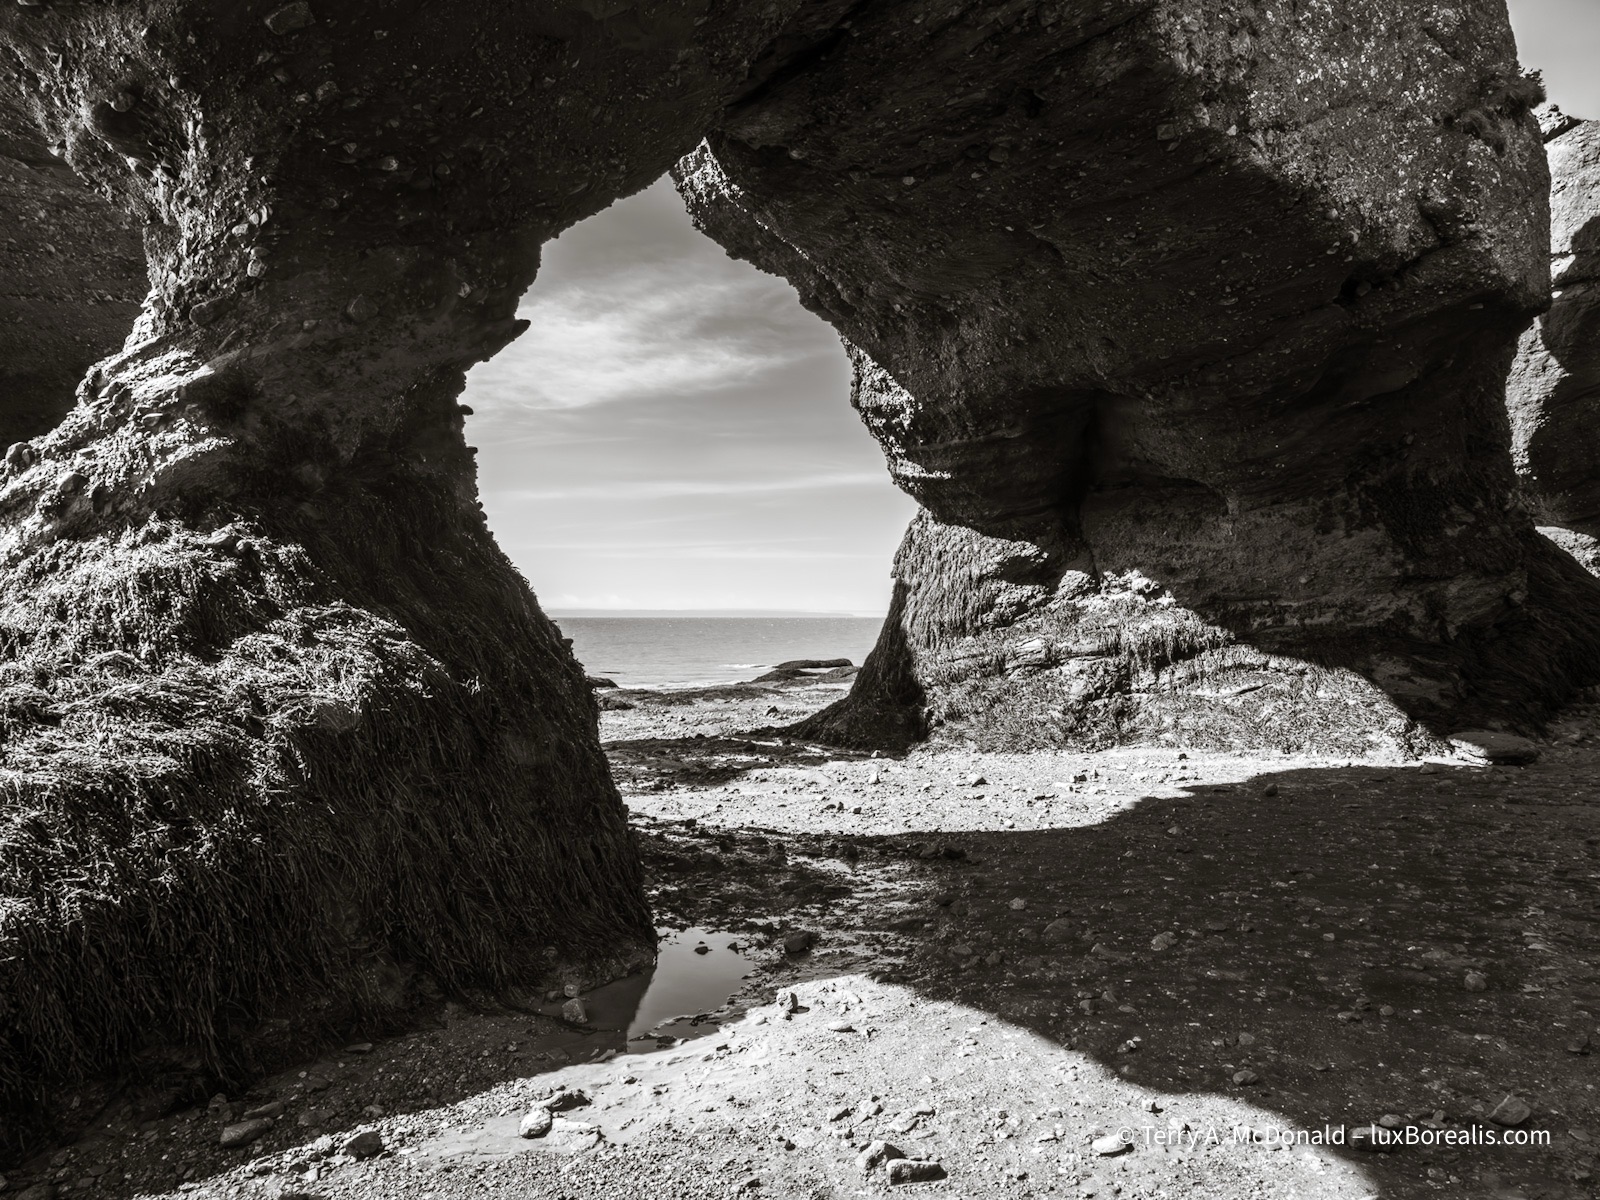
OM-1 | 12mm | ƒ11 @ 1/320 | ISO 800 | HHHR | Lightroom
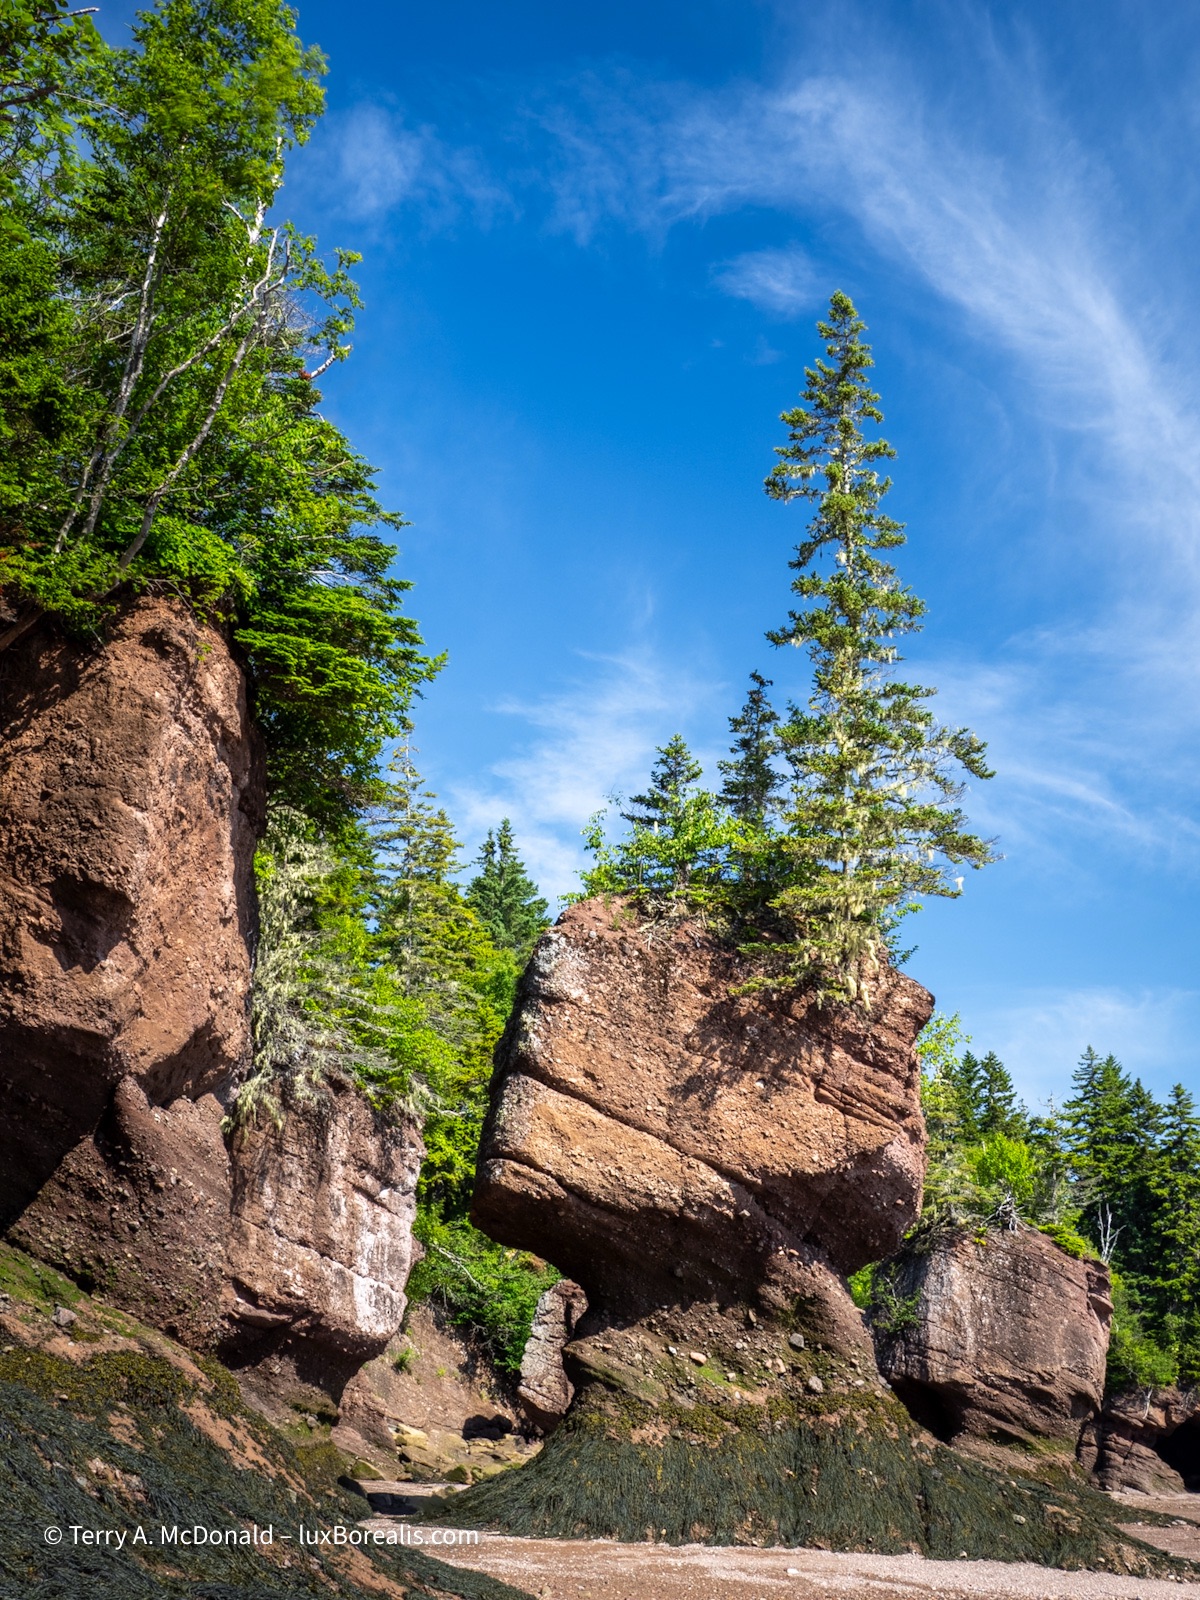
OM-1 | 24mm | ƒ11 @ 1/320 | ISO 800 | HHHR | Lightroom
Back at the car, I had a picnic breakfast then was off back to Fundy with a couple of stops along the way to check out places I had stopped at the day before. So far, the day was going well but I still wanted to get to another favourite, Dickson Falls. With tomorrow and Thursday being driving days, and wanting to make the most of today, I had a quick snacky lunch followed by some downloading and editing at my campsite and, by this point, a nap.
By 4pm, I was thinking that if I want dinner and some photography, I’d better get down to the Boathouse, eat first, then have the rest of the evening for photography. Perfect. Before it got busy with the Canada Day crowds, I had my last fresh seafood dinner back at the Boathouse, then was off to Dickson Falls.
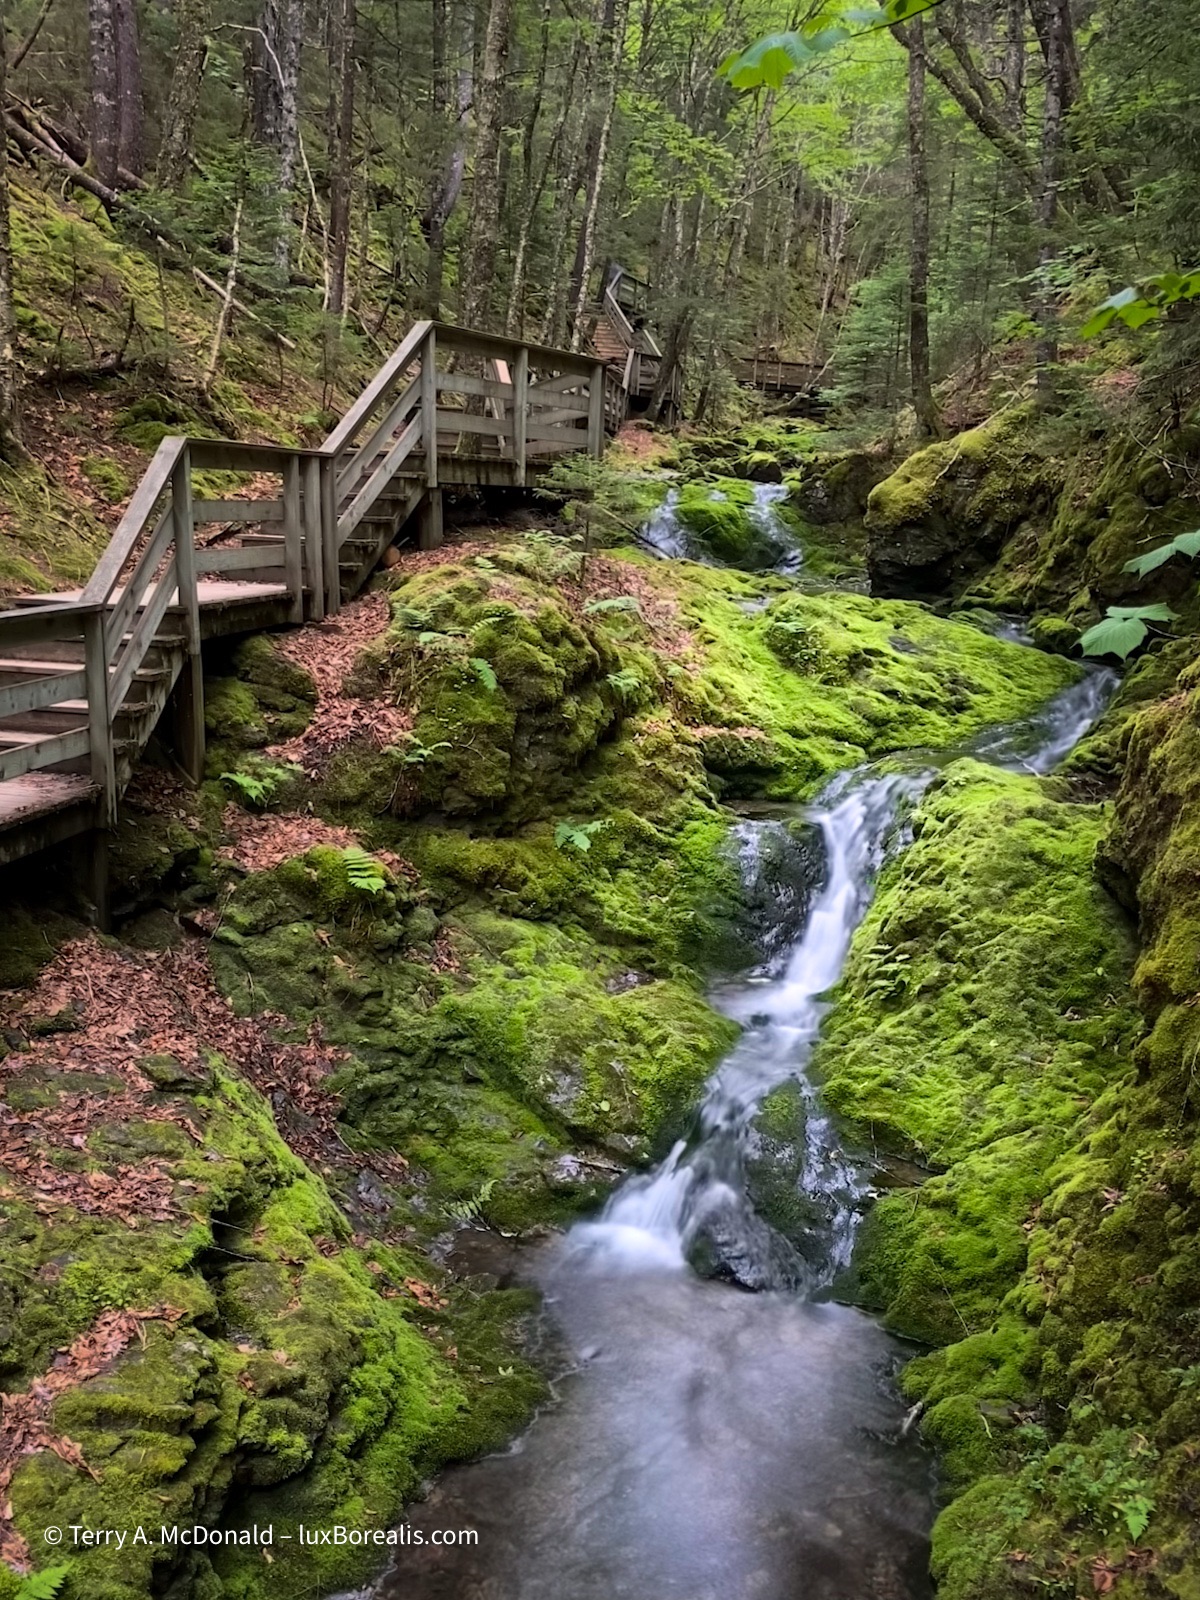
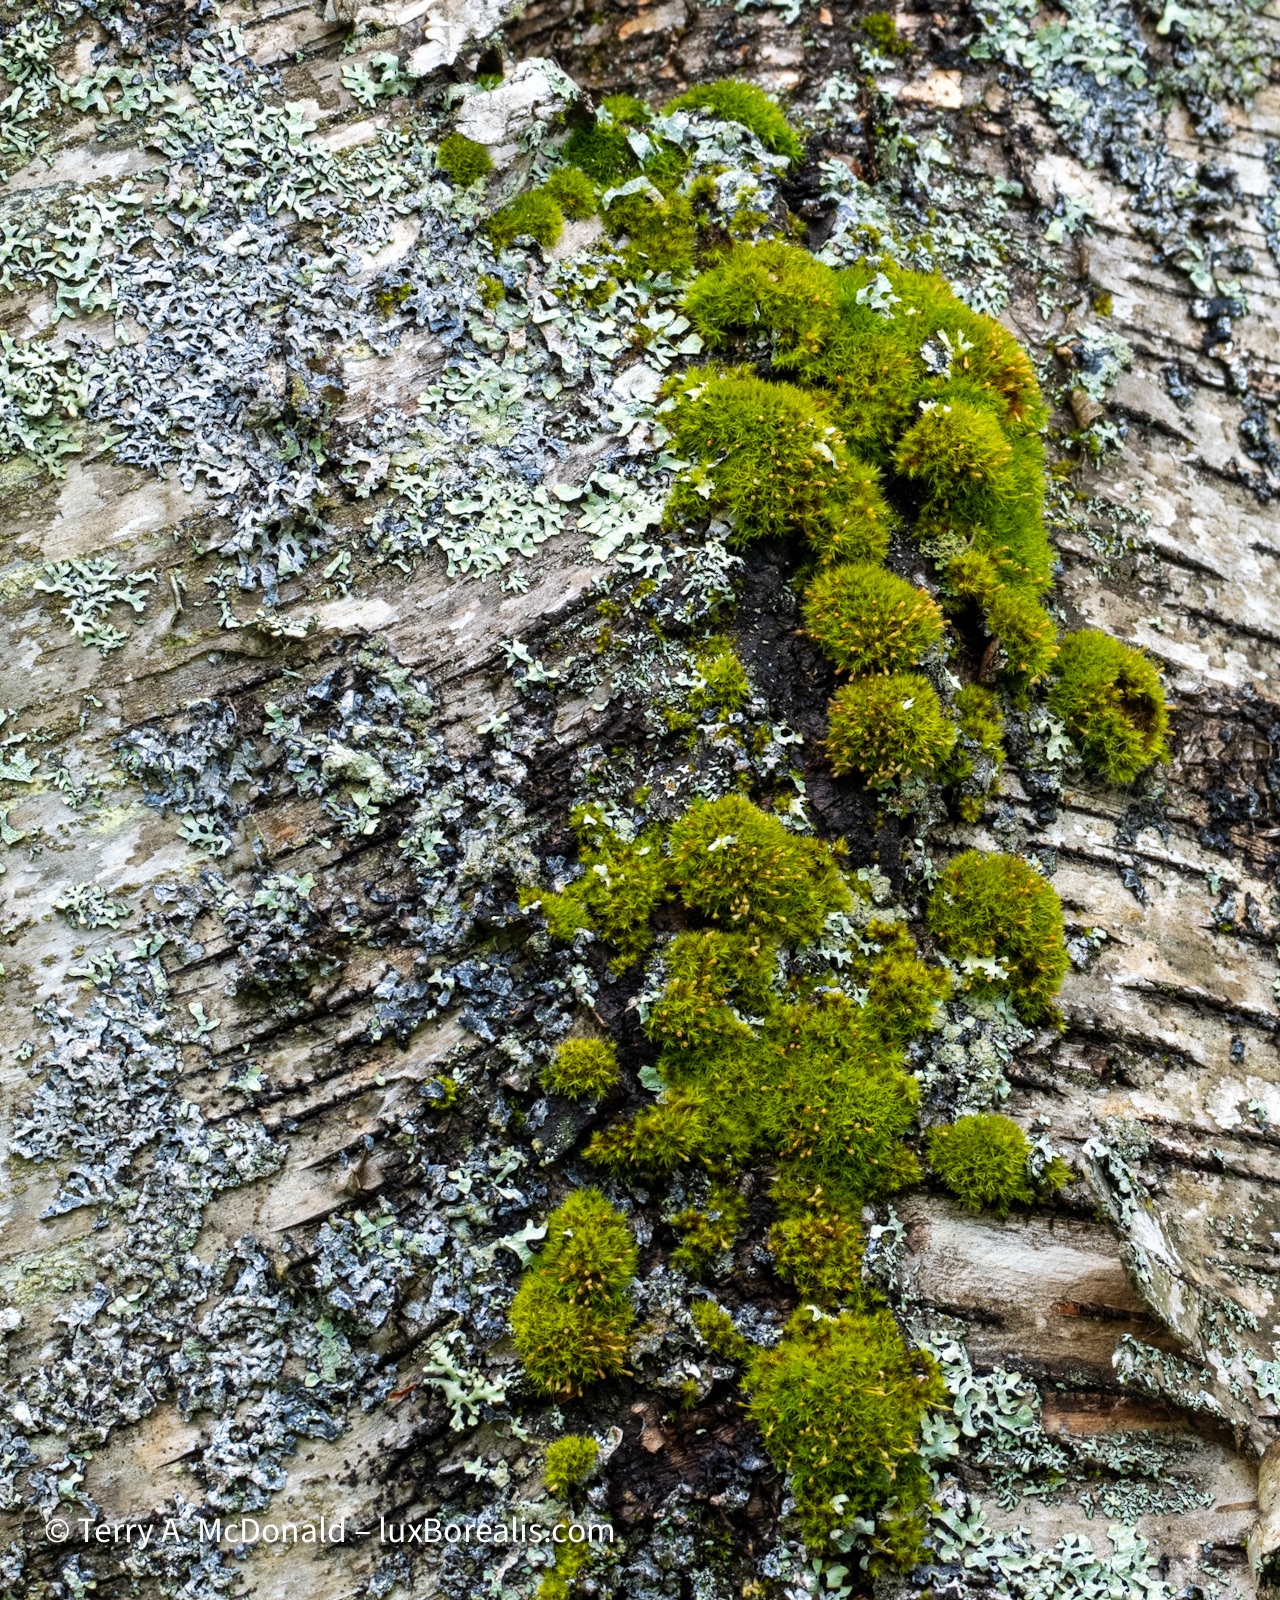
The Acadian forest in Fundy is so lush with bright green ferns and moss in abundance and Dickson Falls shows it off well, Once the morning fog had burned off, we were in bright sunshine. The last thing I wanted were contrasty shadows, so I was pleased to see some cloud roll in.
However, I hadn’t planned on it raining! Halfway through my exposures, a gentle rain began then tapered off, only to increase again. Worse, I had left my tent open for airing and some of my equipment out. Oh well. I wasn’t going to rush my time here in this beautiful forest.
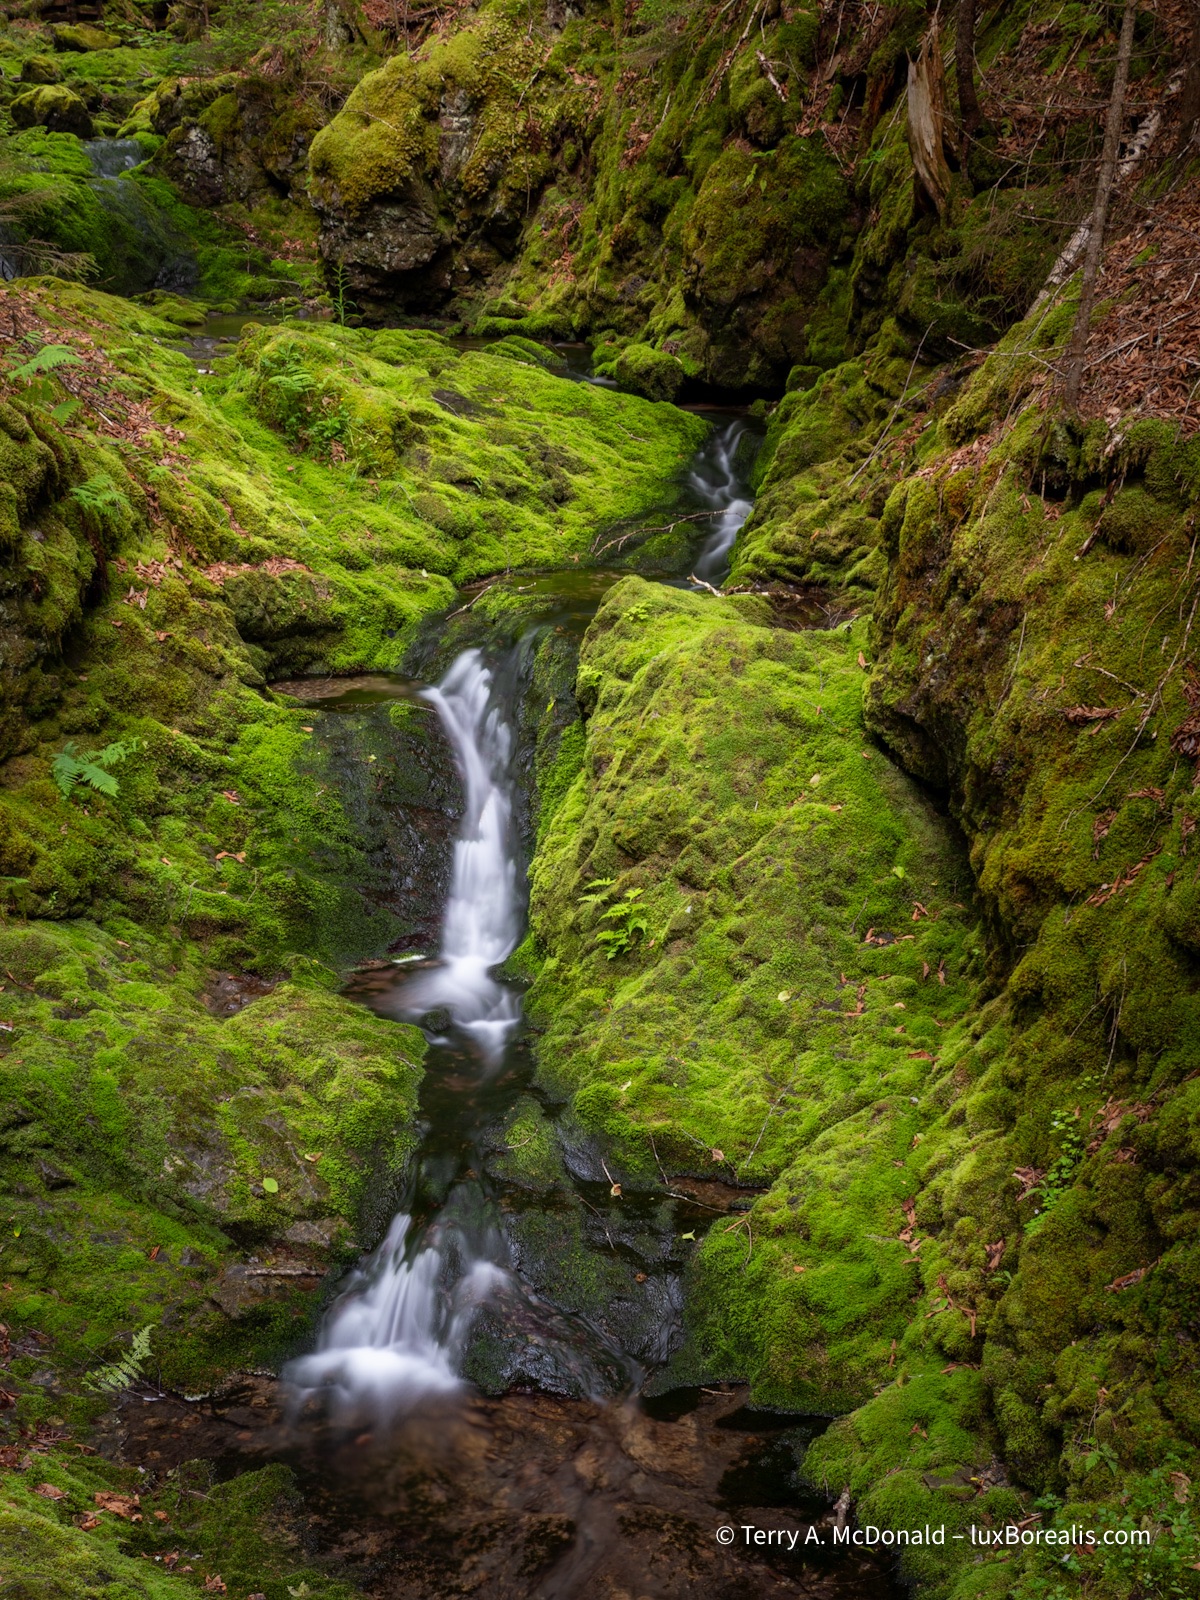
OM-1 | 20mm | ƒ5.6 @ 2sec. | ISO 200 | TripodHR | Lightroom
The only trouble with Dickson Falls—from a photography point of view—is the boardwalk. Not only is extensive as it wraps its way around the falls and up the other side, forcing difficult compositions to exclude it, the boardwalk bounced every time someone walked close by. And, as it turned out, I wasn’t the only one enjoying an after-dinner stroll down the many steps to the falls. I lost count of how many times I had to pause what I was doing until everyone had passed by and the boardwalk settled back down.
Now wet, but elated with the Dickson Falls experience, I headed back to my campsite to begin drying out. The next morning, I stuffed the wet tent and fly into its stuff sack and was on my way westwards, back to southern Ontario, by 6:45am.
With a good Anthony Horowitz detective audiobook playing and the 16 hours of driving up the St. Lawrence split over two days, I was good to go.
Looking back, I can only see successes. Sure, not everything worked out perfectly, but I was in the right headspace to create, what are to me, some very memorable photographs that capture the essence of place and the art inherent in nature.
Thanks for reading. Please continue the discussion by adding your questions, comments and observations to the COMMENTS section. As well, I invite you to SHARE this post with others.
OM-1 | 210mm | ƒ11 @ 1/100 | ISO 3200 | HHHR | Lightroom
