iPad for Photographers
A number of people keep asking me how I like Apple’s new iPad. Frankly, I love it and would have one except it’s not quite there, yet, for photographers. To make it truly useful as a content generator (as opposed to its current configuration as a content provider), I think it needs the following:
- larger HD – 64 GB doesn’t cut it when I have 12GB of music alone,not to mention apps plus docs; photos and slideshows take space!
- more efficient USB support for external HDs – I keep all my raw images on a portable HD; only my Lightroom catalogue is on the computer but even the data for it takes 8GB
- multitasking – it appears to be here with iOS 4.0 – we’ll have to see how efficient it is
- LR for iPad for ingesting images (2 USB ports needed – one for the camera, t’other for the portable HD), cataloguing; even some initial processing should be possible
- a larger screen would be wonderful – preferably 16:9 ratio.
I know, I’m not asking for much. If you read this Steve, please take note!
Bruce Peninsula National Park
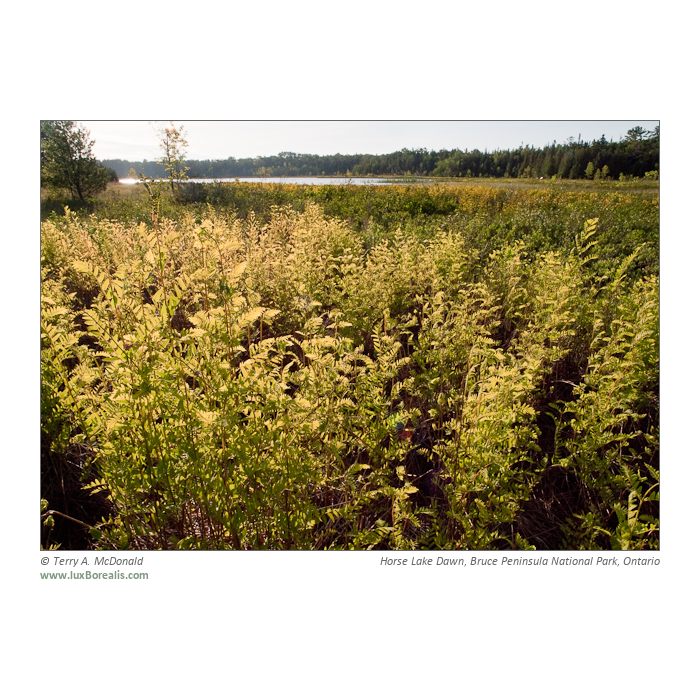
Had a great 4 days in Bruce Peninsula National Park, Ontario last week. The camping was fun, although the facilities there are lousy. It must be about the most disappointing of all national parks for facilities. I’d rather s–t in the woods, thanks.
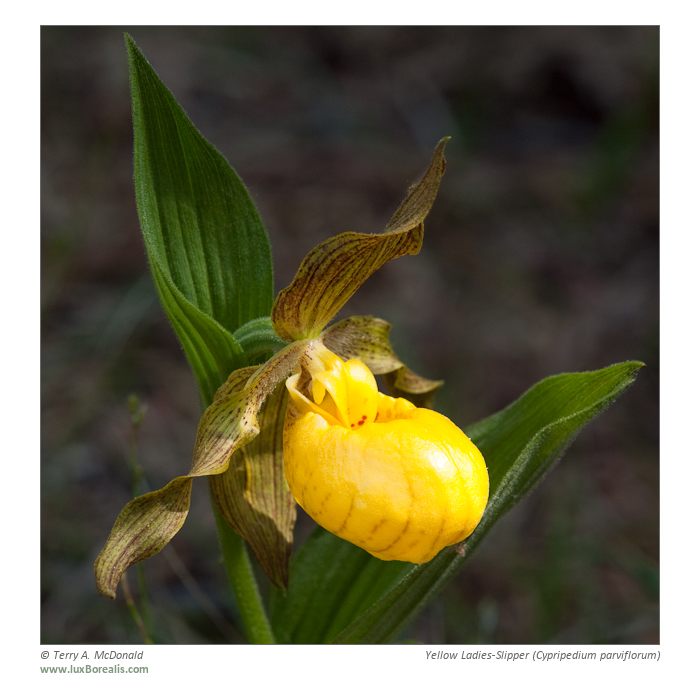
But the beauty of the Niagara Escarpment more than makes up for it. Dramatic cliffs, the spectacularly blue waters of Georgian Bay, brilliantly yellow Ladies-Slipper orchids. Lots to shoot. You can see a few below. Also see my website for more: luxBorealis.com-Gallery.
BTW – the photos below and on Flickr were created in Lightroom 2 using LR/Mogrify2 -a must-have plugin. The web gallery on my site was done using the Lightroom 2 HTML Web Gallery engine. It is truly wonderful to be doing all of this and maintaining filename standards and metadata and processing from all within Lightroom. I’m a happy camper!
This summer I will be heading to Algonquin for some interior canoeing with my daughter – any recommendations of photogenic locations that are relatively easy to get to (not a 2000m portage, please!) would be appreciated. I always prefer to canoe into a base camp and stay there for a few days then move on. Much better for photography and exploring that way. Cheers!


Aperture vs Lightroom – Decision Time!
So the winner is…
I’ll get to that in a moment. This process of comparing the two apps has been a great learning process. Each of them has their strengths and weaknesses. What is unfortunate is that although both manage photos very well, surprisingly, neither of them has the processing side nailed down as well as technology current allows. In other words, what is arguable the whole point of this exercise – producing the highest-possible quality of photographs – is not done perfectly in either application.
Both apps are missing what I deem to be a key feature: Transformation. I am not much a city person, but when I photograph buildings, I want to correct the inherent perspective distortion. I don’t usually remove all of it as I do want the give the impression of size and distance. This is only possible in Photoshop. Even Photoshop Elements has it, so Lightroom and Aperture should have it as well!!!
Lightroom lacks a truly useful spotting brush; it is still back in the days of a round-only, spot-only dust removal system. I don;t have a problem with dust – my problem is with errant twigs and stems of grasses. Aperture’s Retouch brush is a true brush that allows you to work with long, thin distractions such as twigs, powerlines and hairs – even iPhoto, Apple’s free photo app, has this feature! C’mon Adobe – this is a no-brainer. Just add your Photoshop Healing Brush to Lightroom!! Again, even Elements has this feature – surely Lightroom should, too!
Aperture is slow to use. I can’t count the number of times I get a spinning ball waiting for full res images to load (MBP 15″ 2.4Ghz Intel Core 2 Duo w/ 4GB RAM and nothing else open!). If I have to wait like this I would never be able to wade through all my images. Aperture has a superior GUI, though; e.g. the image filmstrip comes up on the left side – proportionately, I have more left-right screen real estate so putting on the side makes better use of my space.
I also love Aperture’s brushes and their implementation. Anything can be a brush and can be painted in or out. However, in Lightroom I find it helpful to be able to turn on or off the mask created through using the Adjustment Brush. As well, having multiple changes using one brush is very helpful; e.g. I can increase exposure and contrast and decrease saturation all in one easily editable brush.
Ultimately, my decision is to use Lightroom for four main reasons:
- Aperture is too slow in reacting to rather simple changes;
- Lightroom allows Adjustment Brush “multi-tasking”;
- Lightroom has a graduated filter – I use graduated filters frequently in landscape images;
- Lightroom is backwards-compatible with all my previously-processed the raw files created using Bridge and ACR. Switching to Aperture would mean having to redo past images.
So, for those who have been following this saga, there you have it. It’s Lightroom – and, may I point out, Lightroom 2. I have downloaded Lightroom 3 Beta and will commit to it when it is a full version, but this comparison was actually between Lightroom 2 and Aperture 3 – rather telling.
In the near future, I will add a Lightroom workflow to give a sense of how I make use of the app.
UPDATE:
The new header was made from within Lightroom 2 using the LR/Mogrify2 plugin from Timothy Armes found at the Photographer’s Toolbox. Great app and it’s donationware, so please donate to Timothy to get full access to it. Wonderful as it is, I still needed Photoshop to create the luxBorealis.com in the font I chose as LR/Mogrify2 only recognizes .ttf fonts and doesn’t, as yet, add stokes to fonts. BTW it would be nice to have drop shadows for fonts and images, too (just in case you’r reading this, Timothy!)
UPDATE 2:
I’ve been taking a bit of heat from the Apple community about not supporting Aperture. Let me assure everyone that I am a staunch Apple supporter and have been for 20 years now, starting with a Mac Classic! I have used Mac and Windows for the same length of time and will always be a Mac.
More on Aperture and Lightroom
Okay – I’m still not satisfied with either.
I just finished an afternoon shoot of 100 shots – all done in raw. I have processed them using 3 different methods: ACR 5.x via Bridge; Lightroom 2.6 and Aperture 3.0. Here’s what I found:
- In ACR 5.x I zipped through them – mostly because I am thoroughly familiar with the keyboard shortcuts. I did some Exposure correction, some Auto Exposure, some Adjustment Brush, some Graduated Mask very quickly and efficiently;
- In Lightroom, I was slowed down slightly due to being less familiar with the keyboard shortcuts however I picked them up rather quickly, specifically K for Adjustment Brush and M for Graduated Filter
- I did find Lightroom a bit frustrating in that I couldn’t simply tab to exposure values like I could in ACR – I had to trackpad over and click in the Exposure box. I found I could use the L and R cursor keys which sped things up somewhat, but I didn’t like the intervals as much
- I also noticed that the scale for the Graduated Filter changed from whole numbers to decimal numbers – perhaps due to previous masks I created in ACR. It seems odd that the numerical value should change like this.
- If I want to print jpegs to file, I should be able to save them to a different folder using the same filename – Lightroom won’t let me unless I “Export” the jpegs using a somewhat less sophisticated interface – similar to the ACR interface for saving images. While creating and running a Photoshop action through Bridge may sound intimidating – I can ensure exactly what my output will be like in every regard – but than I can through Export, yet similar to “Print to File” but with the bonus of keeping my naming structure.
- I still can’t get used to the dark grey interface
- on my MacBook Pro Intel 2.4GHz laptop, Lightroom still hesitates a few seconds before I can interact with each new raw image – there is no hesitation in ACR 5.x. In fact, ACR, the Adjustment Brush and GRaduated mask pins appear immediately
- Perhaps it is my incompetence with the Lightroom interface, but I don’t find it intuitive to synchronize adjustments over a series of images without having to create a preset.
- As with all computer monitors, I have more Left-Right real estate then Top-Bottom so I would like the thumbnails to be along the left like they are in ACR. I like the way they “Hide” along the bottom, but I don’t need the Presets found along the left as often as I need the Thumbnails.
- In Aperture… WHERE IS THE GRADUATED FILTER?? I’ve just gotten so used to using it. This is pretty much a deal-killer for me using Aperture as a total solution. Also…
- the Auto Exposure setting does a much better, cleaner job than in Lightroom
- I don’t like the Hot-Cold cutoffs – even set at 100% I have clipping if any one colour is at 253 pixels. I would prefer to set the Hot and Cold thresholds to Luminance as I have done with the Histogram (why can’t the two settings be tied into one another?)
- Perhaps it is my incompetence with the Aperture interface, but I don’t find it intuitive to synchronize adjustments over a series of images. With ACR and Lihtroom I set the adjustments for one image, select all and click on “Synchronize” to have one, some or all of the adjustments applied to the other images.
- Perhaps it is the Browser that could use some work… When I select images, I don’t see any change to indicate the images that are and are not selected. I iPhoto, a thin yellow line appears around the selected images – in Aperture, nothing. Even Lightroom the borders go light grey to indicate selected image.
So where does this leave me? Well, I’m back to square one – that is, I’m not totally satisfied with either Lightroom or Aperture and I am not yet ready to move from Photoshop-Bridge-ACR to either. If anyone out there has some insights into this I would appreciate hearing from you.
Image-A-Week 3
Okay – I know it’s been a long time. I’ve been shooting, but have not had time to upload photos.
Spring has sprung in southern Ontario. Actually, it sprang upon us in mid-March with highs in the teens-low 20s (°C). Too early for me to wrap my mind around it.
These Spring Beauties were spectacular congregated around the base of a huge beech tree. I used the 12-60mm on my Olympus E-30 and softened the harshness of the bright afternoon sun by using my trusty “clear” garbage bag.
BTW – this was exported from Aperture using the free borderFX plug-in. Enjoy!
And – if you want to learn the techniques for capturing nature and outdoor photos, sign up for my Spring Woodlands Workshop – Friday eveing, April 30th and all day Saturday May 1st here in Guelph. $125 if you pre-register – info@luxborealis.com

Carolina Spring Beauty - Olympus E-30 w/ 12-60mm f/2.8-3.5
