My Nikon D800e has arrived and…
…I’ve started putting it through its paces. [Many thanks to Lan at Vistek Mississauga for finally getting one of these into my hands!] I don’t think I’m overstating things when I say that, at least for me, this is the dawn of a new era in photography. Sorry for the melodrama, but I’ve been using 4:3s DSLRs since I switched from 35mm and while I can state unequivocally that I made some absolutely wonderful images with them, I always felt just a little hampered with the lack of fine detail I had become used to when shooting 6×7 and 4×5 (and 35mm Velvia). It would appear the D800e might just bridge that IQ gap I have been missing.
This morning I was out before dawn putting the camera through its first paces and am just now sitting on the deck waiting for the images to upload to my computer. As background, I am using a MacBook Pro (mid-2011) 2 GH Intel Core i7 with 8 GB of ram. As the D800e has two card slots, I have put into the CF slot a Lexar Professional 32 GB 400X UDMA card (dedicated for video and overspill) and into the SD slot a Lexar Professional 32 GB 400X SD UHS1 card. I am dedicating my raw images to the SD card since I can easily remove it from the camera and plug it directly into the MacBook Pro (I would prefer to be doing that with the CF card, but I guess that would be asking too much of Apple).
So the images have uploaded and didn’t take as long as I expected given that they are all raw files between 40 and 50 MB in size. The 78 images were uploaded in just a few minutes into Lightroom 4.1. This is partly because I have only Medium size jpeg previews made and 1440 pixel previews and a Standard Preview size of 1440 pixels at Medium quality. While this speeds uploads, it does mean that I wait for full-sized previews to be generated upon zooming for the first time in Lightroom.
Equipment
I set out this morning, as usual, with my complete kit of tripod + electronic remote, polarizing and ND3 filters plus lenses: 20/2.8 AF-D, 28/2.8 AF-D, 50/1.8 AF-D, 105/2.8 Micro AF-D and 300/4 AF-S. They are mostly D lenses because I was able to pick them up used for a great price and just couldn’t justify the extra expense for the AF-S versions when the optics are virtually identical (particularly with the 20mm and 105mm Micro-Nikkor). I hardly ever use a 28 or 50, so my key focal lengths are well-covered with near excellent glass and the 105 AF-D is a much more manageable size compared to the AF-S version. AF might be a bit slower, but for most of my work with that lens I am using MF anyway.
Field Experience – so far, anyway…
I have enjoyed the switch from Olympus to Nikon over the past two months, although I greatly miss having both shadow clipping and highlight clipping show in LCD previews. Olympus would show Shadow clipping as blue and Highlight clipping as red just as Lightroom does – I can never figure out why Nikon does’t do the same except that Highlight clipping is much more important to be aware of than Shadow clipping. Also, I miss being able to program the delay between mirror lock-up and shutter activation. Olympus would allow 1, 2, 3, 4, 5, 7 & 10 seconds; the D800e only allows up to 3sec. so I just set the dial to “Mup” and count my own 4 or 5 seconds – no real problem there as it is identical to how I use my Pentax 67.
Everything seems to be in its place for other settings and I haven’t found the camera to be cramped. One thing I did notice right out of the box was how light the camera felt. I am glad of it not being the “professional” size of a D4 or D3 as I much prefer something that is more “backpack-able” and “portage-able”.
I plan to shoot at the base ISO of 200, unless there is a compelling reason to change, as ISO200 does provide the greatest dynamic range. Typically, I shoot using Aperture-Priority (A-mode) as it is aperture that I wish to control more often than shutter speed. I work on a tripod, so unless the wind is blowing, shutter speed is not usually significant.
I am greatly enjoying the much larger viewfinder experience offered by a full-frame camera. There is space to look around! I make constant use of the digital level projected in the viewfinder and find Nikon’s implementation quite good except for one thing – the markings are in black. If they were at the top (as they are when I shoot vertically) then it’s not too bad as they are more often projected against the sky (for landscapes). But with black markings at the bottom, I found they were difficult to see at times. Depressing the shutter release 1/2-way does give a split-sceond of the “ambient-red” look so I can see where I’m at, but I must admit to finding the implementation of the digital level in the viewfinder less helpful than my experience with the Olympus E-30, although the Nikon seems to be slightly more precise with finer markings.
Breakfast is calling. More to come…
Cheltenham Badlands
Victoria Day holiday Monday started at 4:30am. A quick bowl of cereal was followed by a knock at the door. Kerry Little had arrived and we were on our way to the Cheltenham Badlands. Our goal was to be there before sunrise – no problem.
The day dawned clear with a slight and unexpected wind; the previous two mornings had been so calm. Oh well -not to worry – the rocks certainly won’t blow around!
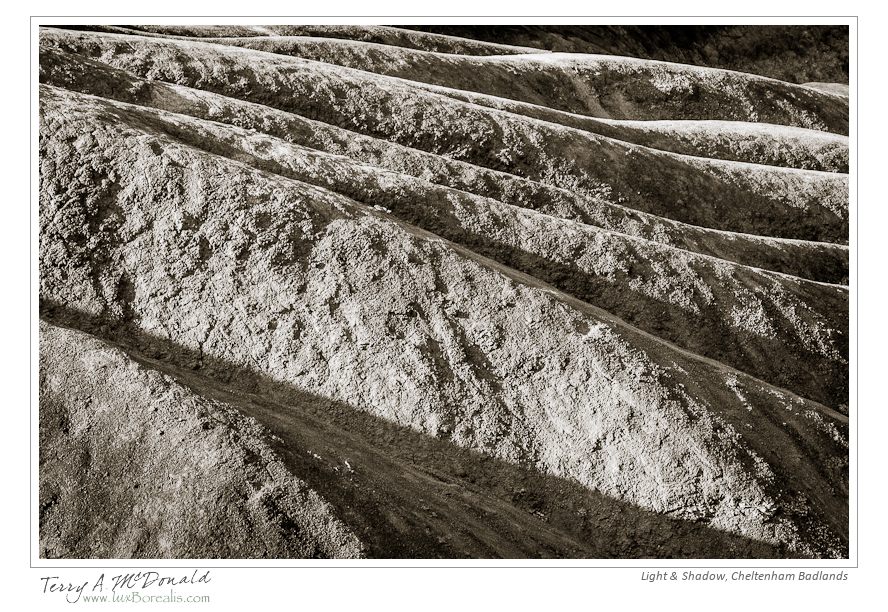
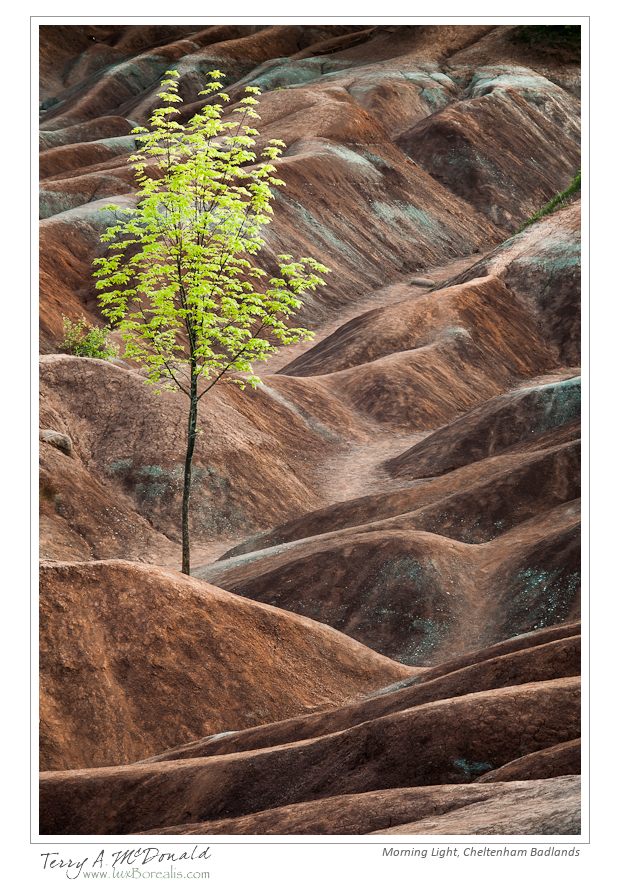
Cheltenham Badlands are a small and rather unique feature along the Niagara Escarpment of exposed and eroded “red” and “green” Queenston shales. While you won’t find any hoodoos like there are out west (Alberta Badlands, Yoho National Park hoodoos and US Badlands), the colours, textures and contrasts of the undulations and hummocks are wonderful subjects in themselves. I prefer the subtle lighting of early morning before there is direct sunshine on the site, however, with a keen eye, dramatic photos can be made at any time of day and season.
I am still shooting with the D200 loaned to me by Kerry, and used a selection of lenses from both of our gear bags: 20mm, 50mm, 85mm, 105mm, 80-200mm and 300mm. I briefly used Kerry’s D3 to get a sense of the 20mm on a full-frame body – wonderfully amazing – I am so looking forward to working with the incredible perspective provided by a 20mm.
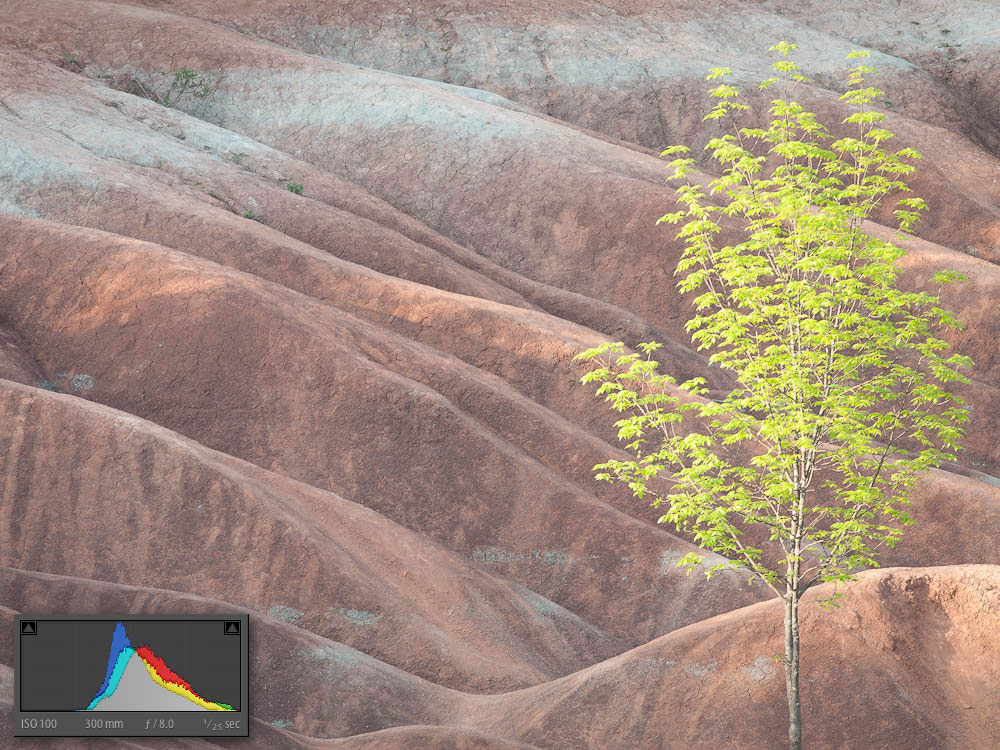
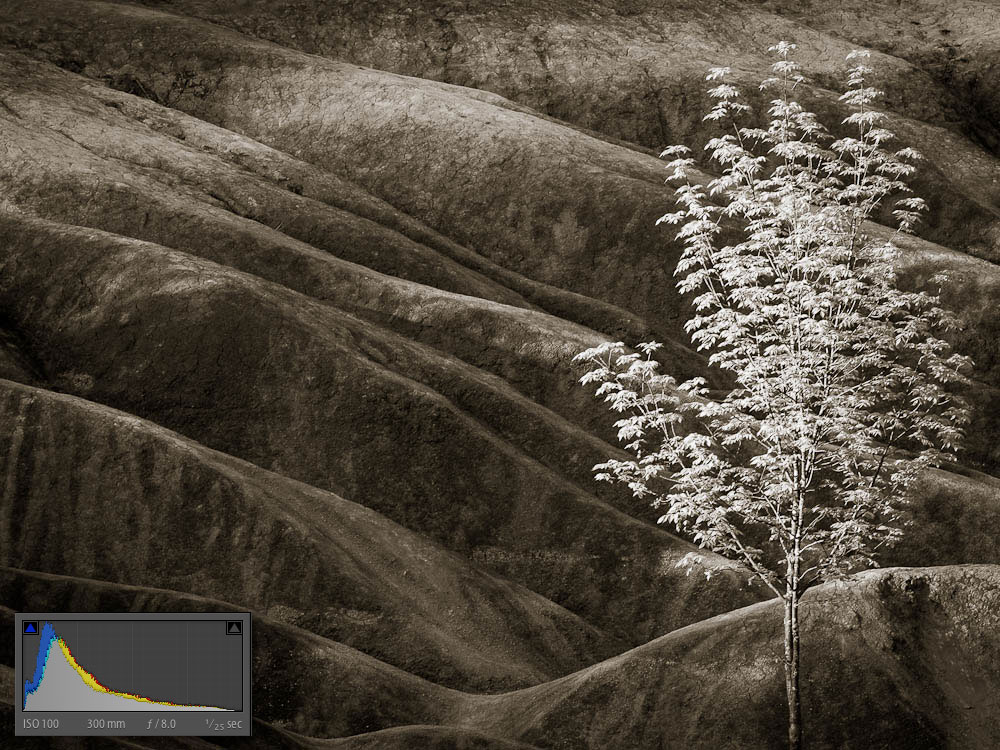
All shots were made on tripod allowing the use of small apertures for great depth-of-field. Shutter speeds ranged from a few seconds to about 1/40th. Most of the raw images were exposed-to-the-right creating distinctly washed out images that retained full detail without the spectre of noise in the shadows. Here is a “before” and “after” sequence, along with the histogram for each, to give you a sense of how this works. After editing the colour version, I went on to create a black-and-white version that I also added some subtle brown/sepia toning to.
Lightroom 4 is truly a marvel to work with. I can be much more precise with the “processing” of each image, allowing me to recreate more precisely what I “saw” in the field. Besides the before-after shots, I’ve included a few other shots from the day.
-
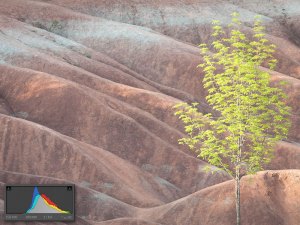
- Original “raw” capture
-

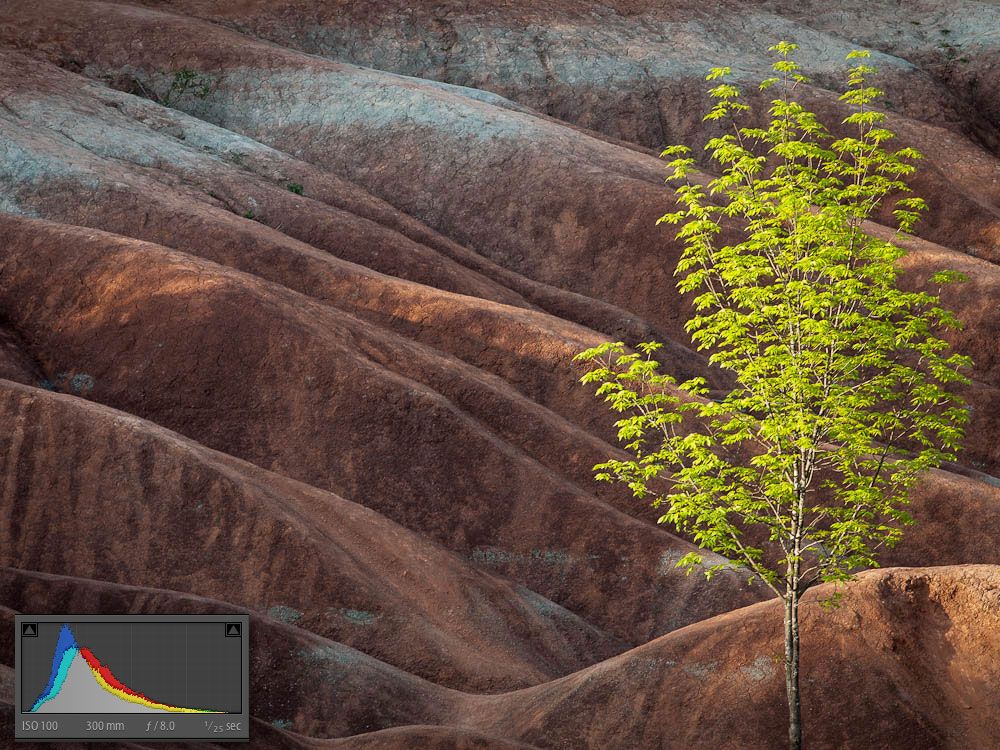
- Colour edit
-
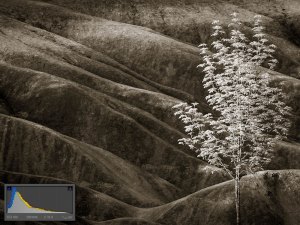
- B&W edit with toning
-
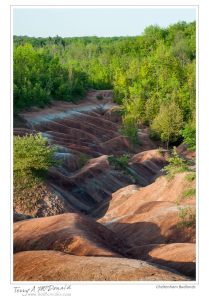
- Cheltenham Badlands

-
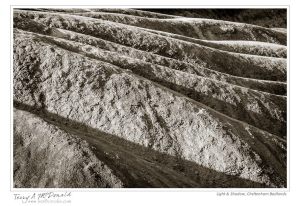
- Light & Shadow
-

- Morning Light
-
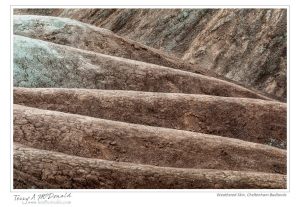
- Weathered Skin

Lightroom 4 is truly a marvel to work with. I can be much more precise with the “processing” of each image, allowing me to recreate more creatively what a “saw” in the field. Here is a selection of other photos from the day:
Nikkor 300mm f/4 AF-S – Amazing!

Unmanipulated 100% view
Twenty-five years ago I owned a 300/4 manual focus for my Nikon FM and FM2. It was a great lens, but as way leads onto to way, my Nikon gear was replaced with Pentax 67 gear. It’s funny, though, how things come full circle…
I took ownership of this new AF-S version of what has always been an amazing lens in the Nikkor line-up and it is just as good now as ever. Here are a few shots made last night in our backyard of our resident Eastern Cottontail. In fact, I have made two screenshots showing two raw files at 100% with no manipulation – both shot on a Nikon D200 I am currently borrowing 9prior to the arrival of the D800e.

Unmanipulated 100% view
Maybe I’m easy to please, but I was more than pleasantly surprised at how sharp these images were. They were shot in evening light at f/4 with shutter speeds of 1/100 and 1/125 using an ISO of 400. I can tell I’m really going to love this lens. The bonus is that on the D800e, it can used full frame as a 300mm or in DX mode as a 450mm – still with a 15MB file size! Here are two images processed from last night’s shoot. Enjoy!


Dundas Valley Spring 2012
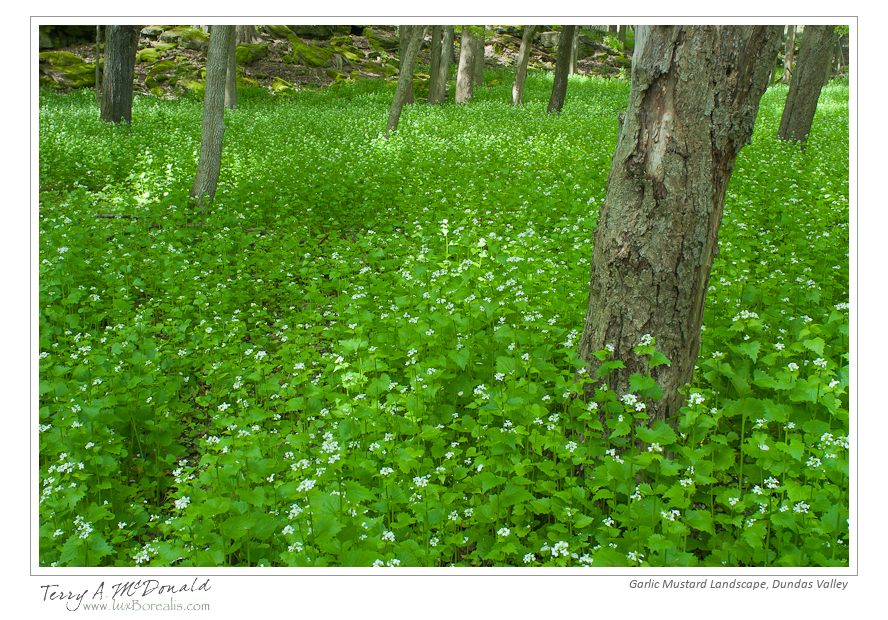
I spent a beautiful (albeit windy) Saturday morning leading my Nature Photography class from Mohawk College through a small part of the Dundas Valley in hopes of shooting some close-ups of spring wildflowers and other nature photos. I think we all came away with some good photos, but I must admit to being rather disappointed with the day. While there were quite a few Jack-in-the-Pulpits, there was an almost complete lack of anything else.
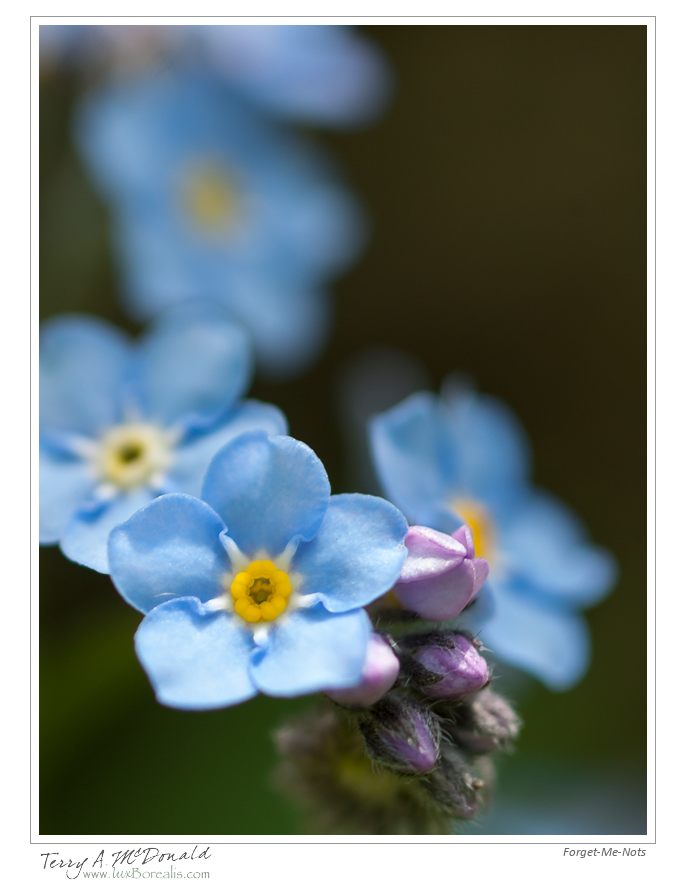
To me, this is discouraging in such a typically bountiful area as the Dundas Valley. While there were many patches of mayapples, we saw only one clump of trilliums. While one could argue the flowers were finished early, there weren’t even any tell-tale clumps of leaves of trillium plants. Even dog-toothed violets (trout lilies) were in short supply (no flowers, of course, as they are long gone, but very few scatterings of leaves). Instead, vast areas of the forest were covered by mats of either forget-me-not or garlic mustard. From a photographic stand point, these worked quite well, but as a naturalist, I am rather concerned that these aliens have choked out native species of this area.
Even ferns were in short supply. There were very few in the forested area and no Christmas ferns at all; just a few around the mossy boulders.
Oh well… I’ve posted four photos below. As it turns out, my wife Laurie had a wonderful morning birding in the Valley, having seen wood ducks, orioles, eastern bluebirds, a rose-breasted grosbeak and a myriad of warblers, including a number of palm warblers.


Some 105mm Micro-Nikkor photos
 I’m still awaiting my D800e…perhaps just as well so Nikon has a chance to iron out a few bugs 😉
In the meantime, I’m using a D200 that belongs to my friend Kerry Little – many thanks! – to explore the prime lenses I’ve purchased. I am thrilled to be getting back into close-up and macro work with the 105 Micr-Nikkor, which, of course, is a 150mm on the DX camera. Wow – great working distance and wonderfully tight close-ups.
 Our daughter turned 16 last week (yikes!) which brought a beautiful bouquet of flowers including two Protea. Our love of these beautiful and intricate flowers came with our trips to South Africa – their native land. Our two trips – both in April, their autumn – brought many close encounters with these flowers in the wild. Spectacular! They are incredibly ornate and colourful and make ideal subjects for photographers.
With these being cut flowers, I could move them to an east window after the sun had passed, giving strong, but filtered light. I shot on a tripod allowing for precise composition and the longer shutter speeds needed for small apertures. It was a luxury to be able to rotate and move the vase to get just the right views, framing and focus – something I don’t have the option of doing when photographing in the field!
