Landscapes of Wellington County
For a while now, one of the projects I’ve been working on is a series of landscapes of Wellington County. Now, for those of you who aren’t familiar with the area, Wellington County is an hour west of Toronto and surrounds the city of Guelph (about 120,000) and the towns of Erin, Fergus and Elora with a hodge-podge of townships trending northwest from there. Predominantly farmland with few natural areas, Wellington County is bisected by the Grand River and some of its tributaries, namely the Speed and Eramosa Rivers. It’s not exactly Madison County with its various bridges, but, there are a few places where the river courses are quite photogenic. As well, Elora Gorge offers some great photographic potential.
There is not much in the way of topography, though, with the highest point being Starkey Hill, just east of Arkell (southeast of Guelph) atop the Guelph Moraine, part of the Galt-Paris Moraine complex left over from the last glacial period. The Grand River valley also provides some topography, but with most of the land being private and the natural areas being either wetland or forest, there are few “vistas” ideal for landscapes.
If I could photograph only one thing, it would be landscapes – those broad, sweeping, three-dimensional vistas filled with detail that start at my feet and extend to the horizon. However, to really work, they require just the right combination of timing for vegetation and lighting – that dramatic moment that says something more than “I was here”. And, more often than not, landscapes are at their most stunning when I’m on my way somewhere else and can’t stop to photograph. Such is life… Needless to say, my landscapes of Wellington County continues to been a long-term project.
Yesterday morning I made a point of doing some exploring to re-familiarize myself with some spots I hadn’t been to in some time. It was a fine summer morning still fresh after Sunday’s rain. Thank goodness for the rain over the last week, otherwise the river courses would have been nearly dry. I worked in the area just north and east of Guelph – the Eramosa Township area.
Field techniques included, as usual, a Nikon D800e mounted on Manfrotto 055 legs and head, mirror lock-up and an electronic release. Shooting data for each photograph is in the caption. The raw image files were processed using Lightroom 4.1
Here are a few from yesterday…
-
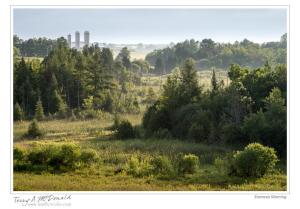
- AF Micro-Nikkor 105mm ƒ2.8 D; ƒ16 @ 1/15, ISO100

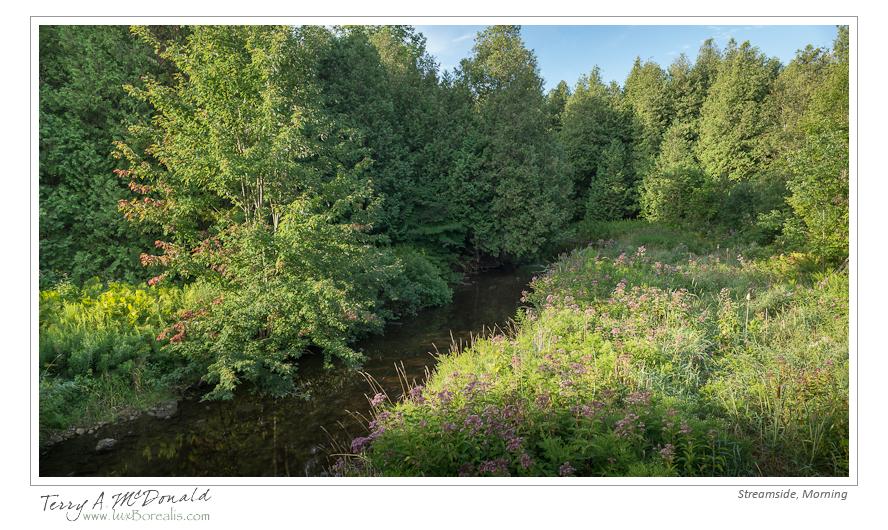
-

- AF Nikkor 24mm ƒ2.8 D; ƒ11 @ 1.3sec, ISO50; w/ Polarizing & ND3x filters
-
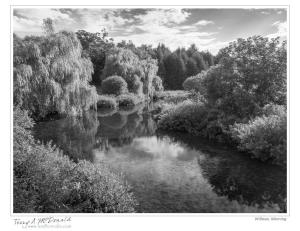
- AF Nikkor 24mm ƒ2.8 D; ƒ22 @ 0.6sec, ISO 50 w/ Polarizing & ND3x filters

-
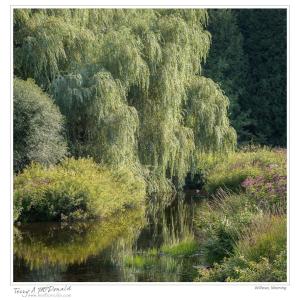
- AF Micro-Nikkor 105mm ƒ2.8 D; ƒ16 @ 1/30, ISO200 w/ Polarizing filter

Lightroom: There is more to print resolution than meet the eye
While surfing today (hey, it’s raining out, why not!), I came across an excellent article from last year by Lightroom guru Jeff Schewe that sheds an incredible amount of light and detail on print resolution. If you are printing your own prints using Lightroom then I strongly suggest you read this article and adjust your printing routine accordingly.
I’ll warn you, the article is 5 pages long and full of detail that just might cause some head-scratching, but persevere and you will come out the other end much more knowledgeable about printing.
Here is the link from the magazine Digital Photo Pro :
The Right Resolution
The conventional wisdom says set 300 dpi and forget it, but it turns out that there’s more to optimizing image resolution for fine-art printing
Process HDR images in Lightroom
I’m not big on HDR, but while surfing this morning, I came across a great tutorial for processing high-bit HDR image in lightroom 4.1. No, you still can’t merge images in Lightroom, but you can take a merged 32-bit HDR file (from Photoshop or Photomatix Pro) and manipulate it in Lightroom as many of the adjustments are now “HDR-aware”. That is, LR now recognizes high-bit images and extends the ability to adjust them. For example, the Exposure adjustment extends to +/– 10 stops!
Here is the link for this tutorial over at LightroomSecrets.com:
http://lightroomsecrets.com/2012/07/process-your-hdr-images-in-lightroom/#more-3839
A few “pretty” nature photos from the cottage – Nikon D800e
Spent a few days at the cottage and managed to capture a few photos between reading and eating and family and rain storms and wind and heat. I call them “pretty” as they are, in my mind, more nature snaps than they are artistic. Enjoy!
-

- Nikon D800e w/ AF Nikkor 28mm ƒ2.8: ƒ11@1.3sec ISO50 w/ ND3x
-

- Nikon D800e w/ AF Nikkor 50mm ƒ1.8: ƒ11@30sec ISO100 w/ ND3x
-

- Nikon D800e w/ AF Micro-Nikkor 105mm ƒ2.8: ƒ8@1/25 ISO200
-
- Nikon D800e w/ AF-S Nikkor 300mm ƒ4 IF-ED: ƒ8@1/500 ISO400
-

- Nikon D800e w/ AF-S Nikkor 300mm ƒ4 IF-ED: ƒ8@1/320 ISO200
-

- Nikon D800e w/ AF-S Nikkor 300mm ƒ4 IF-ED: ƒ7.1@1/400 ISO200
My First Canvas Print – Kilimanjaro
I have often toyed with the idea of having canvas prints made of some of my photographs. To me, canvases always appear to be decorative rather than artistic. However, that changed after seeing some of the work done by Gregg Parsons of Guelph. He is making exquisite canvas prints of his work and prints for others as well.
I knew i had the ideal location in our home for a canvas print and knew exactly which photograph would go there – a photograph I made of Mount Kilimanjaro in Tanzania. On our trip in 2007, we flew into Nairobi then flew on to Kilimanjaro International Airport in Tanzania. Well, that flight took us right by Mt. Kilimanjaro – the Kibo and Mawenzi summits in brilliant sunshine above billowy white cloud below. As we banked around the airport, a wonderful scene unfolded – the scene captured in the photograph below.
Amazingly enough, I had Gregg print this 5mp photograph, made through the airplane window, to 18″ x 46″ – and it turned out wonderfully well. The tone is perfect as are the subtle highlight details in the clouds. Many thanks Gregg. You can see Gregg’s work and find out about his canvas printing at greggparsons.ca.

