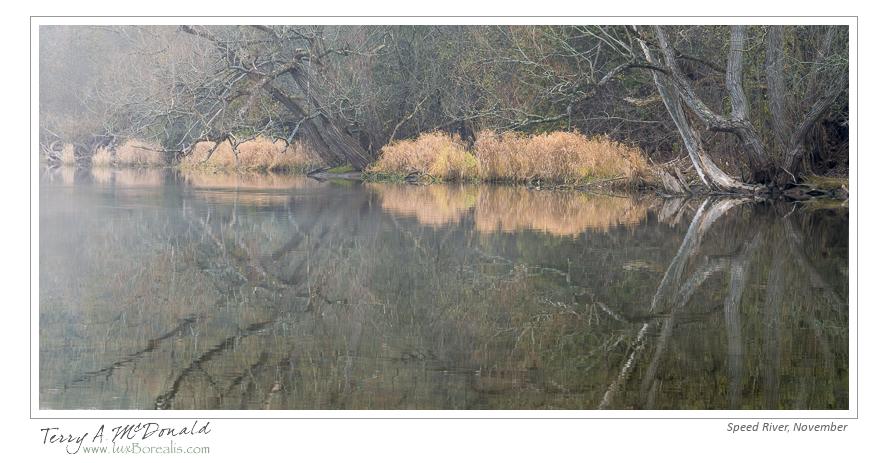
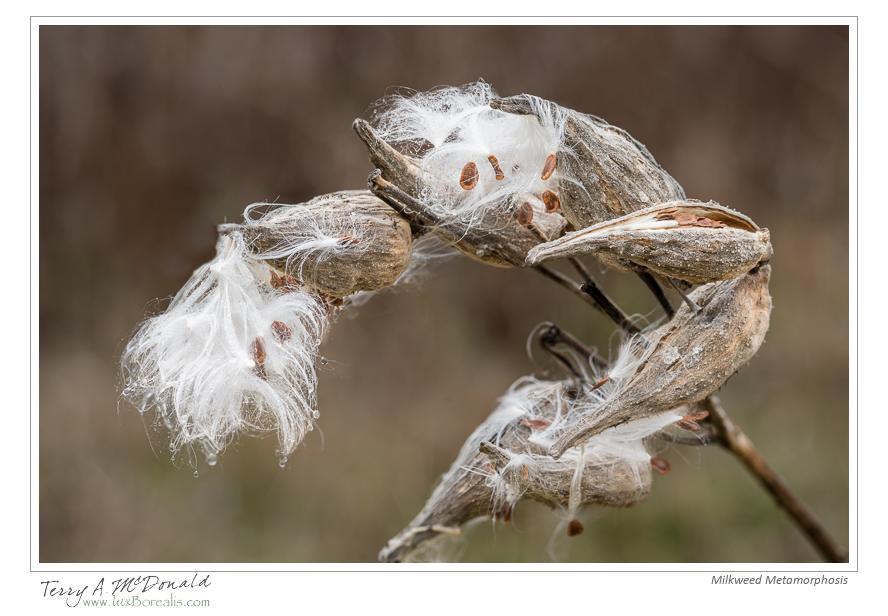
Speed River Trail off Niska Road
I had a holiday today – woo-boo – so Laurie and I went hiking on a stretch of trail we have never been on, despite living in Guelph for 20 years! Beautiful – and great photographic potential. In fact, I decided on this trail because I had seen the work of other photographers along the trail. It did not disappoint. Here are two from today. What started as a thrilling foggy day began to turn blah, but still had enough light for a couple of photographs…here they are.
Both are shot with a AF-D Micro-Nikkor ƒ2.8 on a tripod-mounted Nikon D800E and were post-capture processed in Lightroom 4. The Milkweed suffered from too much background at ƒ16, so it was aligned in Photoshop with the same shot at ƒ5.6 to provide a soft background, then the ƒ16 background was laboriously erased. As Lightroom is my workhorse and does just about everything except cook meals, this is my first instance of using Photoshop this year.
AF-S Nikkor 24-85mm ƒ3.4-4.5 VRII Lens Test on a D800E
I love my prime lenses and I love the whole approach to using primes: choosing specific focal lengths to capture specific perspectives then moving to carefully compose the photograph to make best use of the film or sensor perspectives. The alternative is a zoom lens.
Zooms have their place too. While travelling around Africa, Europe and the UK, I found my two zooms, which covered the complete focal length range from 24mm to 400mm, ideal for quick hand-held shots in a rapidly changing environment. They were both Zuiko Digital zooms and simply the best combination out there. In fact, the only reason I moved away from them was Olympus’ reticence (or lack of R&D) in coming out with a sensor with enough pixels to emulate the detail I enjoy with 6×7 and 4×5 photography.
However, since switching to the Nikon D800E and prime lenses, I have, on a few occasions, missed having the flexibility of a zoom lens, especially when shooting family snaps and shots around the school. Now, the D800E is definite overkill for snaps – quite often I have it set to capture 9MP jpegs. And, perhaps buying a zoom lens for this camera is a bit dumb as I could buy a decent point and shoot that has greater range for less than the cost of a good zoom. However, it’s also nice to have the flexibility of an excellent auto-focus, zero shutter delay and, if needed, 36mp (which, by the way, is great for cropping sports photos when the action is on the other side of the field – even when using a300mm lens!).
So what did I do? I have a wonderful family who generously assisted with my purchase of the newest Nikkor zoom, an AF-S 24-85mm ƒ3.5-4.5 VRII. The focal range is almost ideal. I would have preferred stretching it to at least 100mm as my previous zoom was a 24-120 Zuiko Digital and it was ideal. The Nikkor is also a bit slow, but when you put it in perspective, this lens covers four times the sensor size as the Zuiko 4:3s lenses, so losing half a stop and 1/3 in focal length isn’t really a big deal. If 85mm isn’t quite long enough, I can always crop with plenty of pixels “to spare”.
But how is the lens quality. I always fell that when you choose a zoom lens, it’s not for quality, but rather for convenience, so I always expect to give up some lens quality. That being said, my primes are not necessarily Nikon’s best: they are all AF-D (older designs) and cheaper builds than the newer ones. I have a 24mm ƒ2.8, a 28mm ƒ2.8, a 50mm ƒ1.8 and a 105 Micro ƒ2.8. So it was against these lenses that I would test the new zoom.
This afternoon, I set up the tripod and electronic release, set the camera to ISO 100 with Mirror Lock-up and full frame raw capture and shot a series with each lens at wide open, ƒ11 (my most-used aperture) and closed down. It was really ƒ11 that is most important to me. I know lenses are a bit mushy at larger apertures and go soft at smaller apertures due to refraction, so those are the details I will show here.
Observations
I’ll not go into a detailed account of each focal length and aperture. You can see for yourself, the differences between the primes and the 24-85mm zoom as I have included a small gallery of comparisons at each focal length at ƒ11, showing the corners only. In the gallery are comparisons at 100% of the top right corner in Lightroom’s “Compare” mode. The files have had no additional processing or sharpening. NOTE: When you look at the gallery images, be sure to click on “View Full Size” in the bottom right of the window that opens.
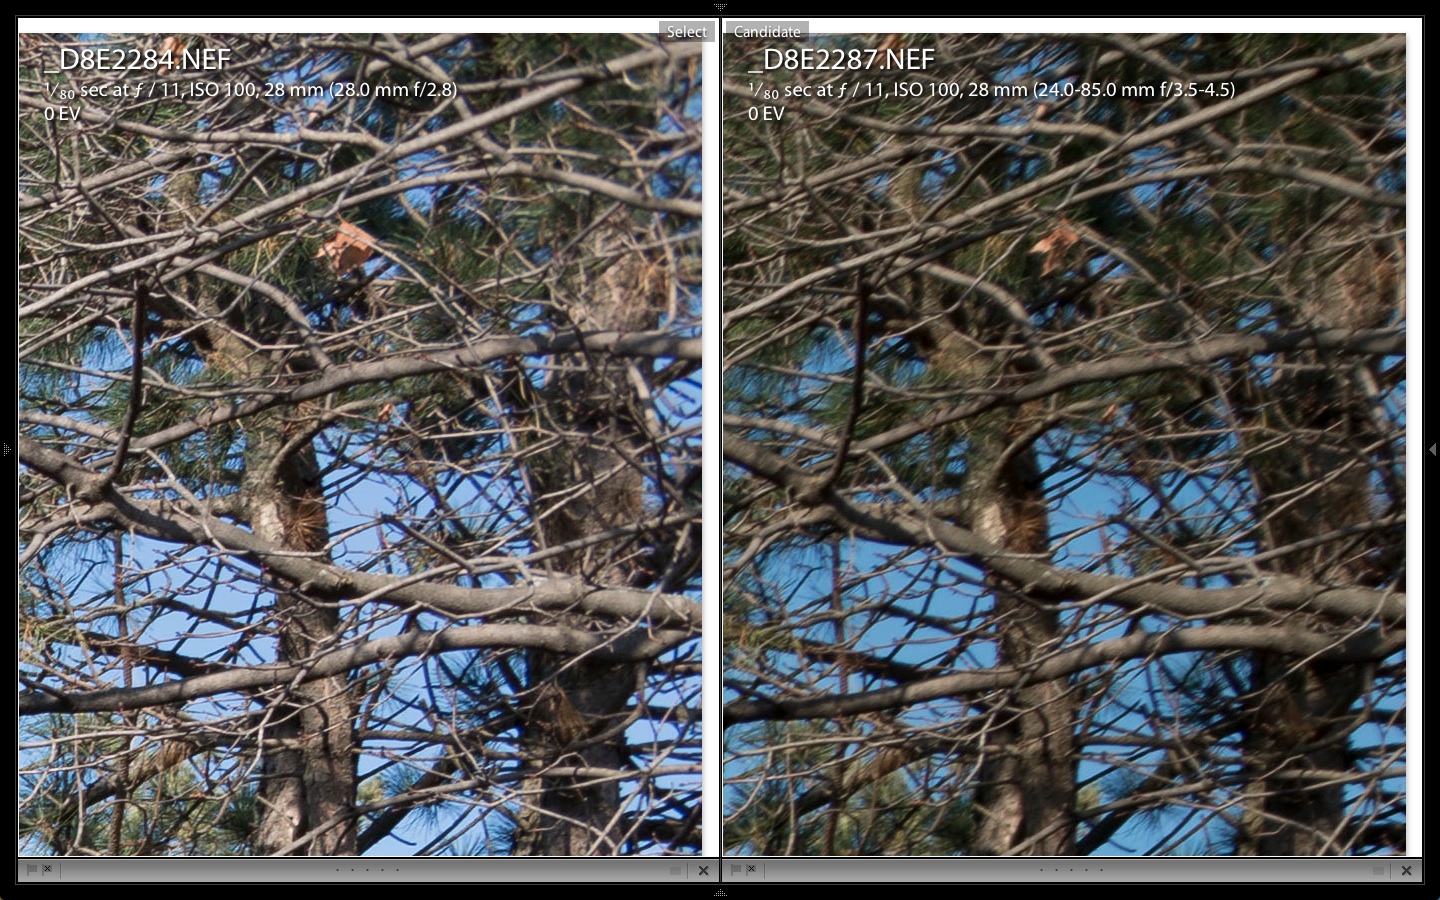
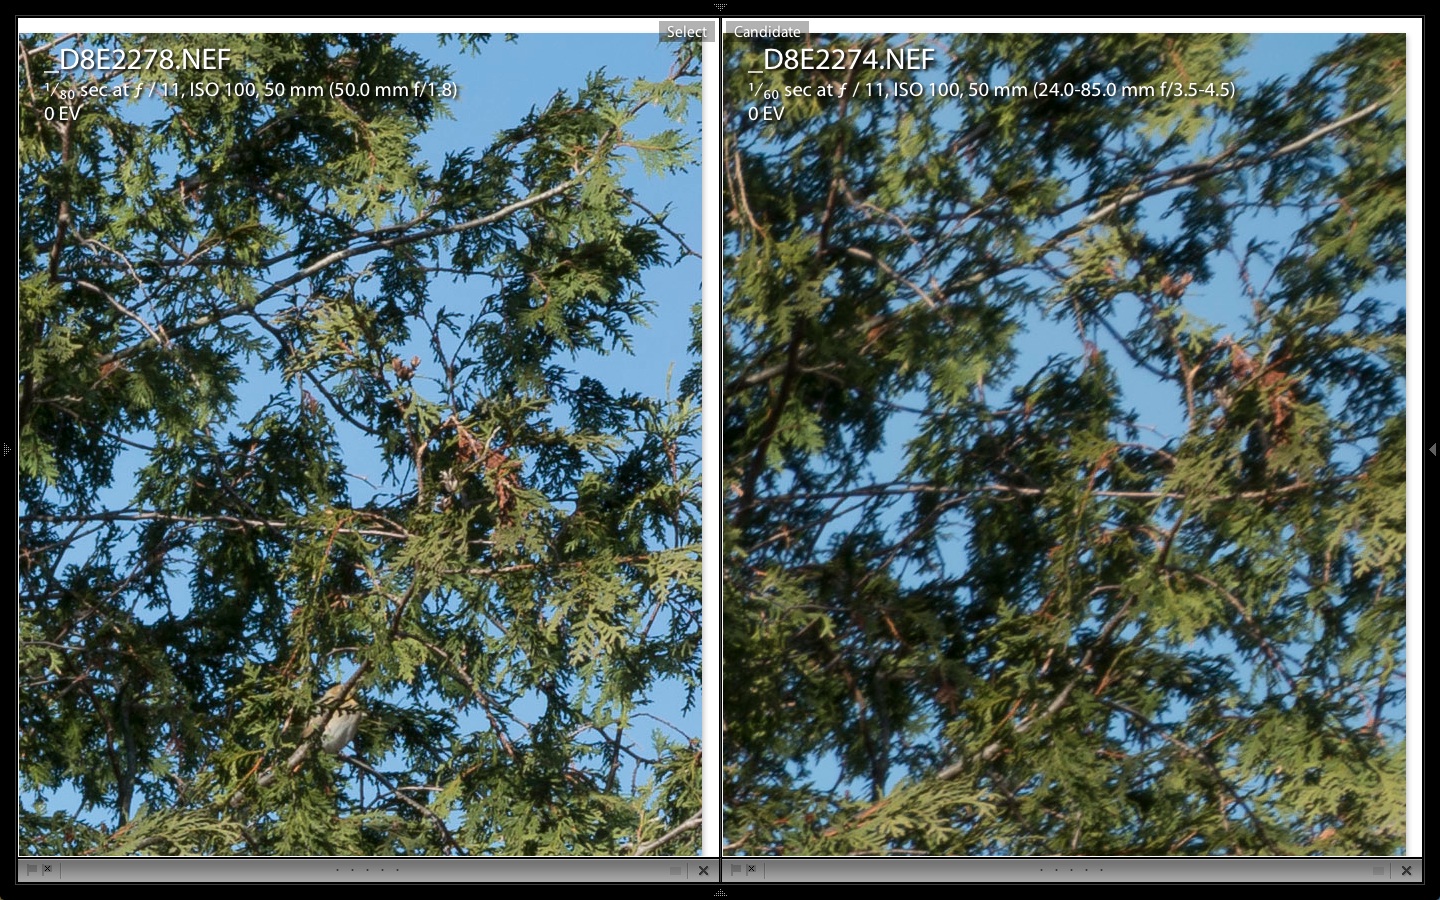
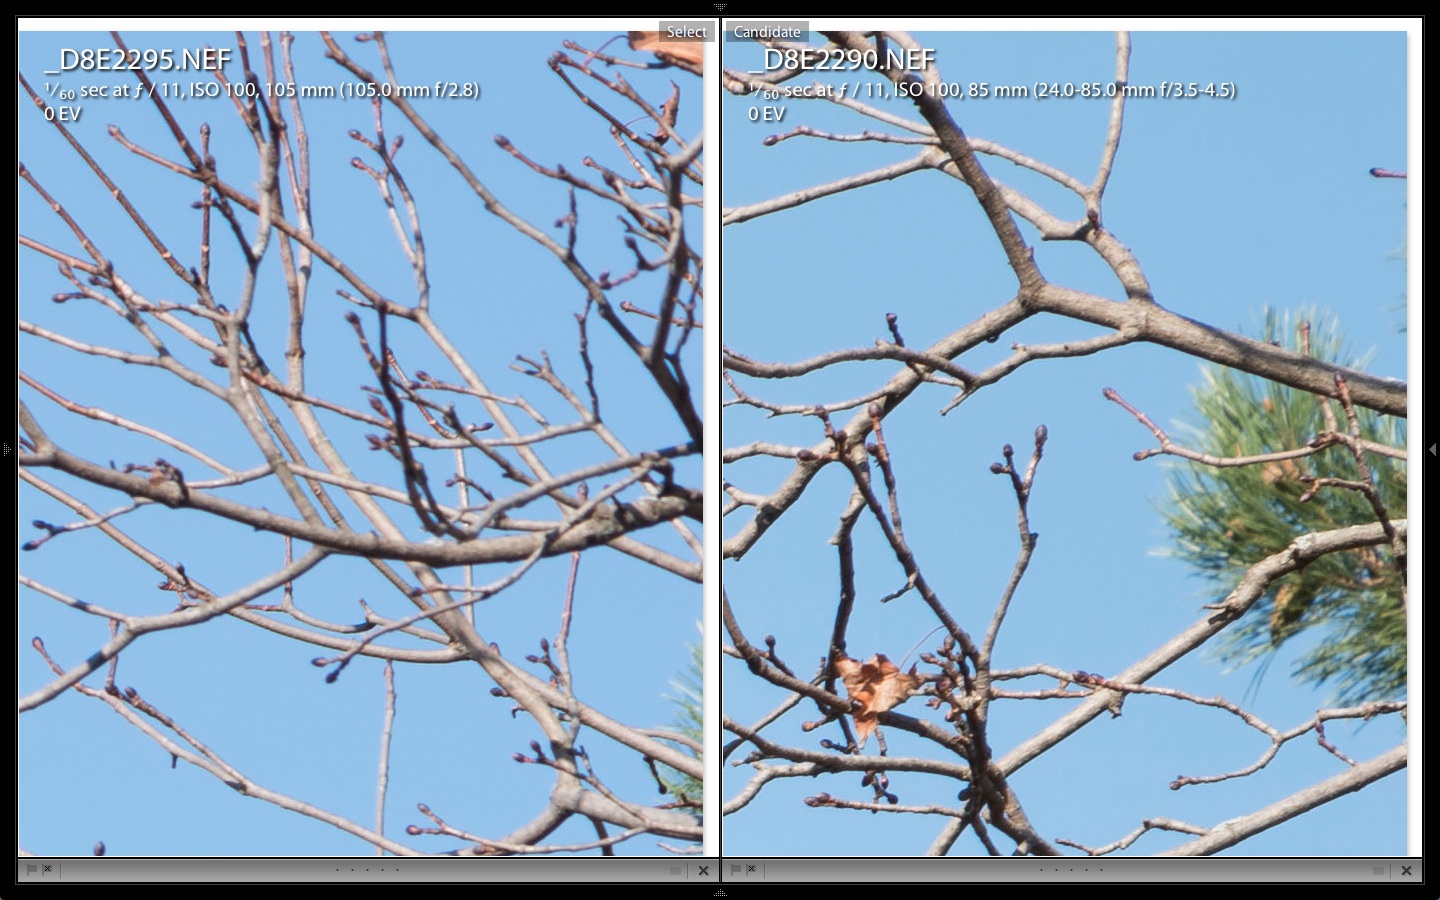
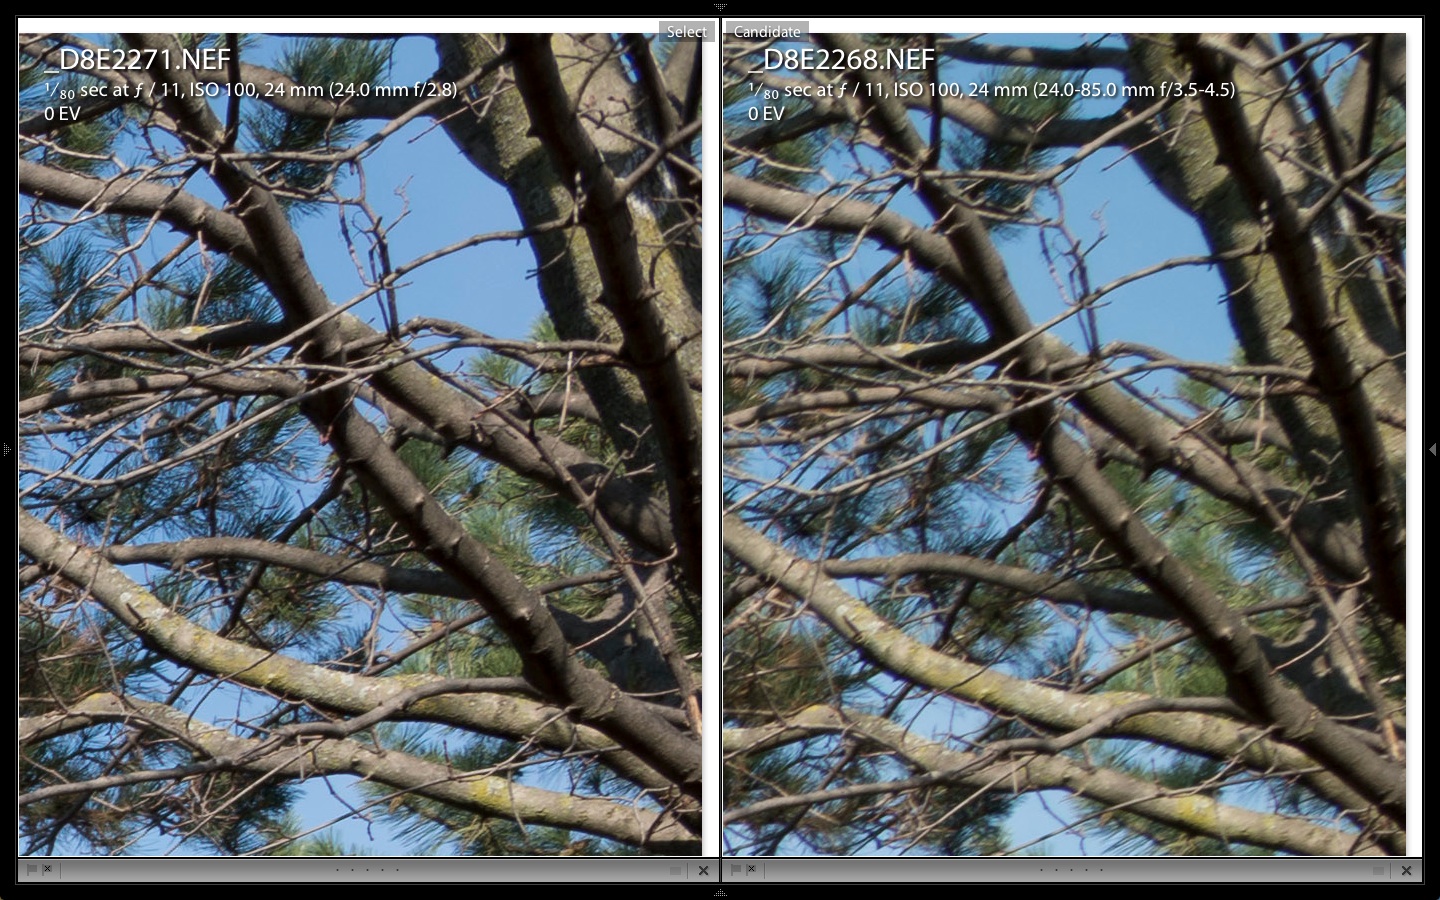
Needless to say, the centre of each frame is quite good and not significantly different at comparable focal lengths and apertures. What is most important to me are the corners as that is where a lens falls apart. The 24-85mm zoom didn’t disappoint, but it didn’t match the quality of the primes, either. As expected, the zoom showed more light fall-off in the corners, but quite unexpectedly, it did rather well up against the 105mm Micro-Nikkor. I also didn’t expect the 50mm ƒ1.8 to perform as well as it did – it looks great in the corners.
One unexpected difference was in colour saturation and exposure. While the primes had slightly higher contrast (as expected), the zoom has slightly richer colours which may be a result of exposures from the zoom being 1/3 to 3/4 of a stop darker. Not a big problem, but unexpected. Perhaps the stated maximum aperture of the zoom is not as wide as claimed meaning the ƒ3.5 is really a ƒ4 or 4.5. That is one real bonus of prime lenses – they are generally faster than zooms in the sae relative price range and primes are of higher quality at maximum aperture.
So, is the AF-S Nikkor 24-85mm VRII lens good enough to walk around with? Yes it is – just. I am well aware of its shortcomings – which are not too serious, really – and plan to make good use of this lens. However, I will not be using it for my dedicated landscape and nature shots. I will forego the convenience of having a range of focal lengths in one lens and will gladly switch primes when I feel the shot really deserves the kind of quality I can get from prime lenses.
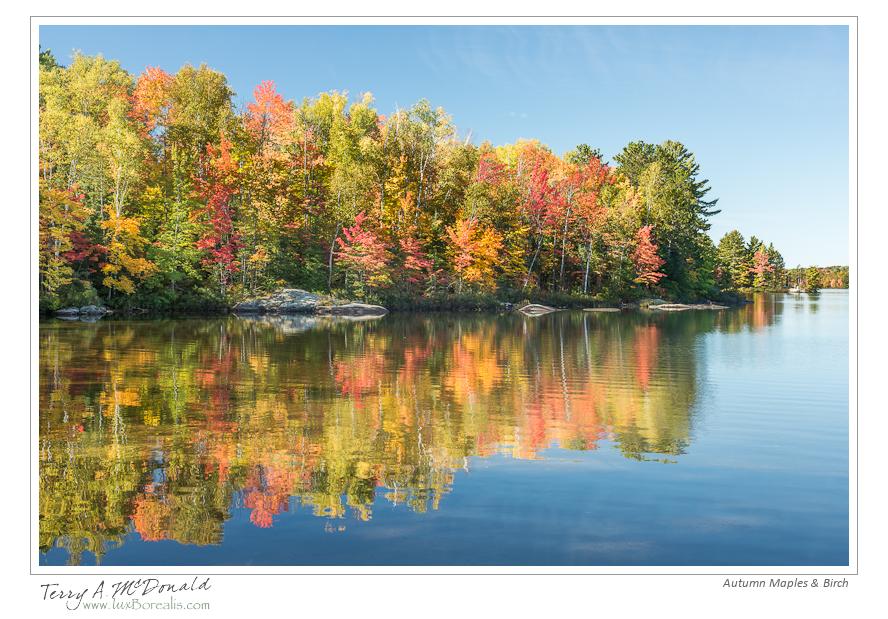
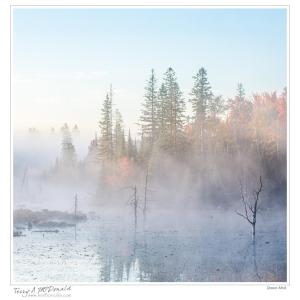
Autumn is here!
It’s been a busy September for me – too busy to even write a post.
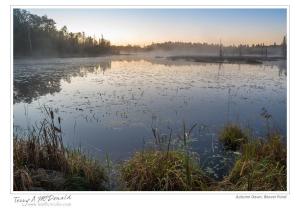
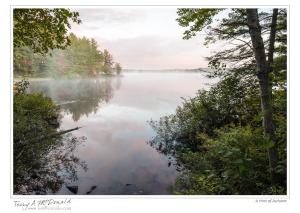
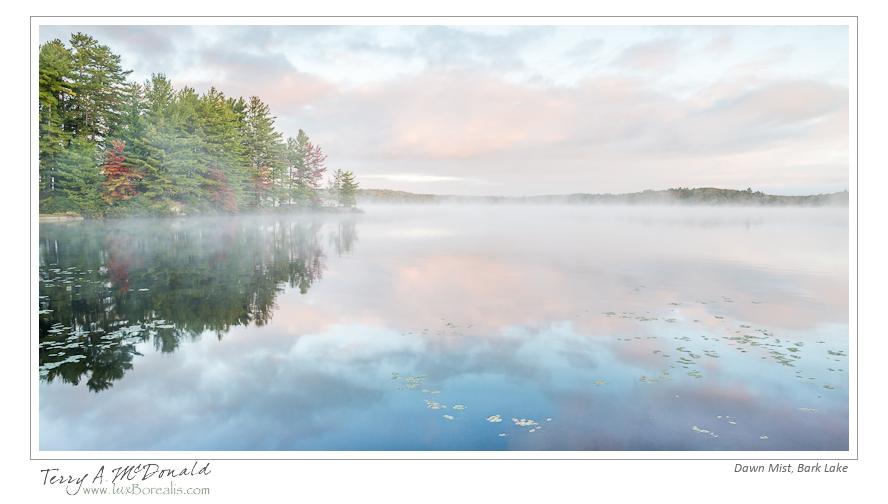
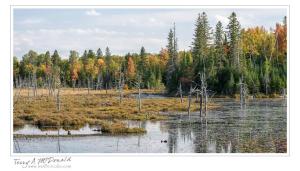
For the past week, I’ve been up at Bark Lake Leadership Centre with a group of Grade 10s from St. John’s-Kilmarnock School. It is the first of two intensive weeks of a locally designed Terrestrial and Aquatic Ecosystems science course. We have the students working outdoors and in right from our 7:30am microclimate data gathering session to the end of evening case studies at 10pm – which, for me, leaves precious little time to capture the spectacular beauty around Bark Lake.
Each morning I had about 40 minutes of light prior to the microclimate study I supervise. With sunrise around 7am, that meant most of my dawn shooting was before sunrise. I also got out one evening for some night photography plus another morning of landscapes. However the beauty and accessibility of spectacular views more than made up for the limited time I had. Below you’ll find a small gallery of images from the week. I think the over-riding factors for success this week was the wonderful lighting and the almost complete lack of wind. There’s nothing that spoils a great landscape like wind and having consistently beautiful mornings made the few minutes of photography I had a complete pleasure. In fact, I probably had more minutes of ideal conditions in this week than I had all year long!
All images are shot with a Nikon D800e with Nikkor primes and are processed in Lightroom 4. The D800e performed magnificently – especially with the night photos. Combined with Lightroom 4, I was surprised with what could be brought out of the shadows with virtually no grain or noise, just a few hot pixels after 4 to 8 minutes of exposure. I will work some more on this to determine if it is better to have a shorter exposure with higher ISO (more grain) or a longer exposure at a lower ISO to reduce grain.
The new adjustments of LR4 were really stretched as I often used -100 Highlights with +100 Shadows to reduce the contrast of the bright autumn sunshine. I am continually amazed at what LR can do with images to tweak them to what I pre-visualized in the field.
My 24mm was the workhorse with the Micro-Nikkor 105mm also a favourite. Less-used were the 20mm, 50mm and 300mm. Although all were needed at some point, I could have lived with only the 24 and 105.
Here’s the gallery – Enjoy!
-
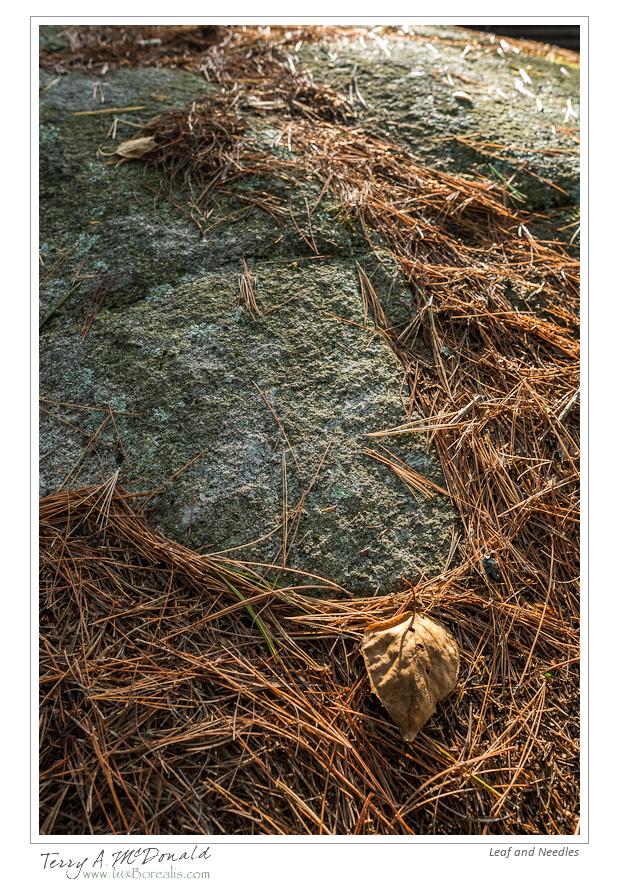
- Nikon D800e w/ AF-Micro-Nikkor 105mm ƒ2.8; ƒ11 @ 1/3 ISO 100
-
- Nikon D800e w/ AF-Nikkor 24mm ƒ2.8; ƒ11 @ 0.4sec ISO 100

-
- Nikon D800e w/ AF-Nikkor 24mm ƒ2.8; ƒ16 @ 0.6sec ISO 100

-

- Nikon D800e w/ AF-Nikkor 24mm ƒ2.8; ƒ11 @ 1/3 ISO 100
-

- Nikon D800e w/ AF-Nikkor 20mm ƒ2.8; ƒ11 @ 2.5sec ISO 100

-
- Nikon D800e w/ AF Micro-Nikkor 105mm ƒ2.8; ƒ11 @ 1/80 ISO 200

-

- Nikon D800e w/ AF-Nikkor 24mm ƒ2.8; ƒ8 @ 1/100 ISO 1600
-

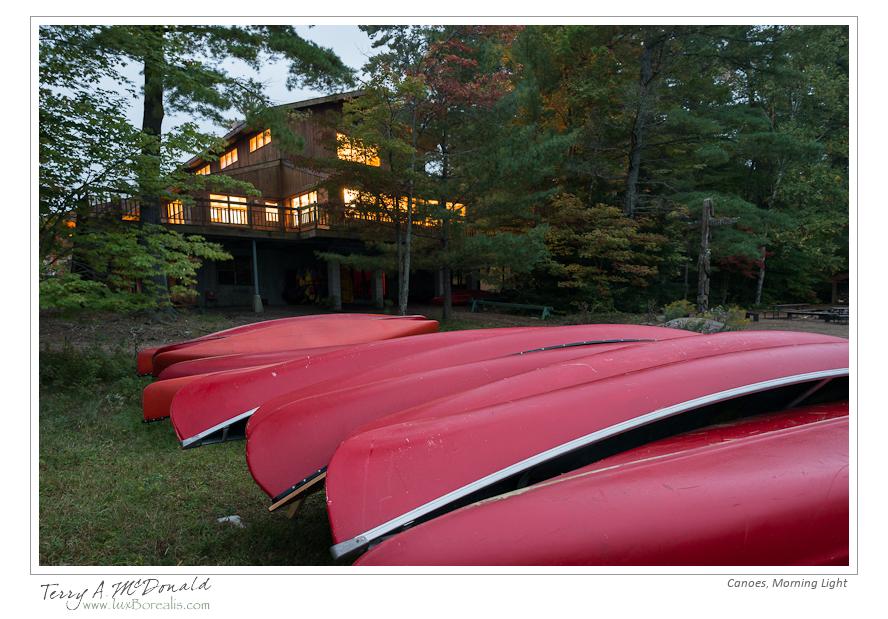
- Nikon D800e w/ AF-Nikkor 24mm ƒ2.8; ƒ8 @ 8sec. ISO 800
-

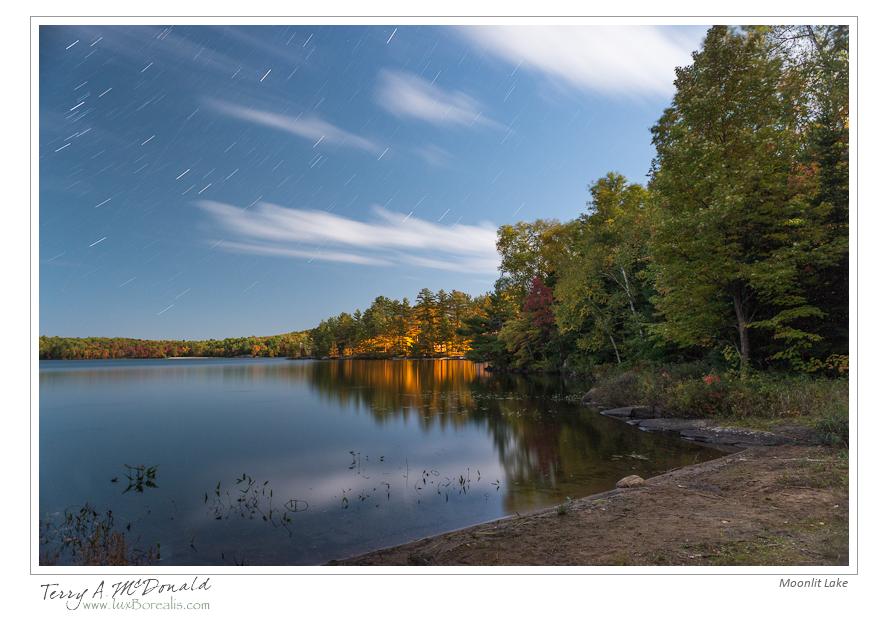
- Nikon D800e w/ AF-Nikkor 24mm ƒ2.8; ƒ5.6 @ 458sec. ISO 400
-
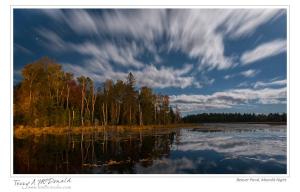
- Nikon D800e w/ AF-Nikkor 20mm ƒ2.8; ƒ8 @ 146sec. ISO 100

-
- Nikon D800e w/ AF-Nikkor 24mm ƒ2.8; ƒ8 @ 25sec. ISO 100

-
- Nikon D800e w/ AF Micro-Nikkor 105mm ƒ2.8; ƒ22 @ 1/6 ISO 400
-

- Nikon D800e w/ AF-Nikkor 50mm ƒ1.8; ƒ11 @ 1/13 ISO 100
-

- Nikon D800e w/ AF Micro-Nikkor 105mm ƒ2.8; ƒ11 @ 1/50 ISO 100

-
- Nikon D800e w/ AF Micro–Nikkor 105mm ƒ2.8; ƒ11 @ 1/20 ISO 100

Tethered shooting with a Nikon D800e
It’s frustrating to learn that Adobe has dropped the ball with respect to tethered shooting. Tethered shooting allows you to connect the camera directly to your computer so that as you shoot, the images appear on screen. It’s a set-up studio photographers frequently use and one I am only tangentially interested in as I don’t make it habit of lugging my laptop out into the wilds for tethered shooting!

Nikon D800e w/ AF-S Nikkor 300mm f/4D IF-ED; ƒ4.5 @ 1/1250, ISO1600
Be that as it may, it is lovely summer morning on the deck with an inquisitive chipmunk as my subject to get tethered shooting working. As a Lightroom user, I was excited to try this out… only to discover Lightroom doesn’t (yet?!) support tethered shooting for the Nikon D800/D800e or D4. A quick online search reveals that Capture One supports it, Aperture supports it, even onOne Software supports it. Why Adobe doesn’t is anyone’s guess. Even the latest version of Lightroom which came out after the D800 – version 4.1 – doesn’t support it.
I own Aperture, but I don’t really want to have a second photo processing/database app on the go. I prefer to keep things simple by using Lightroom, so I won’t be purchasing Capture1 either (although, it sounds like I should as its raw engine produces superior results to Lightroom). This led me to onOne Software. I have OnOne’s “Perfect Photo Suite” of applications but, being more of a “realist” when shooting nature, I have never felt drawn to the product, nor yet had the need of Layers for Lightroom. However, onOne does offer a DSLR Camera Remote for iPad and iPhone. The app comes in two parts – the Server that’s loaded onto your computer and the App itself for the iPad or iPhone. Downloading the Server – which is free – allows you to shoot tethered to your computer without having to purchase the app for you mobile device.
And – best of all – it works! Within 2 minutes of downloading, I had it and Lightroom set up so that as each exposure is made, the file appears on screen in Lightroom. While I can’t control the camera remotely – I would need to purchase the iPad or iPhone app for that – the Remote Server tethering works perfectly well – as you can see from the photo above!
When you first open onOne DSLR Camera Remote Server, it creates a download folder for you. You can create your own folder or go with the one created. Lightroom itself was easy enough to set up. Under File, choose Auto Import > Auto Import Settings… and point LR to the folder created by Remote Server. LR will automatically move the photos from there to a folder you create. This can all be customized for each shoot you do, right down to the file names.
Anyway, technical gymnastics aside (it’s really only a cartwheel to get you started, nothing like we saw in the Olympics!), tethered shooting is easy to do. For me, I doubt I will use it often, but it’s a great facility to have available. Try it…You’ll like it!
Update
With the recent release of Lightroom 4.2, you can now shoot tethered directly with Lightroom. Thanks Adobe for playing catch-up!
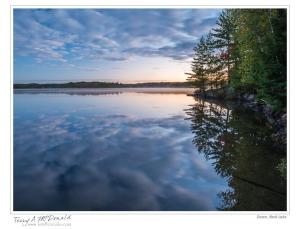
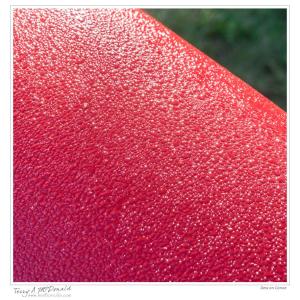
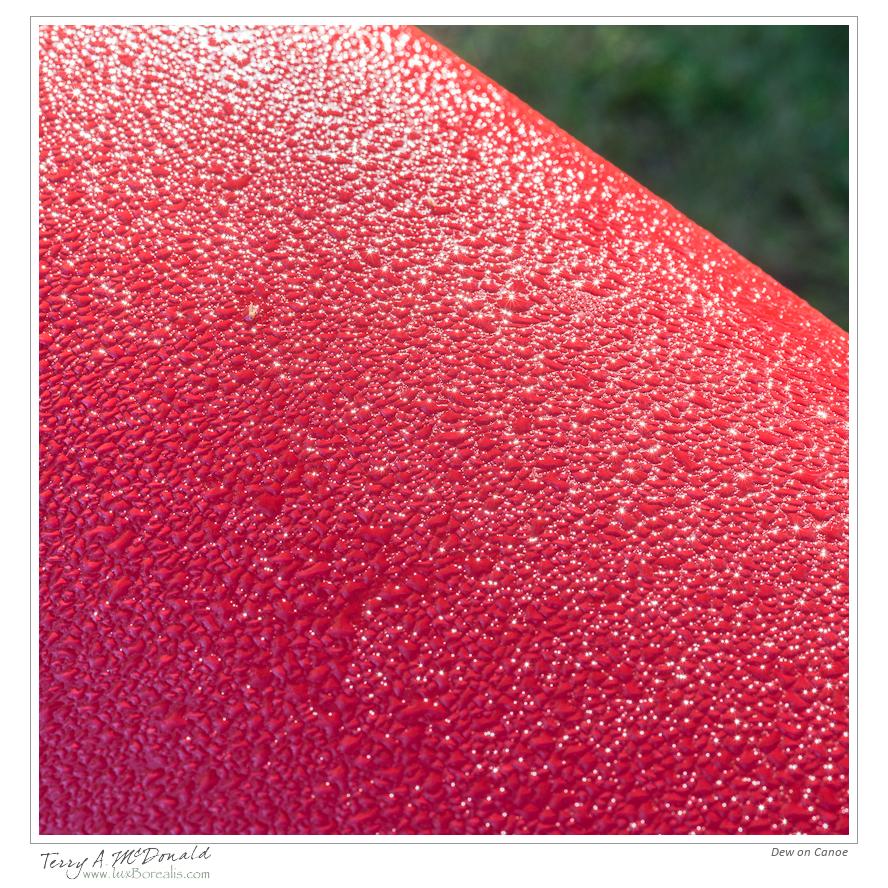
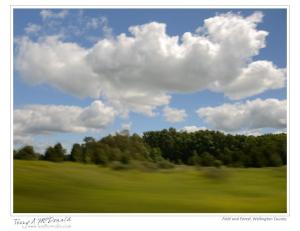
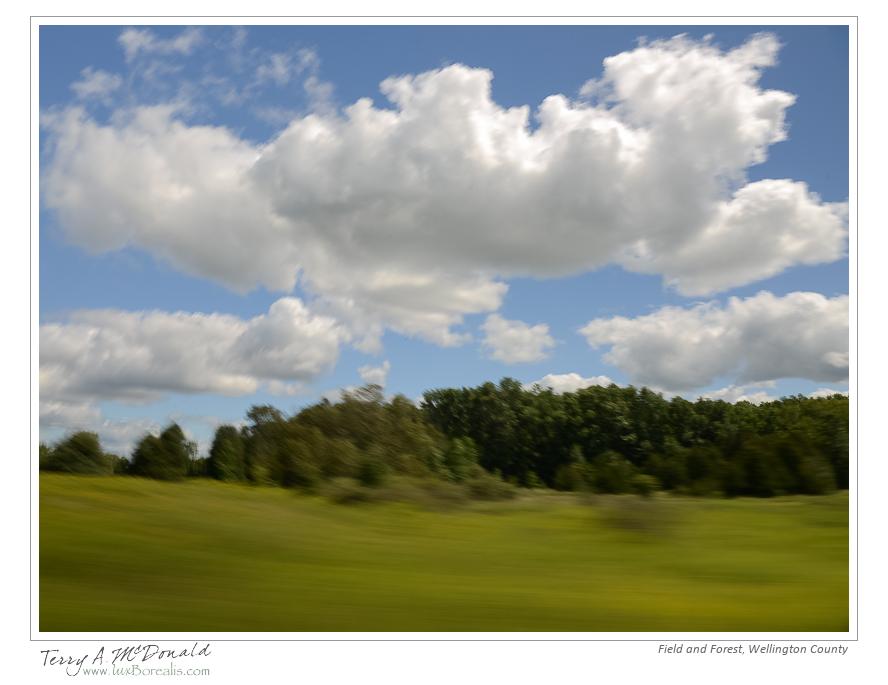
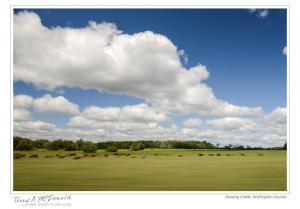
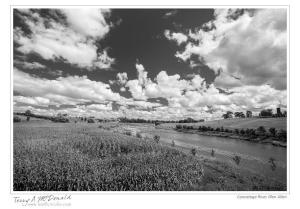
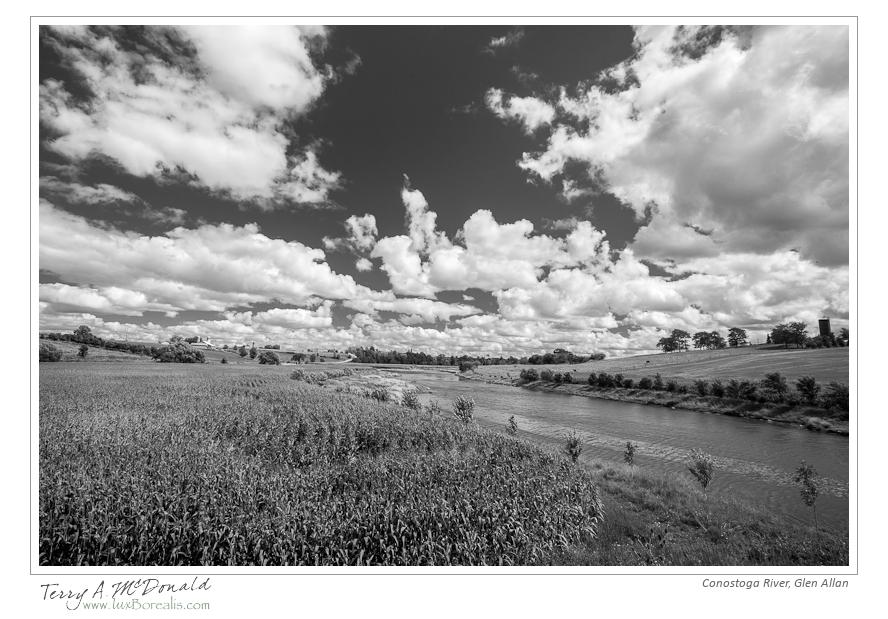
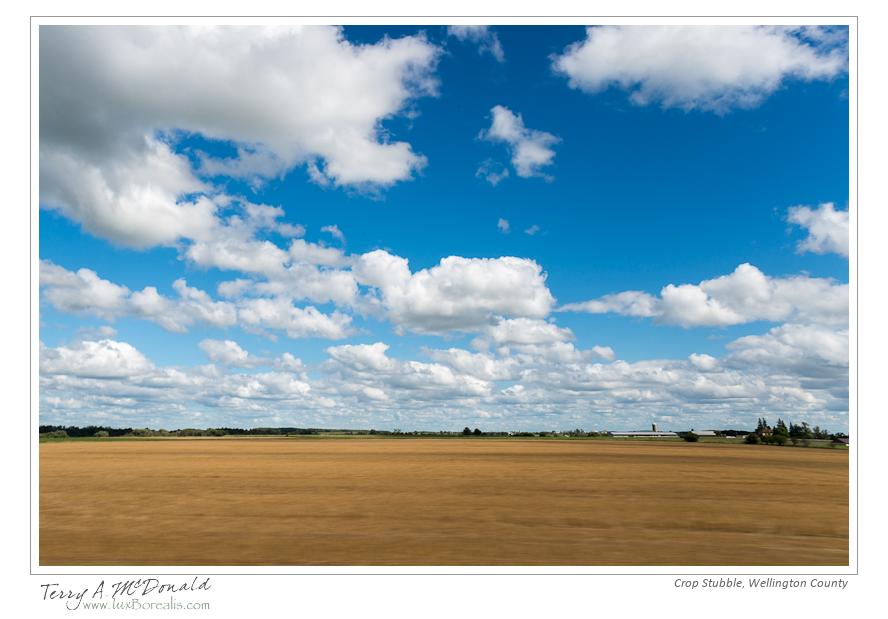
More from Wellington County
More scouting trips around Wellington County. Last Friday, it lead to a wonderful piece of pie at Marj’s in Alma. If you haven’t been, it’s a must! Marj’s is a classic village diner with great service, great food and, most important of all, great, home-made pies.
The photos I’m showing you are not final cuts, but rather works in progress. Some will never see the light of day as they are location “snaps”. I find it helpful to shoot a location when I know it’s not the ideal time, but want to keep a record of what it looks like and its exact location using Lightroom Maps module and the GPS unit on my camera.
You will notice that some of the photos are “blurred”. They are the product of the work I am doing with motion landscapes – photographs that capture varying degrees of motion to give us fleeting glimpses of shapes, colours and textures. They, too, are a work in progress! Final note: all photos are processed in Lightroom 4.1
Enjoy!
-
- Nikon D800e w/ AF Nikkor 24mm ƒ2.8 D; ƒ11 @ 1/10, ISO 50 w/ Polarizing & ND3x filters
-
- Nikon D800e w/ AF Nikkor 24mm ƒ2.8 D; ƒ11 @ 1/10, ISO 50 w/ Polarizing & ND3x filters

-
- Nikon D800e w/ AF Nikkor 20mm ƒ2.8 D; ƒ16 @ 1/125, ISO 100 EI-2/3 w/ Polarizing filter
-

- Nikon D800e w/ AF Nikkor 24mm ƒ2.8 D; ƒ16 @ 1/50, ISO 100 w/ Polarizing filter

-

- Nikon D800e w/ AF Nikkor 24mm ƒ2.8 D; ƒ20 @ 1/50, ISO 50 w/ Polarizing & ND3x filters
-

- Nikon D800e w/ AF Nikkor 24mm ƒ2.8 D; ƒ16 @ 1/30, ISO 50 w/ Polarizing & ND3x filters

-

- Nikon D800e w/ AF Nikkor 24mm ƒ2.8 D; ƒ16 @ 1/60, ISO 200 EI–2/3 w/ Polarizing filter

