Culling, Cold and Birds-in-Flight
Winter bird photography on the shores of Lake Ontario
13 photographs; 2127 words; 11 minute read
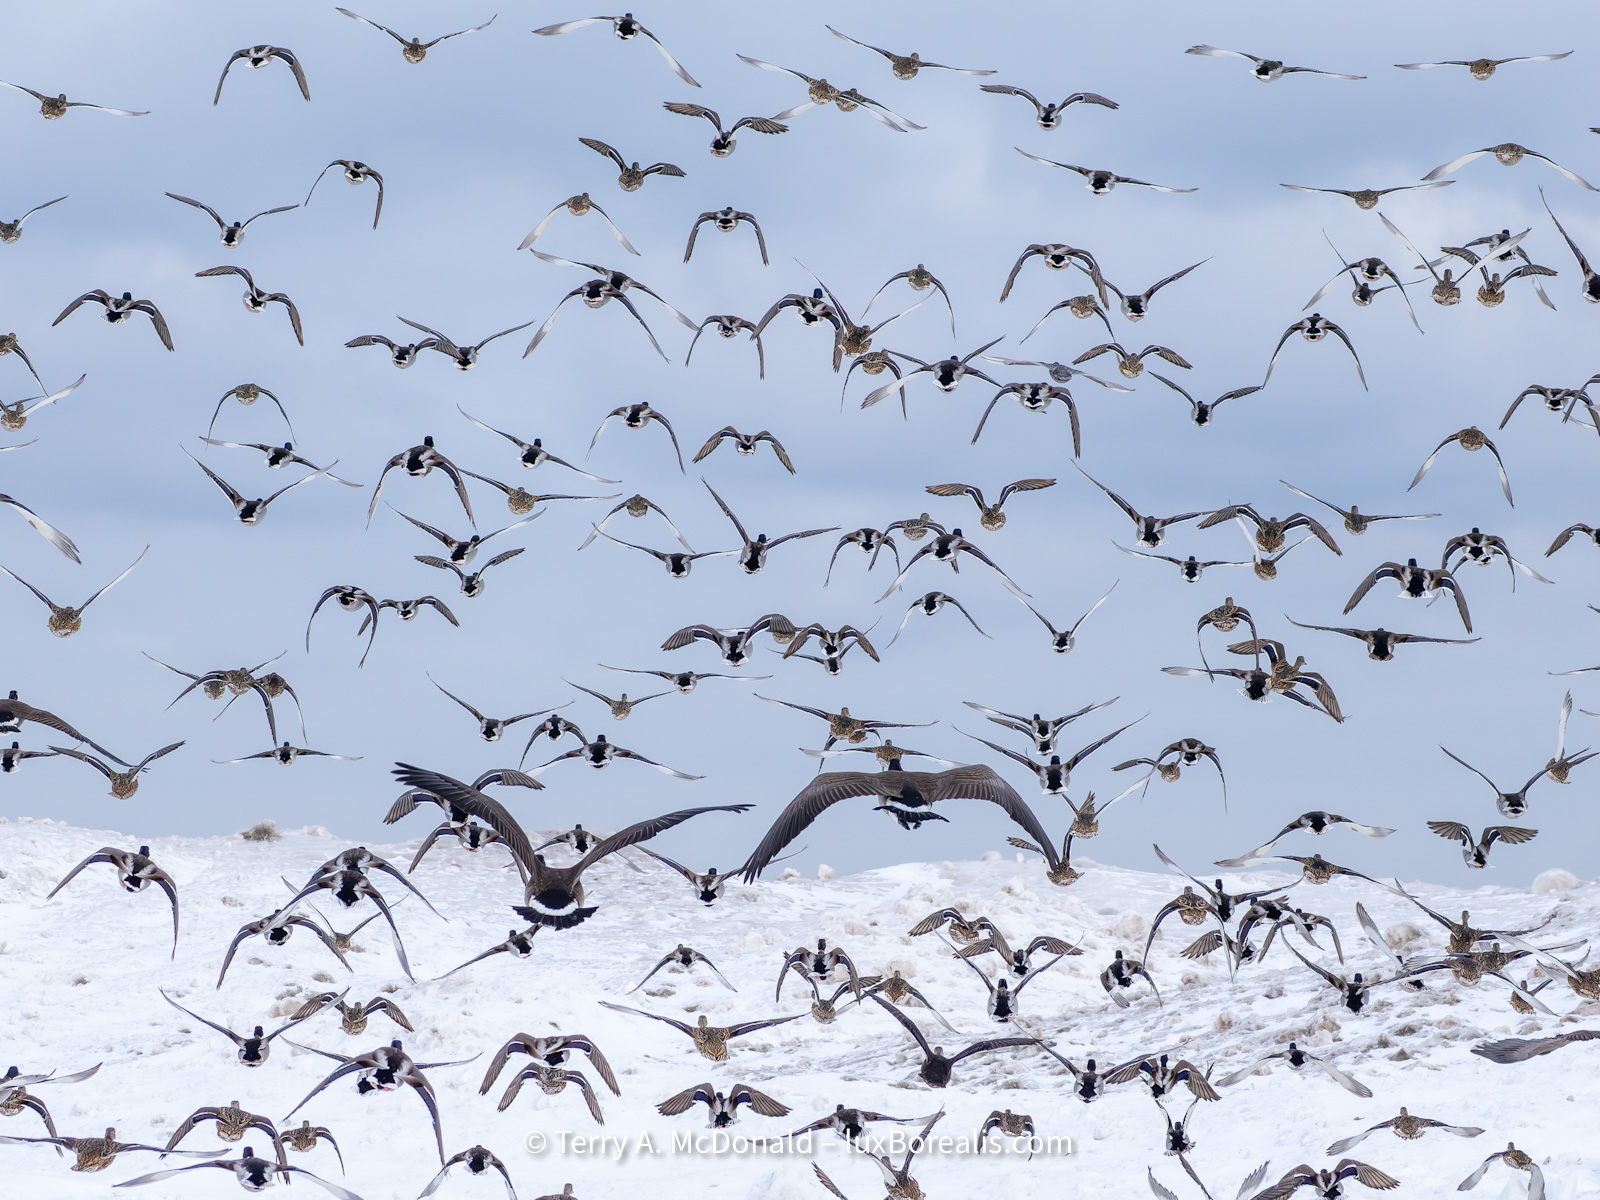
How can these three impossibly disparate concepts synthesize themselves into the perfect storm? Take a hundred or so waterfowl, concentrate them into a small area, then photograph them as they zoom overhead. But that’s just the beginning . . .
Artificial Intelligence has been demonized in photography, and for good reason. Not only is it eliminating jobs, it has changed the whole perception of photography to the point where truly compelling images, ones that seems unlikely or too good to be true, are instantly labelled as AI. It’s one of the reasons I am advocating for #RealWorldPhotography, but that’s a different post for a different day.
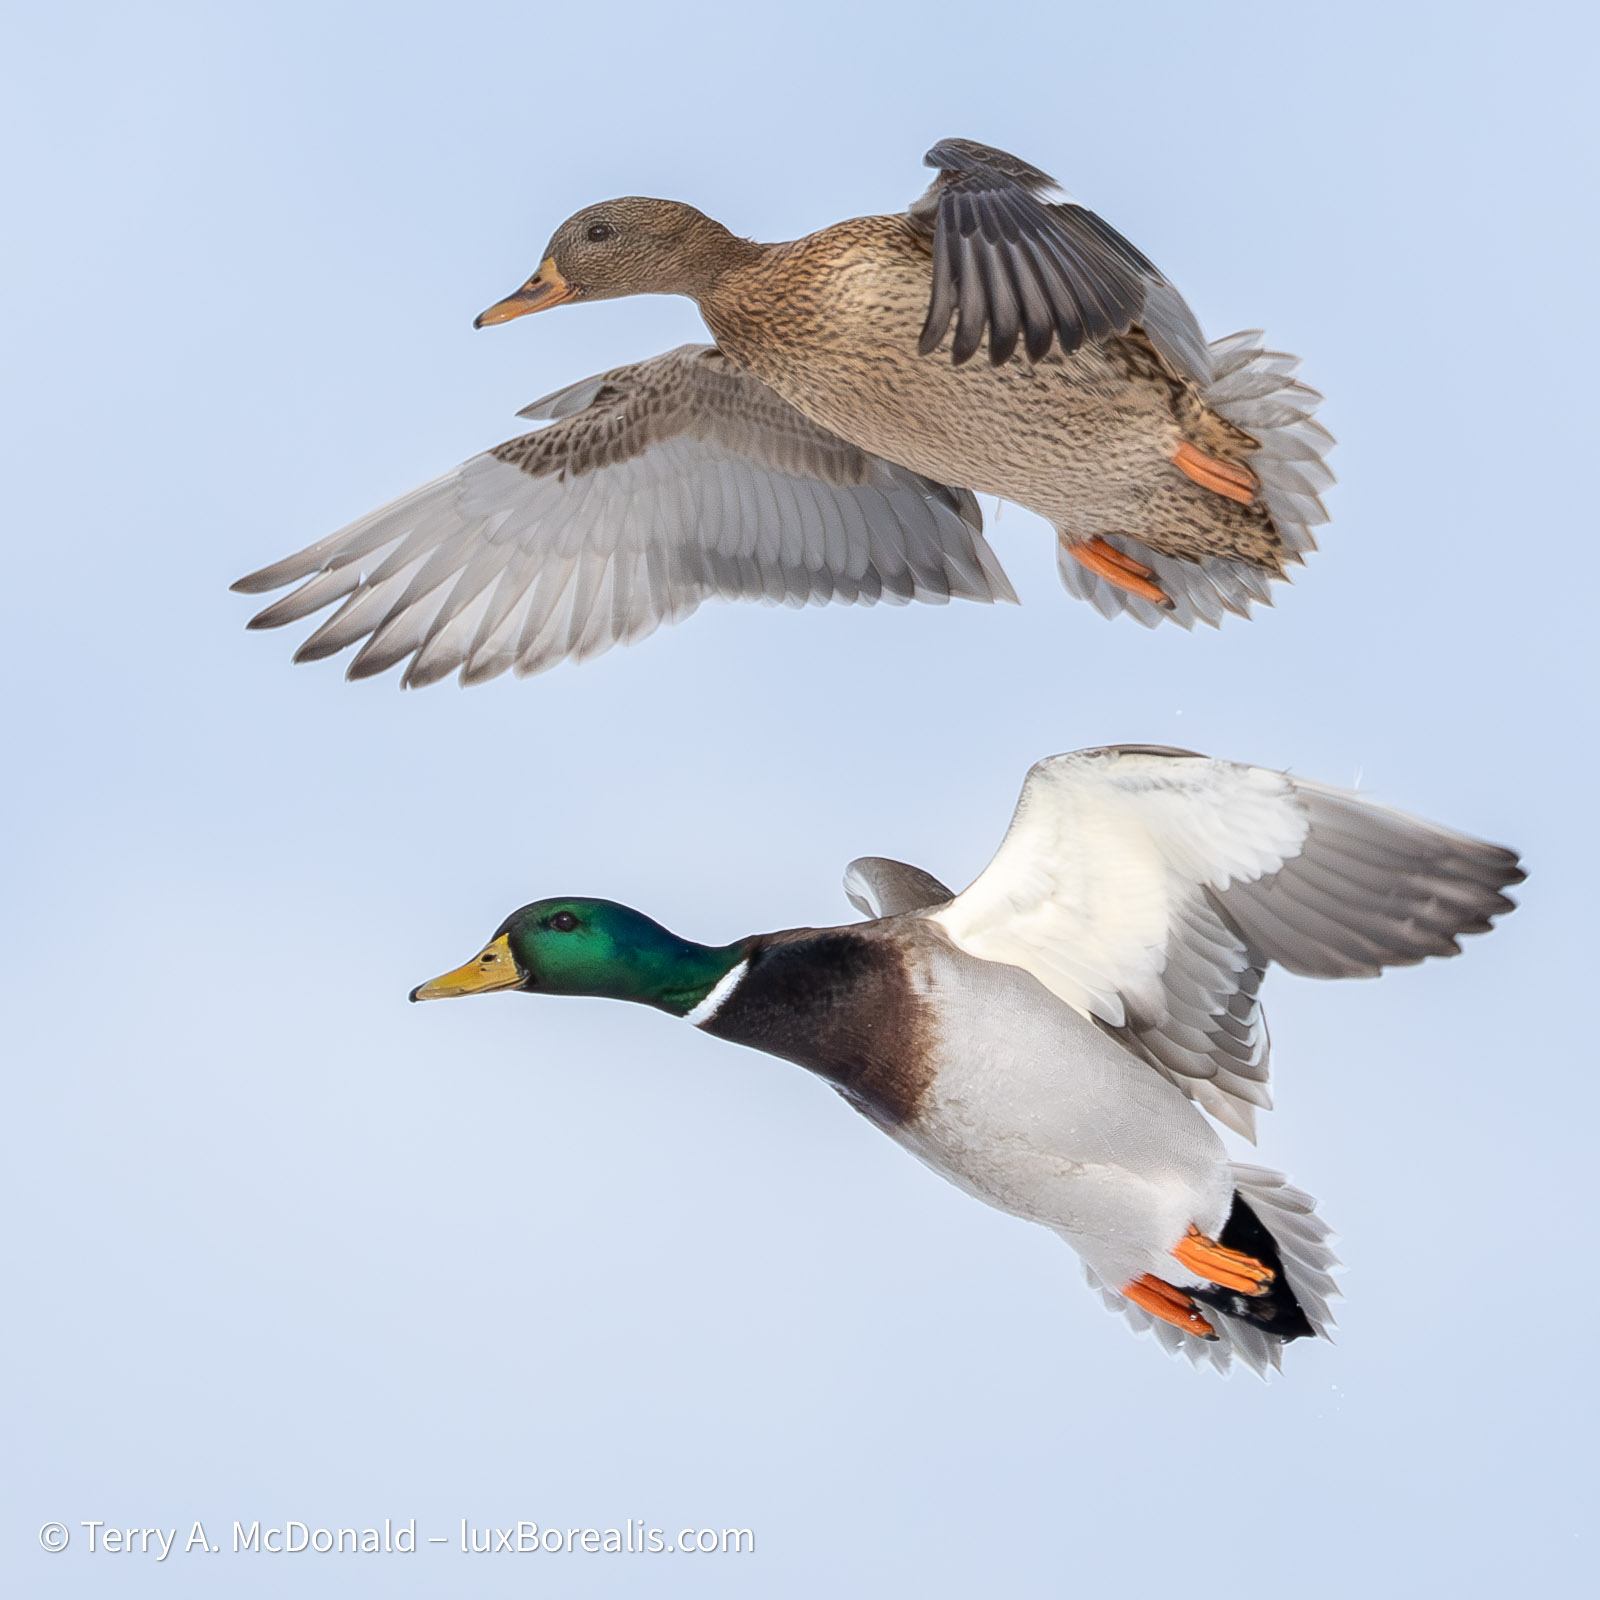
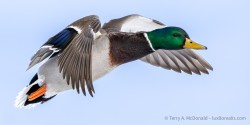
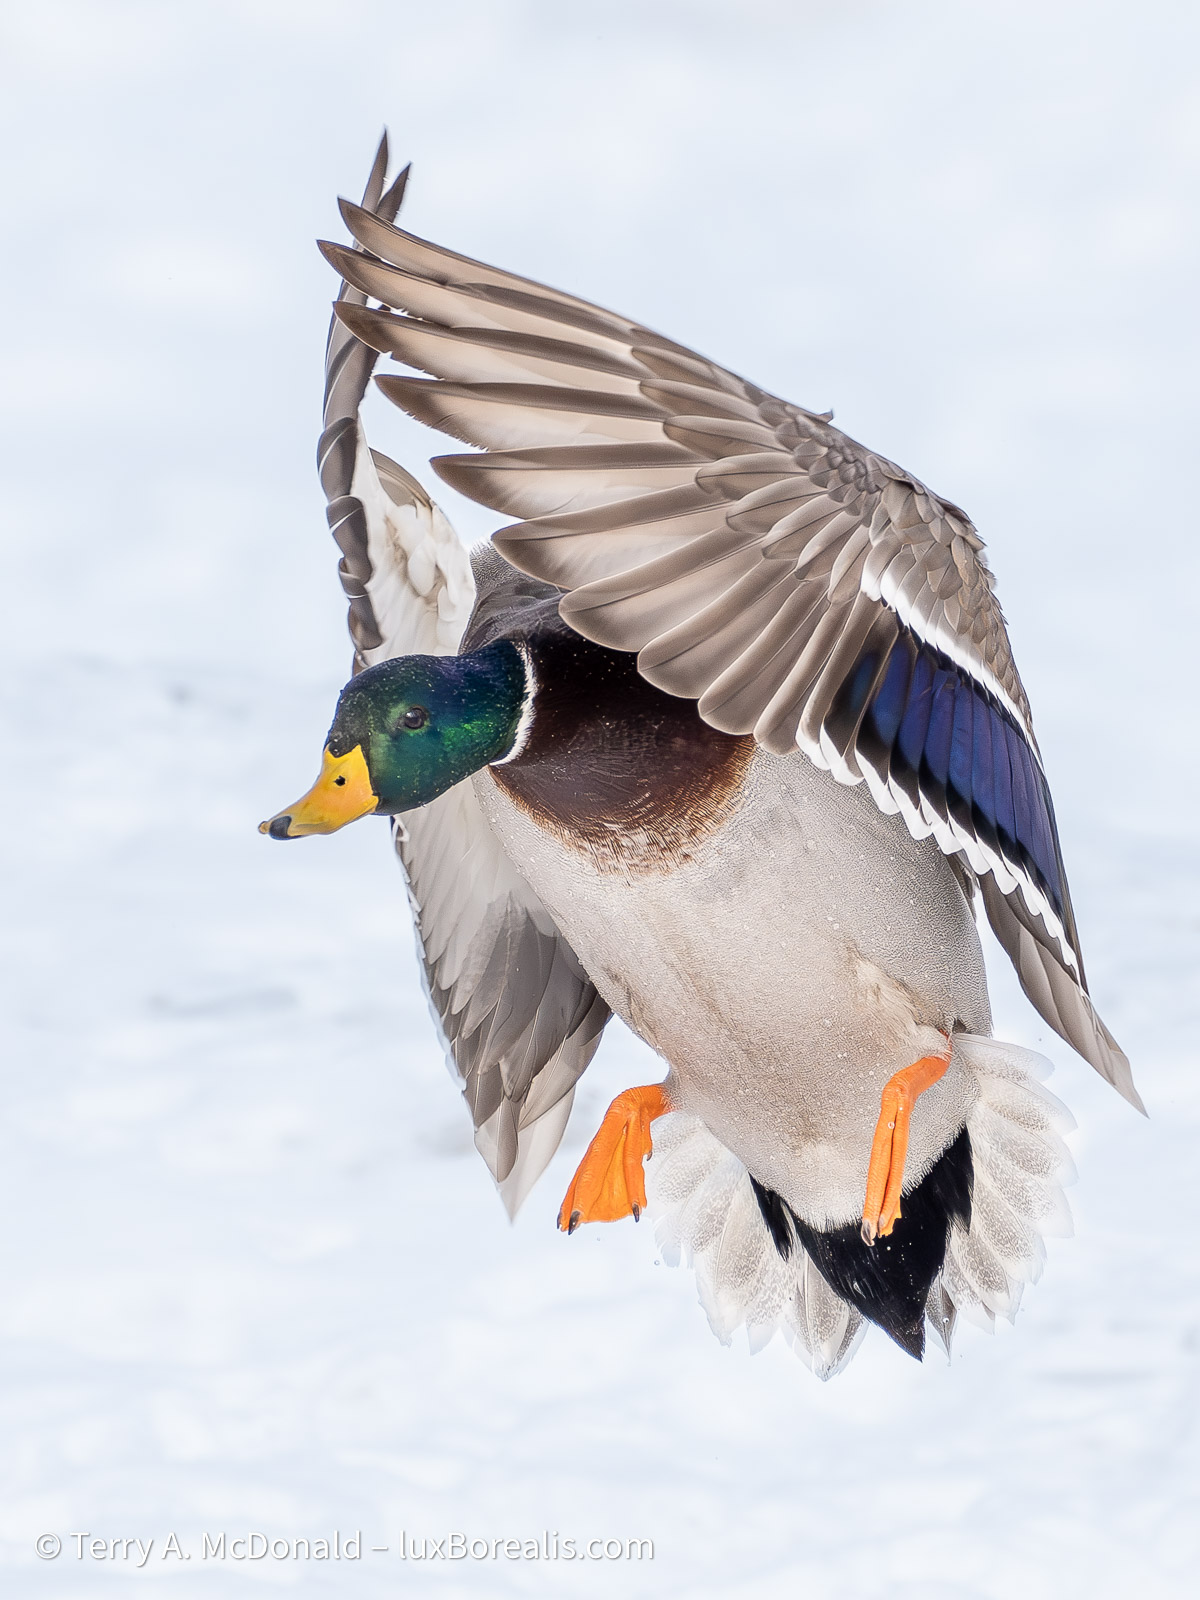
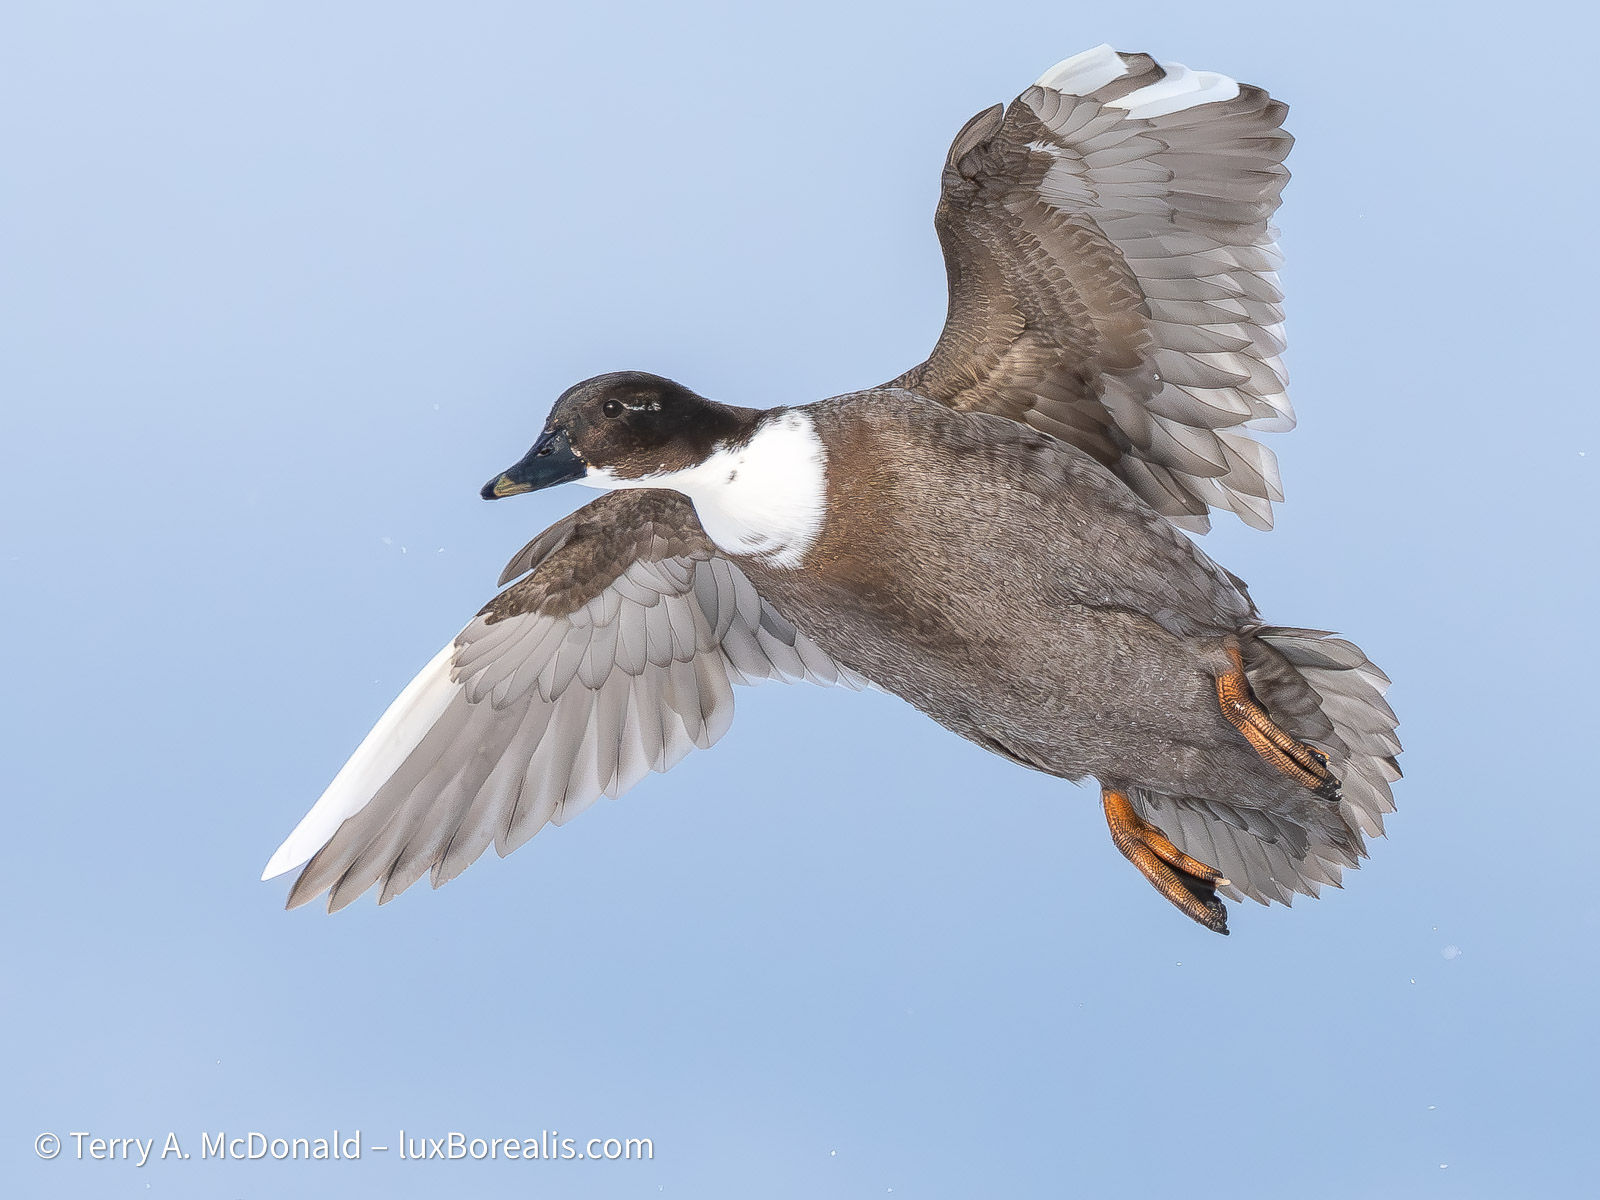
Olympus OM-1i w/M. Zuiko ED 100-400mm IS i at 400mm • ƒ8 @ 1/3200 • ISO 1600 • +1 EV • Lightroom
The mallards were often flying in pairs; capturing two in the same plane of focus took many attempts.
In the last 25 years, photography has undergone two fundamental and very rapid upheavals—digital capture and AI. Unprecedented doesn’t begin to describe them. To encounter similar disrupters, we need to go back 100 years to the advent of the 35mm camera in 1925, and the various iterations of colour film through the 1930s, both of which took decades to be ‘normalized’. From an historical perspective digital and AI have been instantaneous. Fnding the sweet spot in using AI to assist rather than generate is an important step.
Cold
Digital photography allows photographers to make, quite literally, hundreds to thousands of images in a hour. This is what happened earlier this week when I met up with Tom Stirr of SmallSensorPhotography.com for some bird-in-flight photography. The brutal cold of the last few weeks created unique ice conditions along the shore of Lake Ontario, concentrating hundreds of waterfowl in a small area. Tom first noted this phenomenon 5 or 6 years ago and emailed me earlier in the month when the conditions appeared again.
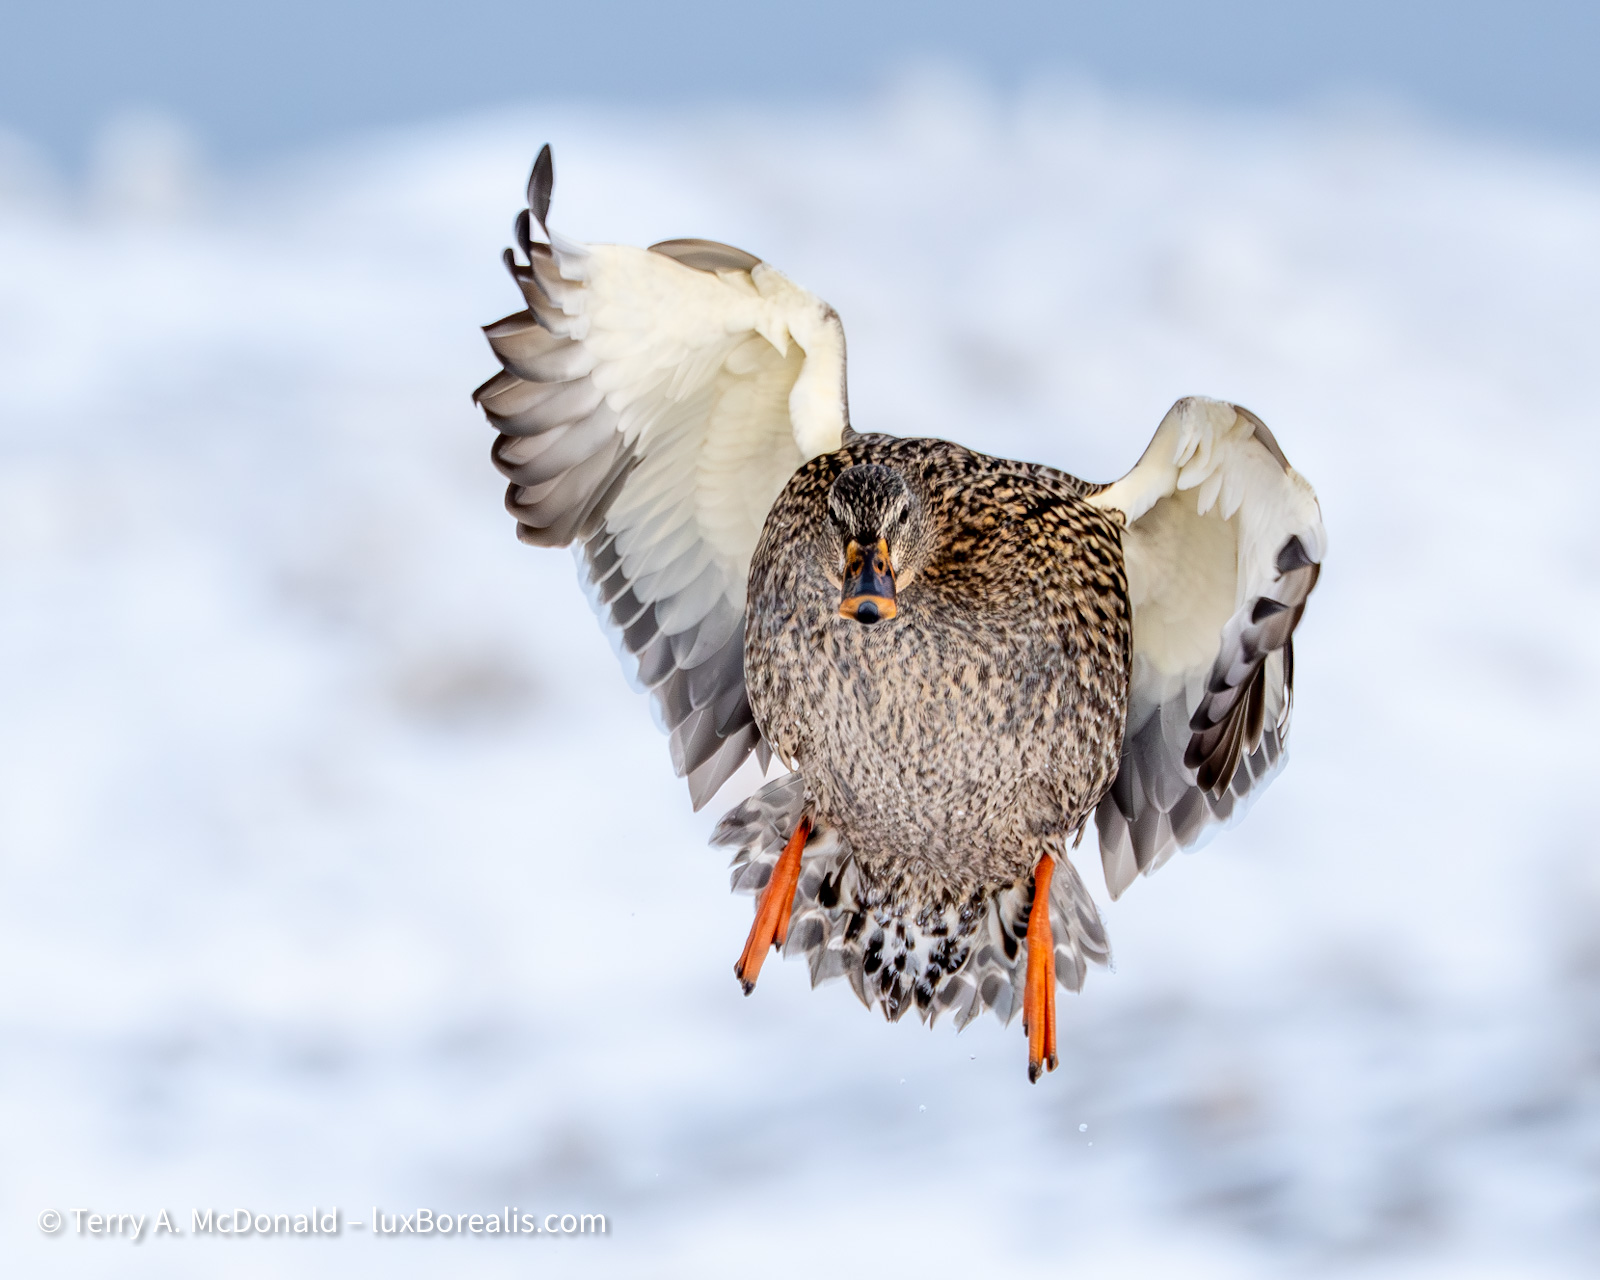
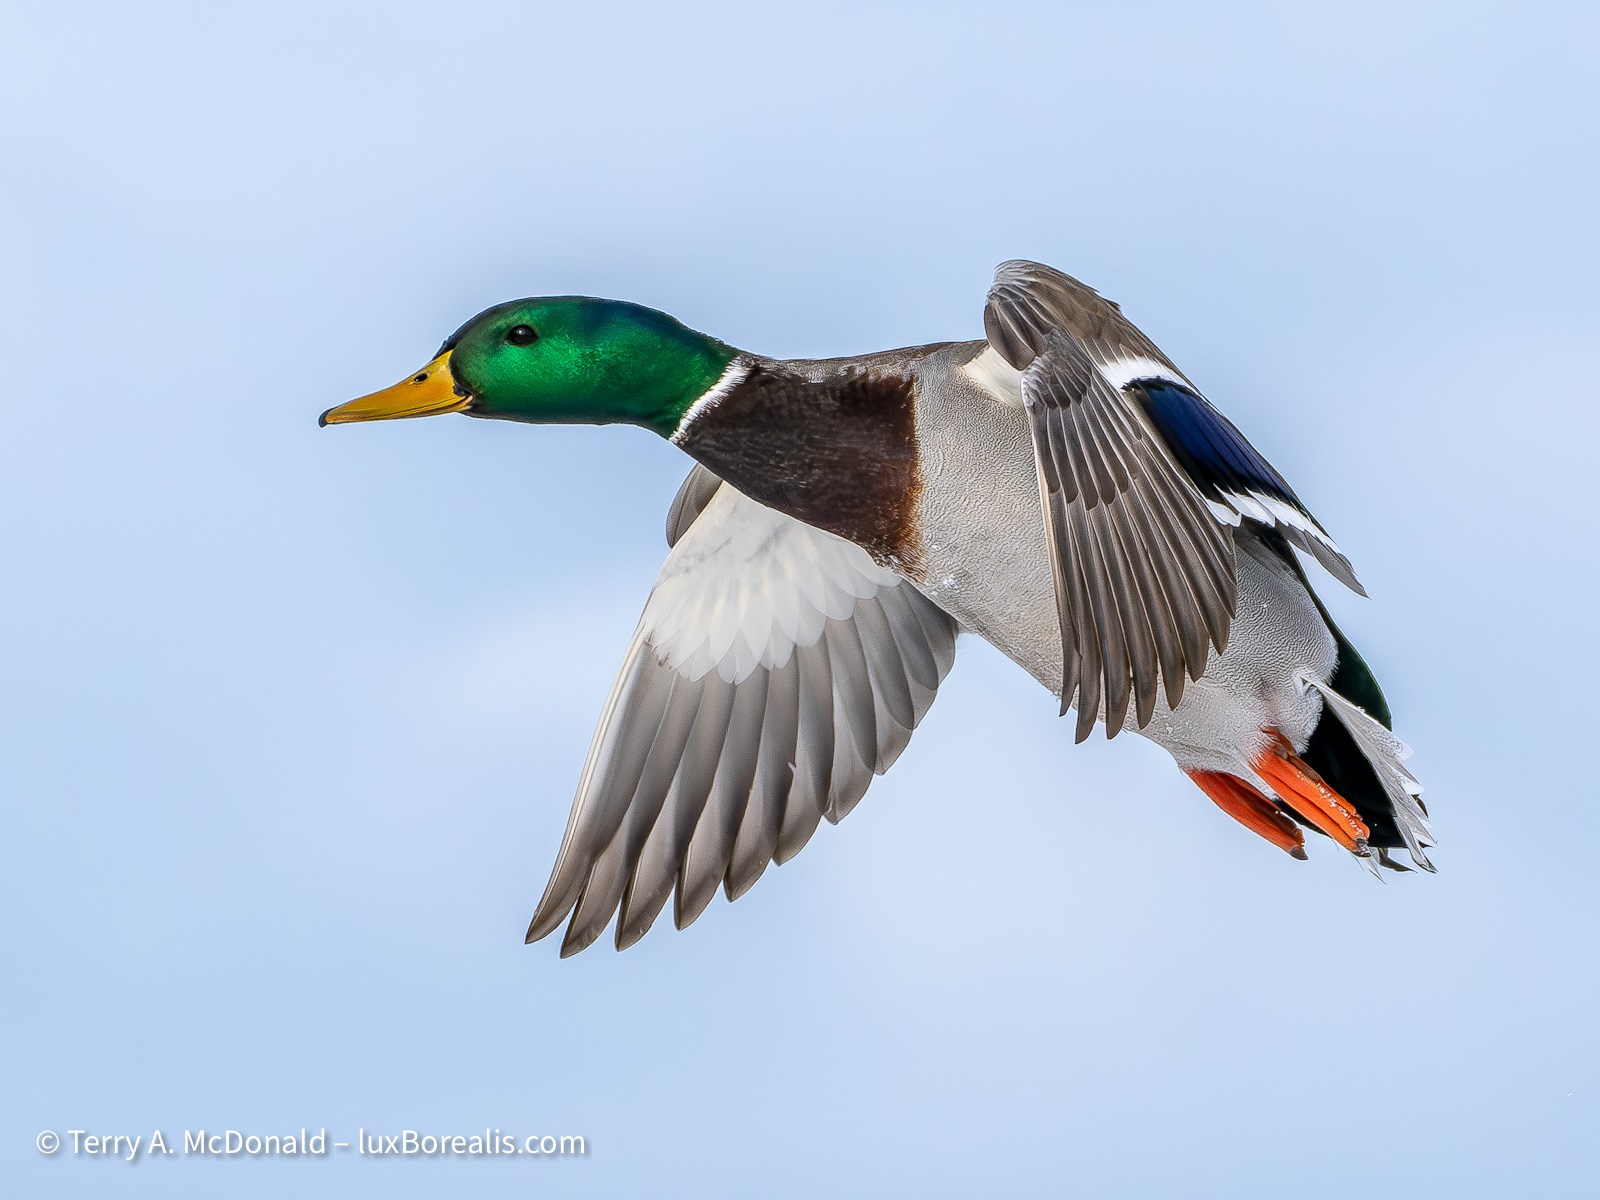
OM-1 w/100-400mm at 400mm • ƒ8 @ 1/3200 • ISO 1600 • +1 EV • Lightroom
The morning was another chilly one, but by 10:30am when we met, the temperature had risen to –9°C. We spent our time sitting on stools in the ice and snow, allowing the birds to come to us, so staying warm was important. I pretty much followed the recommendation in my post Gearing up for Winter Photography. Double gloving was essential for keeping my hands warm, yet still being able to access all camera settings.
Diamonds in the Rough
BIF photography is not my forté, nor is it a style of wildlife photography I normally pursue, so this would be a challenge. I must admit to not looking forward to wading through several hundred images at a time, of mostly the same subject, each showing small, iterative differences in focus, head position, wing beats, feet, etc. to find those diamonds in the rough.
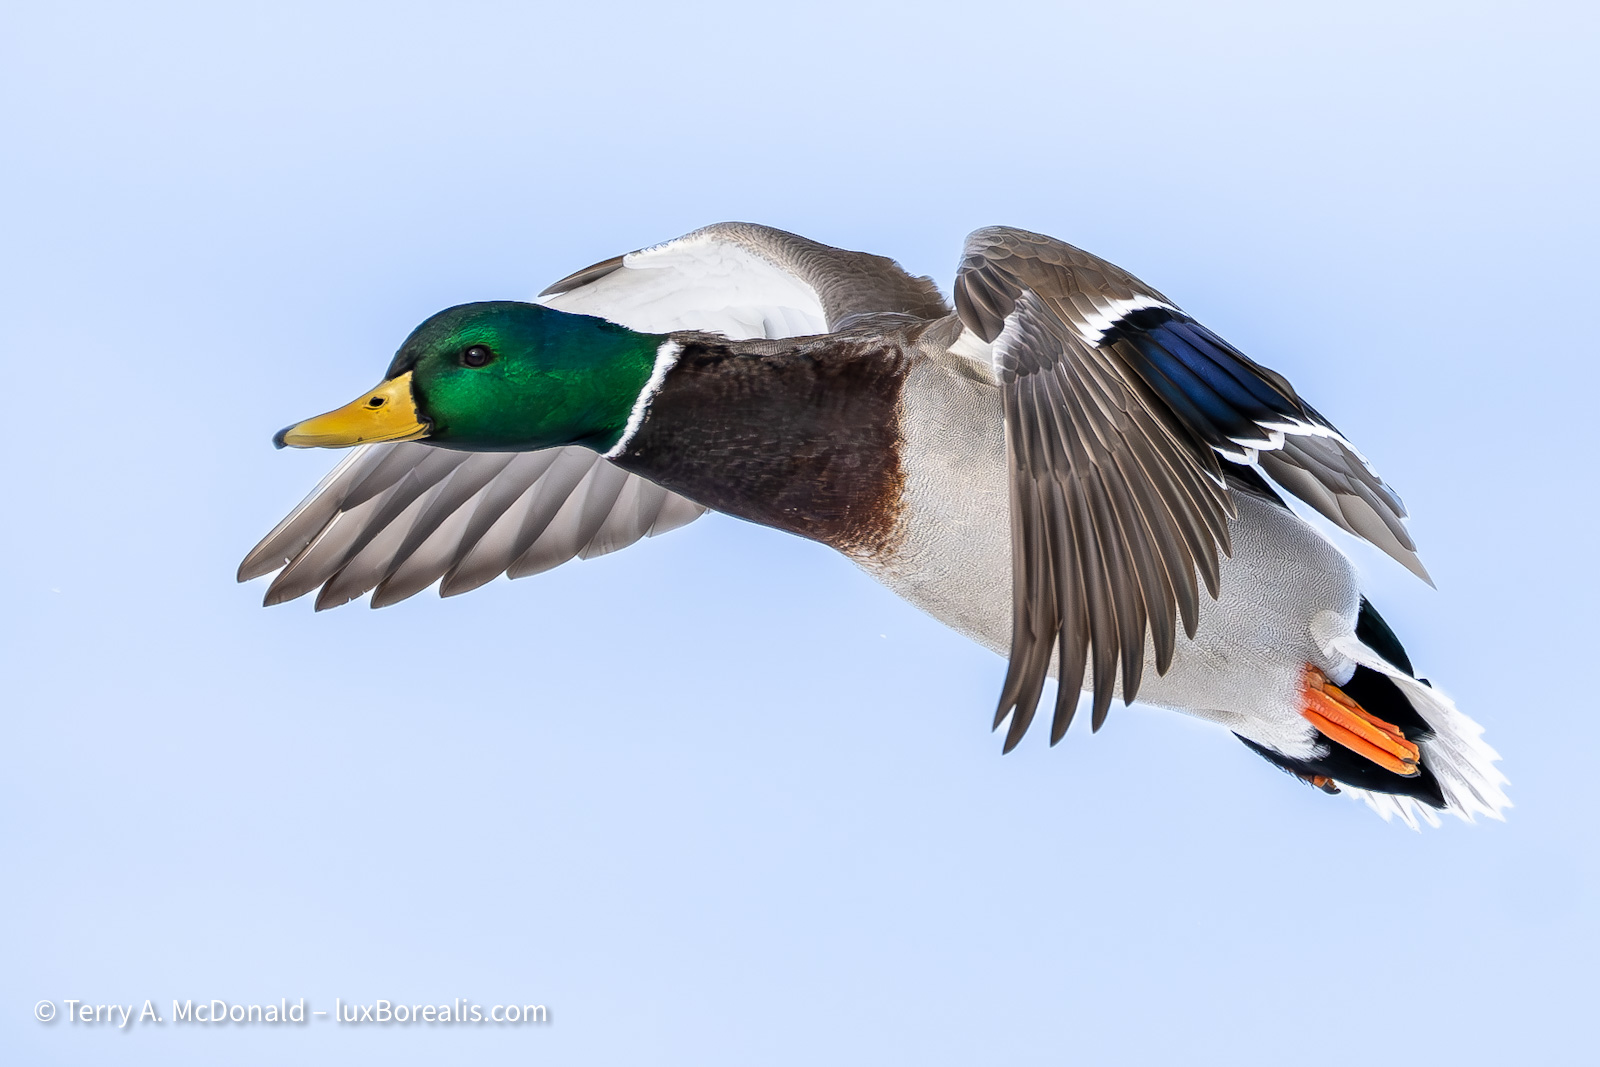
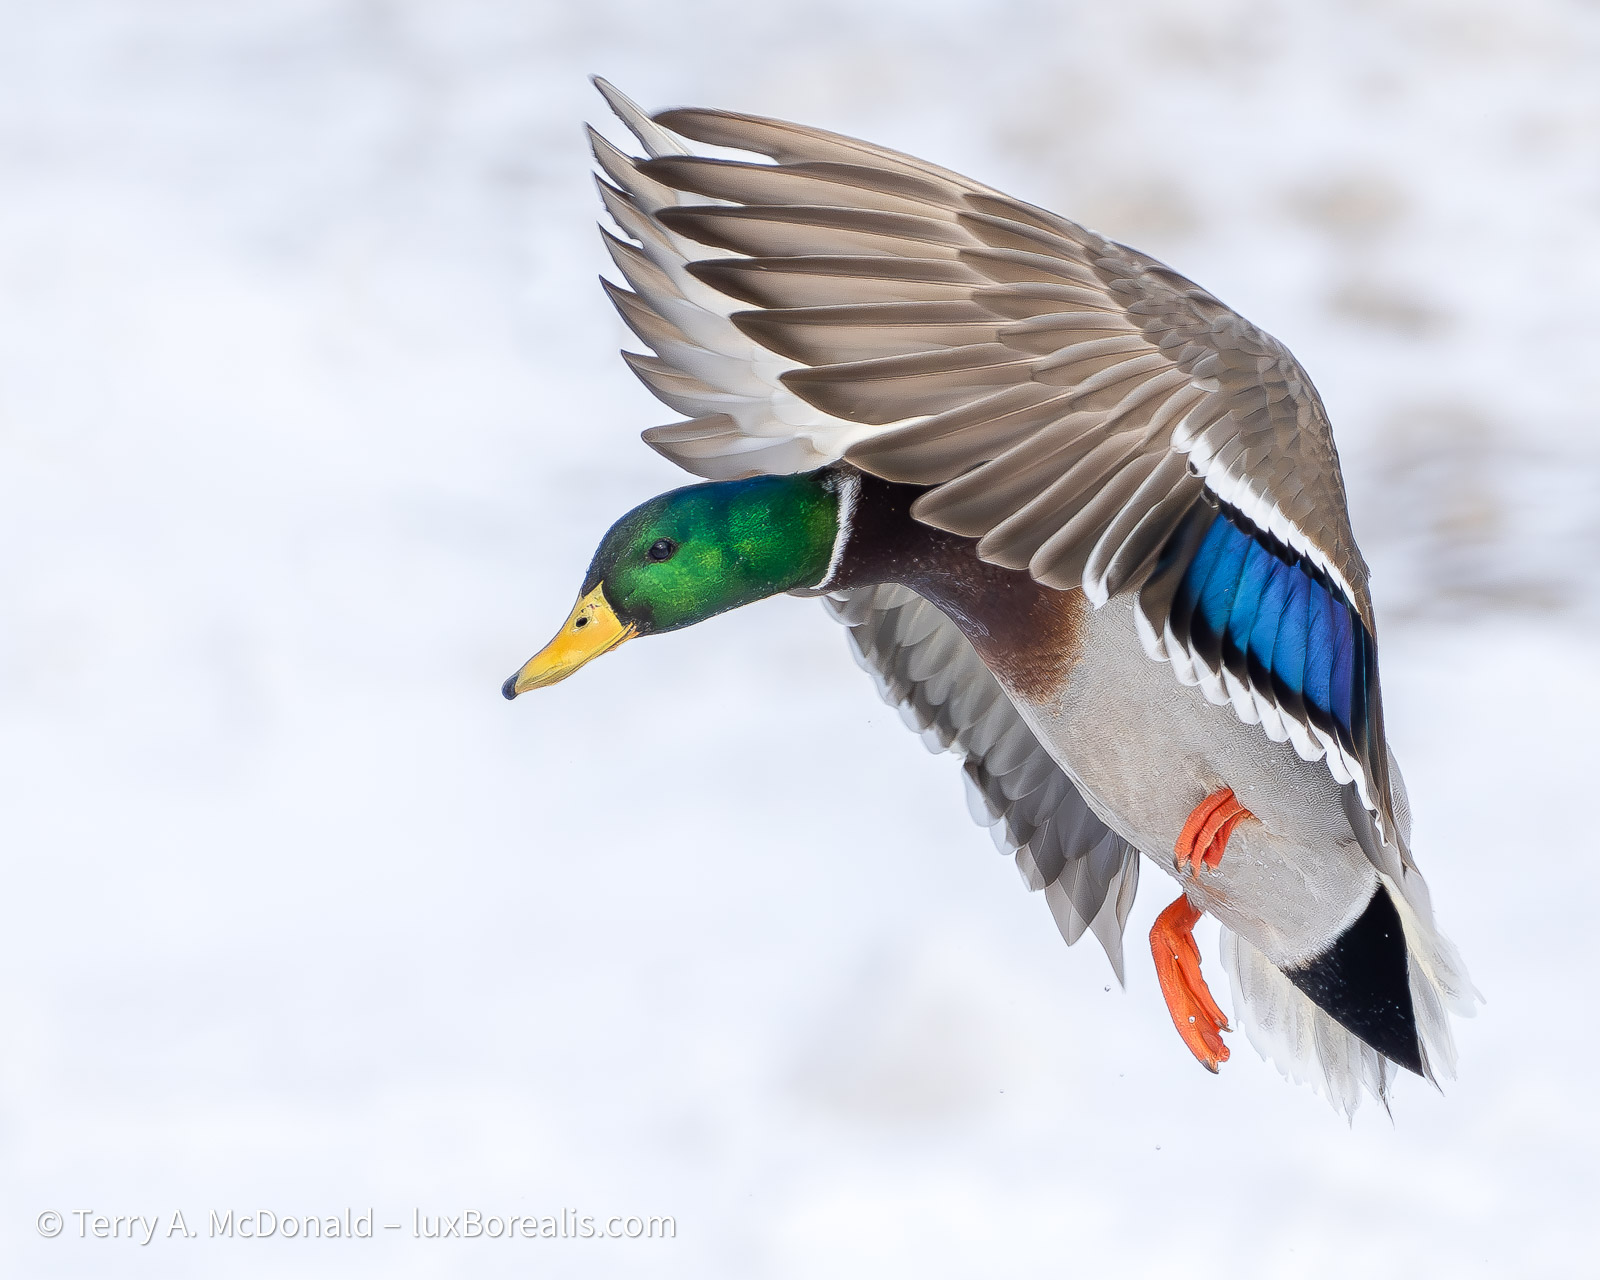
OM-1 w/100-400mm at 400mm • ƒ8 @ 1/3200 • ISO 1600 • +1 EV • Lightroom
In almost two hours, I made 906 images, for me a record. My settings were AF-C and Bird Tracking with Sequential Shooting at SH2, 25fps. The OM-1 is so fast, the camera would AF and AE for each image in a burst. With an ISO of 1600 and an aperture of ƒ8 (mostly), my shutter speeds were in the 1/1250 to 1/8000 range. I also set my Exposure Compensation to +1 EV to partially compensate for the very bright snowy background.
Birds-in-Flight (BIF)
At one point, when someone showed up to feed the birds, we had dozens of mallards and Canada geese flying straight toward us. ‘Like shooting fish in a barrel’, as Tom described it. To me, it was reminiscent of Battle of Britain footage, except these birds weren’t dropping any ‘bombs’ (thank goodness!). Later on, a dog walker arrived which scared the birds into flight away from us. This was fortuitous—as Tom correctly predicted, 10 to 15 minutes later, the birds flew back directly toward us to the near shore, individually, in pairs and small groups, which made for a great many photo ops.
OM-1 w/100-400mm at 123mm • ƒ8 @ 1/4000 • ISO 1600 • +1 EV • Lightroom
In comparison to my ’meagre’ 906 images, Tom made 5629. He was using the M.Zuiko 150-600mm, which extended his range over my 100-400, and he dedicated a good portion of his shooting to specifically using 600mm (1200mm efov) for his blog post Ducks in Flight at 1200mm efov. Tom also photographed using ProCapture Low (SH2) for virtually all of his photography, which explains the greater number of files. ProCapture is something I have yet to master. While I have had success with it each time I’ve used it, I do not relish the culling, which brings me to . . .
Culling
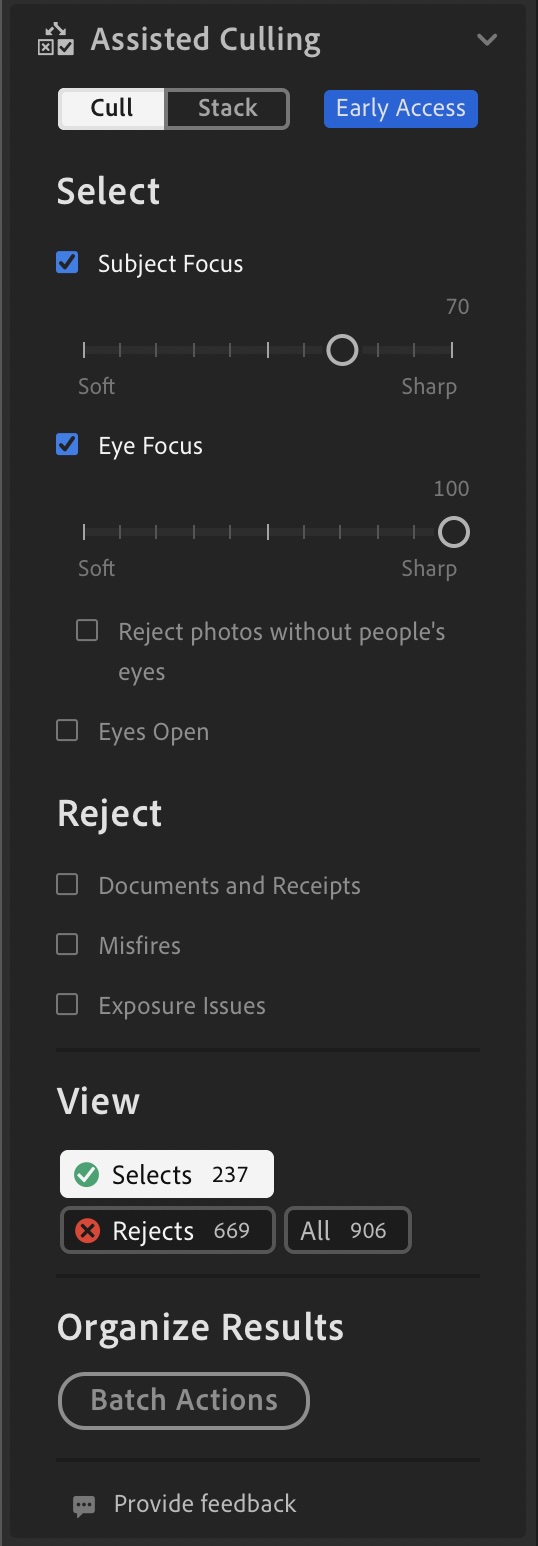
How do you possibly wade through hundreds or thousands of images in a reasonable amount of time? For me, that’s where Assistive AI comes in—and a good time to try Adobe’s Assisted Culling (AC) once again. It’s available on Lightroom Desktop and Classic, though not the iPad version, and surprisingly, not in Adobe Camera Raw (ACR). AC is an ‘Early Access’ feature, meaning it is still in development. It has been trained, through machine learning, to ‘look for’ sharp subjects, sharp eyes, and eyes open—all helpful in wildlife photography, but . . .
Given the needs of the industry, AC was initially developed for portrait photography. Interestingly, portraits, at least corporate head shots, are a type of commercial photography that AI is rapidly replacing. However, high end fashion portraiture and haute couture photography is still very much in vogue.
But I’m photographing a different kind of bird—the wild kind, the unpredictable kind, the #RealWorldPhotography kind. How well would AC handle the wild side?
I set the parameters of Subject Focus to 70% and Eye Focus to 100% as it is most critical for the eye to be sharp. After a few minutes, my 906 images were narrowed down to 242 ‘Selects’, most of which matched the parameters set, though it was far from perfect. I still had to cull based on body, head, and wing position, as that was too much to ask of AC at this stage.
However, in scrolling through the 664 that were ‘Rejects’, there were 6 that I felt should have been ‘Selects’. That’s 1%, so it is efficient, though I did not scrutinize every photo. I ignored photos that may have met the criteria of AC but, due to head, wings or body position, I didn’t pursue. A few of the ‘good’ Rejects I passed on to Adobe through their ‘Feedback’ portal within the panel.
I also tried different parameters and came up with, predictably, different results. Raising the Subject Focus to 90% reduced the number of Selects to 74. However, it also greatly increased the number of perfectly fine Rejects to 26. I’m not sure what all this means other than until Assisted Culling is refined, I will need to keep an eye on the Rejects for any that might actually be perfectly fine.
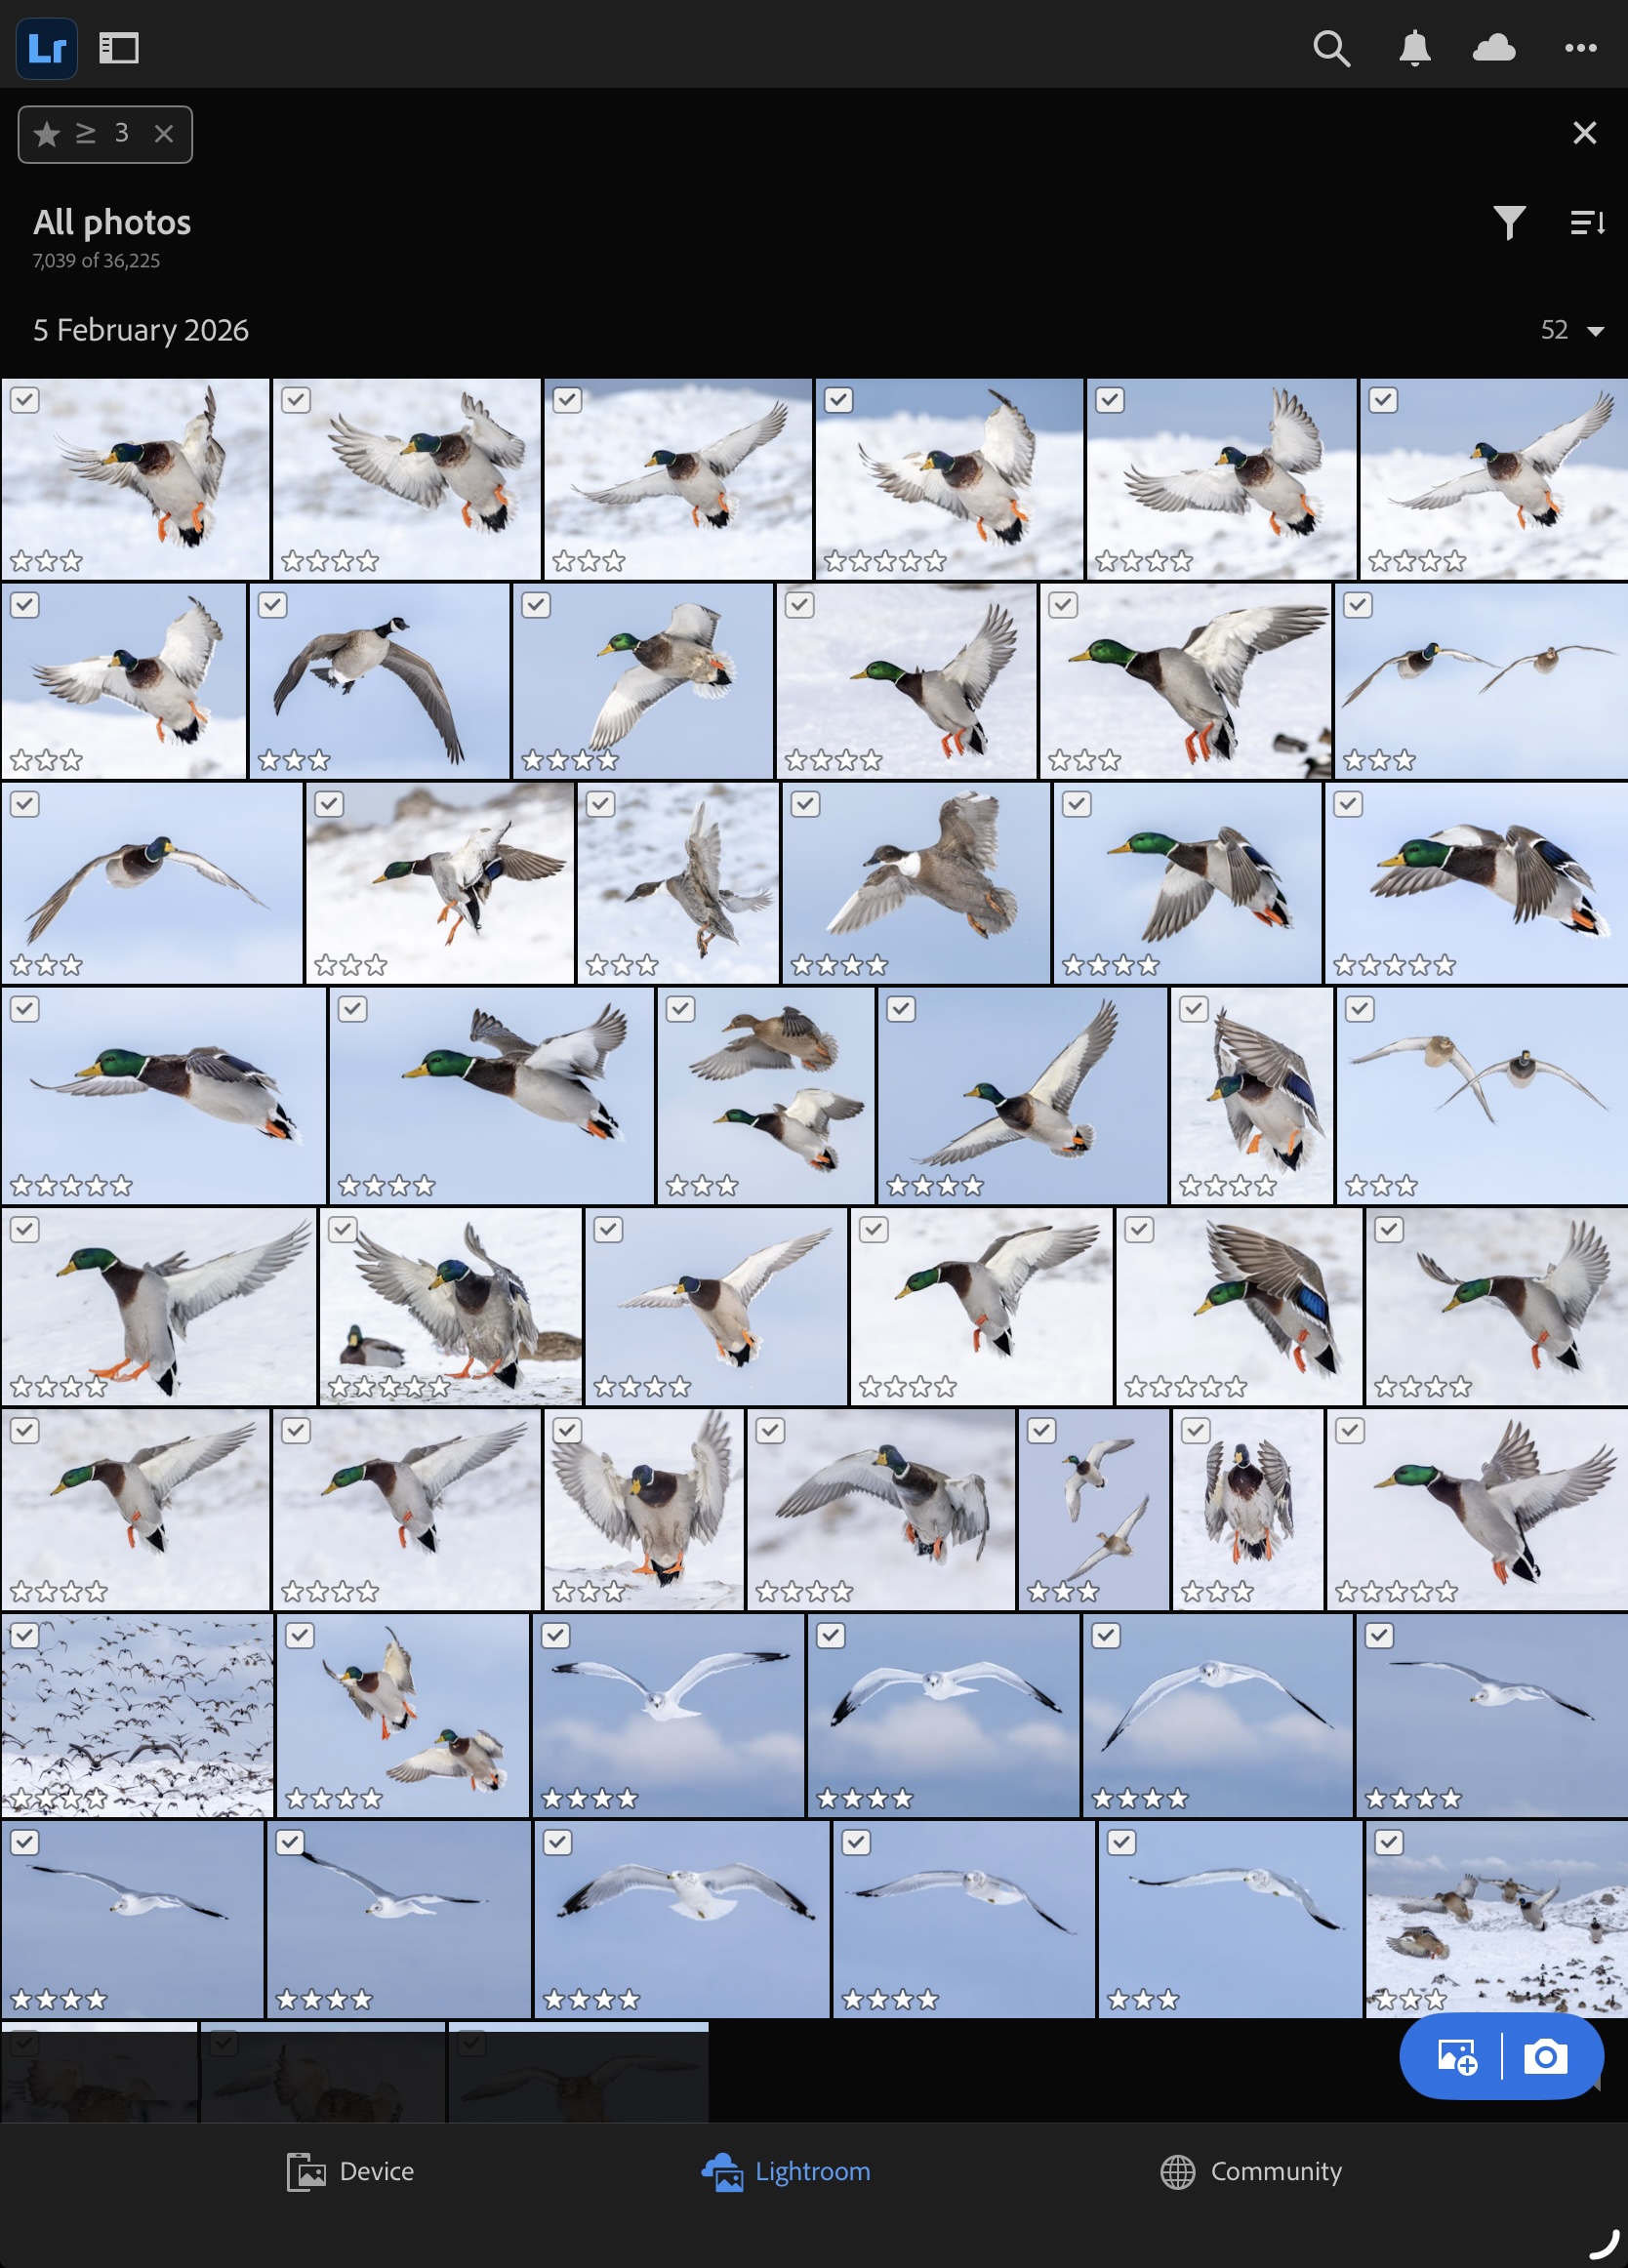
So is Assisted Culling helpful? Yes, but be warned. Check your Rejects, especially if your parameters are too weak. I suggest starting from tighter parameters and working from there. After all, you only need a few of “best”. For me, it turned out that of the 906 images, I rated 51 at 3* or higher with 35 being in the 4* category. No 5* as of yet, but that usually comes after walking away from them for a few days before reviewing them again.
The question now becomes, what do I do with the 855 out-takes? Given that I have at least one decent photograph of each of the different species present—mallard drake, mallard hen, ring-billed gull, and Canada goose—I will delete the 855. No use taking up Adobe Cloud space for sub-optimal photos!
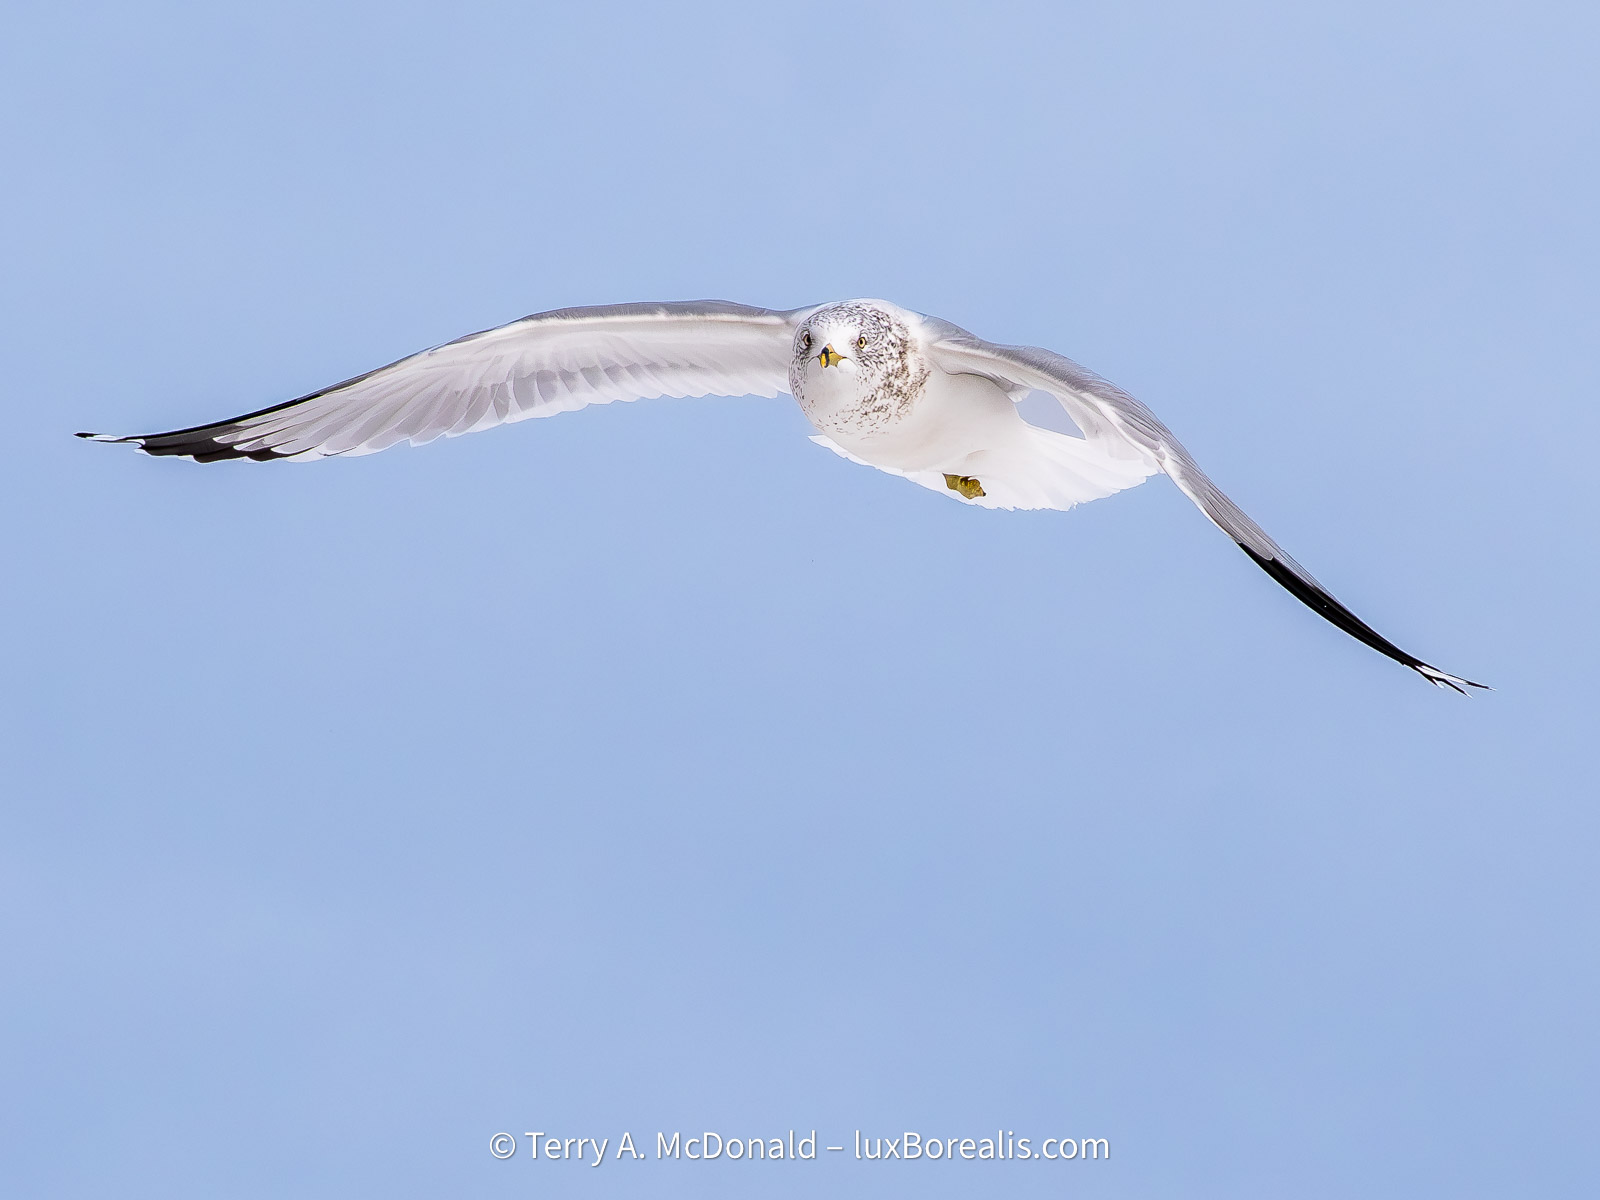
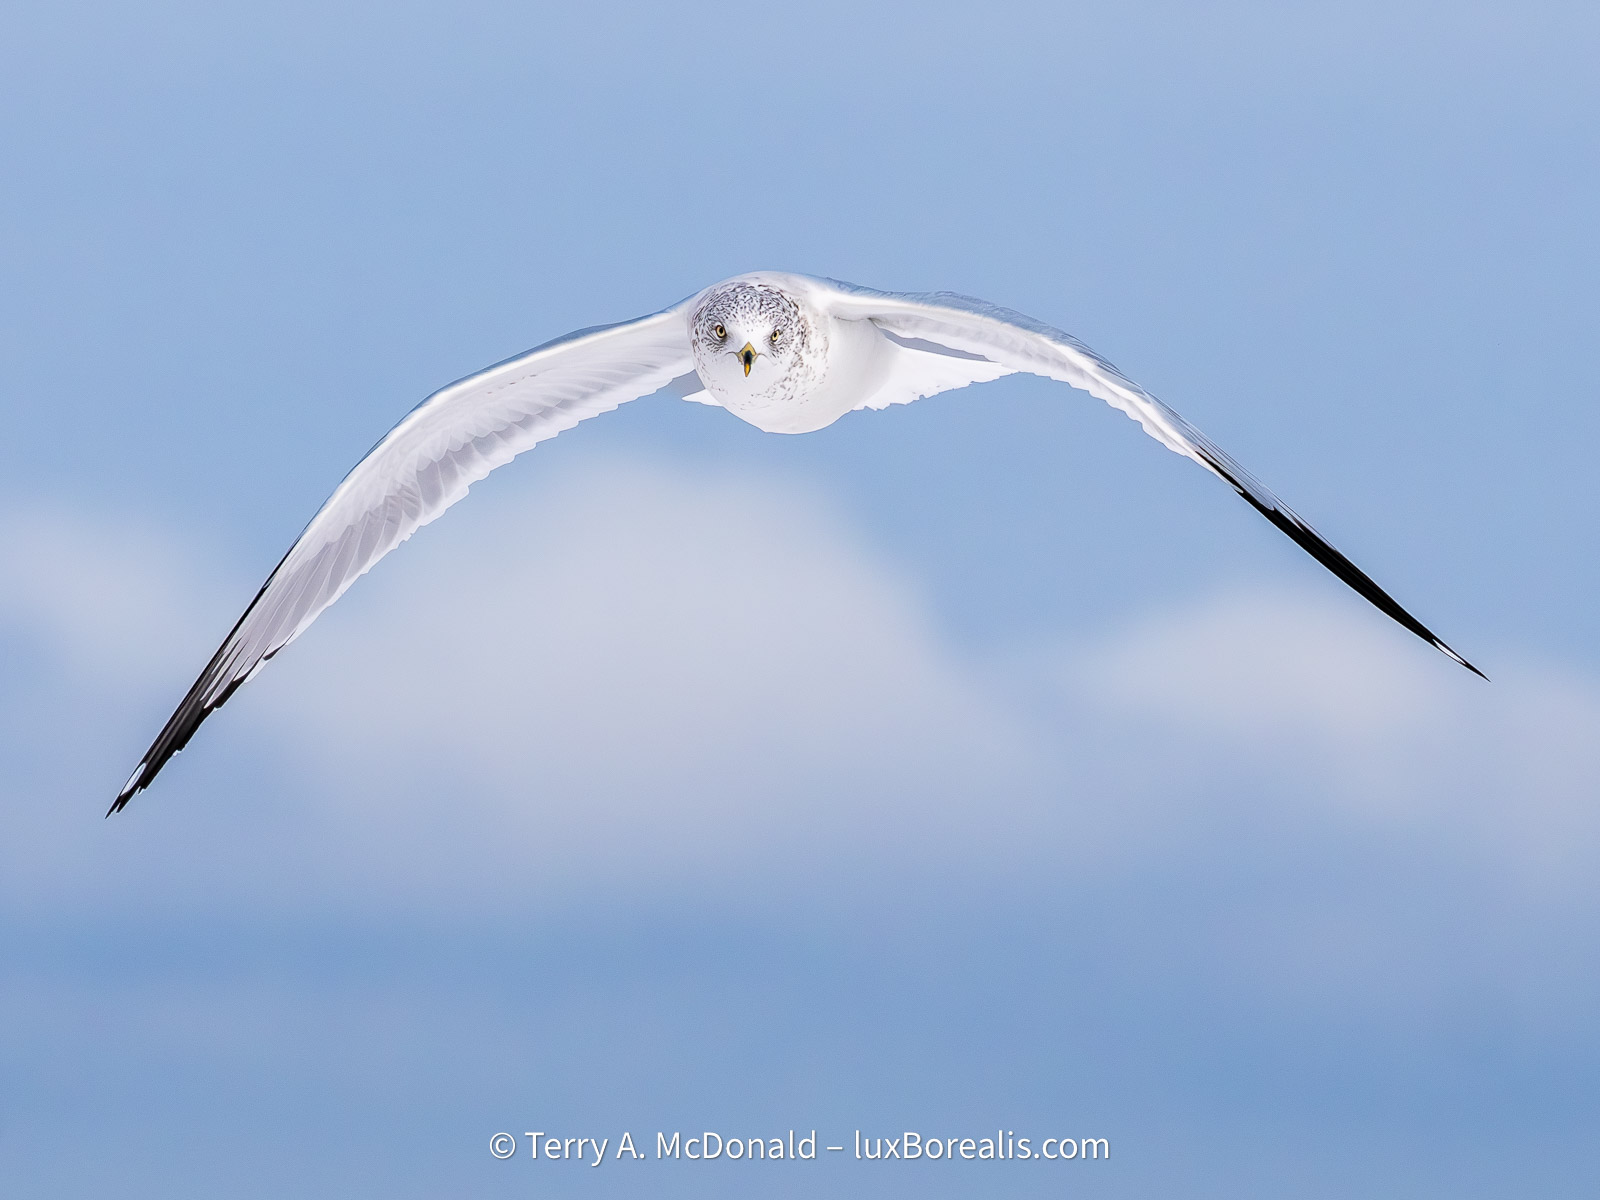
OM-1 w/100-400mm at 100mm • ƒ8 @ 1/3200 • ISO 1600 • +1 EV • Lightroom
Often called sky rats, for good reason, gulls are an elegant bird in flight. In this case, I caught him/her looking at me—always a bonus when photographing wildlife.
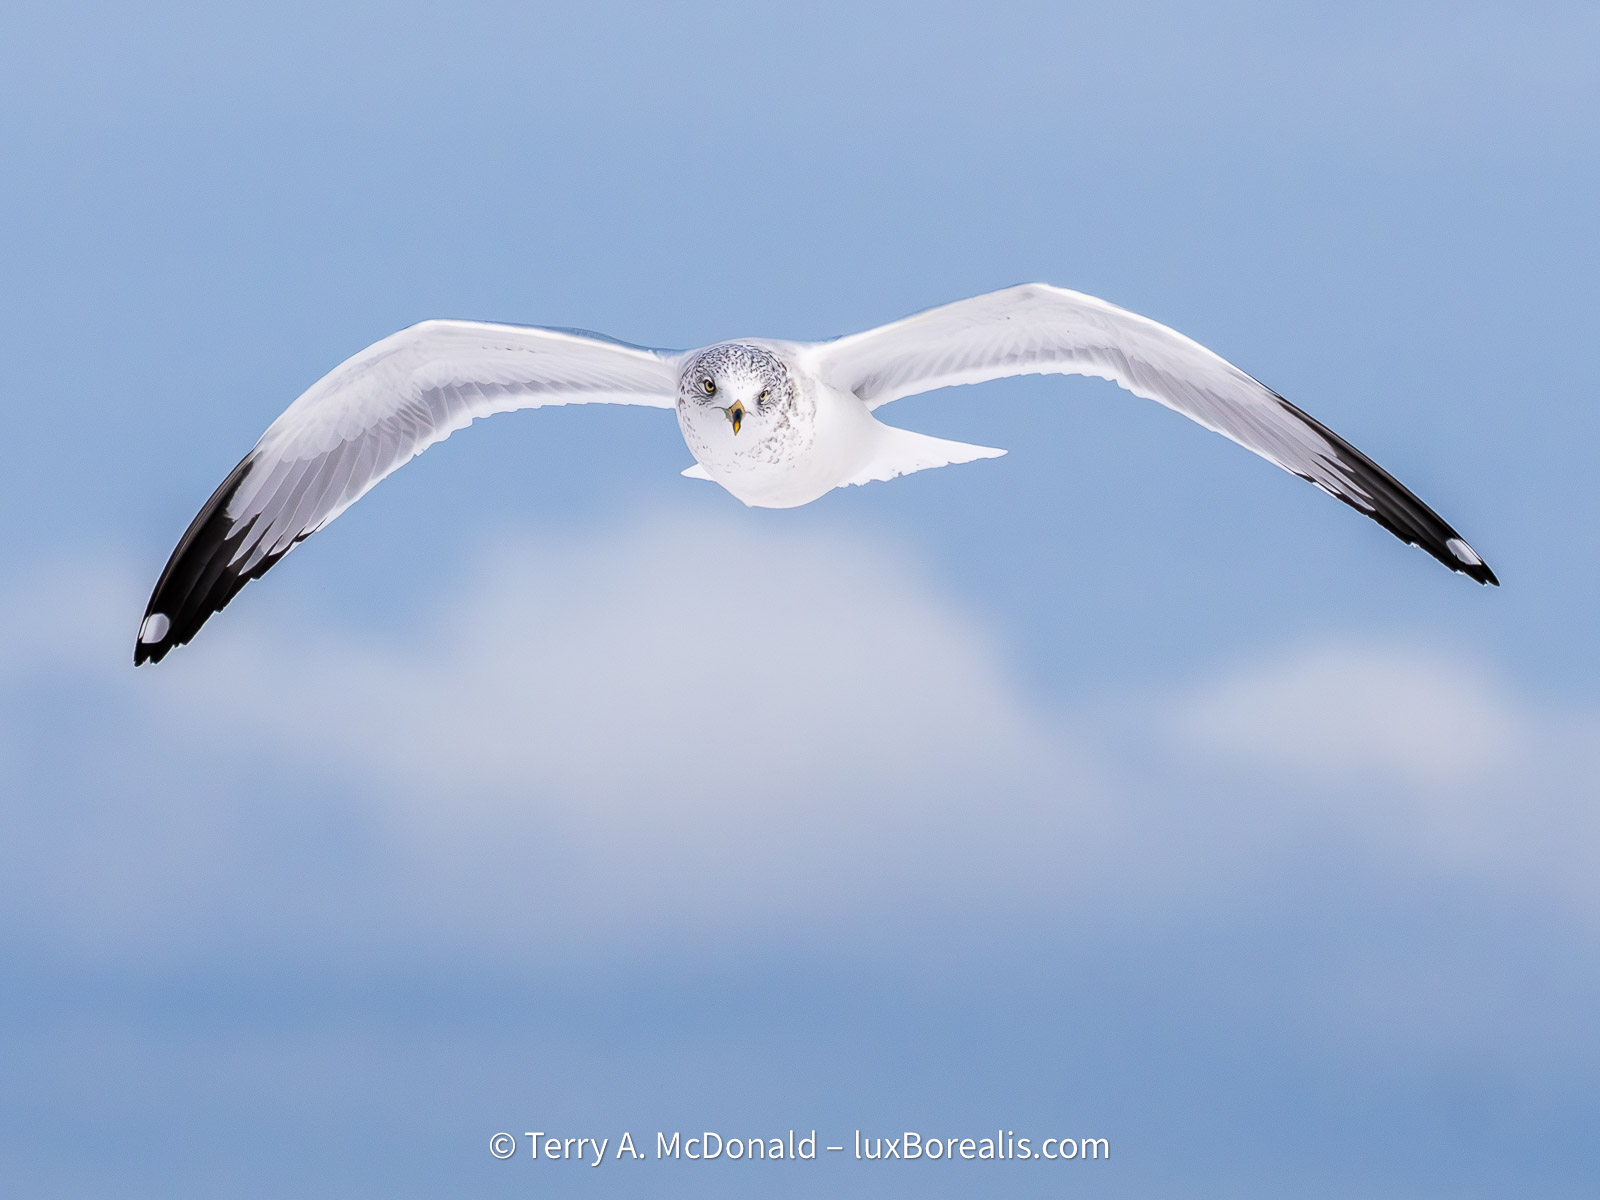
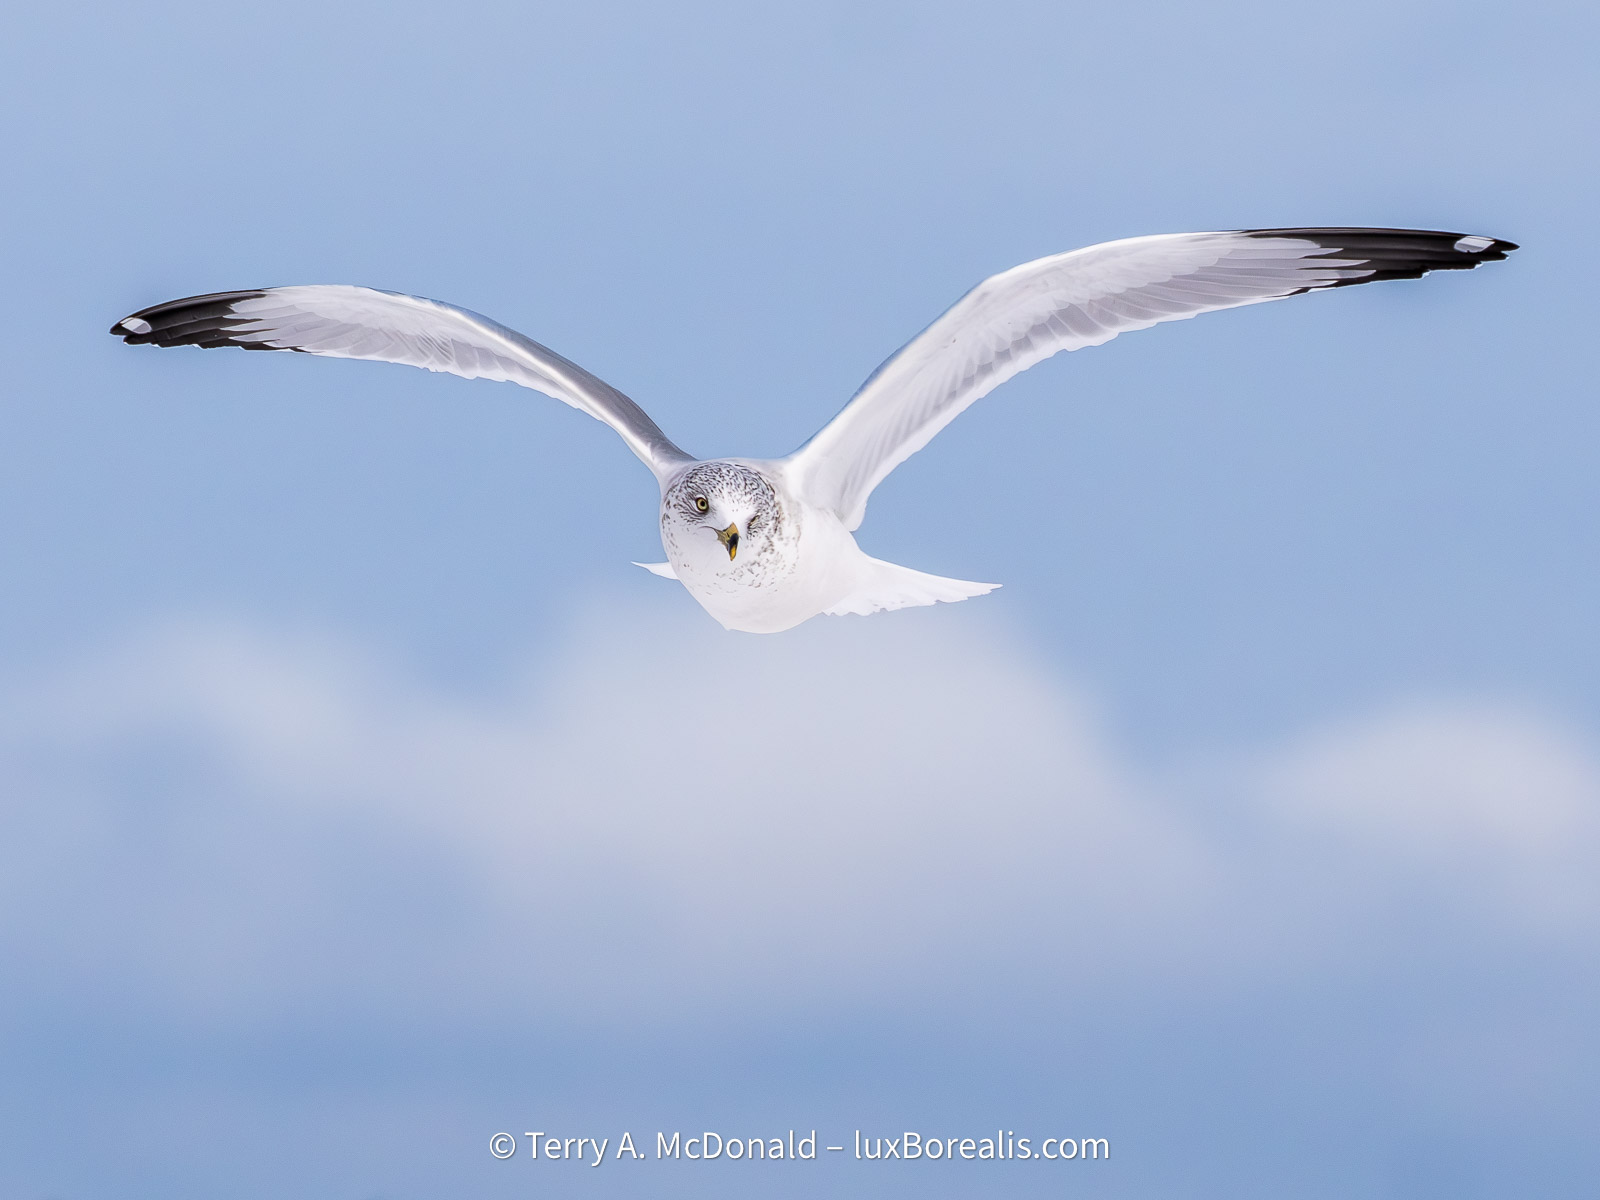
Sequence of gulls.
OM-1 w/100-400mm at 307mm • ƒ8 @ 1/5000 • ISO 1600 • +1 EV • Lightroom
Click on a gallery image to scroll through.
Processing the Best
Now, how to efficiently process these images? My work began with Detail. If an image wasn’t sharp, the eyes in particular, there was no use in spending time editing. I tend to be very conservative in my sharpening, but for these, I found a little more aggressive sharpening helpful. This included:
- increasing Clarity (under Effects) to 20; then
- Denoise at 65;
- Sharpening 100;
- Radius 1.5;
- Detail 60; and
- Masking 30.
Under Optics, I also added Remove Chromatic Aberration. For some images, particularly those that required more cropping, I increased Denoise to 75. With each tweak, I inspected the results at 200% and 100%.
OM-1 w/100-400mm at 285mm • ƒ8 @ 1/2500 • ISO 1600 • +1 EV • Lightroom
These setting were applied to the whole image. As i live with the images, I may find that I switch things around to apply less aggressive sharpening to the whole image and more aggressive sharpening to the subject, using a mask. For now, they seem fine. Once the Detail settings were nailed down, I created my own profile called ‘BIF-Feb2026’. Only once did I try an image in DxO PureRAW and found I was getting better results in Lr, so I stayed with that.
For Lighting (exposure), I began with ‘Auto’, but made a great many changes from there. Lightroom often underexposed images due to the bright sky and snow. It also mis-read the Whites, often lowering them into negative territory when, after manual adjustment, I found +35 to +50 to be the norm. I prefer snow to be white, but I also toggled on highlight clipping to avoid losing detail and made good use of the Highlights adjustment, which was often in the -50 to -90 range.
OM-1 w/100-400mm at 276mm • ƒ8 @ 1/5000 • ISO 1600 • +1 EV • Lightroom
I found Lr often reduced the Black adjustment to -50 which was far too aggressive. Most of the time, Blacks were around 0 with Shadows at +50 to +80 to brighten up the heads of, especially, male mallards. I rarely changed contrast from +7 and had no need to alter white balance—the colours seemed bang on.
Workflow
I worked on each series of similar images at a time. Once the Light settings were nailed down for the first image in a series, including cropping when needed, I made use of ‘Copy Edit Settings’ and applied them to the others in the same series. After all, why re-invent the wheel? There were tweaks after that, but for the most part Copy Edit Settings was a very helpful tool. I would select ‘Modified’, then de-select Effects, Detail and Optics as they had already been set using the Preset I had created..


OM-1 w/100-400mm @ 400mm • ƒ8 @ 1/5000 • ISO 1600 • +1 EV • Lightroom
With Colour, I found the veiled sunlight didn’t change much through the morning, creating fairly consistent white balance from photo to photo—all around 5750°K, give or take. In fact, I really didn’t need to alter the Colour except to standardize it for all photos to 5500°K and +6 Tint, which cooled them slightly; it is winter, after all. Again, I copied and pasted just the colour settings to the entire group of photos.
OM-1 w/100-400mm at 244mm • ƒ8 @ 1/5000 • ISO 1600 • +1 EV • Lightroom
My last additional tweak, which was only slightly laborious, but made simpler with AI masking, was to warm each bird slightly (Temp +5) and cool the background slightly (–10 Temp). To me, this brought out the colours of the birds while maintaining the impression of it being a cold wintery day., which it was! It’s nit-picking, but to me worth it to create a consistent look across the set of images.
OM-1 w/100-400mm at 276mm • ƒ8 @ 1/2000 • ISO 800 • +1 EV • Lightroom
So, that’s a wrap. A successful morning of photography—thanks Tom—and great learning and practice with BIF, culling and processing.
Thanks for reading. Be sure to continue the discussion by adding your COMMENTS, questions or observations and feel free to SHARE with others.
NOTE: This blog is completely free and does not include commercial affiliate links. To help keep it free, consider buying me a coffee . . .

Discover more from luxBorealis Blog
Subscribe to get the latest posts sent to your email.

That photo is so great that it looks like it is AI-generated!!! Beautiful.
Gee, thanks, I think! I guess that’s a compliment these days, in place of what we used to say, “pretty as a post card”.
Actually, you make a fair observation and raise a good point. In some circles, photographers are adding grain back into to photos to make them look more photographic. Ironic, isn’t it?
Thanks for your feedback.
Oh dear, I didn’t mean for my comment to be insulting or negative. It’s just that it looks more like an illustration or a painting than a photograph! (Geez, I hope I haven’t stuck my foot in it even more!).
No-not at all. No offence taken. Your observations are entirely valid and helpful for me. Sometimes it takes an objective set of eyes!
Great photos and useful info on assisted culling. I have tried it on people pictures and it looks like a useful tool, subject to the issues you describe. For me, the chance it misses some good shots is outweighed by being able to quickly sort shots that might otherwise sit for weeks without review.
Thanks, Edward. And thanks for adding to the discussion.
—Terry