Update: Bird Photography in Costa Rica
2113 words; 17 photos; 11-minute read
Clicking on images will enlarge them.
Although it’s the rainy season, we’ve had more than our fair share of sunny weather. Up in the Central Valley and highlands, it was actually pleasant, with just enough cloud to soften shadows. But down here on the southeast Caribbean coast, just a few kilometres north of Panama, the sunny skies bring heat and humidity. The past two days have been scorchers!

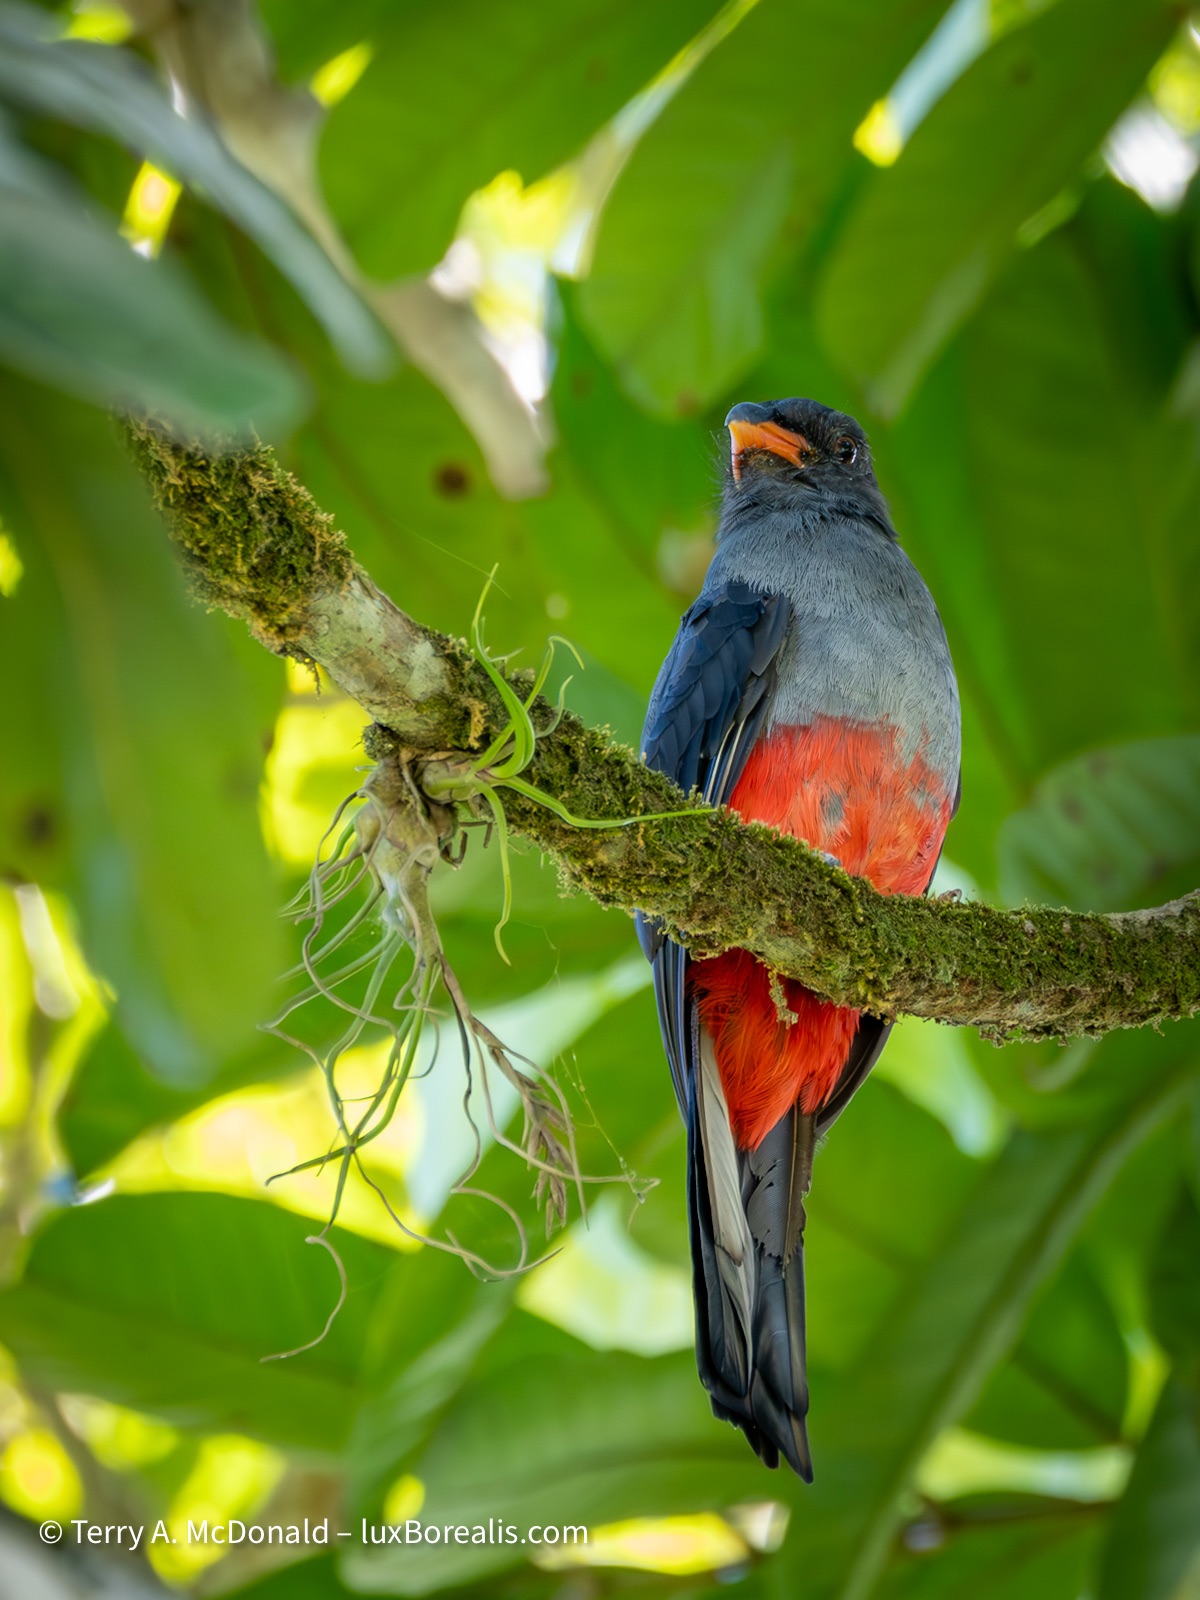
OM-1 | M.Zuiko 100-400mm at 400mm (800mm efov) | ƒ11 @ 1/200 |ISO 6400 | Lightroom
This beauty is arguably the most sought-after bird in Central America. It feeds on wild avocados, swallowing the plum-sized fruit whole, then regurgitating the pit before retreating back into the canopy.
The birds here in Costa Rica are simply stunning. Our guides from Eagle-Eye Tours are on top of everything that moves or calls, with instant identifications. Ernesto Carman is from Costa Rica and knows not just the birds but is an encyclopaedia of natural and cultural history. Jody Allair, from Birds Canada, is amazing with the IDs, and both are quick on the scopes, providing us with clear views of distant birds. Even our driver Ricardo is a birder with a keen eye.
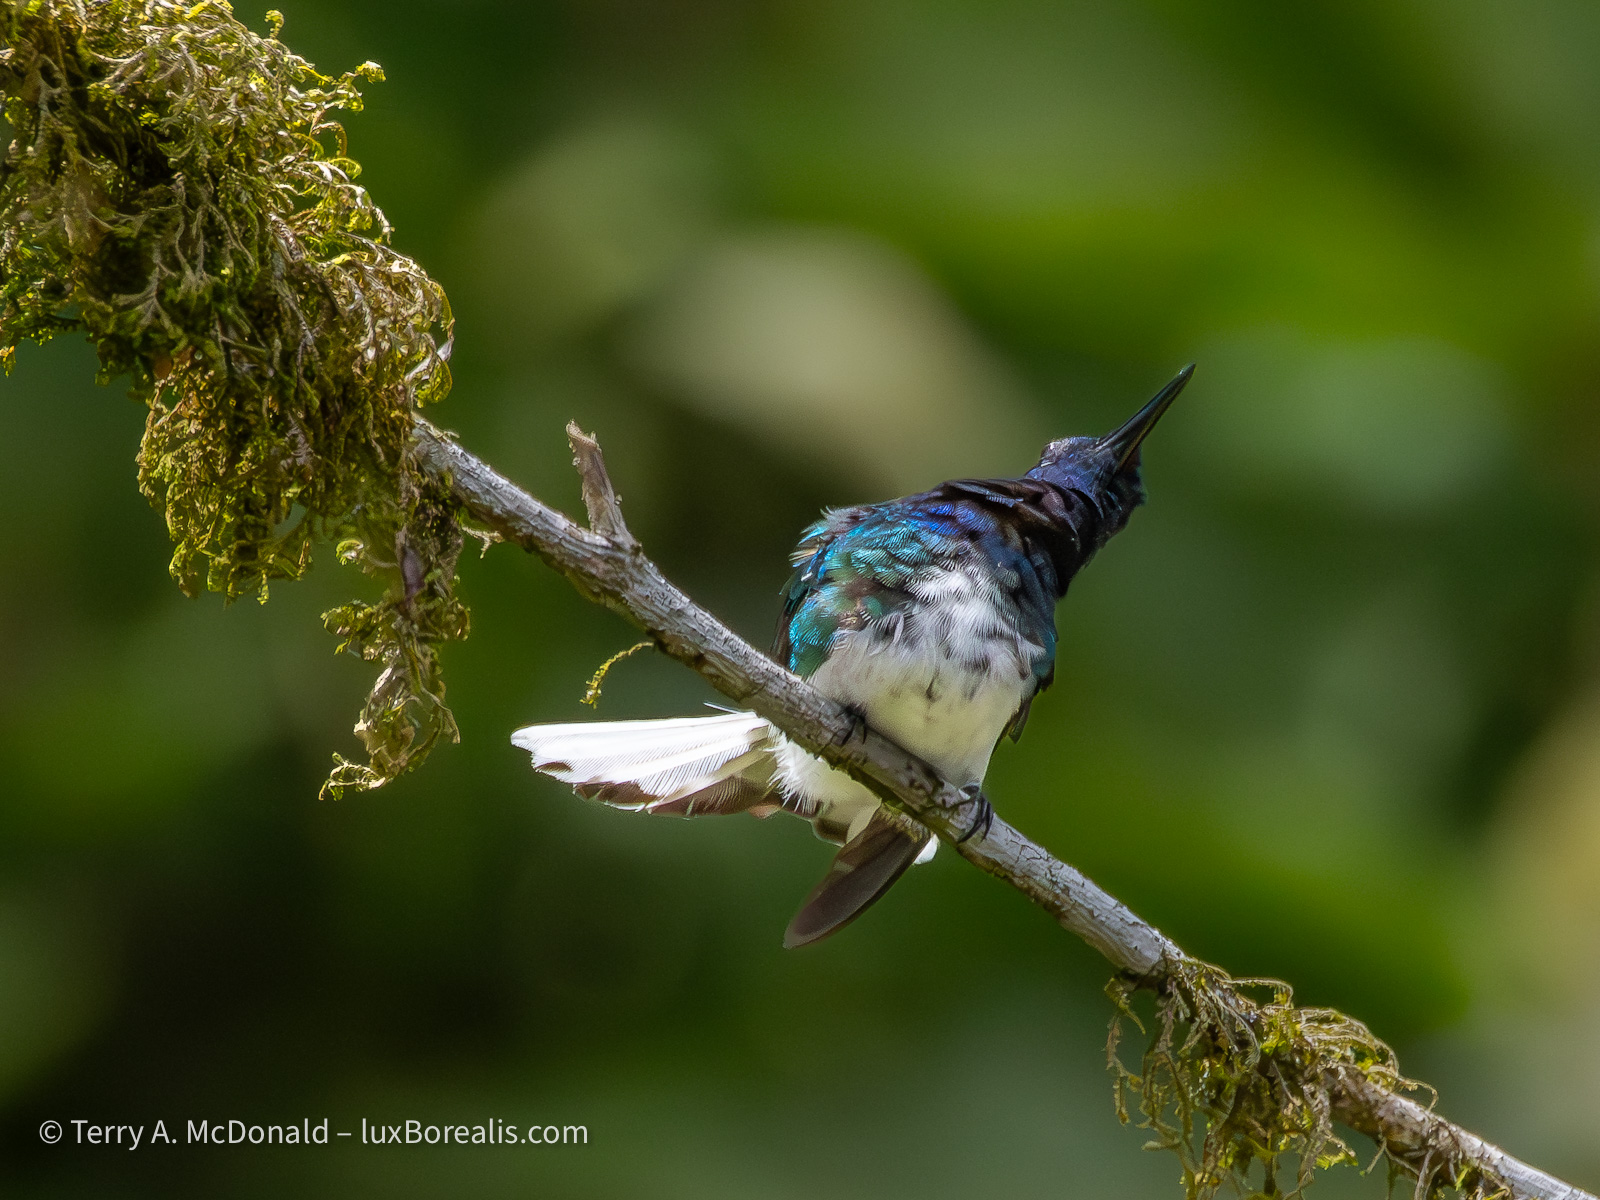
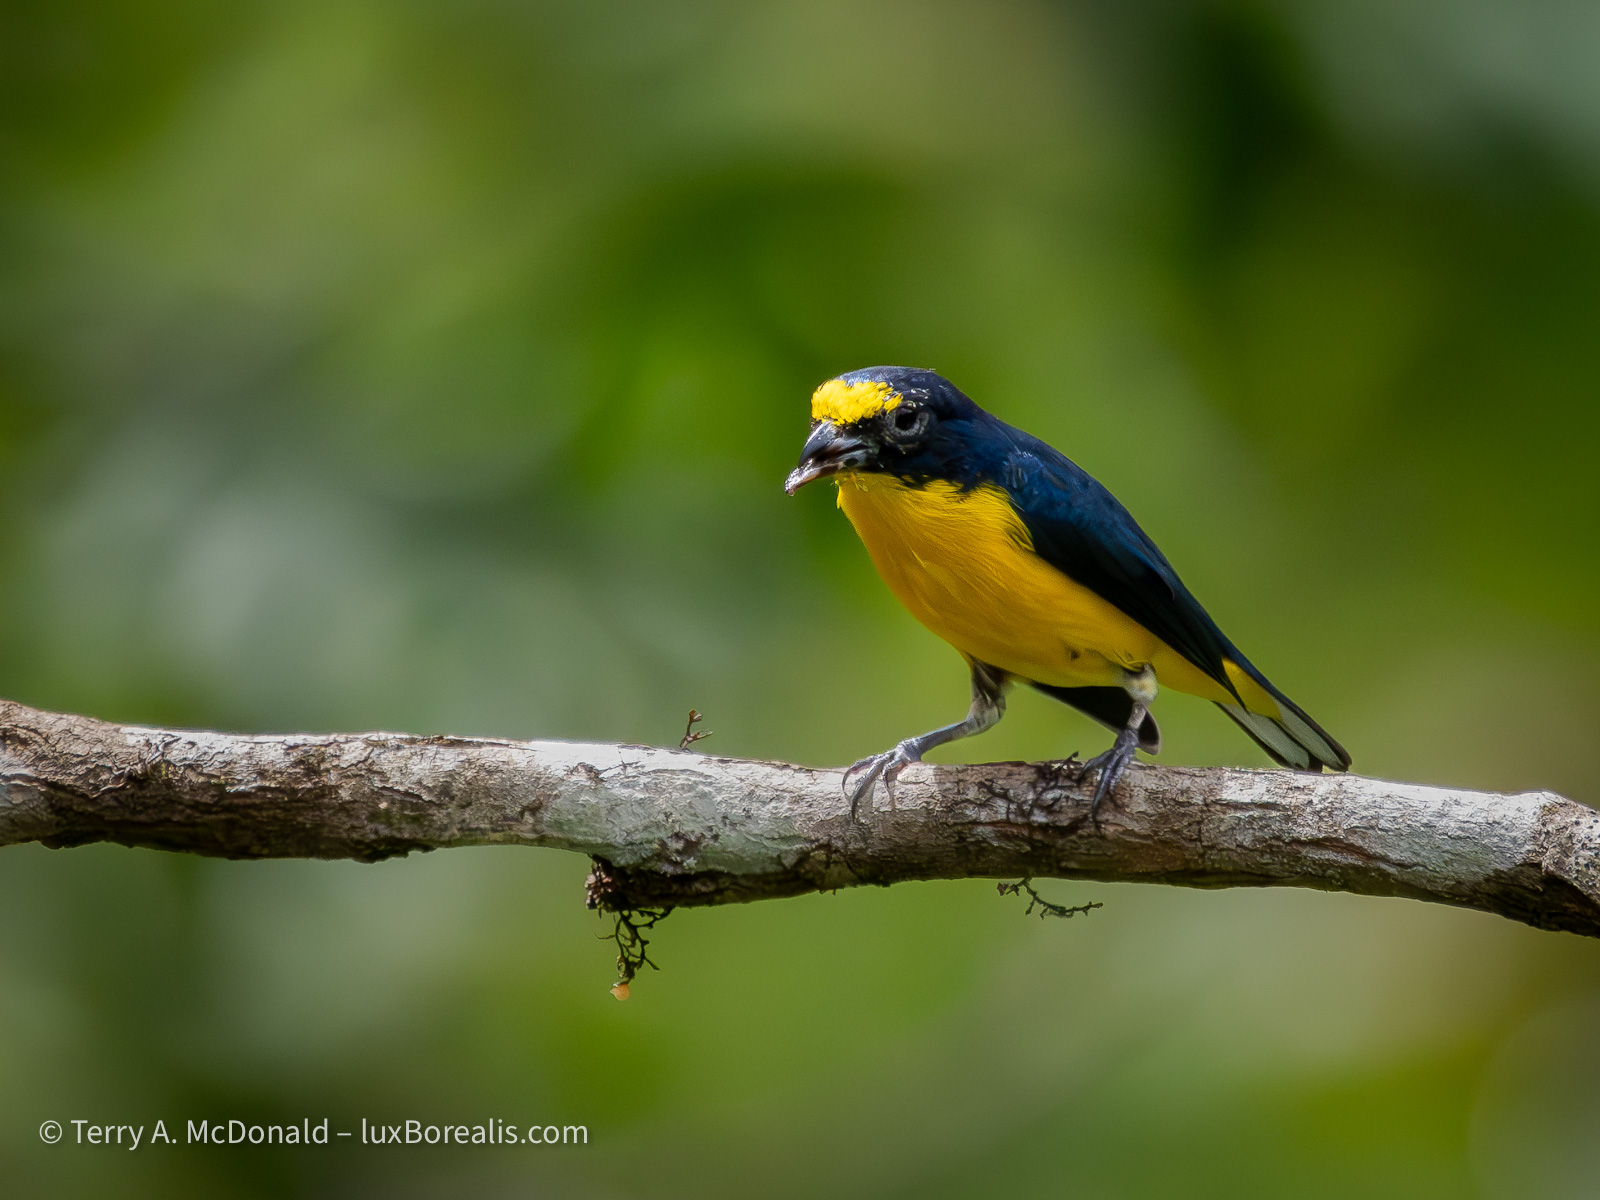
400mm | ƒ8 @ 1/5000 | ISO 6400 | Lightroom
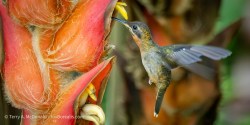
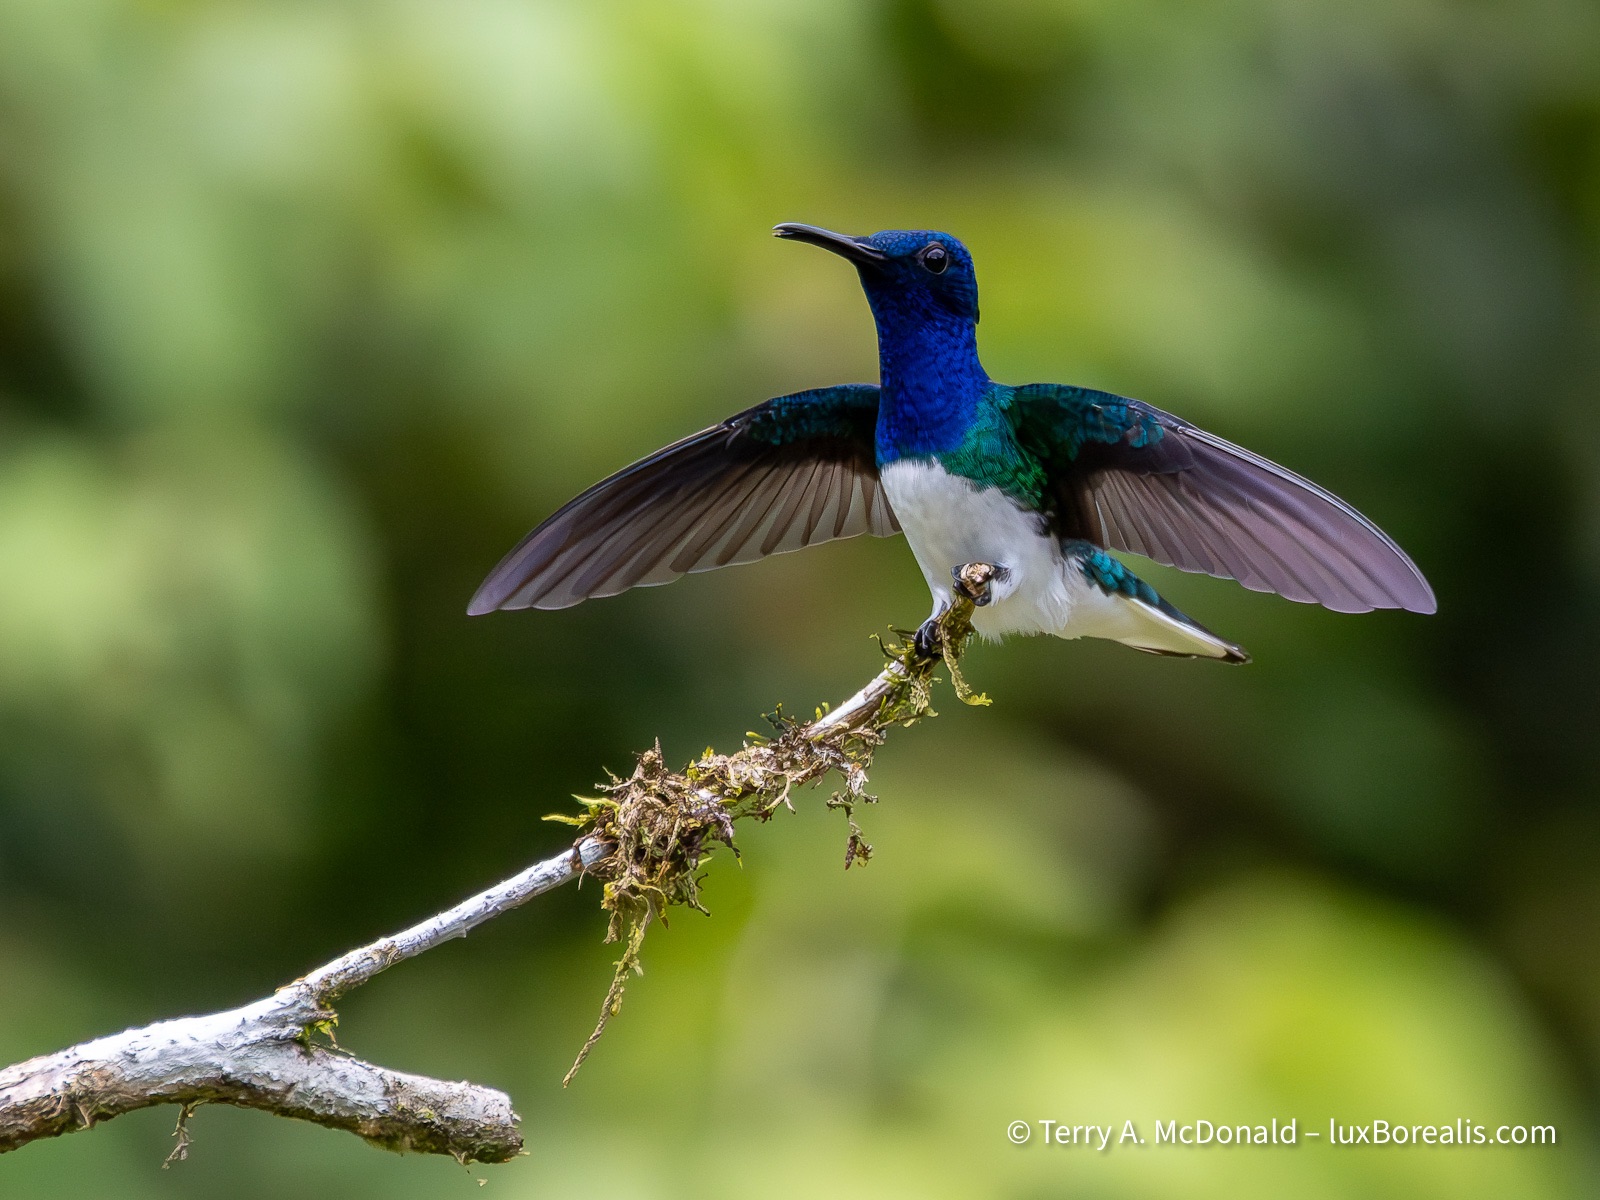
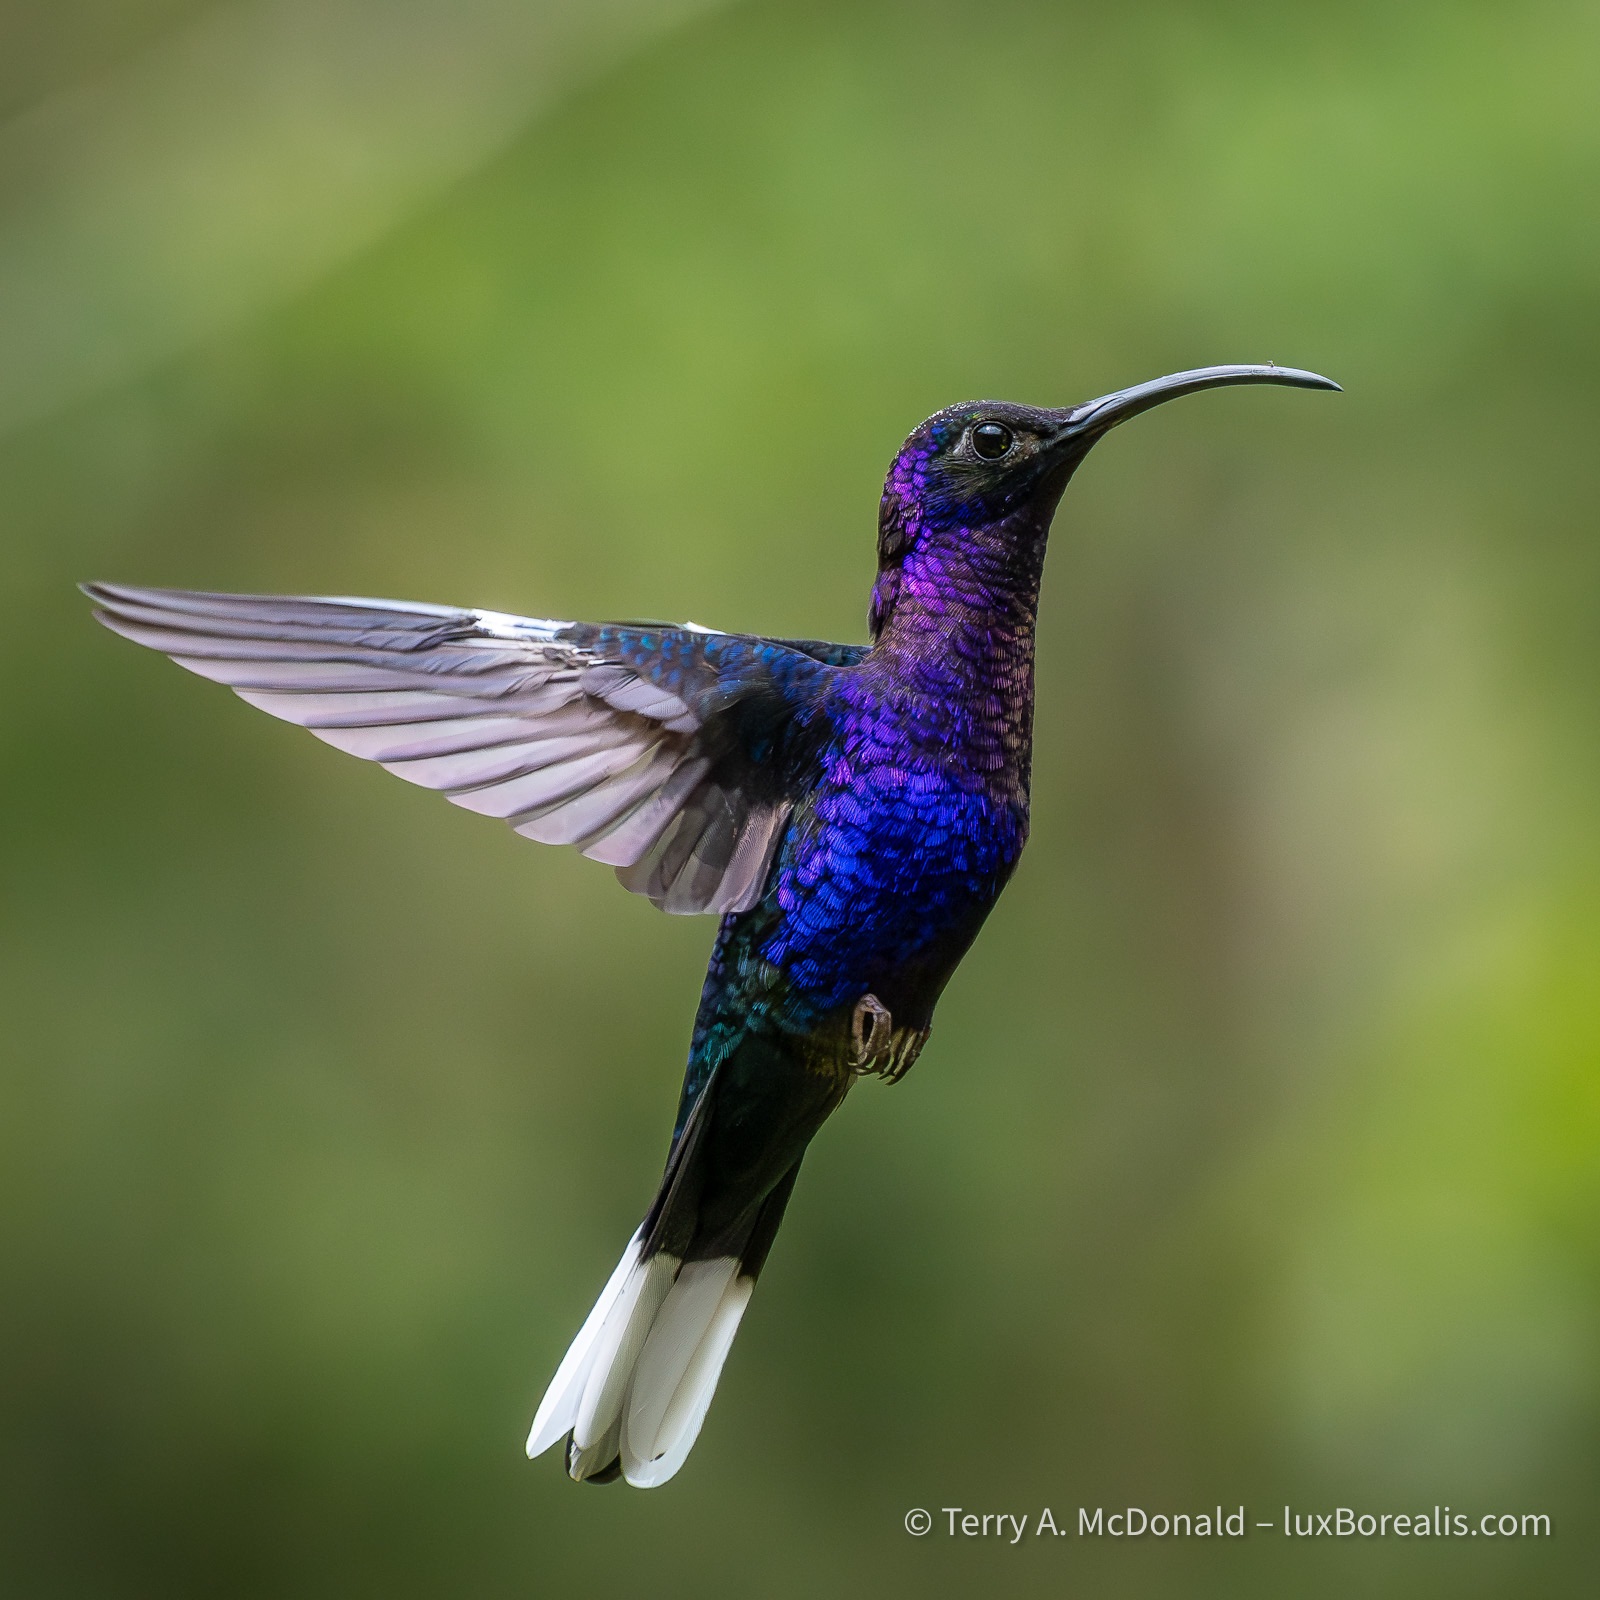
The hummingbirds are nothing short of magnificent and most of the time, predictable. They either have perches they return to, like this Jacobin, or like the Violet Sabrewing below, they hover away from the feeder for a brief second before and after feeding.
The folks we’re travelling with—a total of 12 —are also excellent birders. They are from across the continent from Vancouver Island to Toronto to south Texas and Arizona and bring with them a world of birding. It’s been great to share travel stories and experiences.
400mm | ƒ8 @ 1/2500 | ISO 1600 | Lightroom
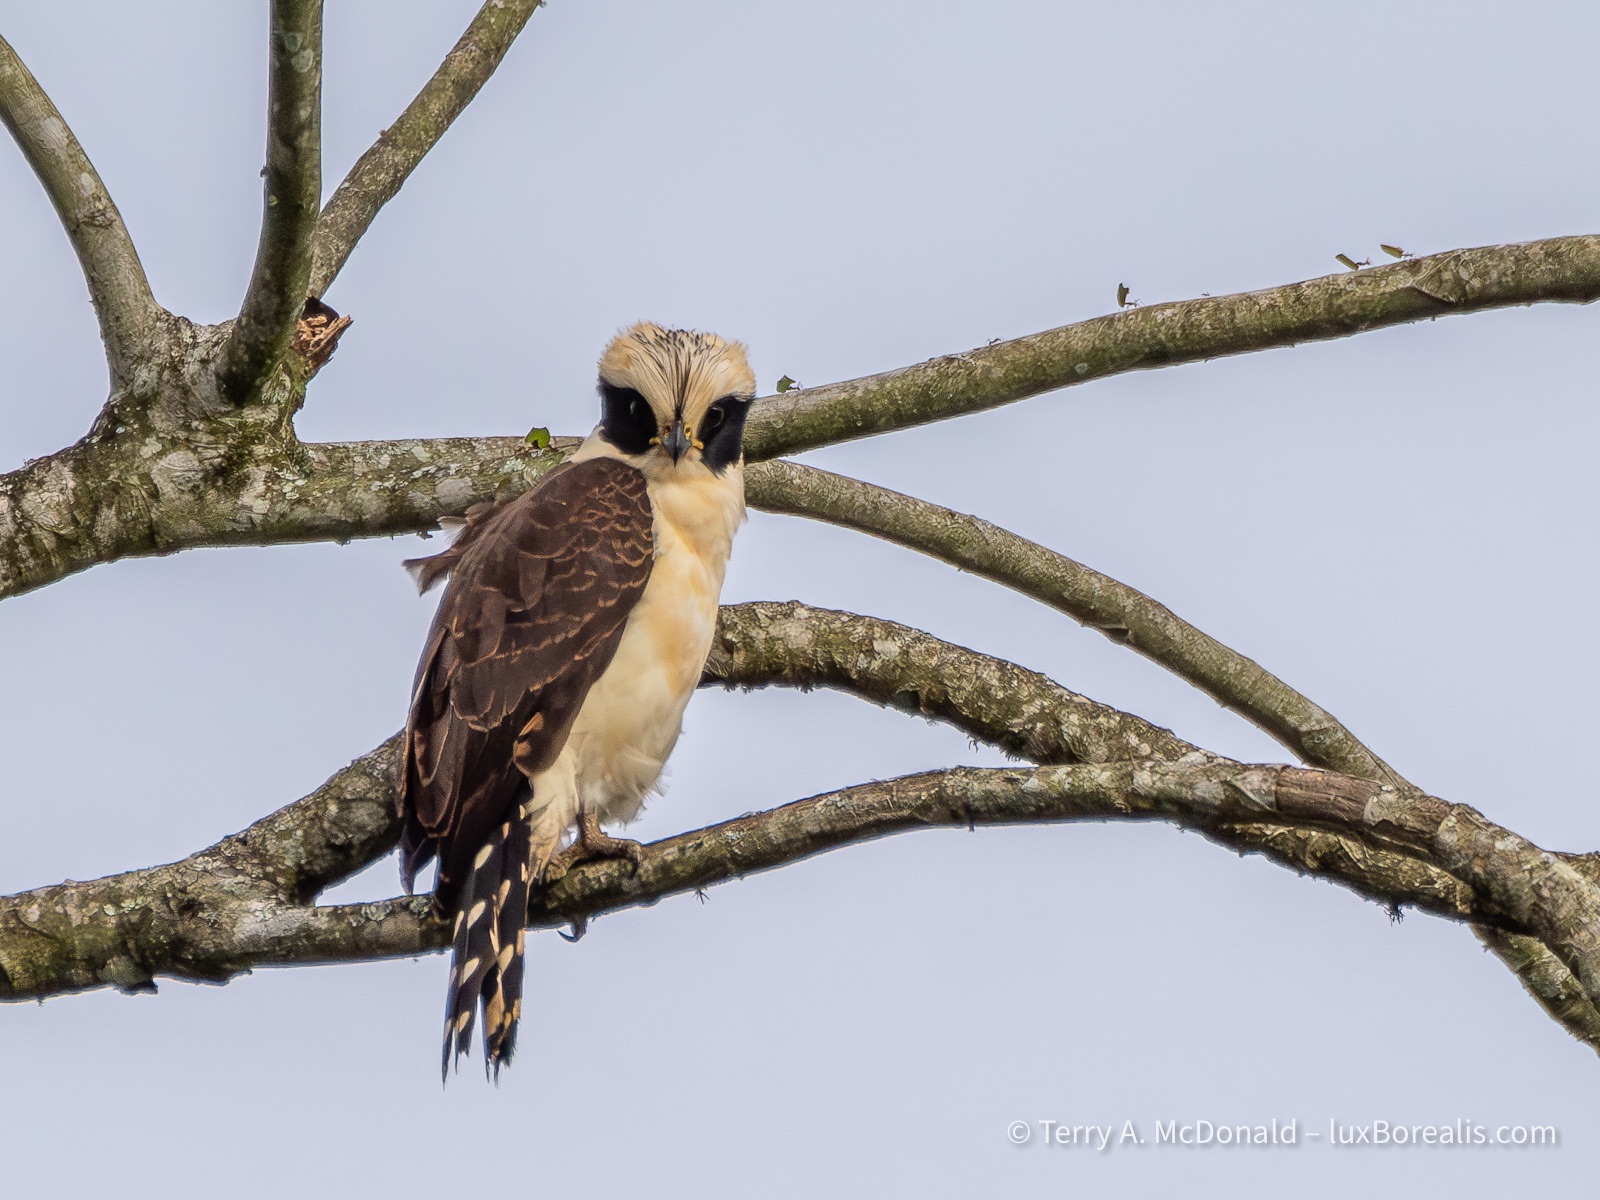
And guess what? It really does make a laughing-like call. Note leaf cutter ants carrying pieces of leaves along the top edge of the branch.
From a photography perspective, I really can’t complain. I’ve had some excellent photo ops, most of which I’ve been able to take advantage of. However, I’ve also noticed that birders are satisfied with seeing a bird half a kilometre away, provided they can ID it. How they can see the leg-colour or a flash of whatever at that distance is beyond me!
400mm | ƒ8 @ 1/5000 | ISO 6400 | Lightroom
400mm | ƒ8 @ 1/200 | ISO 3200 | Lightroom
Field Equipment
On my OM-1, I’m using the M.Zuiko 100-400/5-6.3 (200-800mm efov). For me, even with an 800mm equivalent lens, I need the bird within 20m for what I would consider a successful photo. The Olympus Big White or the 150-600mm would have allowed a greater number of successes, though the added weight would have its own consequences. For ease of vertical shooting and near limitless battery power, I’ve added the HLD-10 vertical grip.
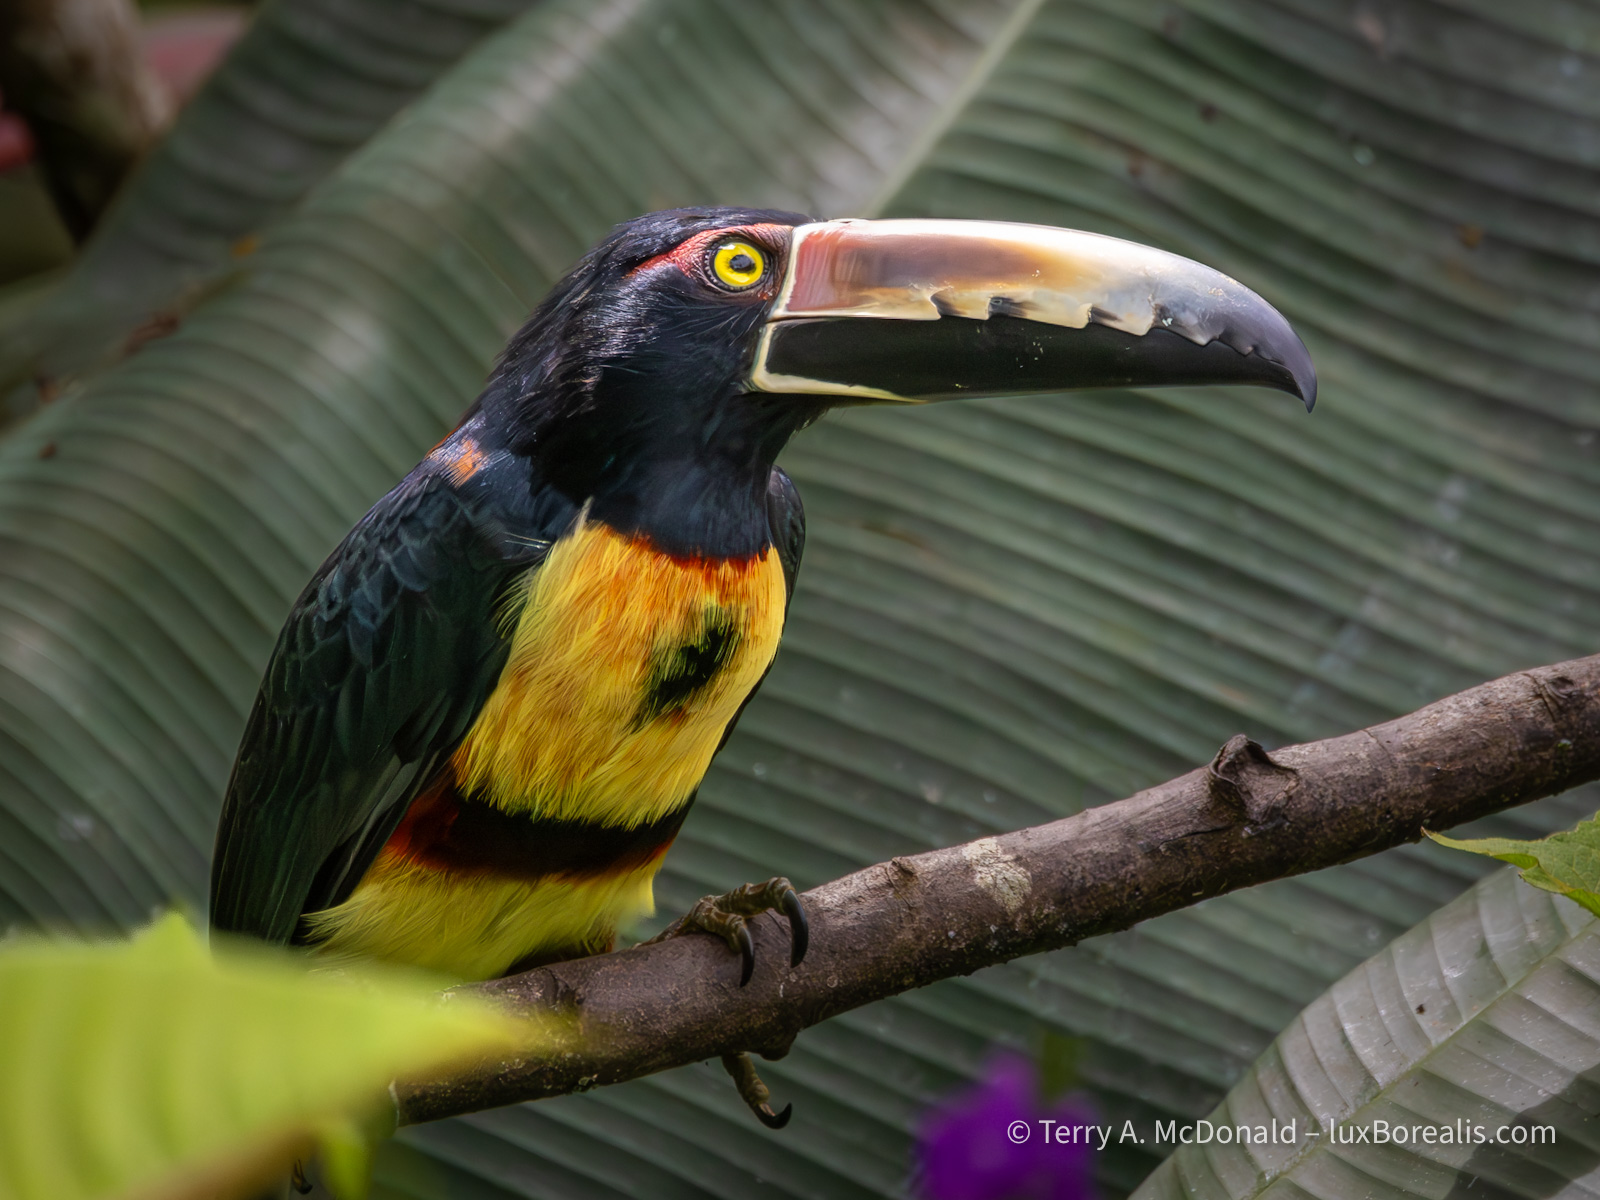
400mm | ƒ8 @ 1/5000 | ISO 6400 |Lightroom
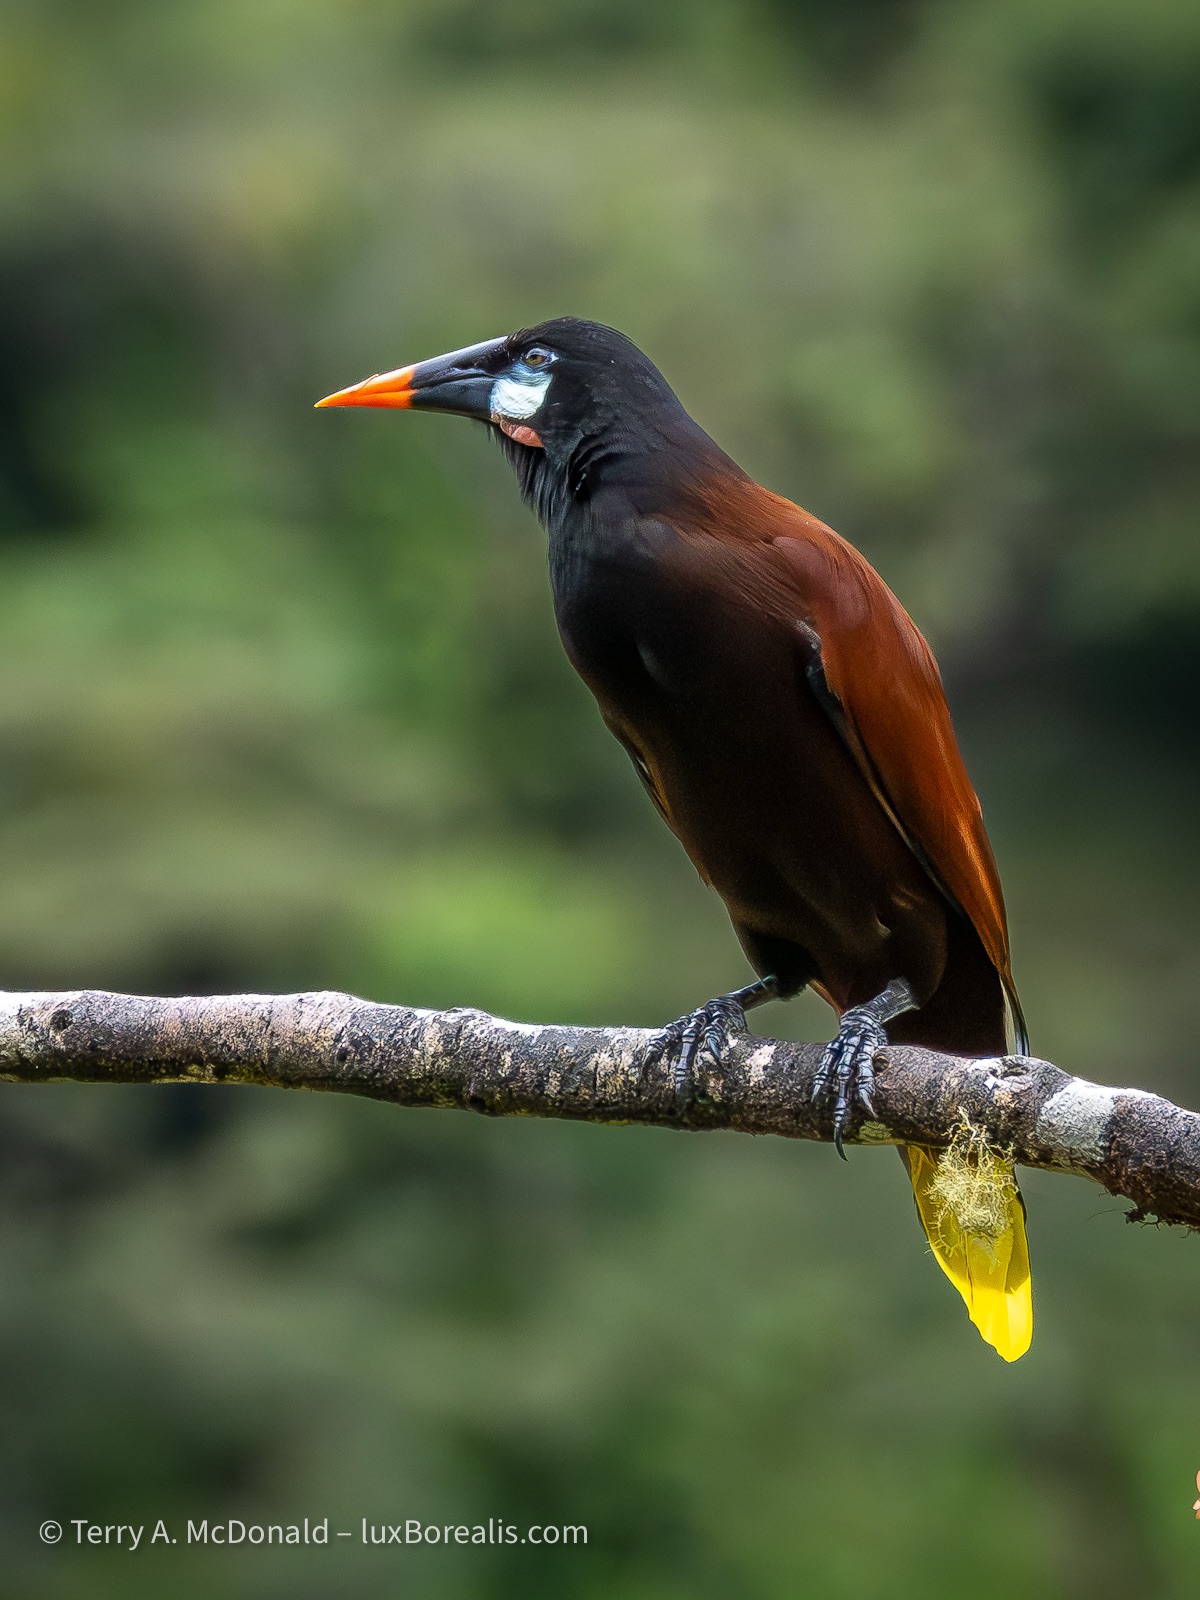
The massive bill on this toucan is actually quite light as it is constructed with a thin skin of keratin over internal structural supports, like an airplane.
Another addition I’ve made to my set-up is a monopod. I know how Olympus/OM System users love to boast about handholding such light equipment with great stabilization, almost as a badge of honour, to the point where even on the OM System website, you’ll rarely see a tripod and never a monopod.
Holding a 2+kg system of body and lens for minutes on end while watching a hummingbird or scanning the canopy for a tell-tale flash of colour simply became uncomfortable when repeated over the course of the day, in 30° heat at 100% humidity. I’m used to a monopod from my years of shooting sports, so using one in these conditions was a no-brainer.
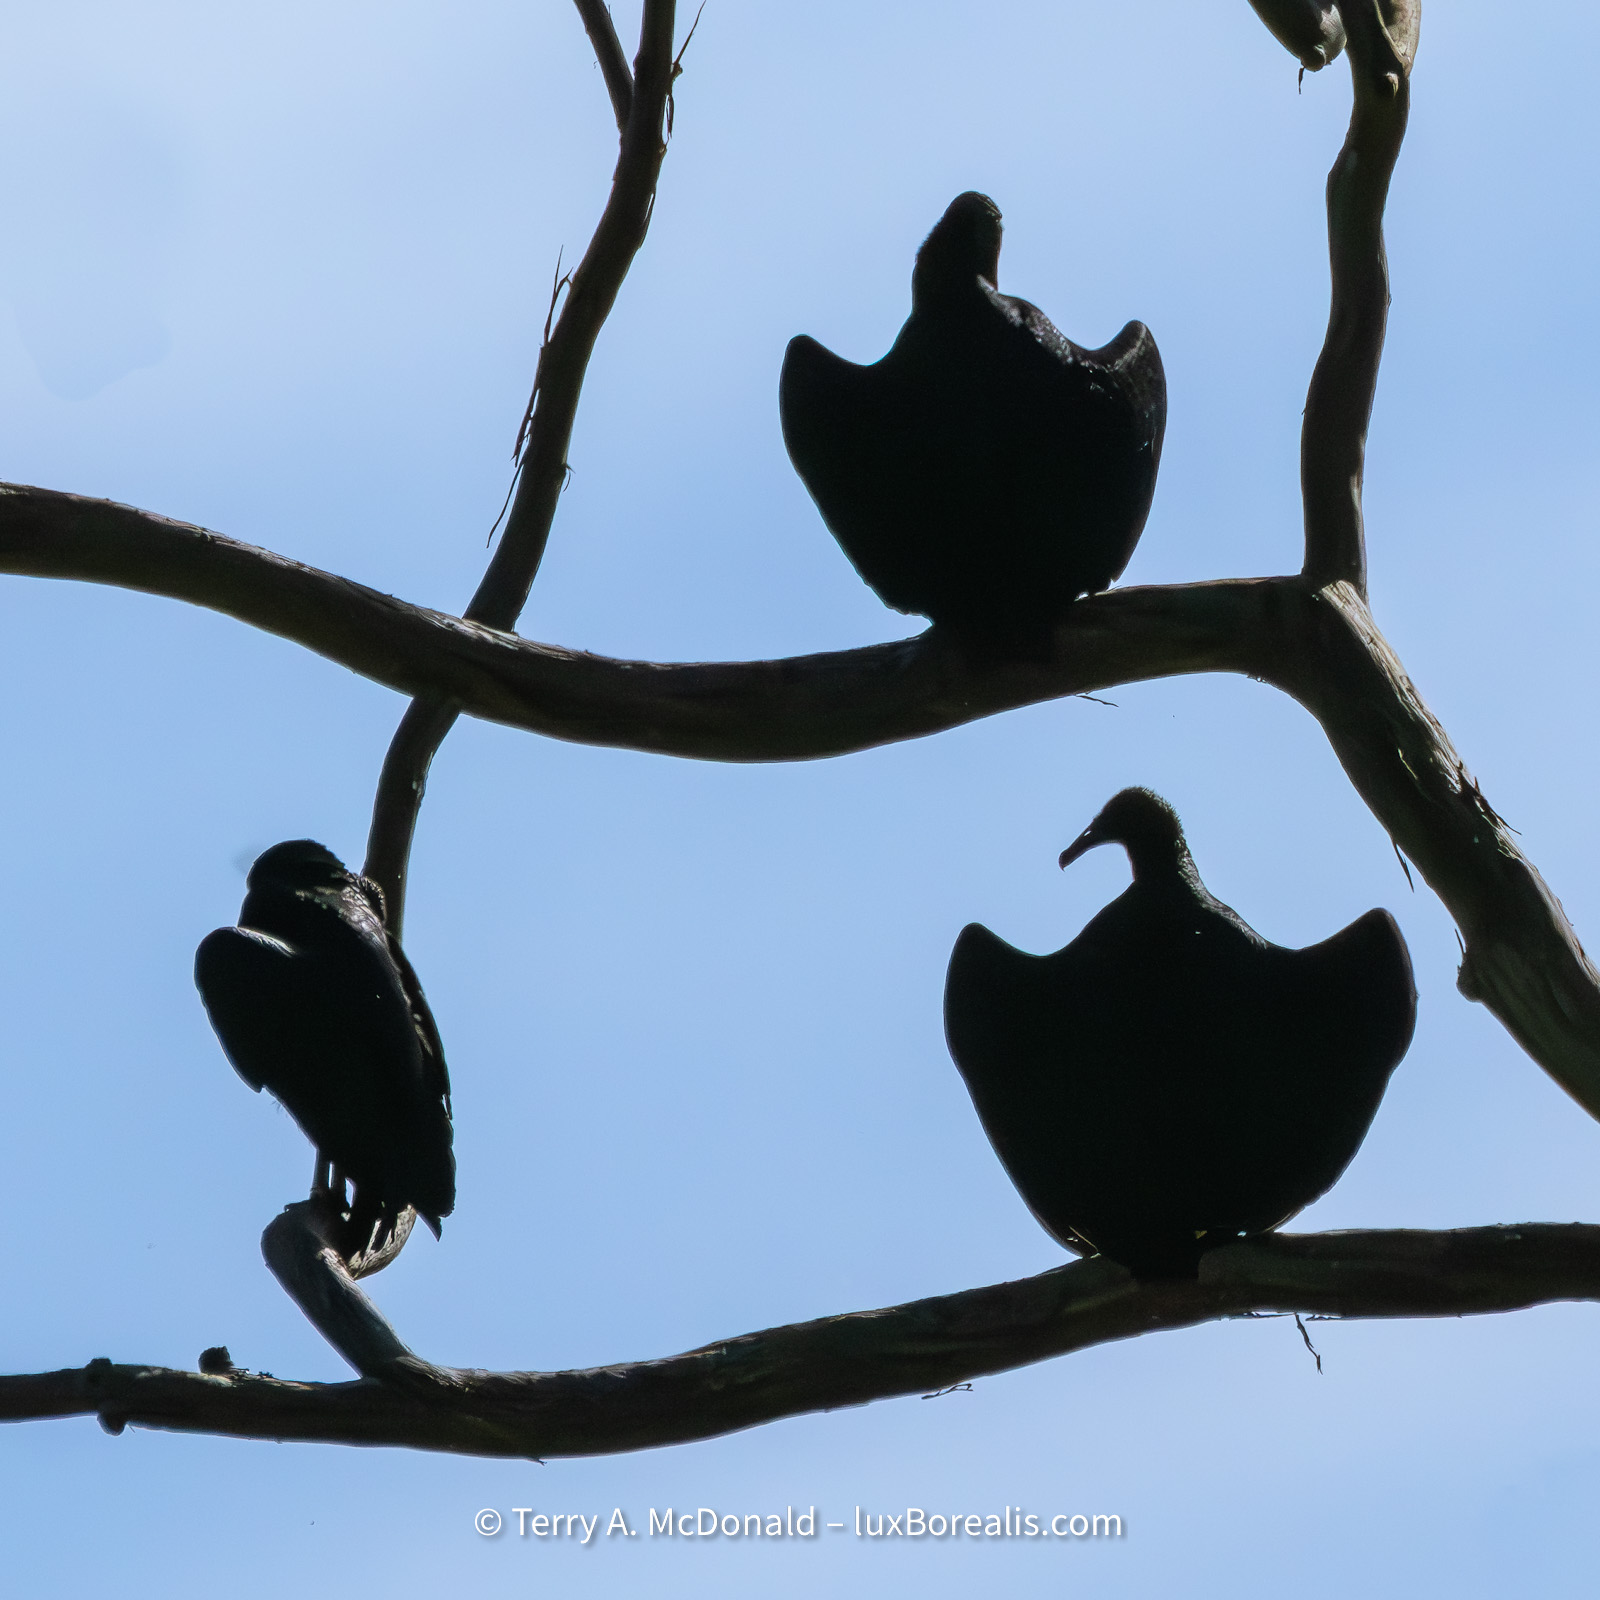
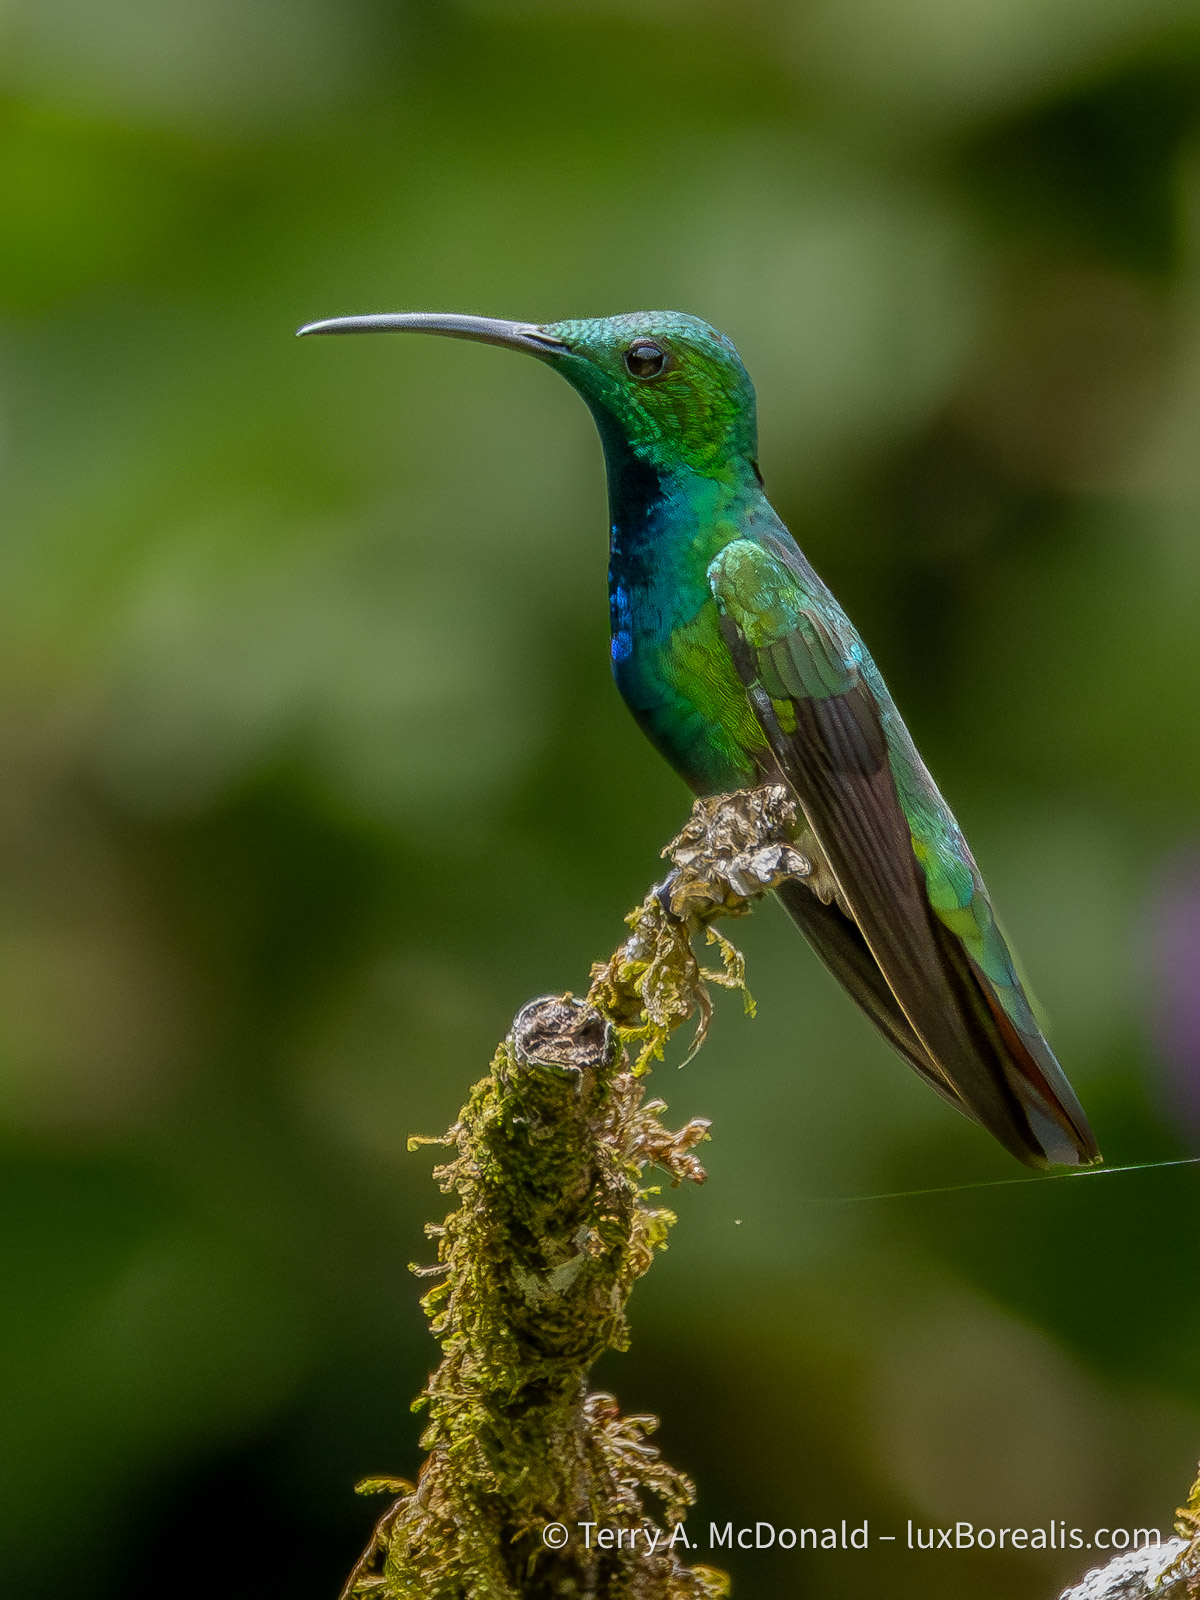
400mm (800mm efov) | ƒ8 @ 1/32000 | ISO 3200 | Lightroom
Silly settings for a static, sunlit silhouette. Just before this, I had been photographing birds in the shaded, dim forest canopy and failed to switch on the fly.
Two of our trip-mates are getting some great results from the Nikon P950, considered to be one of the best birding cameras within financial reach. It’s a super-zoom bridge camera that sports a 2000mm lens (efov), which is great for most sunny and bright conditions. Having a smaller sensor, it is limited to ISO 1600 and even that’s a stretch.
Another thing I’ve learned about birders is that they are happy if they can ID a bird through the leaves or branches of tree. This doesn’t really work for photographs. I have lots of photos of parts of birds seen through the leaves (mostly the butt end) that have now seen the trash bin. They ask me, “Did you get that Shining Honeycreeper?” Well, I did, but only the yellow legs!
Most of our birding has been along road sides, places Ernesto has flagged as being productive. A few great successes have resulted from patiently waiting around feeders and flower gardens set up to attract birds, especially hummingbirds. It’s fine to see the hummers on the feeder, but catching them on the wing or on flowers is a great deal more difficult, again with plenty of misses. The OM-1’s subject tracking allows me to focus on the bird while on the feeder, then track it when it backs off.
One of the most significant features of a good wildlife photo is having a clear background, free from distractions. This has been difficult in the chaotic jumble of a rainforest and tropical plants. With vines, glossy leaves and spots of sunlight through the canopy, it has been especially important to find shooting positions that provide as neutral a background as possible.
300mm (600mm efov) | ƒ8 @ 1/4000 | ISO 6400 | Lightroom
Culling & Processing
At the end of each day, I’ve had between 200 and 500 image files to wade through—the most I’ve 3ver had to deal with on a daily basis. I’m glad I brought my MacBook Air with me. Not only does it make culling faster, it provides full processing capability with Lightroom, with noise reduction and batch processing. On our Tanzania trip last year, I had only my iPad, on which Lightroom is still a bit limiting.
Using the MBA has sped things up, but with hundreds of files each day, it is still a bit of trial keeping up. I enjoy the editing side almost as much as the field work, so it’s doable. What I don’t enjoy is wading through countless rather similar photos of the same subject. But duplicates are unavoidable.
227mm (454mm efov) | ƒ8 @ 1/15 | ISO 6400 | Lightroom
The slow shutter speed and high ISO indicate that this photo was made at 6:11pm almost 45 minutes after sunset. At this point, I hadn’t started using the monopod, so it’s a good example of how good the stabilization is.
I prefer shooting in single-shot mode, but with birds in near constant motion, I find that continuous AF and burst shooting allows me to capture subtle movements resulting in better facial expressions and body position. It also means multiple near duplicates which require scrutiny.
400mm (800mm efov) | ƒ8 @ 1/1000 | ISO 12800 | Lightroom
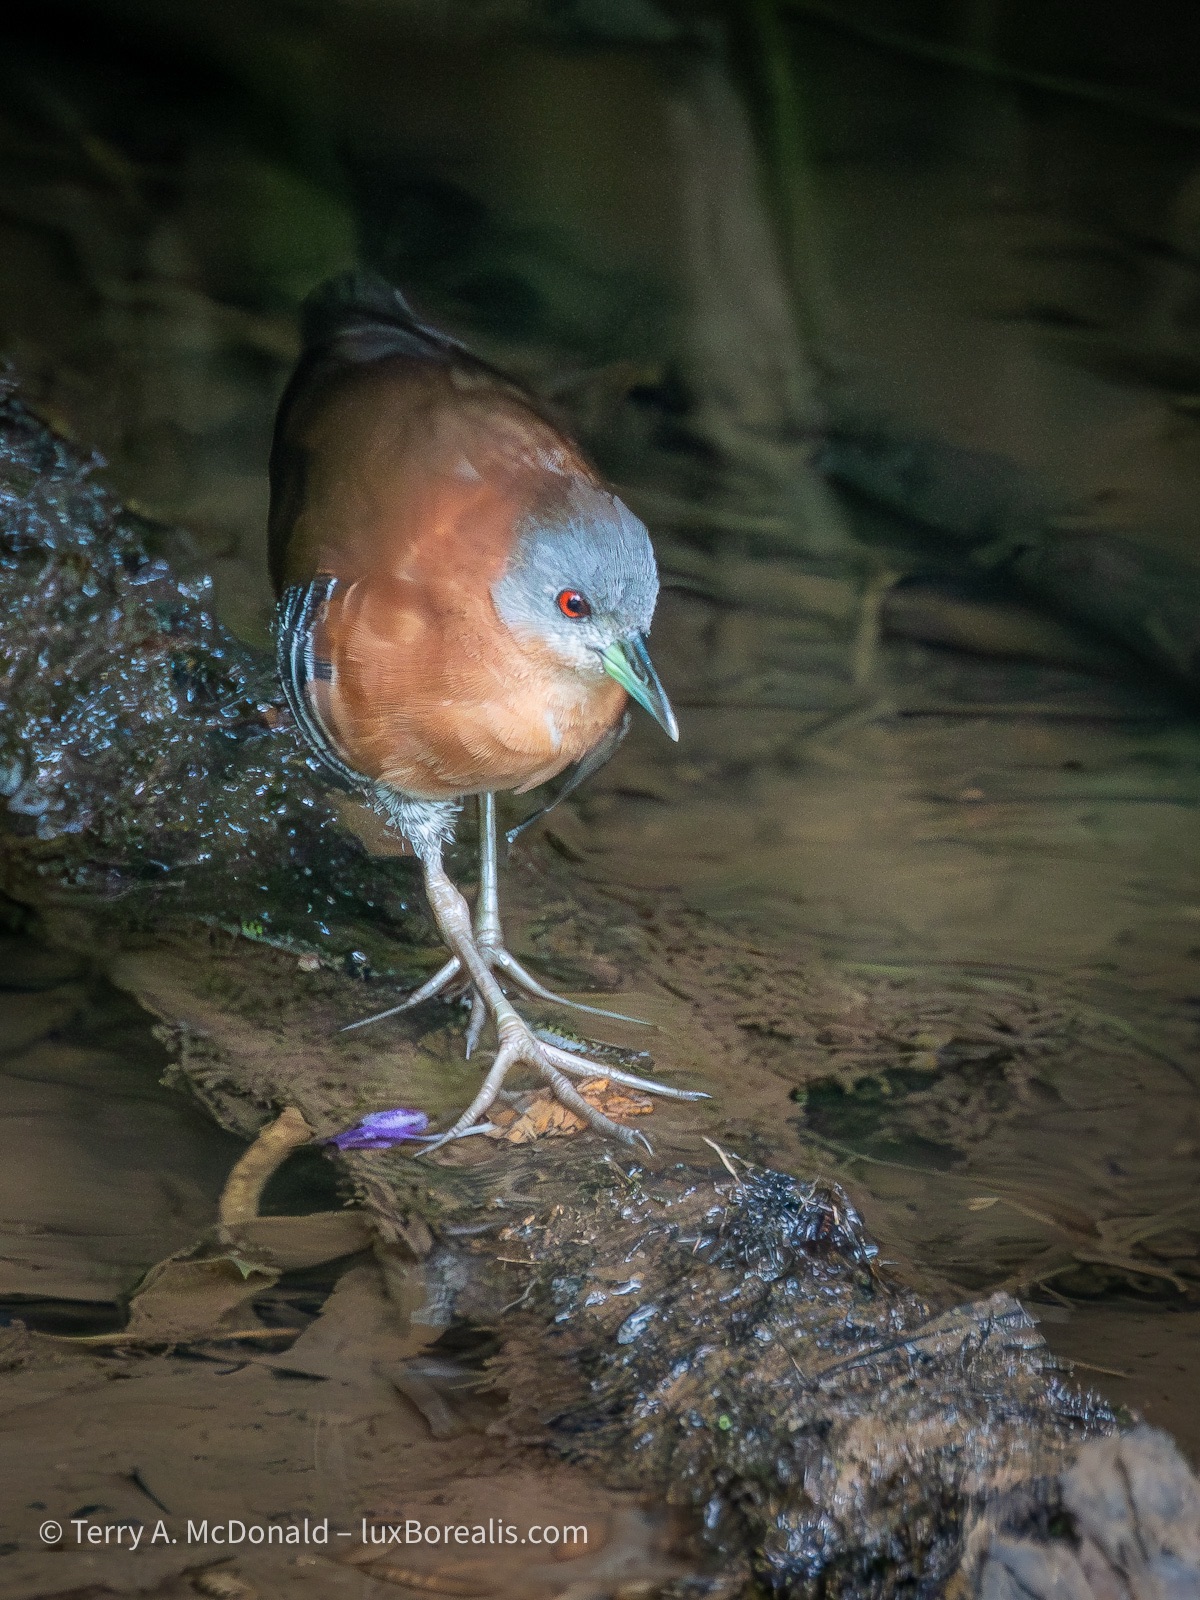
This elusive and rarely-seen marsh bird skulks amongst the overgrown vegetation, coming out only to feed.
307mm (614mm efov) | ƒ8 @ 1/2500 | ISO 6400 | Lightroom
I start by flagging the best of the lot. As I scroll through I quickly flag potentials, X the definite out-takes and leave the duplicates of something I’ve flagged. As I’m working, I’m paying close attention to sharpness, body position, duplicates and overall design.
With over 50% of files culled in the first pass, I then check and double-check focus and facial expressions. I find the 100-400 great up to about 20m, but beyond that it noticeably softens, even at ƒ8. Some of the photos I was hoping would be production quality, simply don’t make the cut. This is disappointing. Other than investing in a different lens, I’m not sure what to do, except to be aware of the shortcomings and work within them.
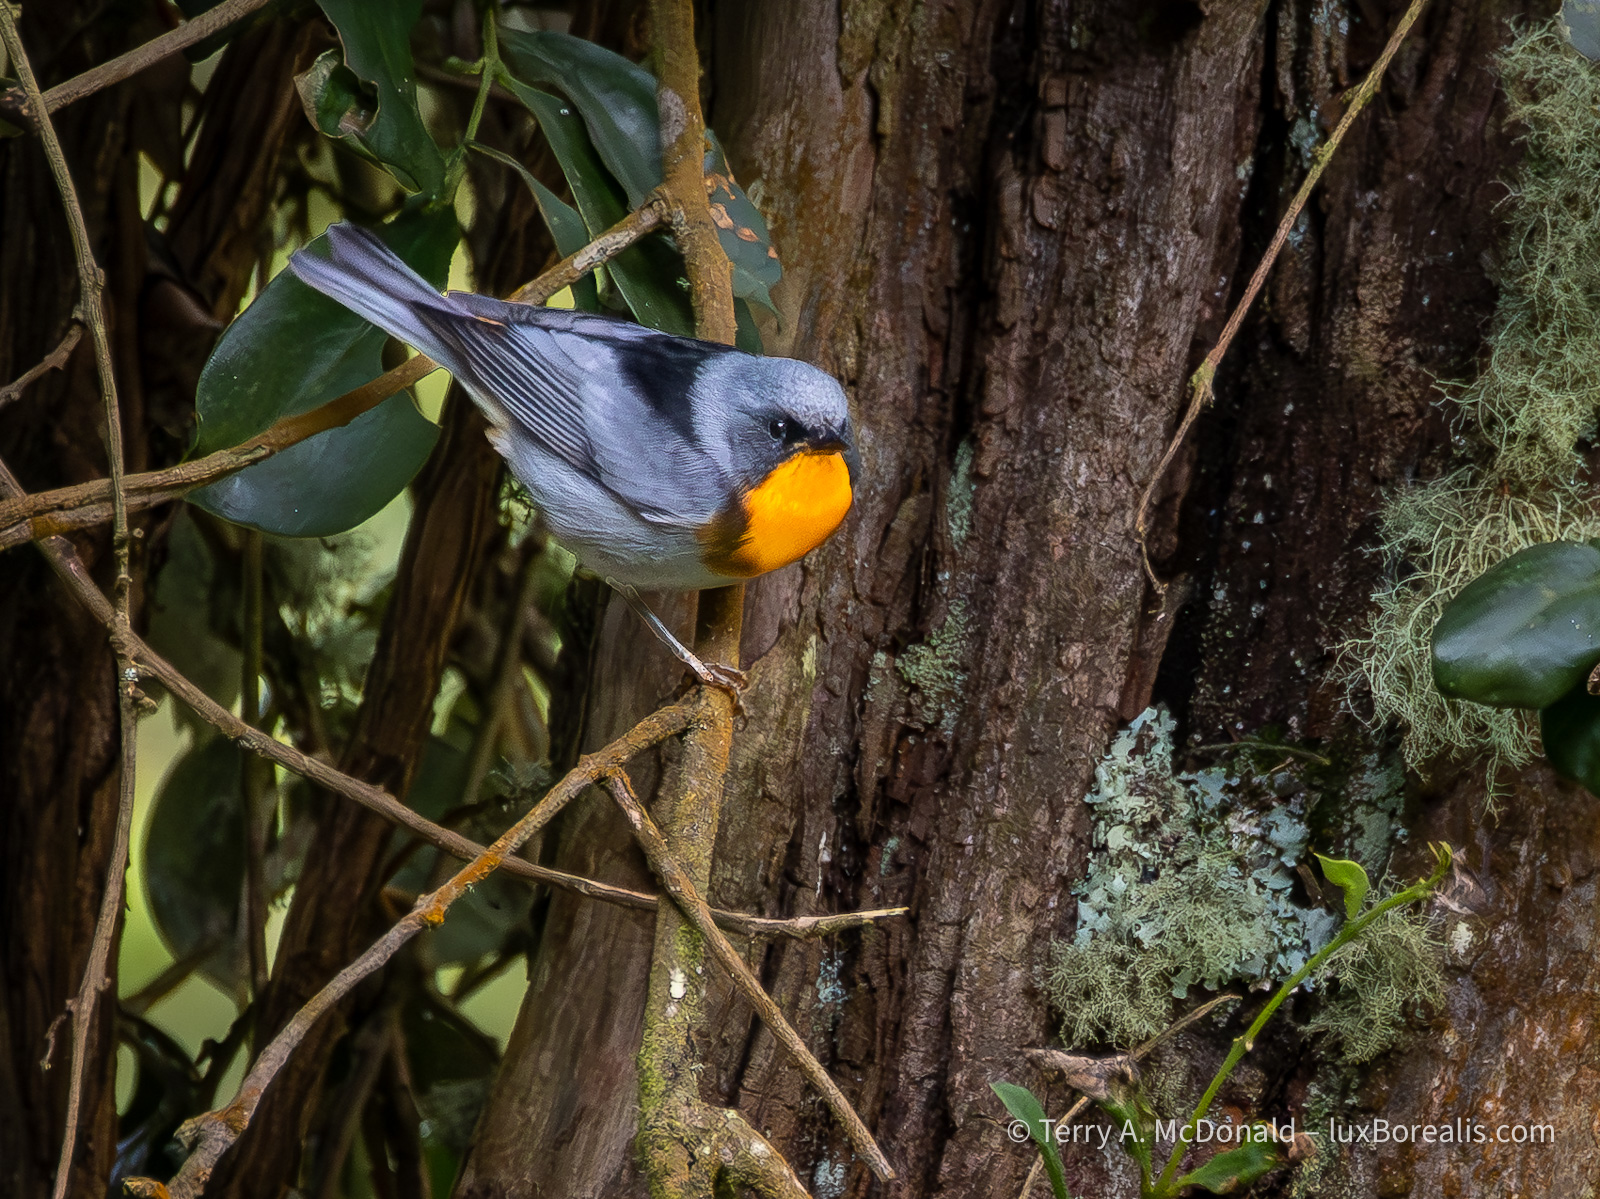
400mm (800mm efov) | ƒ8 @ 1/400 | ISO 6400 | Lightroom
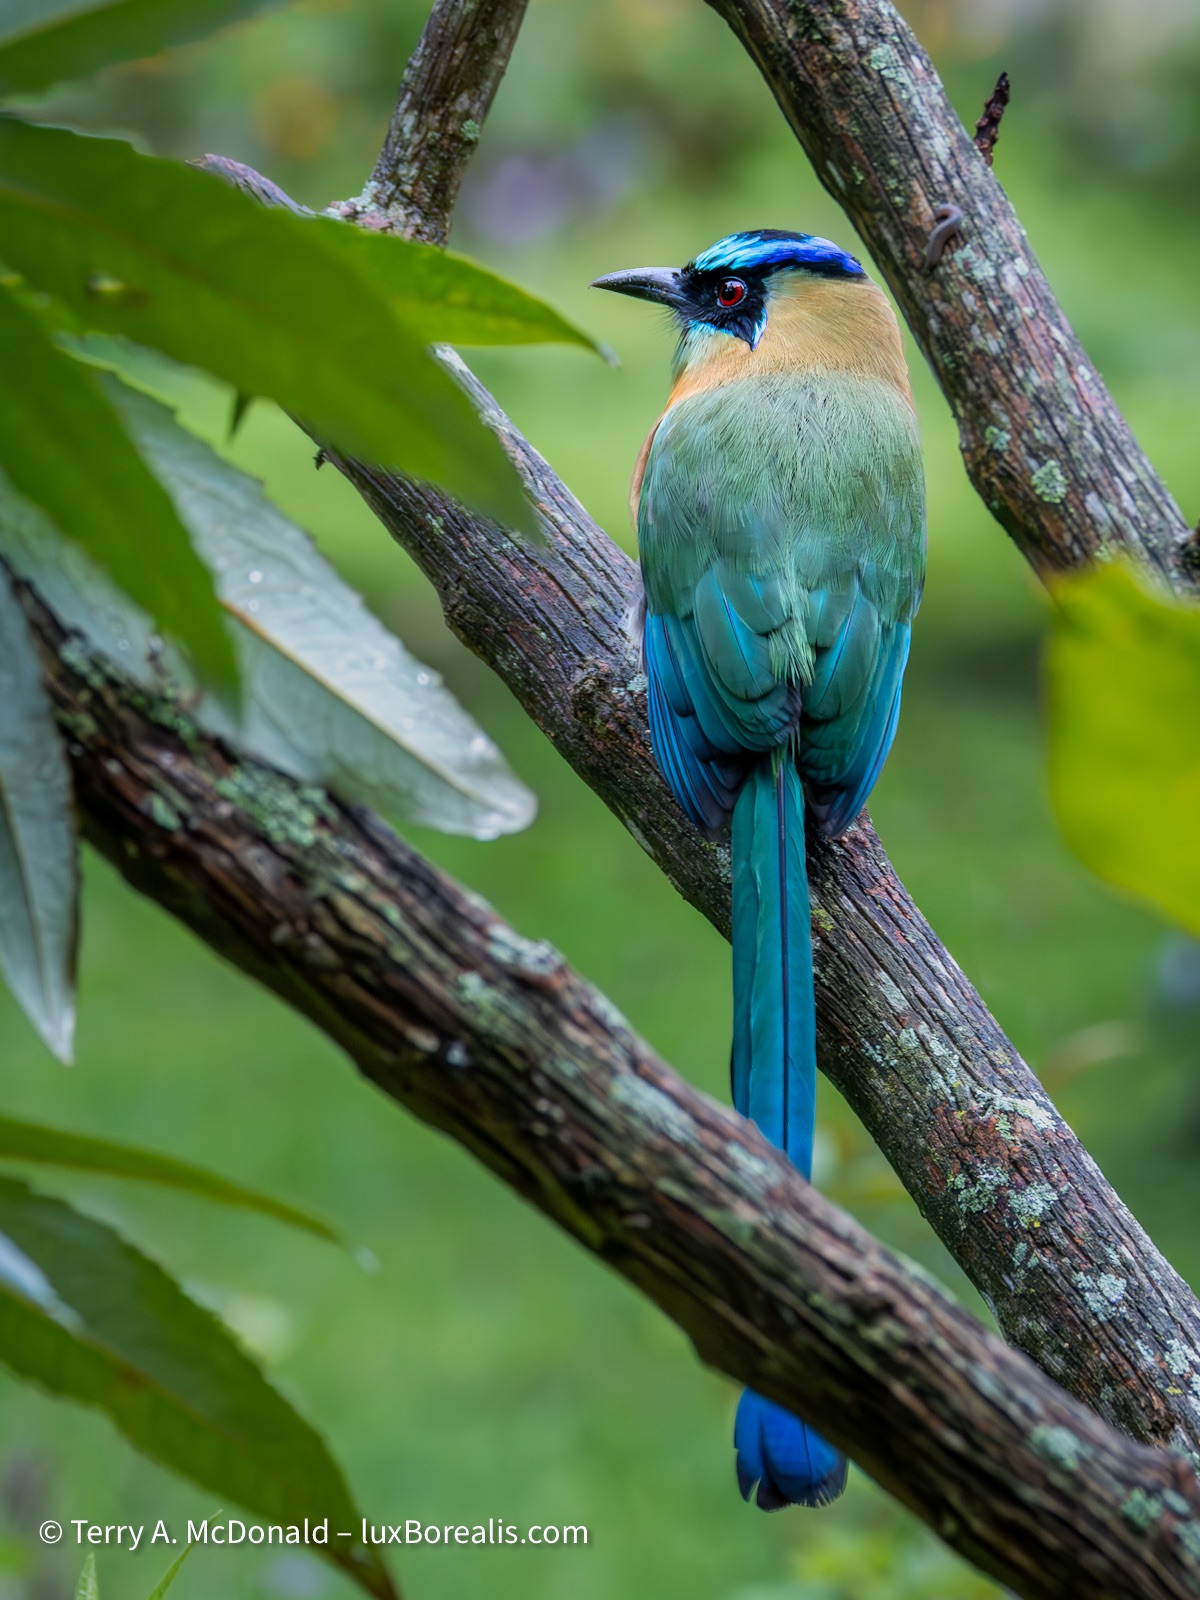
We must have spent 30 minutes on a grey, slightly drizzly day up in the highlands, trying to track this fellow. With its distinctive orange chest, the birders had immediately ID’d the bird, but getting a clear photograph of it was a challenge/
With flagged images identifies, I then concentrate on finding the best of them. I don’t want to waste time processing sub-standard images, so I’m really critical at this stage. If it has great potential, I give it three stars.
Initial processing includes denoising as ISO is often in the 3200 to 12800 range. I find that a Denoise value of 50 to 65 works well with 80 to 100 in Detail Sharpening, plus 30 in Masking. I built these into a preset which also includes +10 in Clarity. If I had time, I might consider running some of the troublesome files through DxO PureRAW or, to correct slight camera movement, Topaz Photo AI. I might still do so once I’m home and have the t8me, but not here.
Next, the file is off to cropping and the various Exposure adjustments. Raising shadows is always important, as well as having an accurate value for ‘White’s to lift the overall colour and presence.
400mm (800mm efov) | ƒ8 @ 1/12800 | ISO 6400 | Lightroom
Watching the behaviours of these hummingbirds—some skittish, some bold, others downright aggressive to each other—was entertaining, especially when they were displaying like this..
At this stage, I begin masking. With birds, I use two masks: Subject and Background. Once the subject mask is tweaked to include just the subject (or anything else I want lit equally, such as the branch they are on), I ‘Duplicate and Invert’ to create a background mask.
The background mask is important for reducing the visual distraction of background elements. I also find that when the exposure of the background is slightly reduced, the subject itself stands out more clearly. Again, this is done in a way that maintains the natural look of the scene. Typically, I will decrease Exposure by 0.3 to 0.5, and reduce Contrast, Highlights and Whites by 30 to 50.
400mm (800mm efov) | ƒ8 @ 1/8000 | ISO 6400 | Lightroom
300mm (800mm efov) | ƒ8 @ 1/400 | ISO 6400 | Lightroom
At this point, the file will earn an additional star, the fourth star indicating it has been processed, but is an image with high visual quality. ‘5 stars’ is reserved for only the best of the best.
So this is how I spend my downtime. Culling and editing takes time and I’m always conscious of finding the balance between being ‘in the moment’ with the group and finding that personal space I need. Laura and I just aren’t used to travelling in a group so, for me, the downtime is essential. Everyone is very understanding. Some are also doing some selecting and editing, others are leaving it all to when they get home. There’s no right way to approach it; I just find that if I’m faced with a couple thousand images at home, all of birds that are totally new to me, I would feel completely overwhelmed. So I continue to chip away at it.
400mm (800mm efov) | ƒ8 @ 1/6400 | ISO 6400 | Lightroom
Identifying the birds is the most difficult part for me. Our guides are great at calling out the names in the field as we see each bird, but my brain just. cannot retain all that new data. Once I have decided a photo is worth editing, I use the Cornell Labs Merlin Bird ID app to identify the bird and Wikipedia to look up and copy the Latin or scientific name. It is an essential tool, not just for IDing brids after the fact, but for use in the field. The Identify by Sound feature is game-changer, alerting you to what’s out there that you can’t yet see.
Stay tuned from more! Now that we’ve been down to the southeast the country and visited Cahuita National Park, I’ll be sure to post at least once more from Costa Rica.
Thanks for reading. Be sure to SHARE this with other birders and photographers and feel free to SUBSCRIBE and COMMENT. Note, this is not a commercial blog. The links are not afflicate links and I earn no kickbacks from having you read and share.
Discover more from luxBorealis Blog
Subscribe to get the latest posts sent to your email.

Trackbacks