Astrophotography—my first serious attempt with the OM-1
As I write this, it’s a bleary-eyed Monday morning after what I will cautiously say was a successful attempt at Astrophotography.
Earlier in the year, you may remember my post about purchasing a Panasonic-Leica 9mm ƒ1.7 lens, expressly for Astrophotography, followed by my Lunar Eclipse sequence of the Blood Red Moon. So things are progressing. Now, in preparation for a month-long trip ‘down East’ to Québec and our Maritime provinces, I wanted to have at least some practice shooting the stars.
Previous attempts have been half-hearted. My ƒ4 zooms are superb for 95% of my work, but for the stars, ƒ2 would be ideal.
Prep
It just so happened that while researching the weather for this weekend (it has been cold, wet and dreary for much of May, even April), I learned about an upcoming Aurora ‘burst’. Well, that didn’t transpire, at least not down here in southern Ontario, but I still needed to get in some practice for the stars.
To help prepare, I read over and made notes from a few articles and videos, in particular, these:
- Astrophotography 101, by Peter Baumgarten
- OM System Tutorial w/Matt Seuss (YouTube)
- A Complete Guide to Capturing Gorgeous Photos of the Night Sky – PetaPixel article featuring Peter Baumgarten
- More OM System tutorials can be found here.
I also checked various websites for sky conditions, specifically:
- Clear Dark Sky conditions (Link)
- Clear Outside (Link)
- Smoke Forecast Canada & USA (Link): With the increasing frequency and intensity of wildfires, smoke now travels thousands of kilometres which can add an unwanted haze to the an otherwise clear sky.
I also checked the Sky Guide app (iOS / Android), which is not only helpful for naming the stars, but also for listing upcoming events, and noting weather for the night ahead.
So, knowing what to do, at least theoretically, I waited for the dark to set in, grabbed my headlamp and gear, dressed warmly, for June 1st anyway, and headed 25 minutes north to an area I’m familiar with along the Grand River.
Arriving, I was surprised to find half a dozen cars there. Who else would be up at 11pm in this somewhat out-of-the-way place? Of course, other people who were hoping for the Aurora, the one that never materialized.
What to shoot
My goals were stars and star trails around Polaris, the North Star, and, if the sky was dark enough, the Milky Way. I wasn’t too hopeful for the Milky Way as the city I live in is to the south of where I was, and would be giving off tonnes of light—which it was. So no Milky Way. Not tonight. Hopefully down East, along the upper St. Lawrence, the Gaspé, or off the Atlantic shores, will have better dark sky conditions. I’m envious of OM Ambassador Peter Baumgarten who lives on Manitoulin Island and has only the huge stretch of Lake Huron to the south of him and endless tracts of the Canadian Shield to the north.
I knew the area I was photographing in well enough, as I had been there a number of times, most recently for some winter shots featured in my article about HHHR and TripodHR vs Up-scaling.
In fact, as my eyes grew accustomed to the dark, I found I didn’t use my headlamp too often (set to RED to maintain my dark vision). The Moon was still up, a Waxing Gibbous, which ended up giving off far too much light for my liking. However, it is what it is, and I’m here to practice, not to create trophy images.
Settings
After a brief walk around to kill time until it was darker and to get a better lay of the land, I spent a few minutes in the car, setting up my OM-1. The more I could do now, the less I’ll need to do in the dark or with the headlamp (set to RED).
- Vertical Handgrip: ON (this moves the working battery away from the core of the camera keeping it cooler during long exposures = less sensor noise);
- Image Quality: Raw; my OM-1 is permanently set to raw, but if you need to make this change you’ll find it under; MENU → Camera1 → 1. Basic Settings/Image Quality → below Custom Mode;
- White Balance: 3800°K; MENU → Camera1 → 2. Picture Mode/WB → WB → CWB (Custom); Peter Baumgarten recommends 3800°K; Matt Seuss, 4200°K. As I am shooting in raw, this can be changed in post-processing, but 3800°K seems more realistic. I needed to increase the Magenta in processing by 12 to 15.
- Noise Reduction: ON (this is a ‘dark frame subtractions, so it takes longer, as an additional dark frame is made after exposure); MENU → Camera1 → 3. ISO/Noise Reduction → Noise Reduction
- Drive Mode: 2s delay as I am not using a remote; MENU → Camera1 → 7. Drive Mode → Drive
- S-IS: OFF as the camera will be on a tripod; MENU → Camera1 → 8. Image Stabilizer →
- Focus Mode: set to StarrySkyAF; in the Menu, it is set to Accuracy and is invoked using AEL/AFL button; (MENU → AF → 1. AF → AF Mode
- Viewfinder: set to Night Vision ON; MENU → Gear → 3. Live View
- Level Gauge: ON, essential for straight horizons when the grid lines are black on black. This is set up in MENU → Gear → 4. Information: check LCD Info Settings, EVF Info Settings and Level Gauge;
- Monitor Brightness to -7; MENU → Wrench → 3. Monitor/Sound/Connection → Monitor Adjust
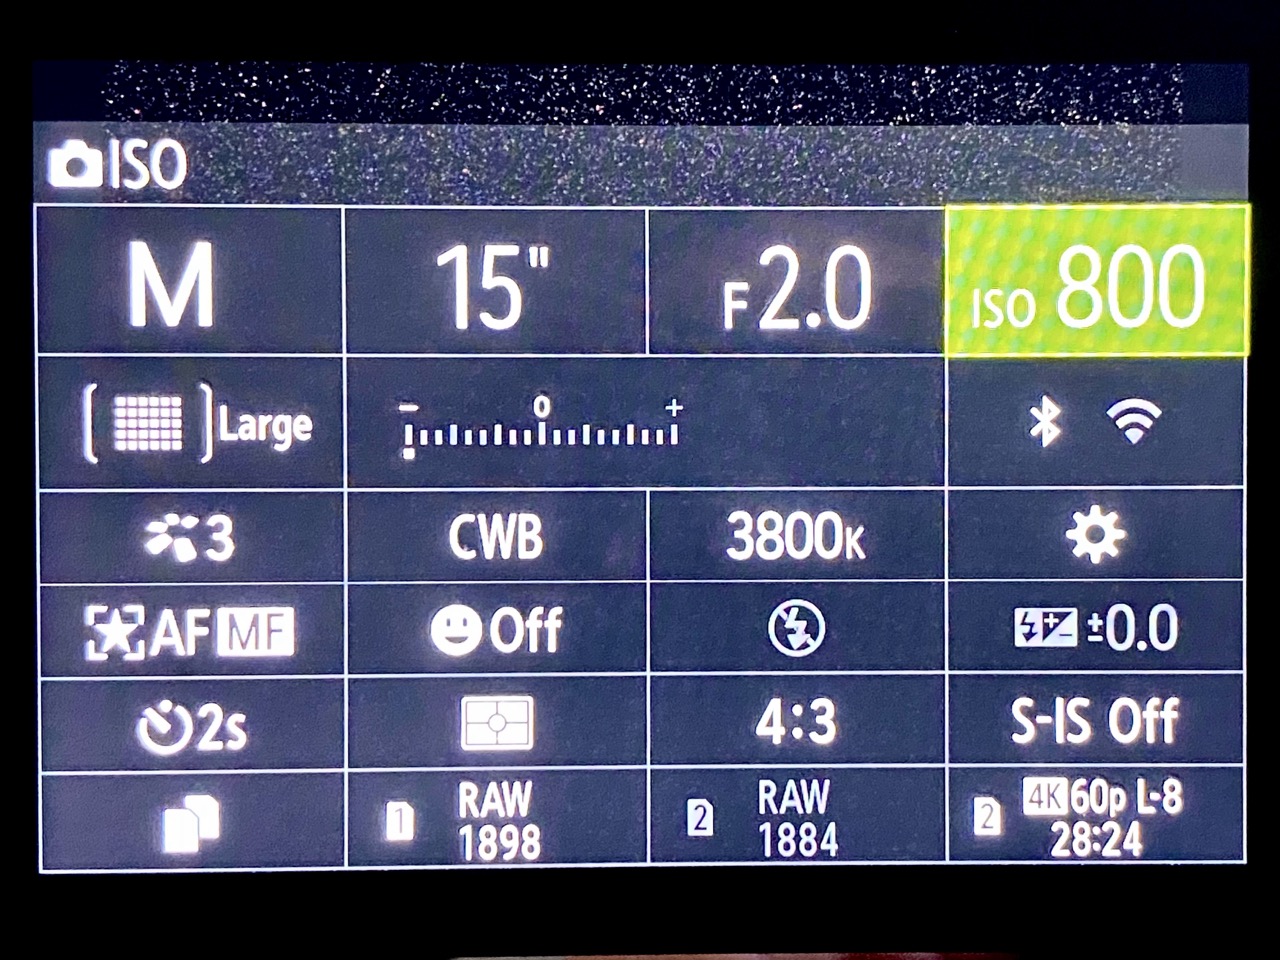
- Shooting Mode: Manual;
- Aperture: ƒ2, which is slightly closed down from the maximum of ƒ1.7, for better corner sharpness;
- Shutter Speed: will vary from 5 to 15 seconds; using the ‘400 Rule’(400 ÷ 35mm focal length), I can go up to 22 seconds (400÷18, which is the 35mm efov of lens I’m using);
- ISO: will vary, but I’ll start at 1600 and go from there, either to 800 or, if needed, 3200.
Note: Many of these settings can also be changed using the Super Panel. With the LCD showing, just select OK, then navigate around the super panel to make the changes.
First set-up
My greatest fear, standing there at the edge of the Grand River in the almost pitch dark was coming across not a raccoon or even a coyote, but a skunk. Luckily there were none around, at least that I saw or smelled.
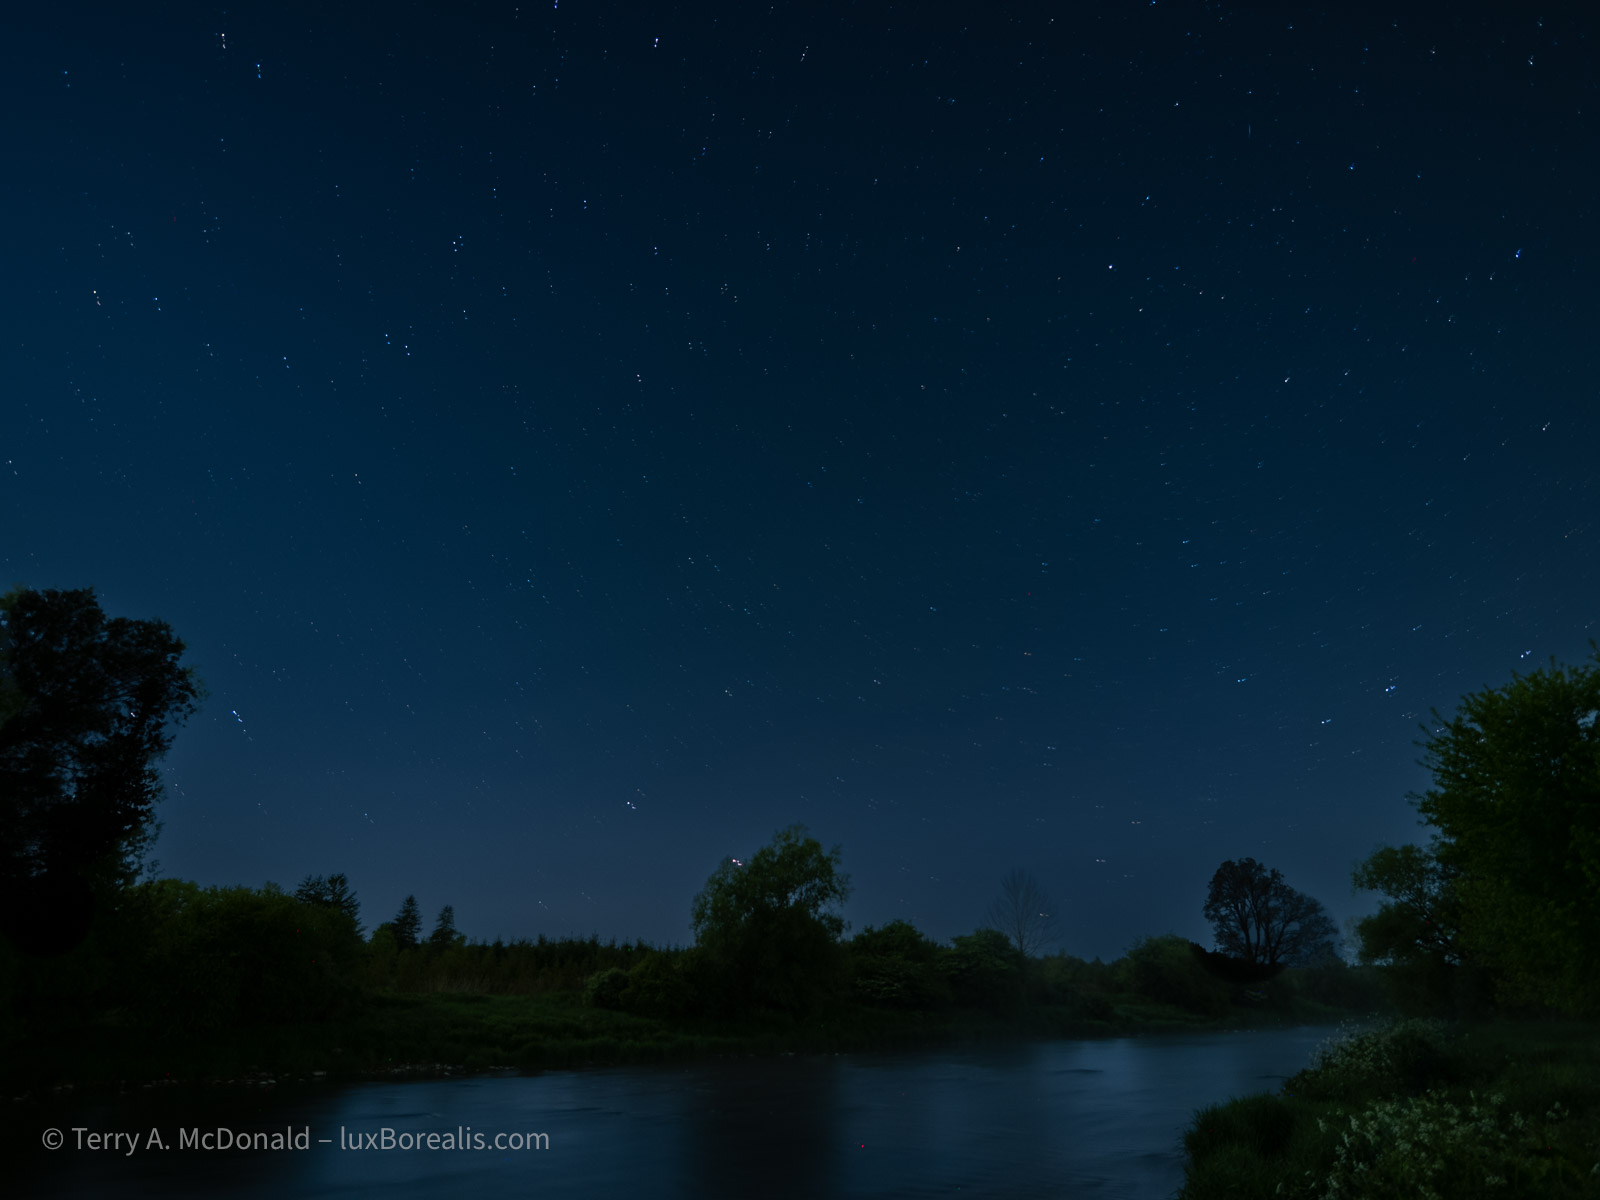
I did two set-ups. The first overlooked a secondary branch of the Grand that has a nice meander to it. It is a view to the northeast and the image below is the best of the lot. You’ll notice the spill of light coming from Guelph, which is to the south (right). While not objectionable to me, as I’m familiar with the area, I understand that it is not ideal in the eyes of Astrophotography aficionados.
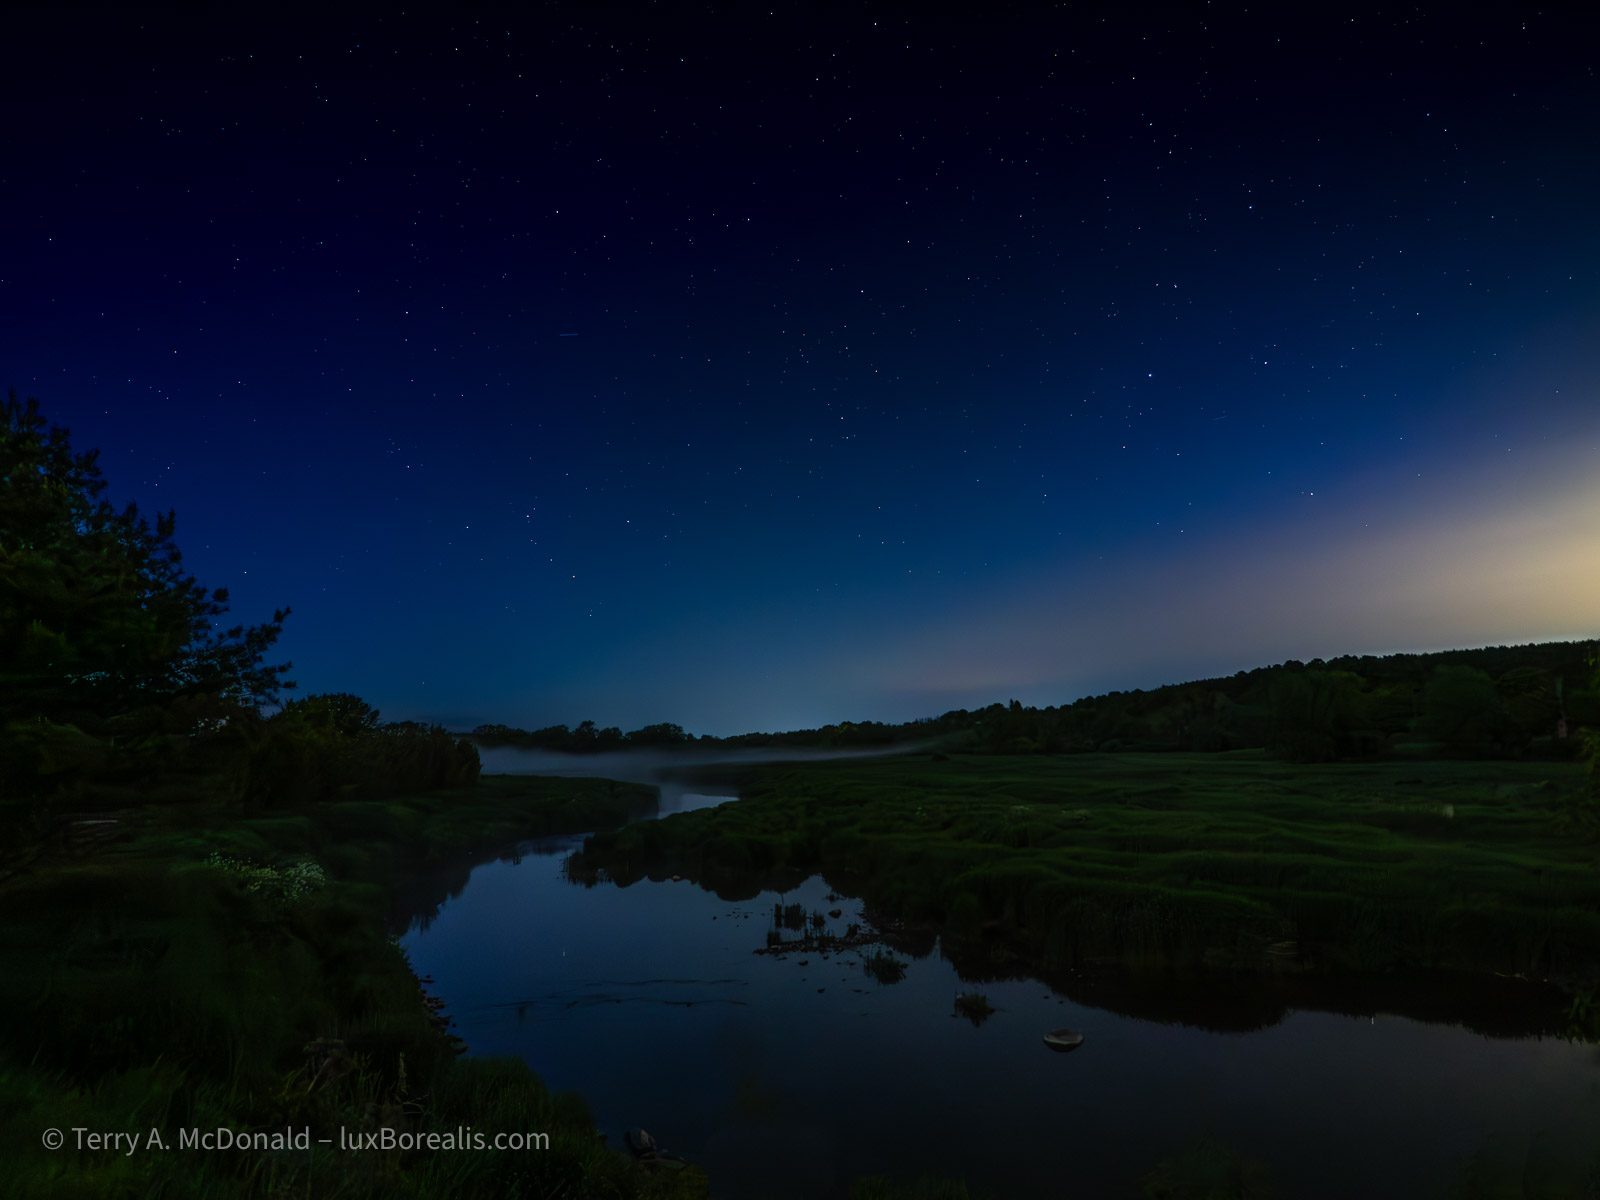
In retrospect, I could have used ISO 800 and 4 seconds or ISO 400 and 8 seconds and achieved the same result.
Second Set-up
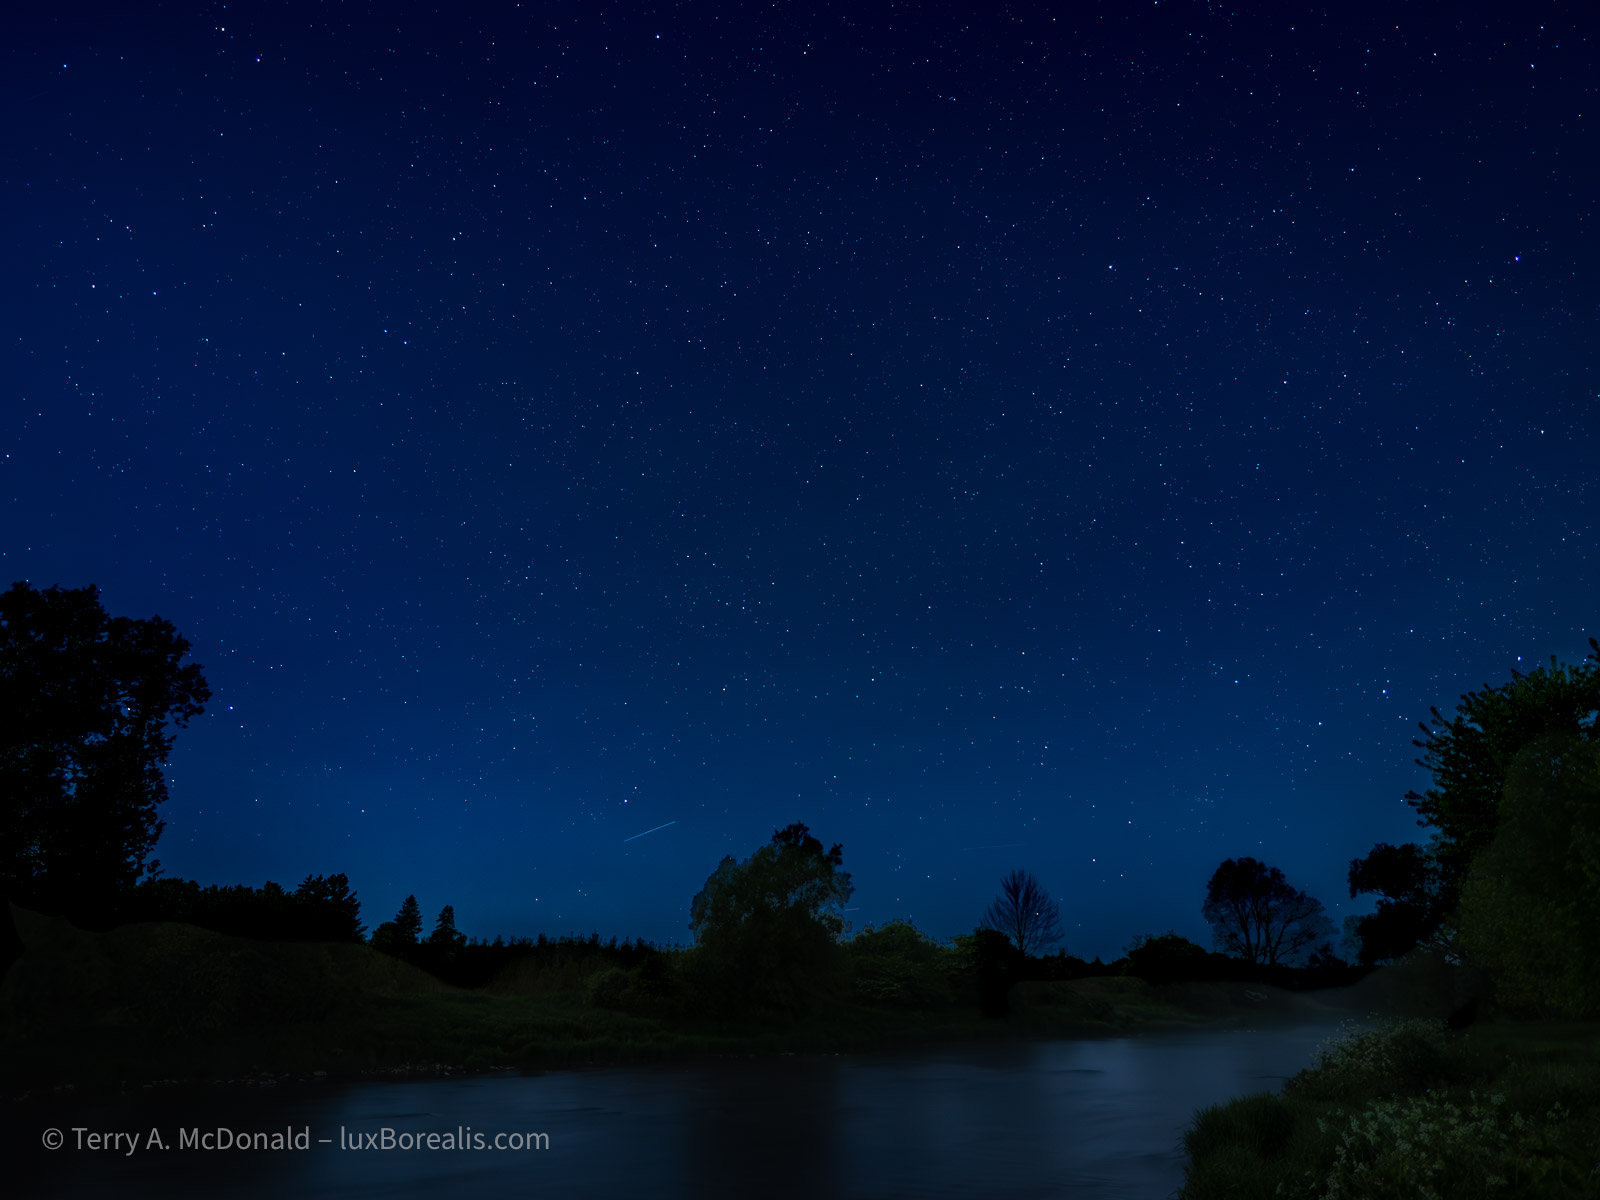
By this point, it had become sufficiently dark to move to my preferred location, along the main branch of the Grand River, looking directly north. I kept hoping the Aurora would put in an appearance, but sadly, not tonight.
However, what I hadn’t planned on was fog. As the temperature dropped, the broad valley began filling with a light fog, centred on, of course, the river. The water had warmed sufficiently during the past couple of warm days which allows this cold air, blown in from the north, to create what every photographer loves—a mysterious-looking misty fog. Unless you are trying to do Astrophotography!!
I had to remind myself that I am practicing tonight. It is what it is. I’ll carry on. Perhaps the fog will add another dimension to the foreground shapes of trees and the river itself.
My first set of shots were straightforward, as I did for my first set-up:
HHHR; Huh?
Now it was time to try something different. Both Peter Baumgarten and Matt Seuss recommended trying Handheld High Res (HHHR), but not TripodHR, even though I was using a tripod. Apparently, it has something to do with the way the set of frames are composited in-camera, that HHHR mode on tripod is an ideal way to reduce noise. You need to make an extra exposure for the foreground and swap it into the 50MP composite. No problem.
So, I tried it and this was the result:
The noise is gone—without additional NR in Lightroom. But, it appears I will need to sort out the composition as the composite definitely shows start movement, telling me the camera did not align the points of light. Perhaps I had too much foreground, as it is perfectly aligned. The instructions from Peter and Matt did say that foreground should be kept to a minimum, so I guessing that was my error. Live and learn, right? That’s why we practice!
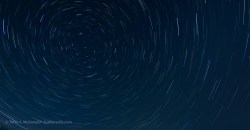
Next up: LiveComp mode
I have been so looking forward to trying this. Back in the film days, when camping at Bruce Peninsula National Park (this was decades ago, long before it was ‘discovered’ and now lever-run!) I made a one- or two-exposure using either Kodachrome 25 or 64 and I got these beautiful star trails.
You can’t do star trails easily with digital as the sensor heats up when used for that length of time. However, Olympus (now OM Systems) has made it possible—with Live Comp.
Set the Shooting Mode to B (Bulb), then use the thumb wheel to select LiveComp. It takes one more step, which flummoxed for a few minutes. You need to select the Menu button (not Info or OK, as I learned) then select the exposure time for each image. Peter Baumgarten recommends 60sec, which is what what I chose. A couple of trial for a few minutes set me up to try it for longer.A
t first, I thought I’d give it 20 minutes. I had my folding chair with me. It was cold, but I could tough it out. For the first few minutes I watched the star trails on the LCD, growing in length. Cool!
So I set a timer and pulled out my iPad to read the novel I had on the go. There is something very peaceful about sitting out past midnight in nature, reading a book, with no distractions.
At 20 minutes, I took a look and—whoa! It was beautiful. I couldn’t stop it. So waited another 10 minutes. By now the cold was beginning to creep in. Although it was 20° during the day, it had dropped to now 3°. Basically, I had on what I often wear in winter: flannel shirt, fleece top, GoreTex anorak, head band to cover my ears, gloves and my hood up. And I was still cold!
But at 30 minutes, I still couldn’t bring myself to stop it. At about 35 minutes into the LiveComp, the coyotes began howling and my hair literally stood on end. they must have been directly across the river from me. This went on for a few glorious minutes—it really is a haunting, but totally amazing sound to hear first hand.
At 40 minutes, I decided to end the exposure. Here is the final product.
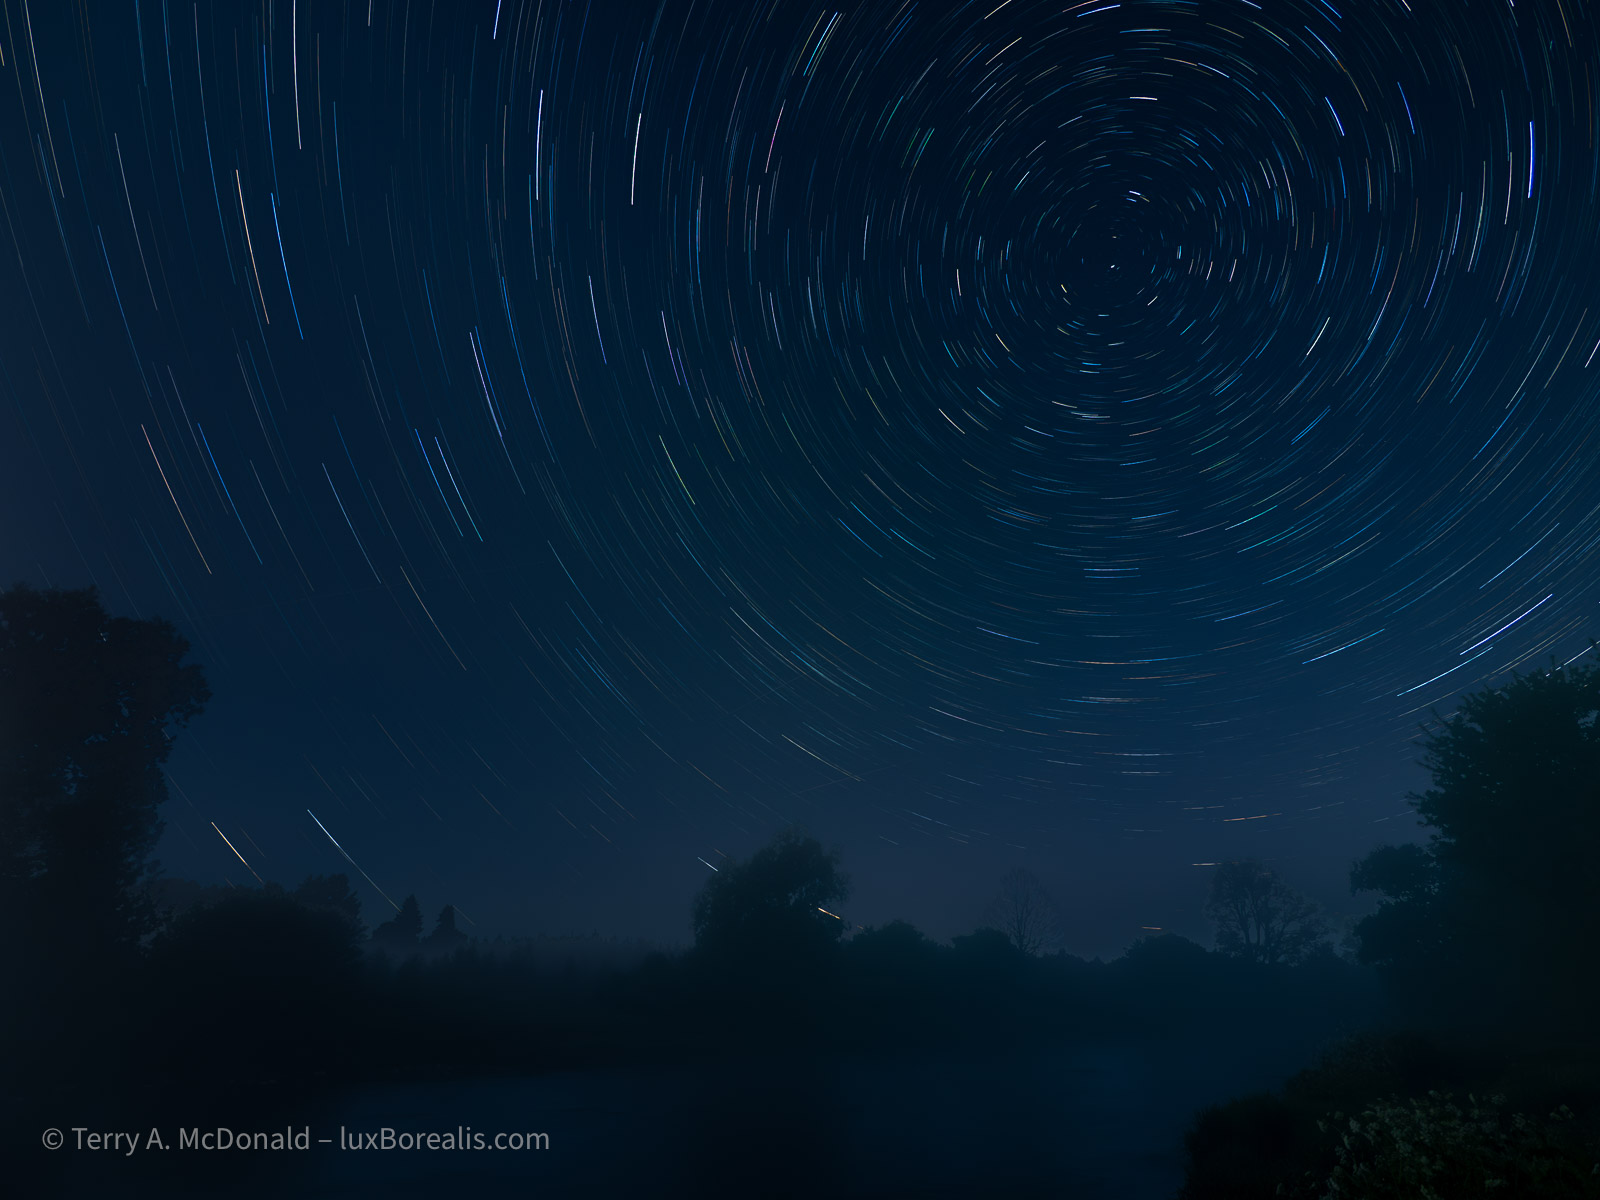
Needless to say, I’m hooked. Next time I’ll have my merino wool long undies on because I want to see the results after an hour or two.
By the way, you might be wondering what my battery level is at, considering the LCD has been on for the past 2 ½ hours and I made numerous energy intensive exposures. The battery, the one in the vertical grip, was in the 60s out of 100% and the camera battery was still at 100%. Amazing!!
Conclusion
I can’t wait to get out again shooting at night. It is compelling. It’s engaging. And the results are, well, you decide. Are the images worth it?
However, it’s always helpful, after trying a new technique, to debrief—to critically review not just the photos, but also the techniques used. For example, I should have made the same shots as above, but in vertical orientation as well. That’s a missed opportunity. After all, I had my L-bracket on, so it was simply a matter of flipping the camera with very little, if any, re-composition.
I still need to sort out the HHHR system. And, I never did try taking a rapid set of frames, 10 or 12, to used as a composite with Affinity Photo. I’m not sure why I didn’t, but I will definitely be trying that in future. Apparently it is another method to reduce noise, though it also involves swapping out a now mis-aligned foreground for an aligned foreground exposed for the foreground and not the sky.
Another technique that would have been helpful for is light painting. Using my head lamp or phone to add a stop of light would help open up the deep shadow areas of the foreground, giving it a more three-dimensional feel.
More to learn. More to test. And, I still did not get a Milky Way shot. Stay tuned! I’ll try to post something from ‘down East’.
Discover more from luxBorealis Blog
Subscribe to get the latest posts sent to your email.

Trackbacks