Maximizing Image Quality: In-Camera Pixel Shift or Software Upscaling?
This is the fourth in a series of articles exploring how to get the most from modern sensors by optimizing the raw files they produce. Previous articles included:
- Raw File Optimization, where I examine the usefulness of Lightroom Enhanced Noise Reduction compared to DxO PureRAW, OM Workspace, ON1 No Noise, and Topaz PhotoAI;
- How well can Topaz PhotoAI and ON1 No Noise ’rescue’ images with motion blur?; and
- Up-scaling Raw Files 1: High quality cropped images with Lightroom, ON1 and Topaz.
Introduction
Pixel-shift technology is a very convenient and welcome off-shoot of recent sensor stabilization technology. During a series of exposures, the sensor is shifted ½ to 1 pixel (or photo site) at a time, with the resulting images combined into a final, much larger file. What a great way to achieve more with less! But how does pixel-shifting stack up to up-scaling technology like that offered by Topaz Photo AI and Lightroom? I’ve chosen not to include ON1 Resize in this comparison as it simply has not performed as well as Lightroom and Topaz in direct comparisons.
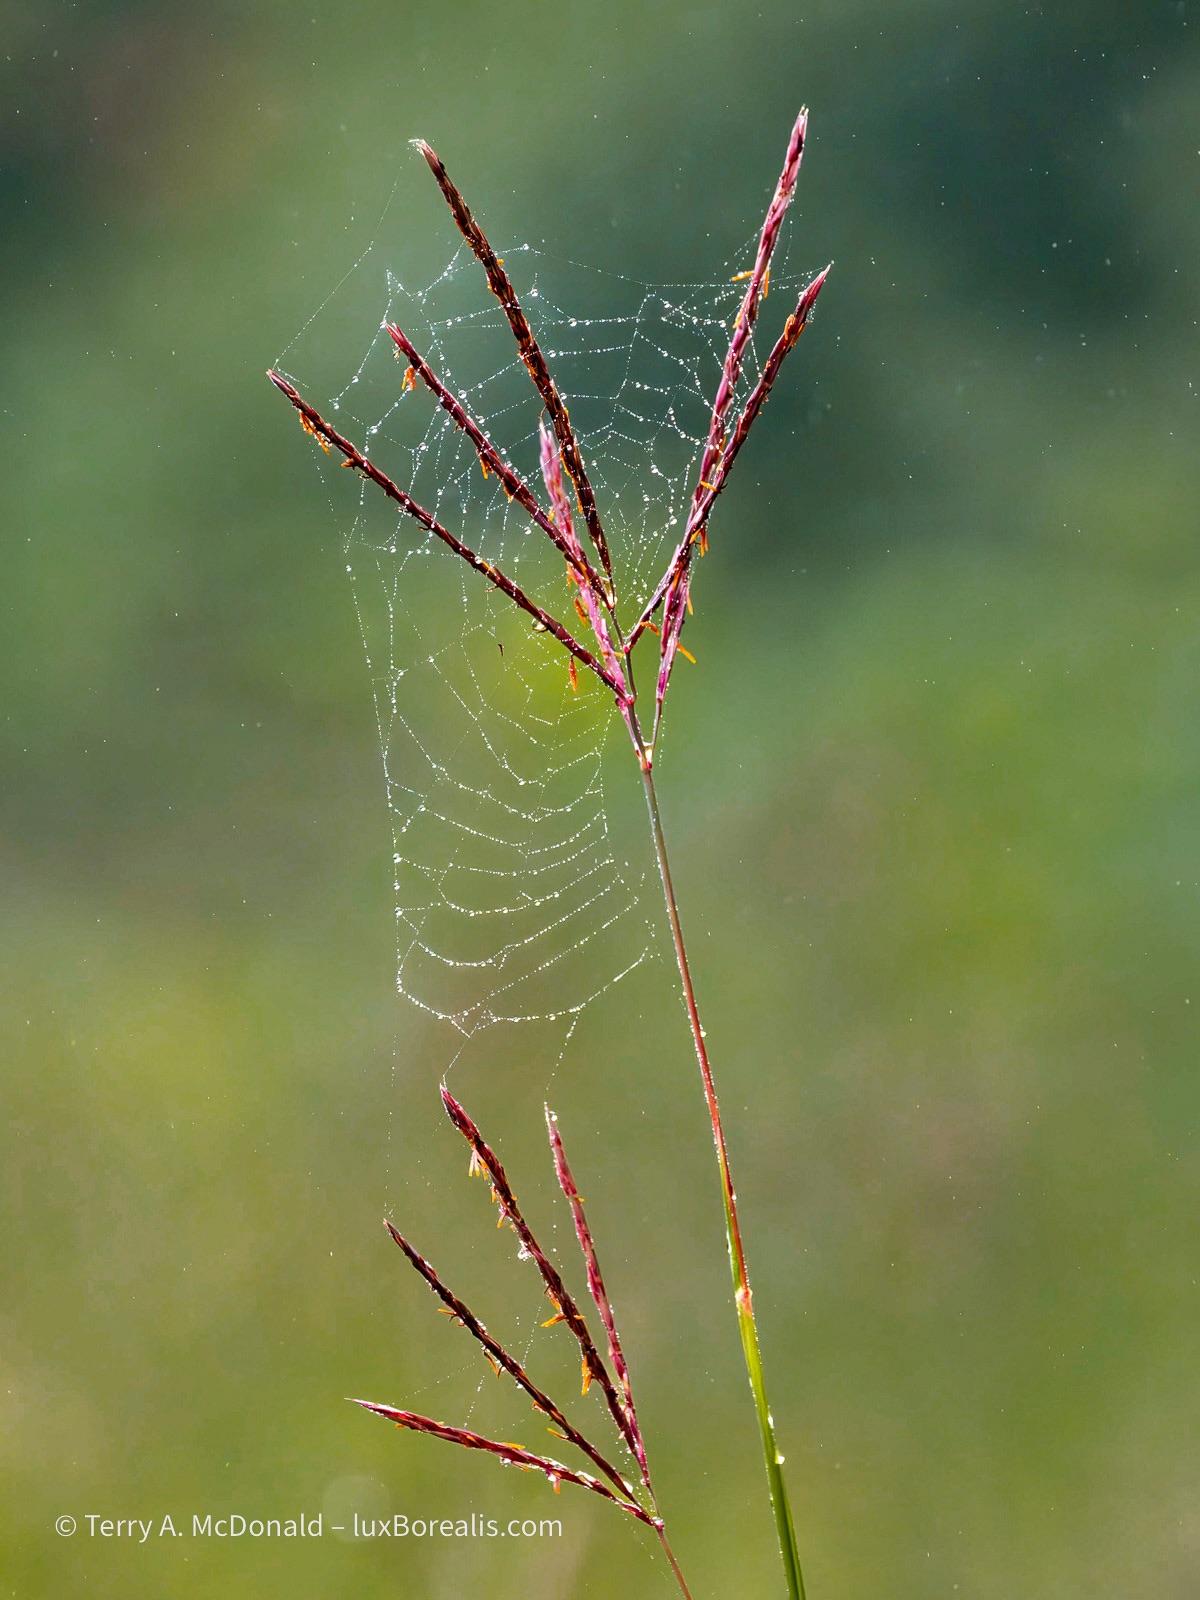
Olympus OM-1 w/M.Zuiko 100-400mm ƒ5-6.3 at 300mm (600mm efov); ƒ8 @ 1000, ISO 3200; 20MP raw file processed in Lightroom.
The base ORF from OM System (Olympus) cameras is 20mp (5184×3888 pixels)—plenty large enough for fine prints up to 16×20”. As an aside, astute readers will recognize that 16×20” requires a file larger than 3888x5184px to print at 300 pixels per inch. The difference between the base 20MP file and the 4800×6000 needed is negligible given how well files up-scale using, for example, direct export from Lightroom, as shown in my previous article.
When you need a significantly larger file to work with, ’HighRes’ mode comes to the rescue. It is one of the half-dozen computational modes available on OM System cameras and a number of other brands as well. With OM cameras, there are two options: Hand-held HighRes (HHHR), which produces a 50MP file, and Tripod HighRes, producing a whopping 80MP (10,368x7776px), large enough for a 34×25” print. The user can determine if they prefer a raw file and/or a JPEG. JPEGs are great for an instant viewing, but having a raw ORF is one of the essentials of good editing practices.
With OM System cameras, there are two added advantages of using HighRes mode:

- Greater dynamic range: With an additional +2 to +2.5 EV, the dynamic range, improvement is significant (see Photons to Photos).
- Virtually no noise: OM System recommends setting the ISO to 800 to ensure faster shutter speeds with no loss of quality due to noise.
Thomas Eisl, a strong advocate of HighRes, goes as far as saying ”When shooting still subjects, you should use this [HighRes] mode whenever feasible in order to maximize image quality.” Though DR and noise are important considerations, we’re not here to test them directly. Let’s see how HighRes mode compares to up-scaling with Lightroom Enhanced Super Resolution and Topaz PhotoAI.
Downsides
A few words are necessary regarding the downsides of HighRes mode.
- If anything moves during the series of exposures—grasses and tree branches swaying in the wind or waves washing up a beach, even you!—users must either build that movement into the aesthetic of the shot or have a photo ruined by unintentional movement. Depending on the shutter speed, moving water is usually okay, but you need to carefully check it in the field using the LCD to ensure the water is smooth.
- Things become complicated if you want to use computational modes such as exposure blending/bracketing (HDR) to capture a contrasty scene or focus blending/stacking to maximize depth-of-field. Shooting three to five frames, each using HighRes mode is theoretically possible but, as you can’t set the camera to do it automatically, you will need to manually change the exposure compensation or focus. If you’re hand-holding, the difficulty will be keeping elements in the photo aligned closely enough to blend the images in post production, not to mention any movement during the duration of the exposures. Furthermore, Live ND mode and Live Graduated ND are simply not possible with HighRes.
So—what to do? For starters, a tripod would solve the second problem (see below) and give you access to 80MP Tripod-HighRes. Or, make a perfect, sharp, well-exposed frame at 20MP and see what Lightroom and Topaz can do for you! In other words, read on . . .
Method
As with previous articles, I think it’s important to outline my methods to allow users to replicate my actions and decide if it ’works’ for them. Or, they can use my methods as a starting point for their own investigations and testing.
I’ve used two photographs that were shot at 20MP and, using HHHR, 50MP. This seems to be the most commonly used HighRes technology with OM System users. A third photo was shot at 20MP, 50MP and 80MP using a tripod. More and more photographers are leaving tripods behind having become more trusting of the industry-standard internal stabilization technology in OM System cameras and lenses.
A Tripod?
Olympus OM-1 w/M.Zuiko 12-100mm ƒ4 PRO IS at 13mm (26mm efov); ƒ5.6 @ 1.3 sec., ISO 200; hand-held, 20MP raw file made using LiveND and processed in Lightroom
While not quite redundant, the usefulness of tripods has diminished. From personal observations and discussions with others, the amazing results from IBIS play a significant role, but it is also about aging photographers who want to carry less. After all, portability is often why they chose OM System in the first place! Furthermore, large prints are rarely the end use of photographs nowadays, so there is the perception that tripods are passé. Hold that thought and keep reading, as Tripod HR adds more than just pixels.
I must admit I’ve greatly reduced my use of a tripod compared to the early digital days and before that, the film days of ISO 50 Fujichrome Velvia! The +2EV improvement from ISO 50 to the OM-1’s base ISO of 200 factors into my decision. Additionally, with M43, ƒ8 has the depth of field of ƒ16, which is another 2EV of improvement.
However, when I do use a tripod, I am instantly transported back to my film days. It’s not nostalgia, but rather a reminder of the value of slower, more purposeful photography. With 35mm film, there were only 24 or 36 exposures, or 10 or 20 exposures per roll with medium format 120 and 220 film. With 4×5, I only ever owned a dozen film backs which is 24 frames. And with each and every one of those rolls and frames, there was also the ca-ching, ca-ching of processing costs that quickly added up. Photography had to be more purposeful!
But it’s more than that. With a tripod, one is now removed from the ’click-itis’ one feels with the rapid-firing burst ability of digital cameras. Needed or not, bursts have become the norm for shooting everything these days, at least with many amateurs.
Furthermore, as tripods are an impediment to movement, I am forced to spend more time consciously and critically examining the elements of the scene in front of me, pre-visualizing and processing the composition without the camera.
When teaching workshops, I always coach participants to work static landscape scenes without a camera stuck to their face, moving around and really examining the scene to make composition decisions. This frees photographers to see beyond the viewfinder, and prevents them from getting caught up with technical manipulations before they’ve adequately addressed the aesthetics of the scene. With a composition in mind, it becomes ’chin on tripod’ to check the view and re-position. The camera comes last. But I’ve digressed . . . Suffice it to say, I love working with a tripod when shooting landscapes and, going forward, I will do so more often. But, this isn’t a confessional!
Processing
Each image was processed in Lightroom, following my usual procedure of breathing life back into the raw file. It is important to remember that raw files are specifically NOT meant to be used directly without being processed. They are digital negatives containing all the amazing potential of the original scene. JPEGs are stripped of this potential as they are compressed and sharpened and reduced to 8-bit in preparation for immediate ’consumption’. Yes, they can be edited, but if you’re going to edit, then start with raw. Editing a JPEG is like trying to change the flavour of a cake when it’s already half baked.
Processing typically includes making adjustments to Exposure, Contrast, Highlights, and Shadows after nailing down Black and White points. Colour Temperature, Tint, Vibrance and Saturation are also adjusted. For base images, Detail Sharpening is applied, often in the range of 60 to 90, with sharpening masking set to between 20 and 40. These are the values I’ve found to be useful starting points for ORFs from my OM-1. Interestingly, I’ve found that HighRes files do not need as much Sharpening Masking as 20MP base images. Lastly, Adjustment masks are added where needed to help shape the light, particularly with the Kilimanjaro Blues photo to better balance the sky exposure with the foliage.
Photos Used
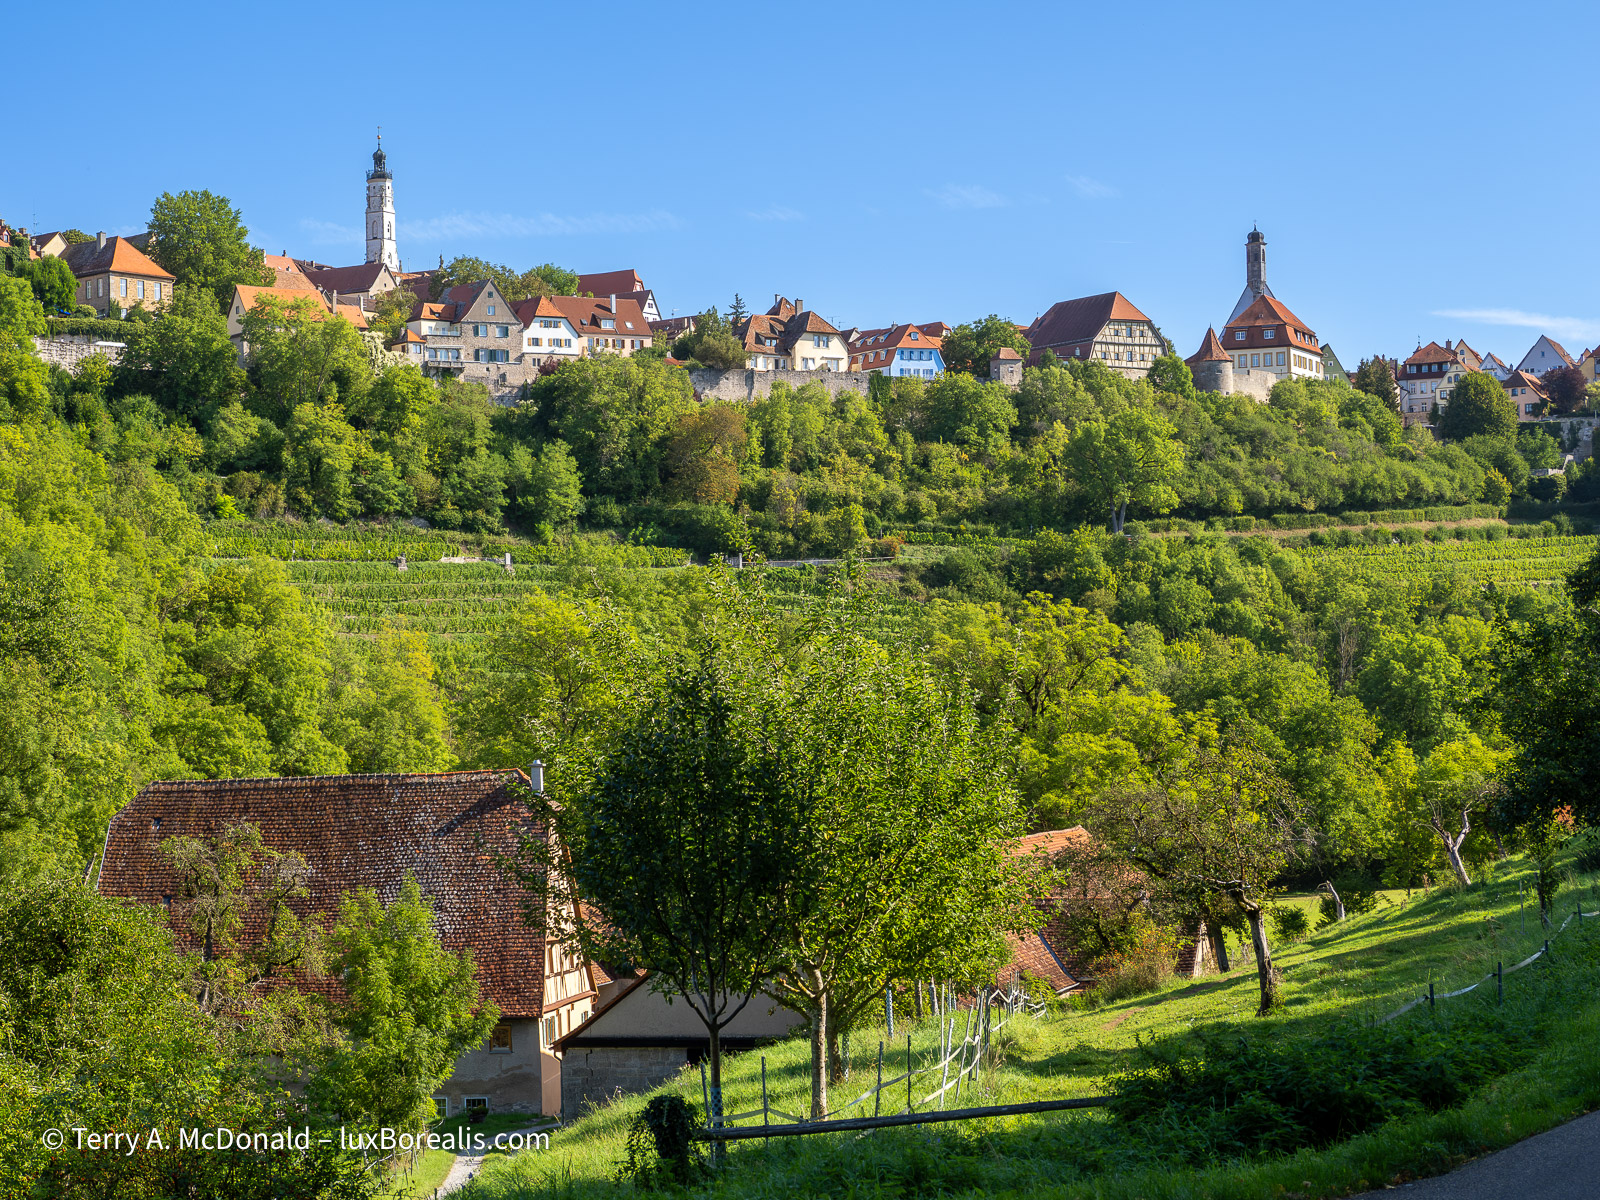
1. Rothenburg ob der Tauber Skyline, Germany. OM-1 w/M.Zuiko 12-100mm/4 PRO IS lens at 34mm (68mm efov); ƒ5.6 @ 1/160, ISO 200 for both 20MP and 50MP HHHR images. Although only base 20MP and HHHR 50MP files were made, I still feel this is a valuable comparison as a richly detailed photo one might make while travelling without a tripod.

2. Kilimanjaro Blues, Tanzania. Another landscape typical of what one might capture while travelling, and with only 20MP and 50MP HHHR files made. OM-1 w/12-100mm at 100mm (200mm efov); ƒ5.6 @ ⅓, ISO 800 (20MP file); for the 50MP HHHR file the exposure was ƒ5.6 @ ⅛, ISO 1600. Needless to say, the light was dwindling as these images were made during the ’Blue Hour’ after sunset. At the Equator, twilight quickly fades to dark. While, the shutter speeds are slow, both images are sharp thanks to OM-1’s industry-leading IBIS.
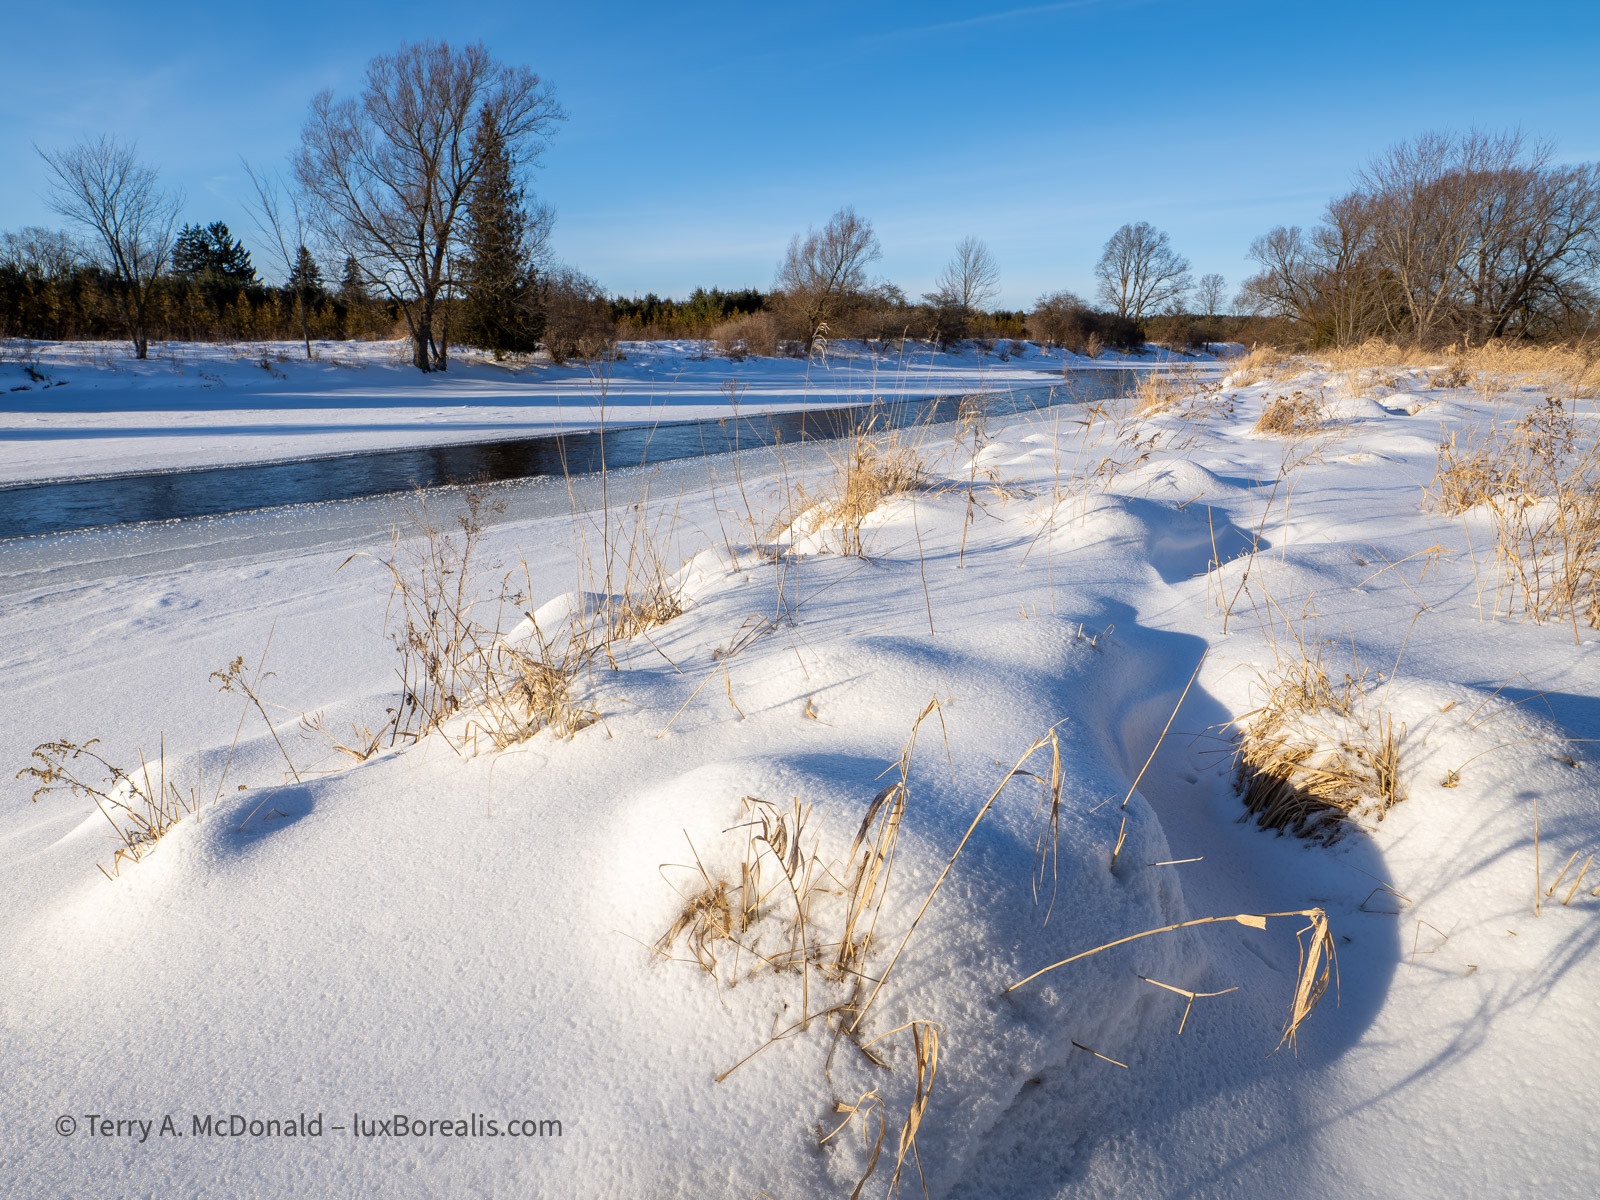
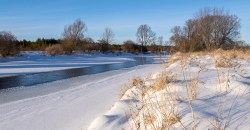
3. Winter Afternoon, Grand River, Ontario. A classic landscape, one with a strong foreground and lots of fine detail, that takes maximum advantage of the benefits of HighRes photography—and for this, I used a tripod. OM-1 w/8-25mm ƒ4 PRO lens at 10mm (20mm efov). All three files—20MP, 50MP HHHR, and 80MP Tripod-HR—were made at the same exposure: ƒ8 @ 1/500, ISO 200. There was no reason to increase the ISO to 800 as 1/500 is plenty fast enough.
Up-scaling using Lightroom
Built into Lightroom is Enhanced Super Resolution which doubles the size of an image. It’s perfect for creating an 80MP from a 20MP file, however, there are two problems
- Lightroom’s ’Enhance’ can only be used once—either for Noise Reduction OR Super Resolution, not both; and
- Super Res cannot be set to any other value other than to double the pixels, so, how does one create a 50MP image?
Solution 1: After running a file through Enhanced Noise Reduction, it was exported as a full-sized 16-bit TIF with no Output Sharpening and ProPhoto RGB colour space. To maintain quality, it is important that Output Sharpening in not applied, as that should be done only at the end of processing, not at an intermediary stage like this. ProPhoto RGB is used as it is the largest colour space available. After importing the TIFF back into Lightroom, it was run through Enhanced Super Resolution with excellent results. As well, additional Detail Sharpening was applied as needed. I would prefer to restrict the workflow to smaller ORFs and DNGs, however, exporting a DNG, renaming it, and re-importing it doesn’t work; Lightroom still recognizes the file as one that has already been Enhanced. So TIF it is.
Solution 2: So, how does one create a 50MP image when Super Res only allows a doubling of pixels? Easy—I learned the value of this method when I tested various apps for up-scaling. Simply choose ’Export > Custom Settings > JPG’ or ’Export > Custom Settings > TIF’ and set the Long Side to what ever pixels you want, in this case 8160px. You would be amazed at the quality of the output. Check out my article or try it yourself. The high quality of the output was certainly a pleasant surprise.
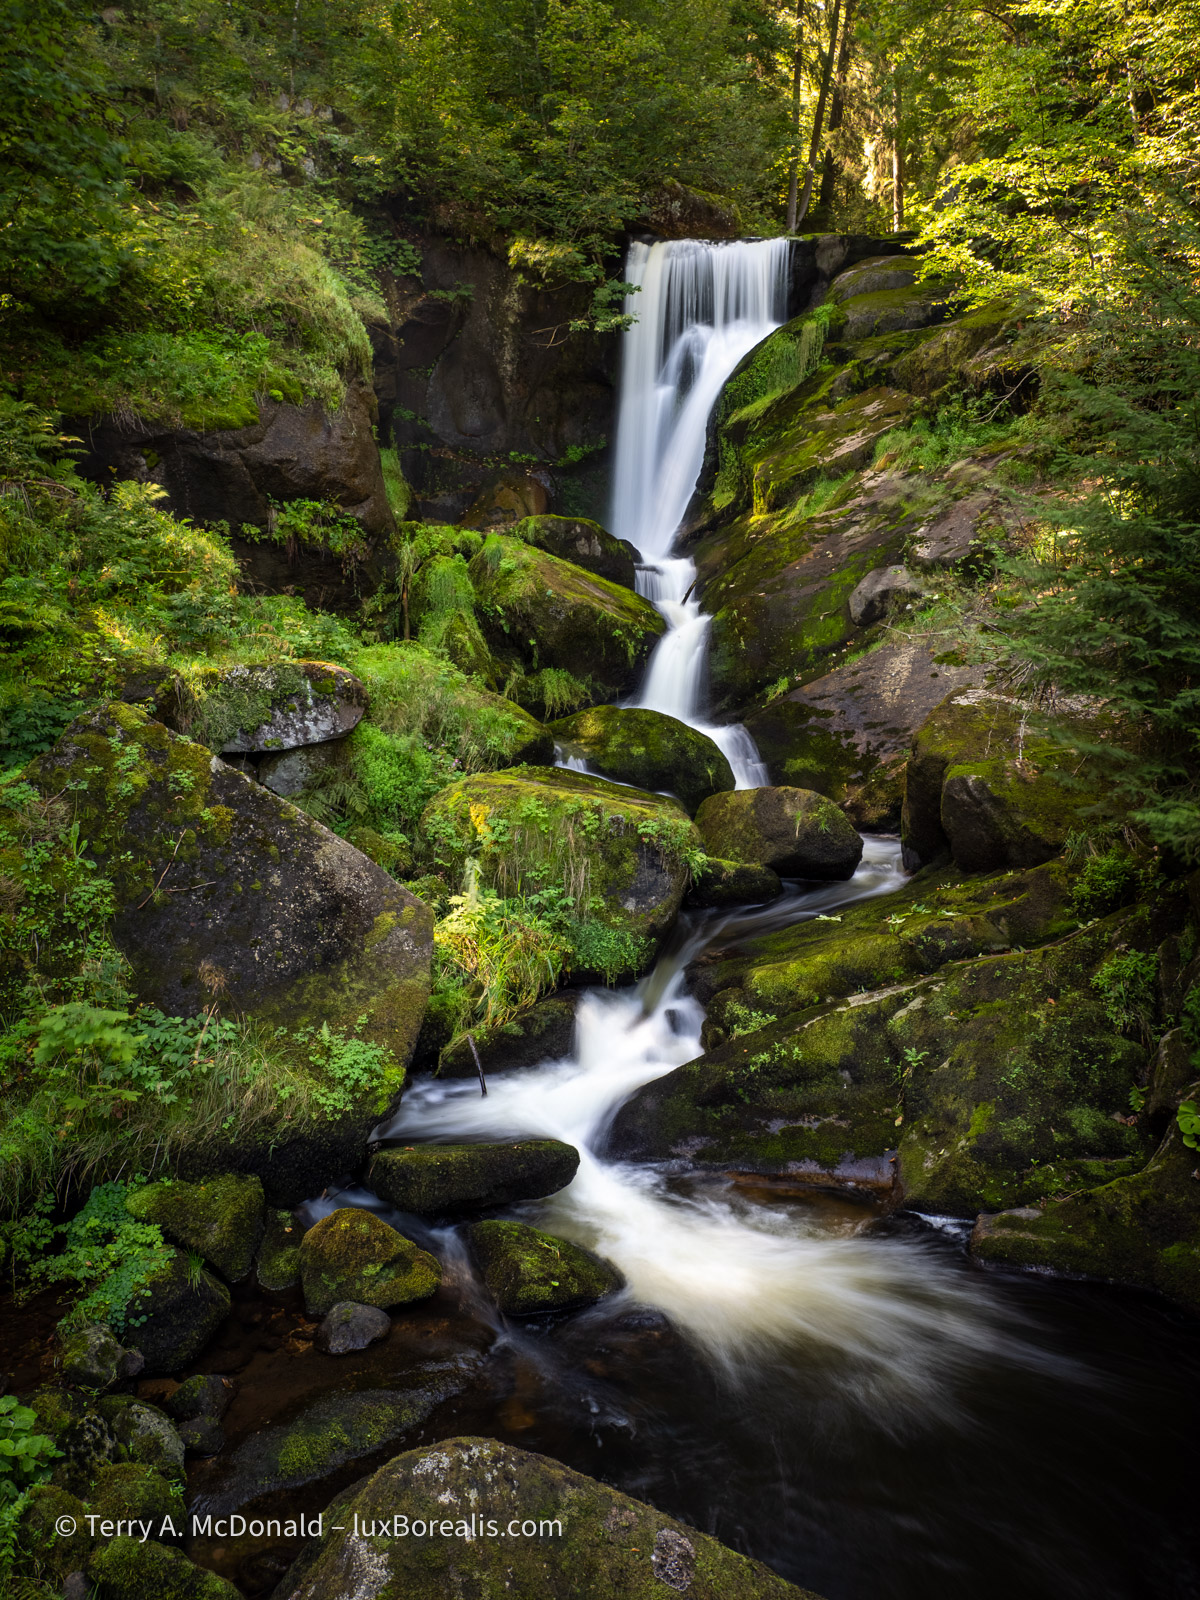
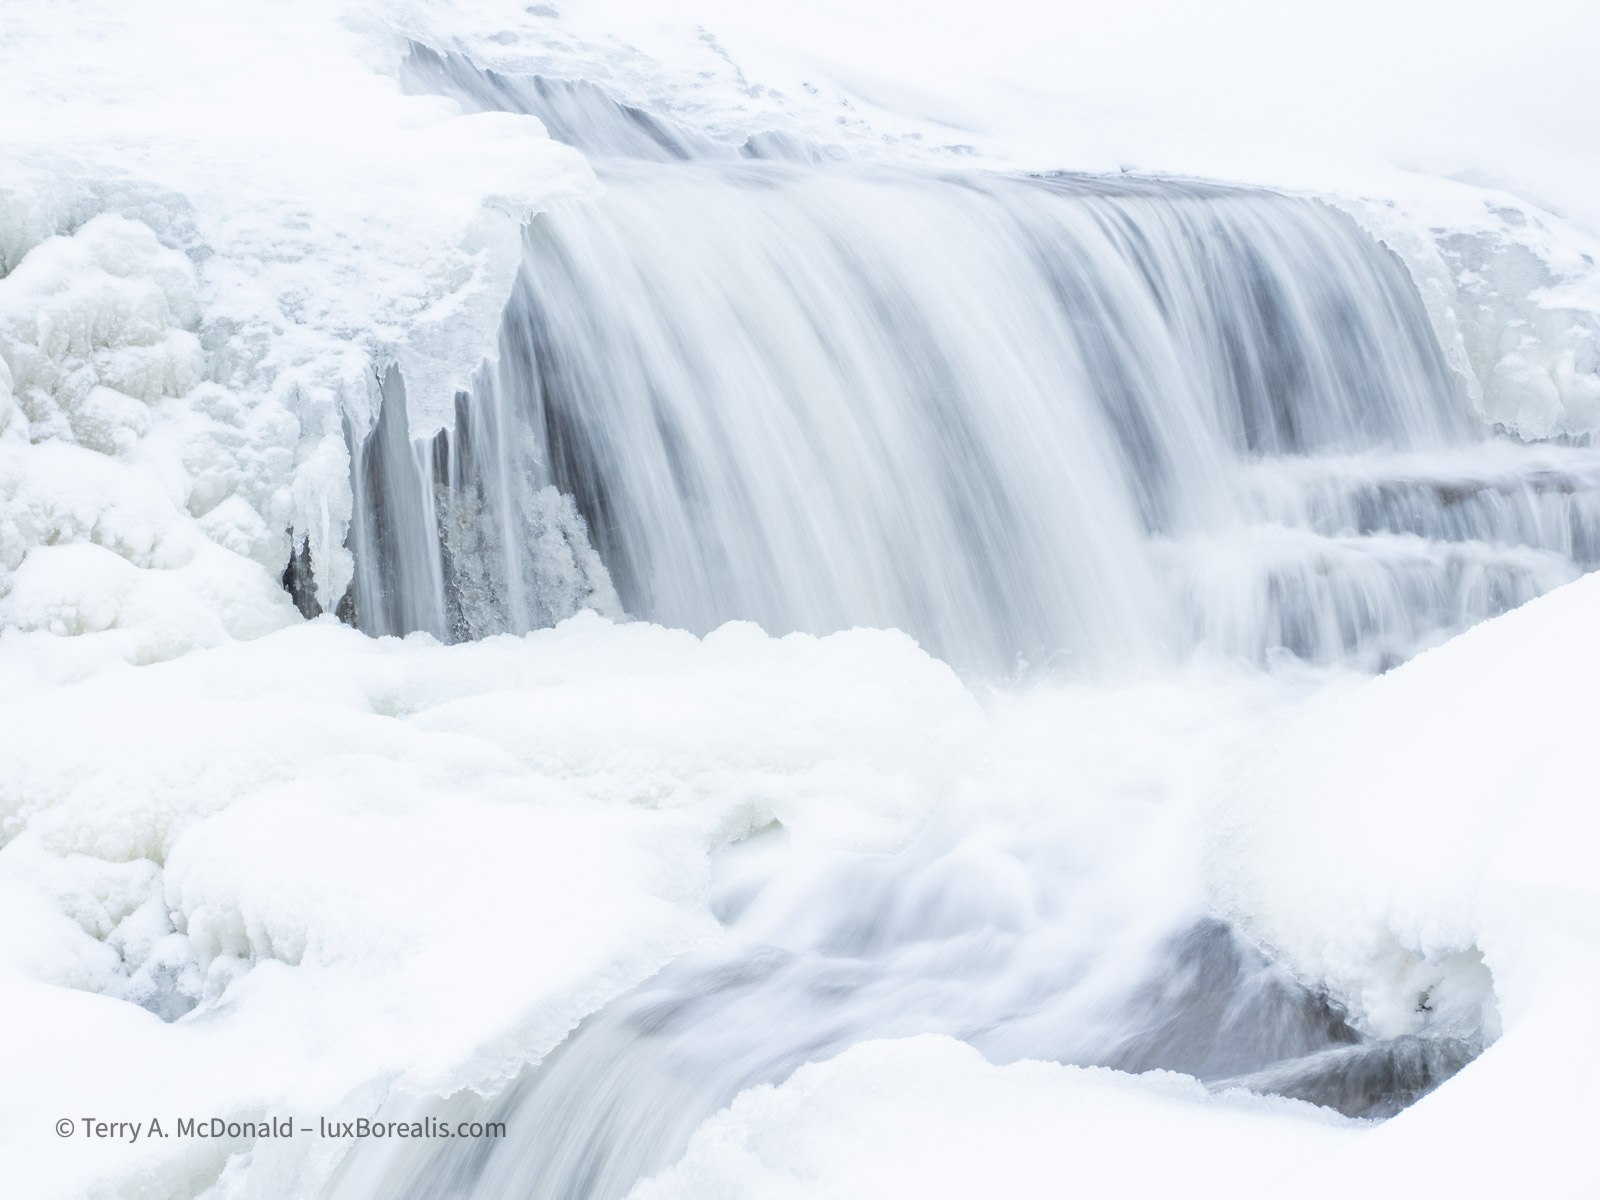
OM-1 w/12-100mm at 15mm (30mm efov); ƒ5.6 @ 1/800, ISO 800; 50MP HHHR raw file processed in Lightroom
Up-scaling using Topaz
I always prefer working from raw files, as does Topaz, so from Lightroom I chose ’Export > Original’ and added the ORF to a folder created for it. When opening a raw file, Topaz automatically applies its excellent Raw Denoise algorithm. I add the Sharpening module, followed by Upscale.
Topaz allows users to create Presets which can speed up processes. However, I treat each file individually, adjusting sharpening as needed using the various algorithms on offer—Standard, Lens Blur, Motion Blur, etc., typically ending up with Standard, but then making fine adjustments to ’Strength’ and ’Minor denoise’ while viewing the image at 100% and 200% to carefully check different parts of it: smooth areas, edges and detailed areas.
The first time I used Topaz to up-scale a landscape photo, the results were terribly soft and not at all encouraging. Going back to Topaz, I realized the AI feature of the app had auto-selected ’Subject Sharpening’ and somehow found and masked a subject, even though the scene really had no specific subject. It’s something to be aware of in the future.
Upscaling also offers some options—Standard v2, High Fidelity v2, Low Resolution, amongst others. Typically, I find Standard v2 most helpful, though with Kili Blues, I used High Fidelity. Comparing and contrasting the various options for Sharpening and Up-scaling is a rabbit-hole in itself, so I’ll not go down there now.
Each ORF was up-scaled to 8160px on the long side (50MP file) and, where appropriate, 10,368px for the 80MP comparison. Topaz can be set to conveniently and automatically save the resulting files as DNGs and put them into the same folder as the original. From there, they were imported into Lightroom for comparison.
For comparison, a 2x DNG (10,368x7776px) is 292MB; the same TIFF is 484MB. Although these are large files, my M1 MacBook Pro with 16GB of ram had no trouble handling them.
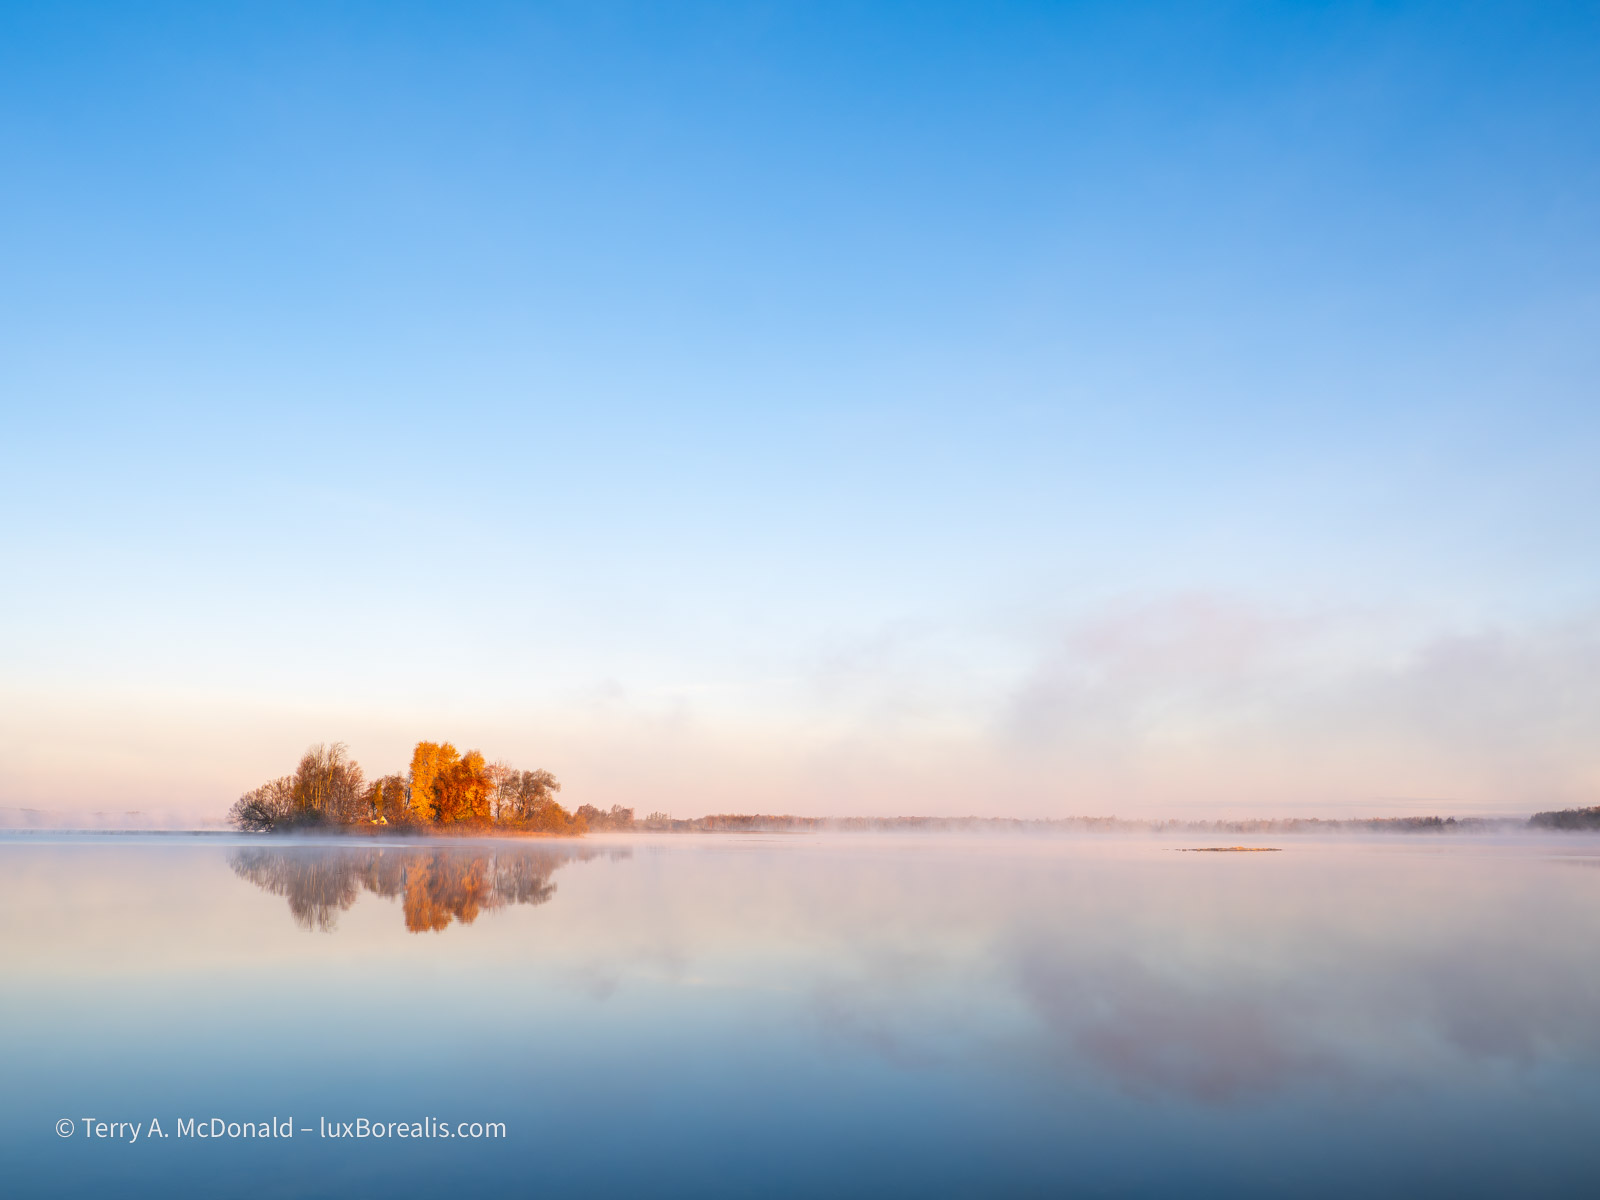
OM-1 w/12-100mm at 31mm (62mm efov); ƒ10 @ ⅛, ISO 200; Live ND mode; 20MP raw file made using LiveND, processed in Lightroom.
Results
The proof is in the results, so it’s time to put you to work. I’ve split the results into two sections: 50MP HHHR mode and following that, 80MP TripodHR mode. I think it’s safe to say that the majority of photographers interested in HighRes will use the 50MP mode far more often than 80MP mode simply because users don’t want to carry a tripod. I get that. But before jumping to conclusions, let’s look at the results.
Results 1: 50MP
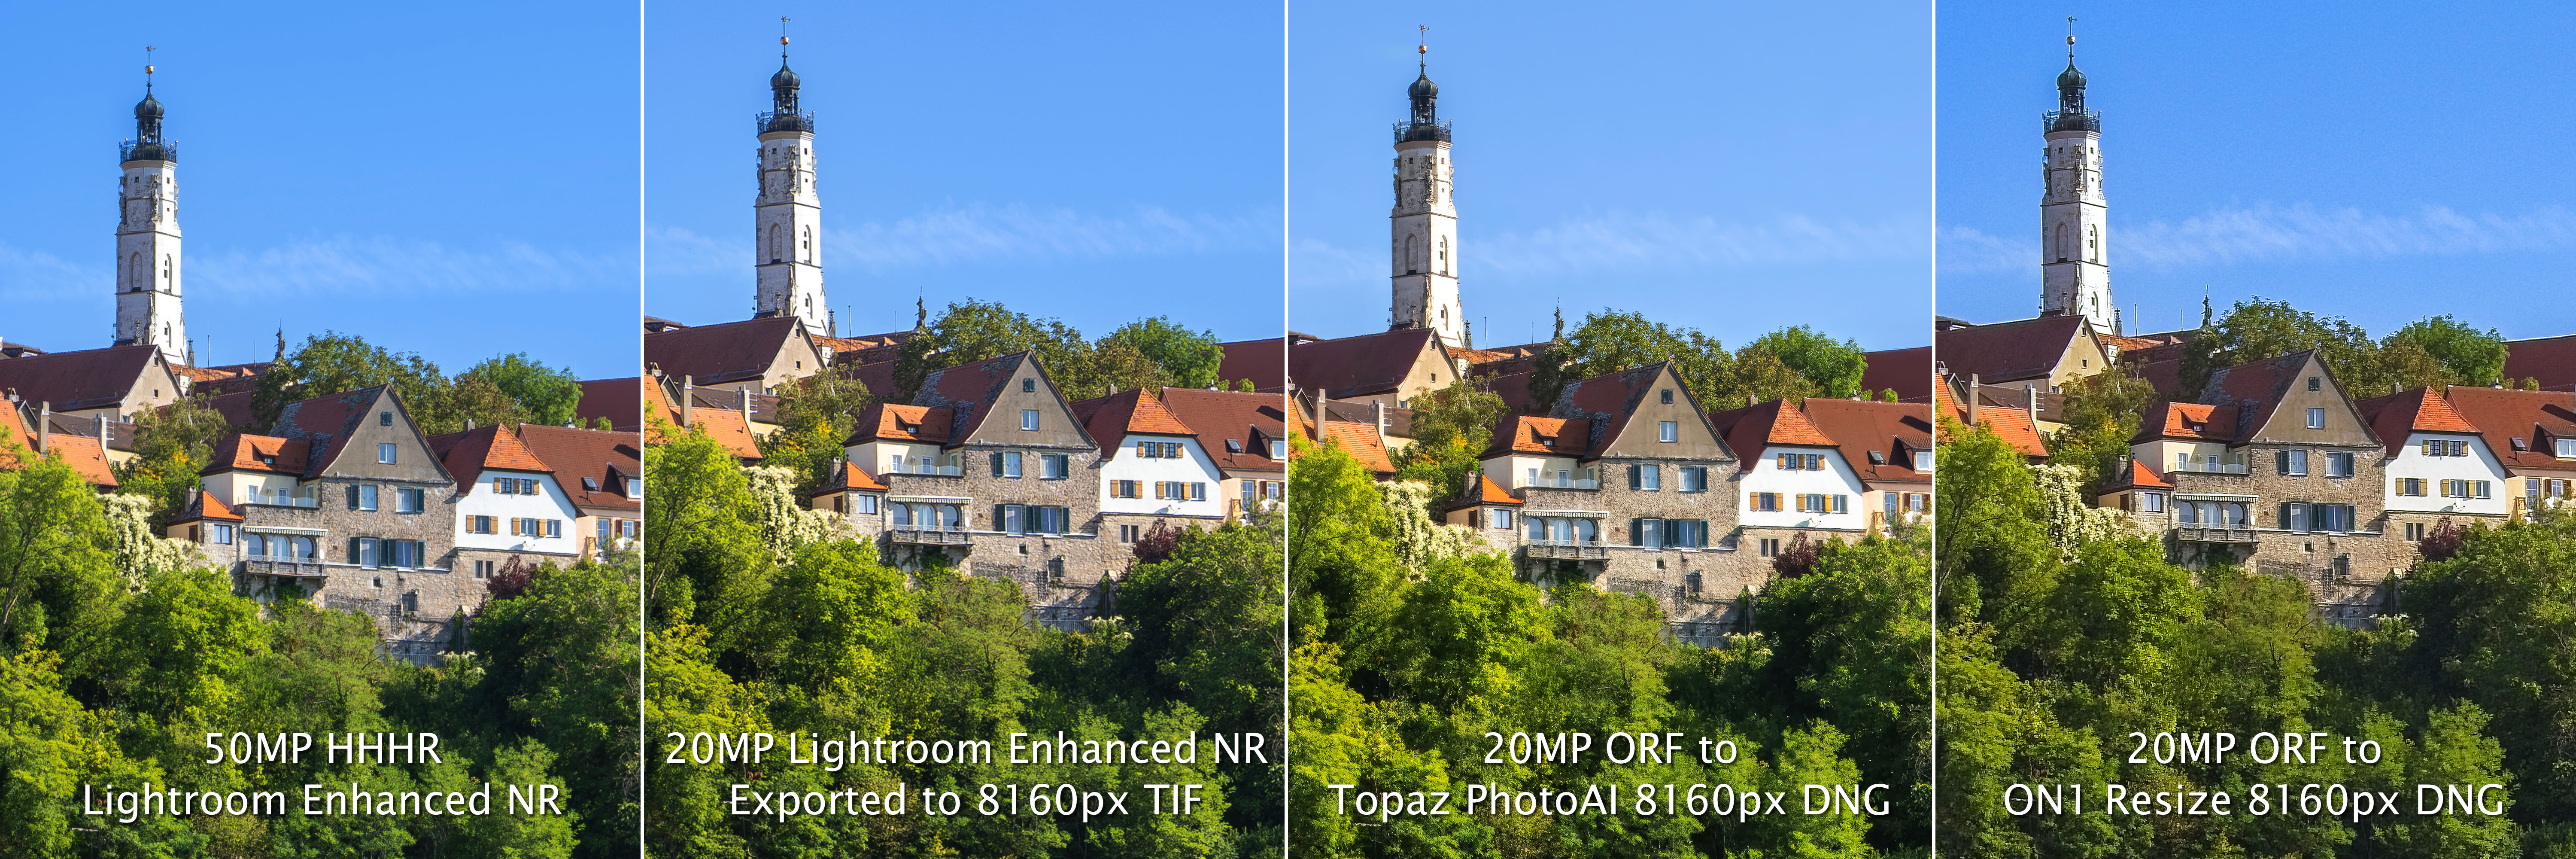
Carefully examine the following comparisons. View them at full size by clicking or tapping to open each file in a new tab. This will allow you to check the smoothness of the sky plus fine details such as rock/brick, leaves, grasses, tree limbs, and roof tiles. The tile roofs are particularly telling as they have low contrast details. How well do the various methods of up-scaling preserve them compared to HHHR?
What do you think? The mountain has a number of low-contrast details, while the foliage provides high contrast details. Note: the 50MP HHHR image does not have the giraffe in the crop as it hadn’t yet moved to that position.
Be sure to view it at full size! What do you think?
So, now that you’ve seen direct comparisons, what do you think?
- Is HHHR necessary to maintain sharp detail?
- Can up-scaling a 20MP file do the job as well?
- Which up-scaling method is best—a direct Lightroom export or Topaz Photo AI?
- How noticeable will the differences be in a 20×27” print?
Let’s have a look at some comparisons of HHHR and up-scaled files using screen shots as viewed in Lightroom at 100%. Again, be sure to click/tap on the files to view the images directly.

The differences become a little more apparent when enlarged further. Surprisingly, both the the subtle and sharp details in the mountain face and remaining glaciers are much clearer in the ‘up-scale-by-export’ version than either the HHHR or the Topaz version.
Here is the same comparison of the Rothenburg photo. Be sure to click/tap on the photo to view the actual 4218×1812 file.
Pay close attention to the roof tile details. The details are apparent in the 50MP HHHR and Lightroom up-scale versions, but less so in the Topaz version. It’s as if the AI algorithm didn’t recognize those subtle details. However, some of the details are sharper in the Topaz version. Look closely at the stone work of the central building and around the windows with the blue-green shutters.
Now for the Winter photo details. Remember to click/tap on the photo to open the actual file in a new tab. This will allow you to see it at full size.
In comparing the HHHR with the Lightroom up-scale, I see that sharpening halos are slightly more prevalent in the Lightroom version and the snow is slightly ’grittier’. Now that I see them closely like this, I’d be inclined to reduce the Texture in Lightroom by 10 or 20 to better blend the edges. With that done, my feeling is, to notice the difference, it would require a ’nose to the print’ viewing distance along with a direct comparison. In other words, I’m not convinced the HHHR version is any better than thte Lightroom up-scale.
In comparing the Lightroom and Topaz up-scaled images, the fine details of branches against the sky look crisper in the Topaz version. However, the tree and shrub details below the horizon become mushy, and look like a watercolour painting. The snow and the water take on a creamy, almost smeared look as well. Just as I found in the up-scaling test of the previous article, some details are better in Topaz and some are better in Lightroom. Combining the two might be the ideal!
Having now had this closer look, what do you think? Is the HHHR version better enough to commit to using it regularly or is up-scaling the way to go?
Conclusion 1: HHHR vs Up-scaling
My feeling is, if a sharp, well-exposed 20MP file is created, the advantages with HHHR of higher dynamic range and reduced noise are less of a factor. In situations where DR is a problem, it is better solved using exposure blending with 20MP files. And, with modern denoise algorithms, noise is a no longer an issue.
Making a straight 20MP file also means there won’t be issues with movement between the individual exposures needed for an HHHR composite. Case in point—the giraffe—it simply would not co-operate for a 50MP HHHR photograph. Lastly, by shooting a base file of 20MP, users still have all the computational modes available, such as exposure blending (HDR), focus stacking, and Live ND/GradND mode.
I’m not trying to talk anyone out of using HHHR mode, but its advantages may not outweigh the advantages of using computational modes when they are required. It’s a matter of having options. Knowing what’s possible with up-scaling now becomes part of the decision-making around the tools available. Of course, if you don’t have access to a sound method of up-scaling or you are intent on only shooting JPEGs, then HHHR is the way to go.
Results 2: 80MP TripodHR mode
While a strong case can be made for using up-scaling instead of shooting 50MP HHHR, is the same true with TripodHR mode? Let’s take a look at the 80MP comparisons. Be sure to click/tap on the file to open a full-sized version in another tab.
Below is the 100% view screen captured from within Lightroom, providing a closer view. Click or tap on the file to view it at full size (4218x1812px):
Now that we’re comparing a straight 80MP Tripod HighRes file to two that have been up-scaled from the original 20MP file, are the differences more apparent? Is there a ’need’ for Tripod HighRes?
Conclusions 2: 80MP
I find that casual viewing of these panels shows no significant difference—much like one would casually view a print on the wall without sneaking up to it. However, when viewed at actual size, the 80MP TripodHR has exceptional sharpness, especially in the bare branches against the sky. The up-scaled files from 20MP are slightly less sharp, but they are still surprisingly good. Would they stand up to scrutiny in a 25×34” print, without direct comparison? Likely, yes. Certainly the average viewer wouldn’t find any fault in the up-scaled versions. However, other photographers might notice.
Furthermore, I find the 80MP TripodHR version to be less edgy with smoother gradations from highlights to shadows. Look closely around the individual grasses, they seem more realistic, more rounded in the TripodHR version as opposed to cut-outs in the other two versions. The water also appears more realistic. It is this realism with smoother gradations that cause serious photographers to choose medium format sensors, and 80MP isn’t too far off.
It is important to consider that adding a tripod to the mix changes more than just capture mode. Not only will there be the additional size and weight of a tripod, you will likely find that your style of photography changes.
OM-1 w/12-100mm at 100mm (200mm efov); ƒ5.6 @ 1/320, ISO 200; 20MP raw file processed in Lightroom.
Discussion
With smaller systems and modern zooms, many photographers have become ’opportunists’. They carry all their gear with them, or a single wide to tele ’walkabout’ zoom. When they see a landscape, they’ll pause and capture it. If on the same outing, they see a macro shot, then lenses are switched and it’s captured. Lenses are switched again if a perching bird or a bird-in-flight opportunity comes along. This is the freedom of having a lightweight system that is easily portable—everything is brought along, though with adding a tripod, one may re-consider some of the lenses.
One Lens (and a tripod)
One of the most basic learning and seeing strategies in photography is to go out with only one lens. Back in the day, it would have been a prime lens, but now it’s typically one zoom lens, or one focal length of a zoom. Some would find this incredibly limiting when there are so many photo ops ‘out there’, each demanding a different lens. The ’one-lens-at-a-time’ routine forces the photographer to focus their efforts on seeing photographs from a narrower perspective, which, in turn, spawns creativity. It’s a well-recognized phenomenon in art and science: creativity stems from limitations, a.k.a constraint-driven innovation. Going out with only one lens is not unlike writing a poem with built-in constraints such as a 14-line sonnet or haiku or painting with a limited colour palette.
This is what a tripod does; it adds a constraint. Consider it ’slow photography’, similar to the ’slow food’ and ’slow television’ movements. Think of the works Ansel Adams created in the mountains of California backpacking with a 4×5 or 8×10 camera, 1 or 2 lenses and a tripod.
OM-1 w/8-25mm at 12mm (24mm efov), ƒ5.6 @ 1/1600, ISO 200; raw files captured at 20MP, 50MP and 80MP, processed in Lightroom.
Using a tripod means making fewer exposures, but being more purposeful with each set-up. As you becme more attuned to working within the constraint, you will begin to see more deeply and your photographs will begin to take on greater visual depth, creativity, and meaning. They will be less about the obvious and more about interpreting different ways of seeing. Rather than snap-snap-snapping, your work becomes more intentional. But, there’s a learning curve to slow photography and a weaning process. FOMO kicks in—we’re afraid of missing a photo. In economic terms, it’s the opportunity cost of choosing one style of photography over another.
So . . . back to 80MP TripodHR. One could shoot 20MP files and up-scale them to 80MP when needed. We know now, it ’works’ and it works well. Or, use a tripod, reducing the number of photos you make but creating images of higher quality. That’s what TripodHR does with improved DR, noise, sharpness and the smoother, more realistic gradations that become apparent. Since the camera is on a tripod, shooting multiple TripodHR frames for HDR and focus stacking is also possible.
But, you might also ask, ‘Why bother shooting at 80MP if a 20MP file creates excellent 16x20s?’ Good question; it boils down to how much larger do you need? But it’s not just the larger size; 80MP TripodHR also provides +2EV of dynamic range and noiseless files. Together, this boost in quality may well be worth the extra effort.
How you and others choose to approach their photography is a very personal decision. There’s no right or wrong. But being aware of the options available is one of the reasons for this article.
One thing I’ve learned from all this testing and viewing and comparing is this: if I have captured a great photo at 20MP—sharp and well exposed—I can be confident in having an image of high enough quality to print large. I won’t sweat trying to capture the same photo at 50MP or 80MP. Look at the Kili Blues photo. The giraffe was in the perfect spot for the 20MP capture and it was motionless. The moment could not be replicated for the 50MP capture. It may be ’only’ 20MP, but I know I can create an excellent up-scale from it, even with direct export from Lightroom and without resorting to Topaz. Funny that.
At the same time, I’m thinking that I just might start using a tripod more often, if only to slow me down and help focus my thoughts and seeing. Instead of having numerous, similar copies of the same scene, each of higher quality.
—
Thanks for reading! In the COMMENTS below, add your questions, comments, or discussion about up-scaling and the apps and equipment used. Please SHARE this with other photographers or with your camera club, and SUBSCRIBE to receive an email notice of new blogs.
Terry McDonald is fine art landscape, nature and travel photographer based in southern Ontario. View his work at luxBorealis.com; select Workshops to enquire about upcoming offerings.
This work is copyright ©2025 Terry A. McDonald and may not be reproduced
in whole or in part without the written consent of the author.
Discover more from luxBorealis Blog
Subscribe to get the latest posts sent to your email.

It’s really fascinating how subtle details pop out differently depending on the upscaling method, huh? That’s why I always play around with different techniques before committing. By the way, if anyone’s looking to get creative with pixel art, here’s a neat tool you might find helpful: Pixelate Image.