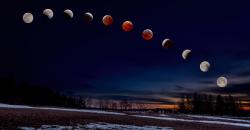
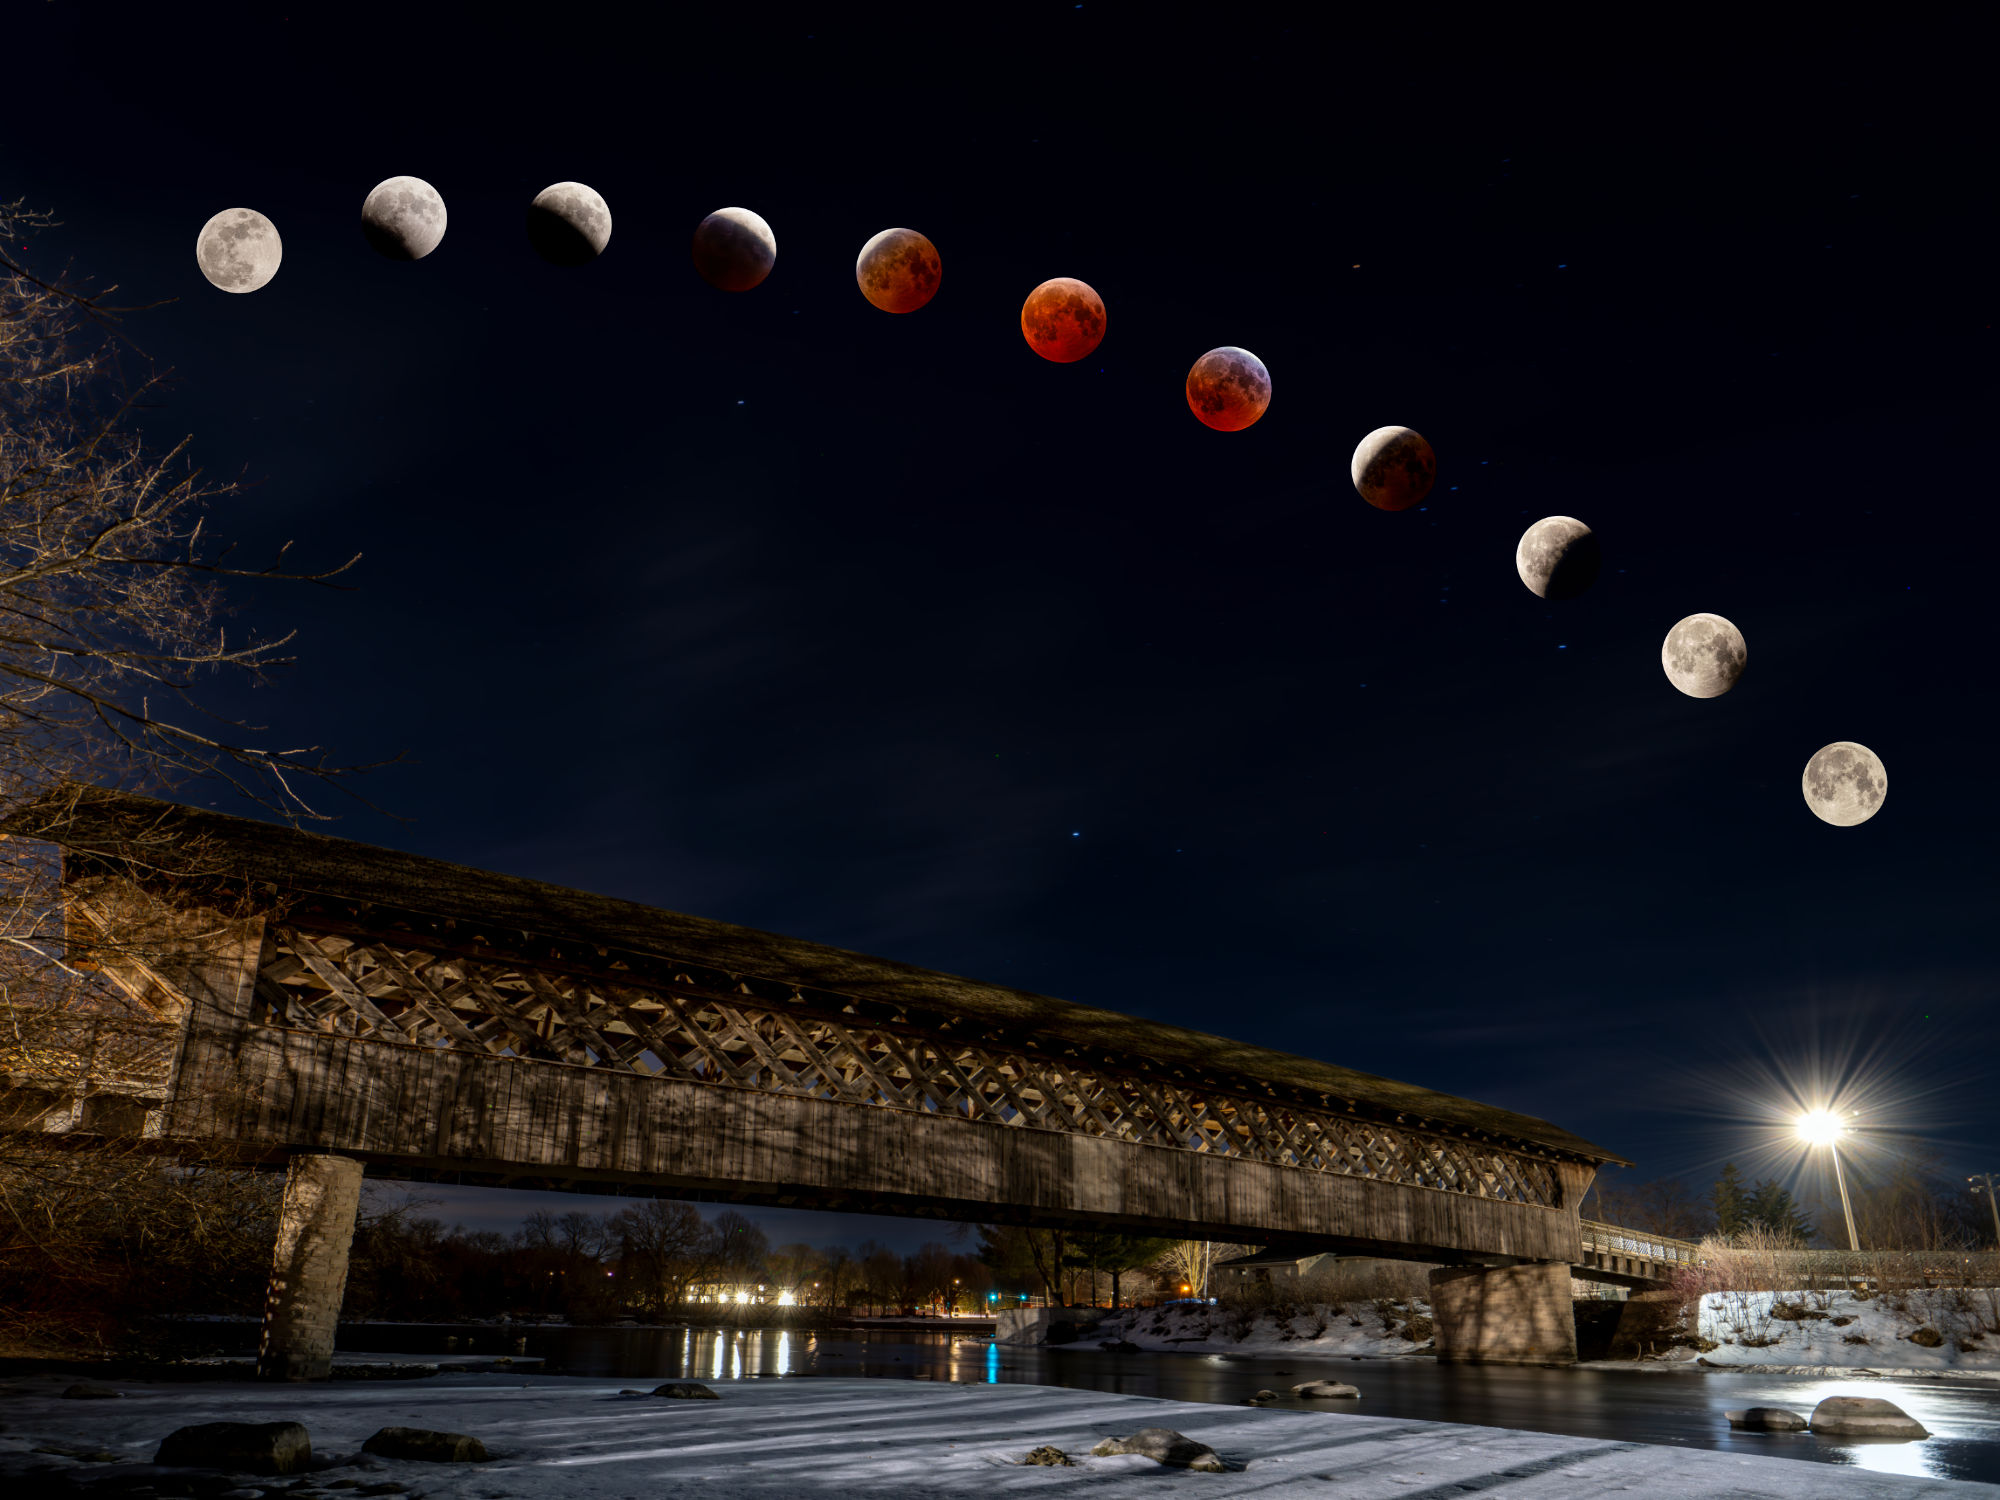
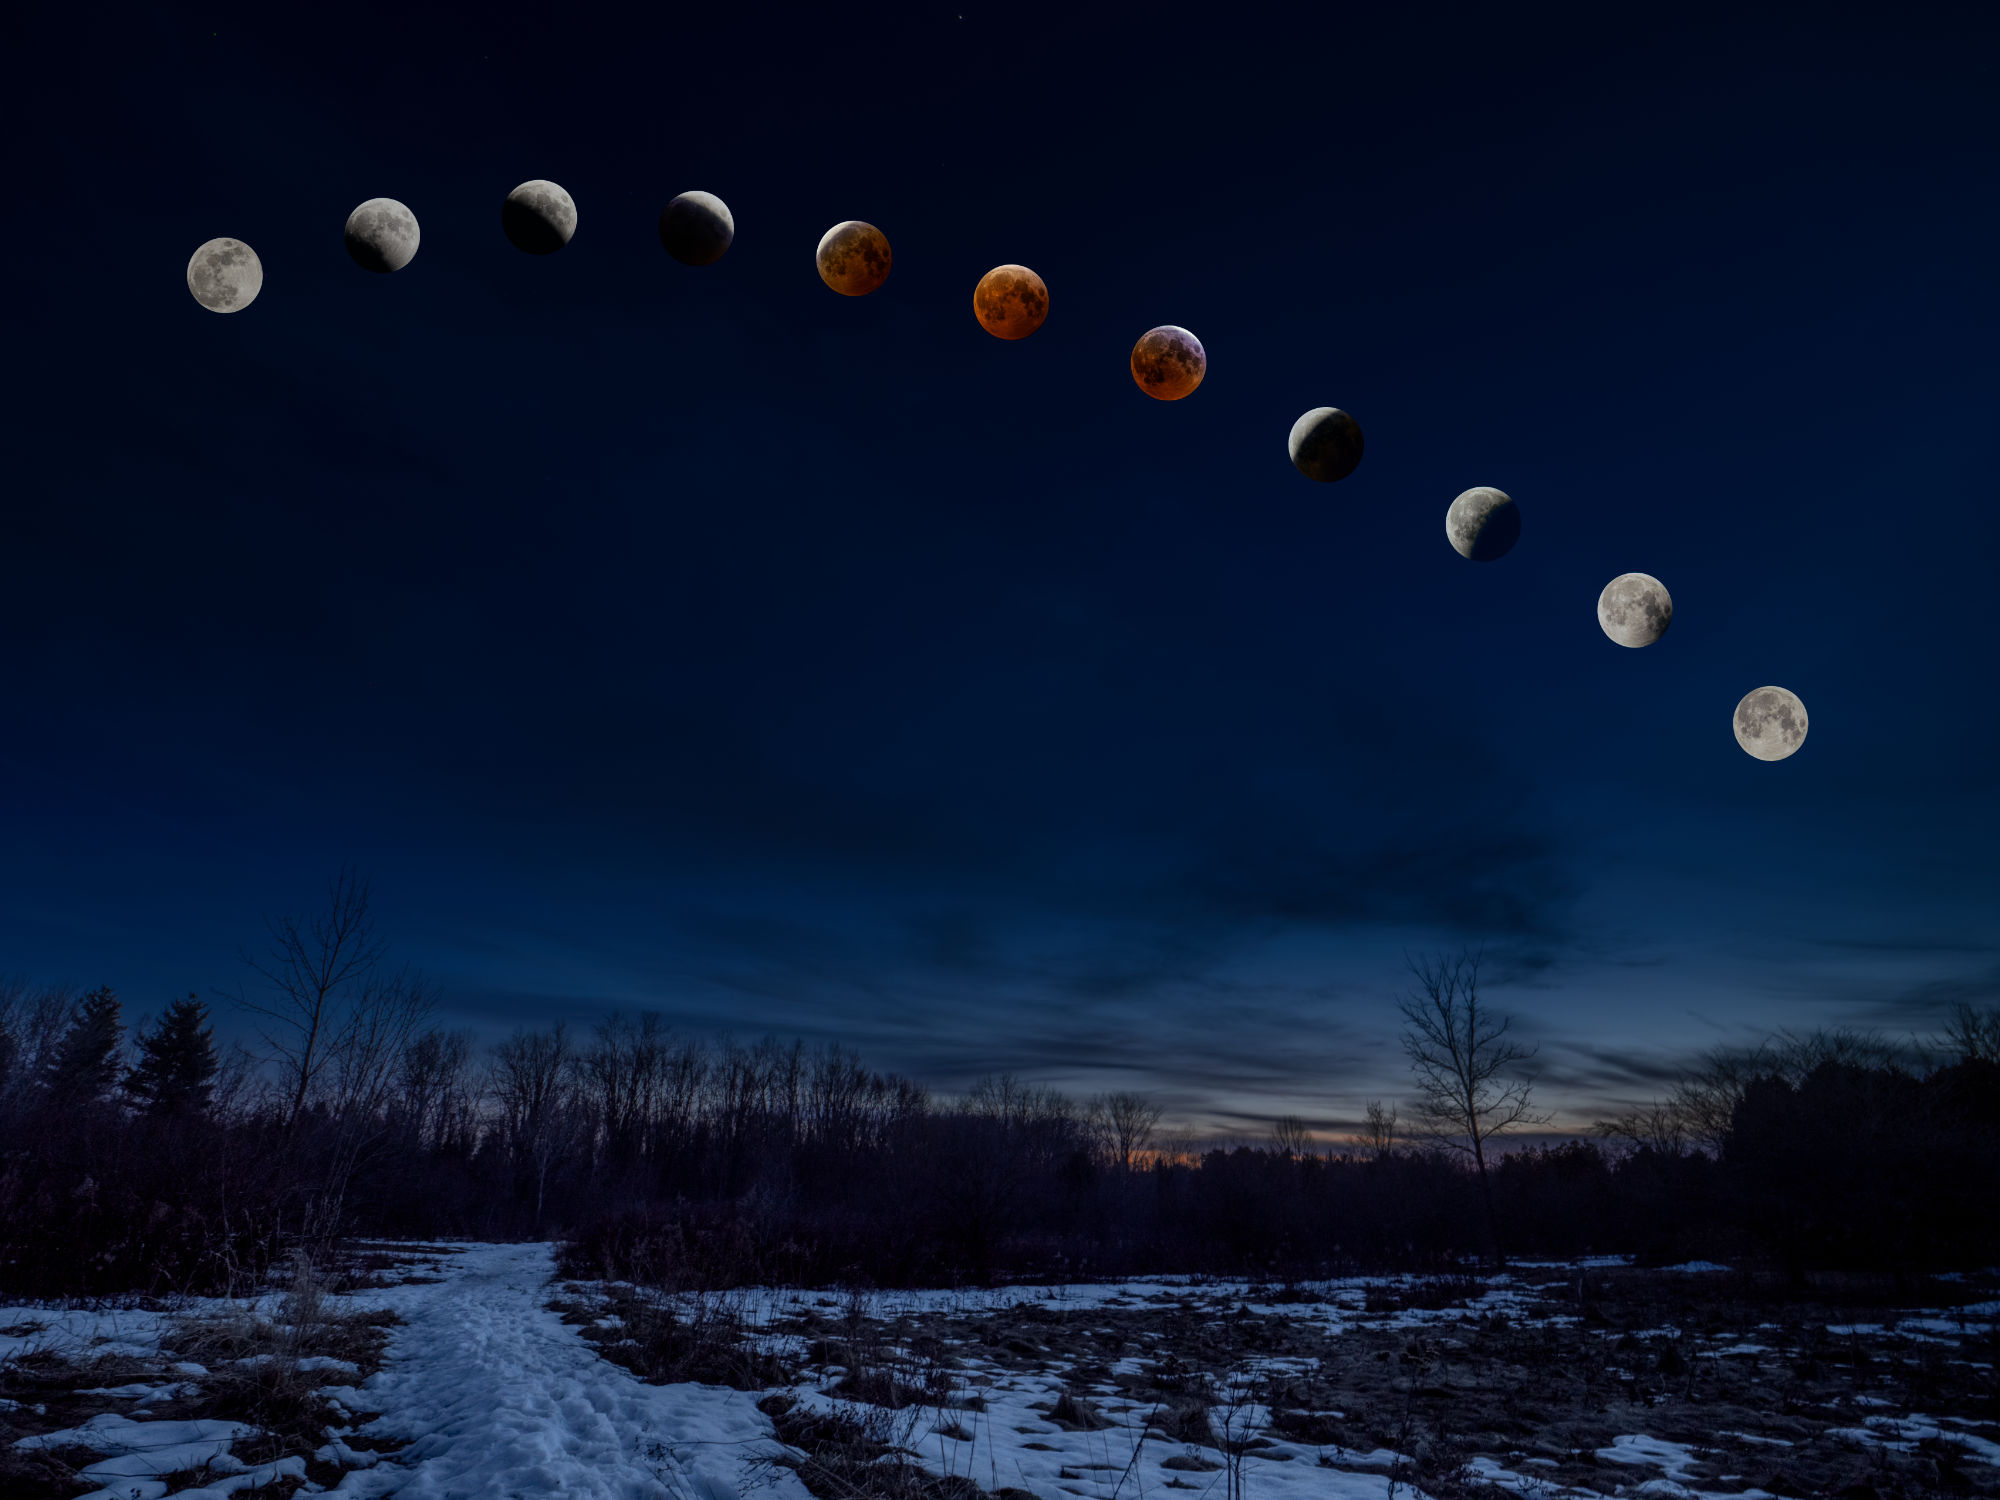
Total Lunar Eclipse—Landscape Composite Photographs around Guelph, Ontario
Or evolution by trial and error . . .
This is the third and final article about the Total ‘Blood Moon’ Lunar Eclipse of 13-14 March 2025. The first, Are you ready? provides background and a series of resources for photographing a lunar eclipse. The second is a First Look at Total Lunar Eclipse Photographs, with a couple of composites of the Moon at different phases.
The photographs presented below illustrate what I had originally envisioned when I was preparing for the Eclipse. Over the years, I have tried a few times to make photographs of a lunar eclipse, but, given the poorer equipment I had at the time and my limited experience, they didn’t turn out too well. I also found that a photo showing an orange-red moon sitting in the middle of the black background of the night sky was cool, but wasn’t terribly engaging. This time, I wanted more.
The biggest advantage of modern sensors, like the one in my Olympus OM-1, is how well they handle high ISO noise. Combined with advances in post-capture processing, including Lightroom’s Enhanced Noise Reduction (or DxO Pure Raw or Topaz Photo Ai or ON1 Photo Raw—I’ve tested them all), the quality of the base raw files and subsequent processed files has greatly improved. Finally, I could work with high quality base files, and it was thrilling!
Capturing the base landscape images
A full day before the eclipse, I went out to scout locations around my home city of Guelph, Ontario. Despite their fast pace and bright lights, I don’t really appreciate city landscapes, preferring to photograph scenes from rural and natural areas. To me, cities are ‘necessary evils’. I appreciate the advantages of city living in not having to drive far for amenities, but at the same time, I long for a quieter life out in the countryside away from the sirens and constant white noise. Oh well . , .
As I was planning the base landscape photos, I felt it was important to maintain a sense of authenticity for each view. Each landscape had to show the correct south to southwest aspect, one that would include all phases of the Eclipse. Each photo should appear exactly as if you were standing in the same location watching for the three hours it took for the Moon to pass through Earth’s umbra.
PhotoPills’ AR mode is essential for this kind of planning. At each location, after centring the PhotoPills Planning map on the app and navigating to the date and time of the Eclipse, I could view the eclipse superimposed on the sky. Perfect!
At sunset, on the evening of the Eclipse, I re-visited each location to photograph it. the view required an ultra-wide angle, so I set up the OM-1 with the 8-25mm set to 8mm (16mm with a 35mm sensor). I would have used my new Panasonic-Leica 9mm/1.7, but it wasn’t wide enough. Mounting the camera on the tripod, I set the aperture to ƒ5.6 and the OM-1’s High Res mode to ‘Tripod’, capturing each scene as an 80mp, 10368×7776 pixel image—plenty large enough for virtually any use. After correcting for wide angle distortion in Lightroom, I ended up with 9526×7145 pixels, or a 68mp image. Not bad for M43!

Each base landscape was processed in Lightroom. I had to switch to my laptop as Lightroom for iPad (still) does not have Enhanced Noise Reduction. The files probably didn’t need it, but I decided to err on the side of caution. Processing also included further reducing the exposure of the sky while keeping and even accentuating the brightness of the foreground. Sky masks and Linear Gradient masks worked their charm. Each landscape was then exported as a TIFF to use later in Affinity Photo.
Processing the Moon shots
Capturing the moon itself was relatively straightforward. I was able to work from the comfort of my driveway, as the view to the south and southwest was unobscured. Between each series of shots, I could go inside, warm up (it was –1 to –4°C) and have 10-minute cat-naps. When there was enough time between segments, i could begin working on images already captured. You can read about the details of the set-up and exposure in the previous article, as well as the initial processing
Once each Moon shot was edited, I went through them as a set to balance the exposure, highlights and shadows, and the colour temperature of the moon, reducing the shot-to-shot differences. This tweaking took longer than expected, but was necessary to ensure consistency from phase to phase. I ended up choosing 11 different phases: three are ‘pre-Blood Moon’ showing Earth’s umbra gradually passing over the face of the Moon, three images show Totality, and three more are ‘post-Blood Moon’ as the umbra recedes, with a full moon at each end.
Working in Affinity Photo
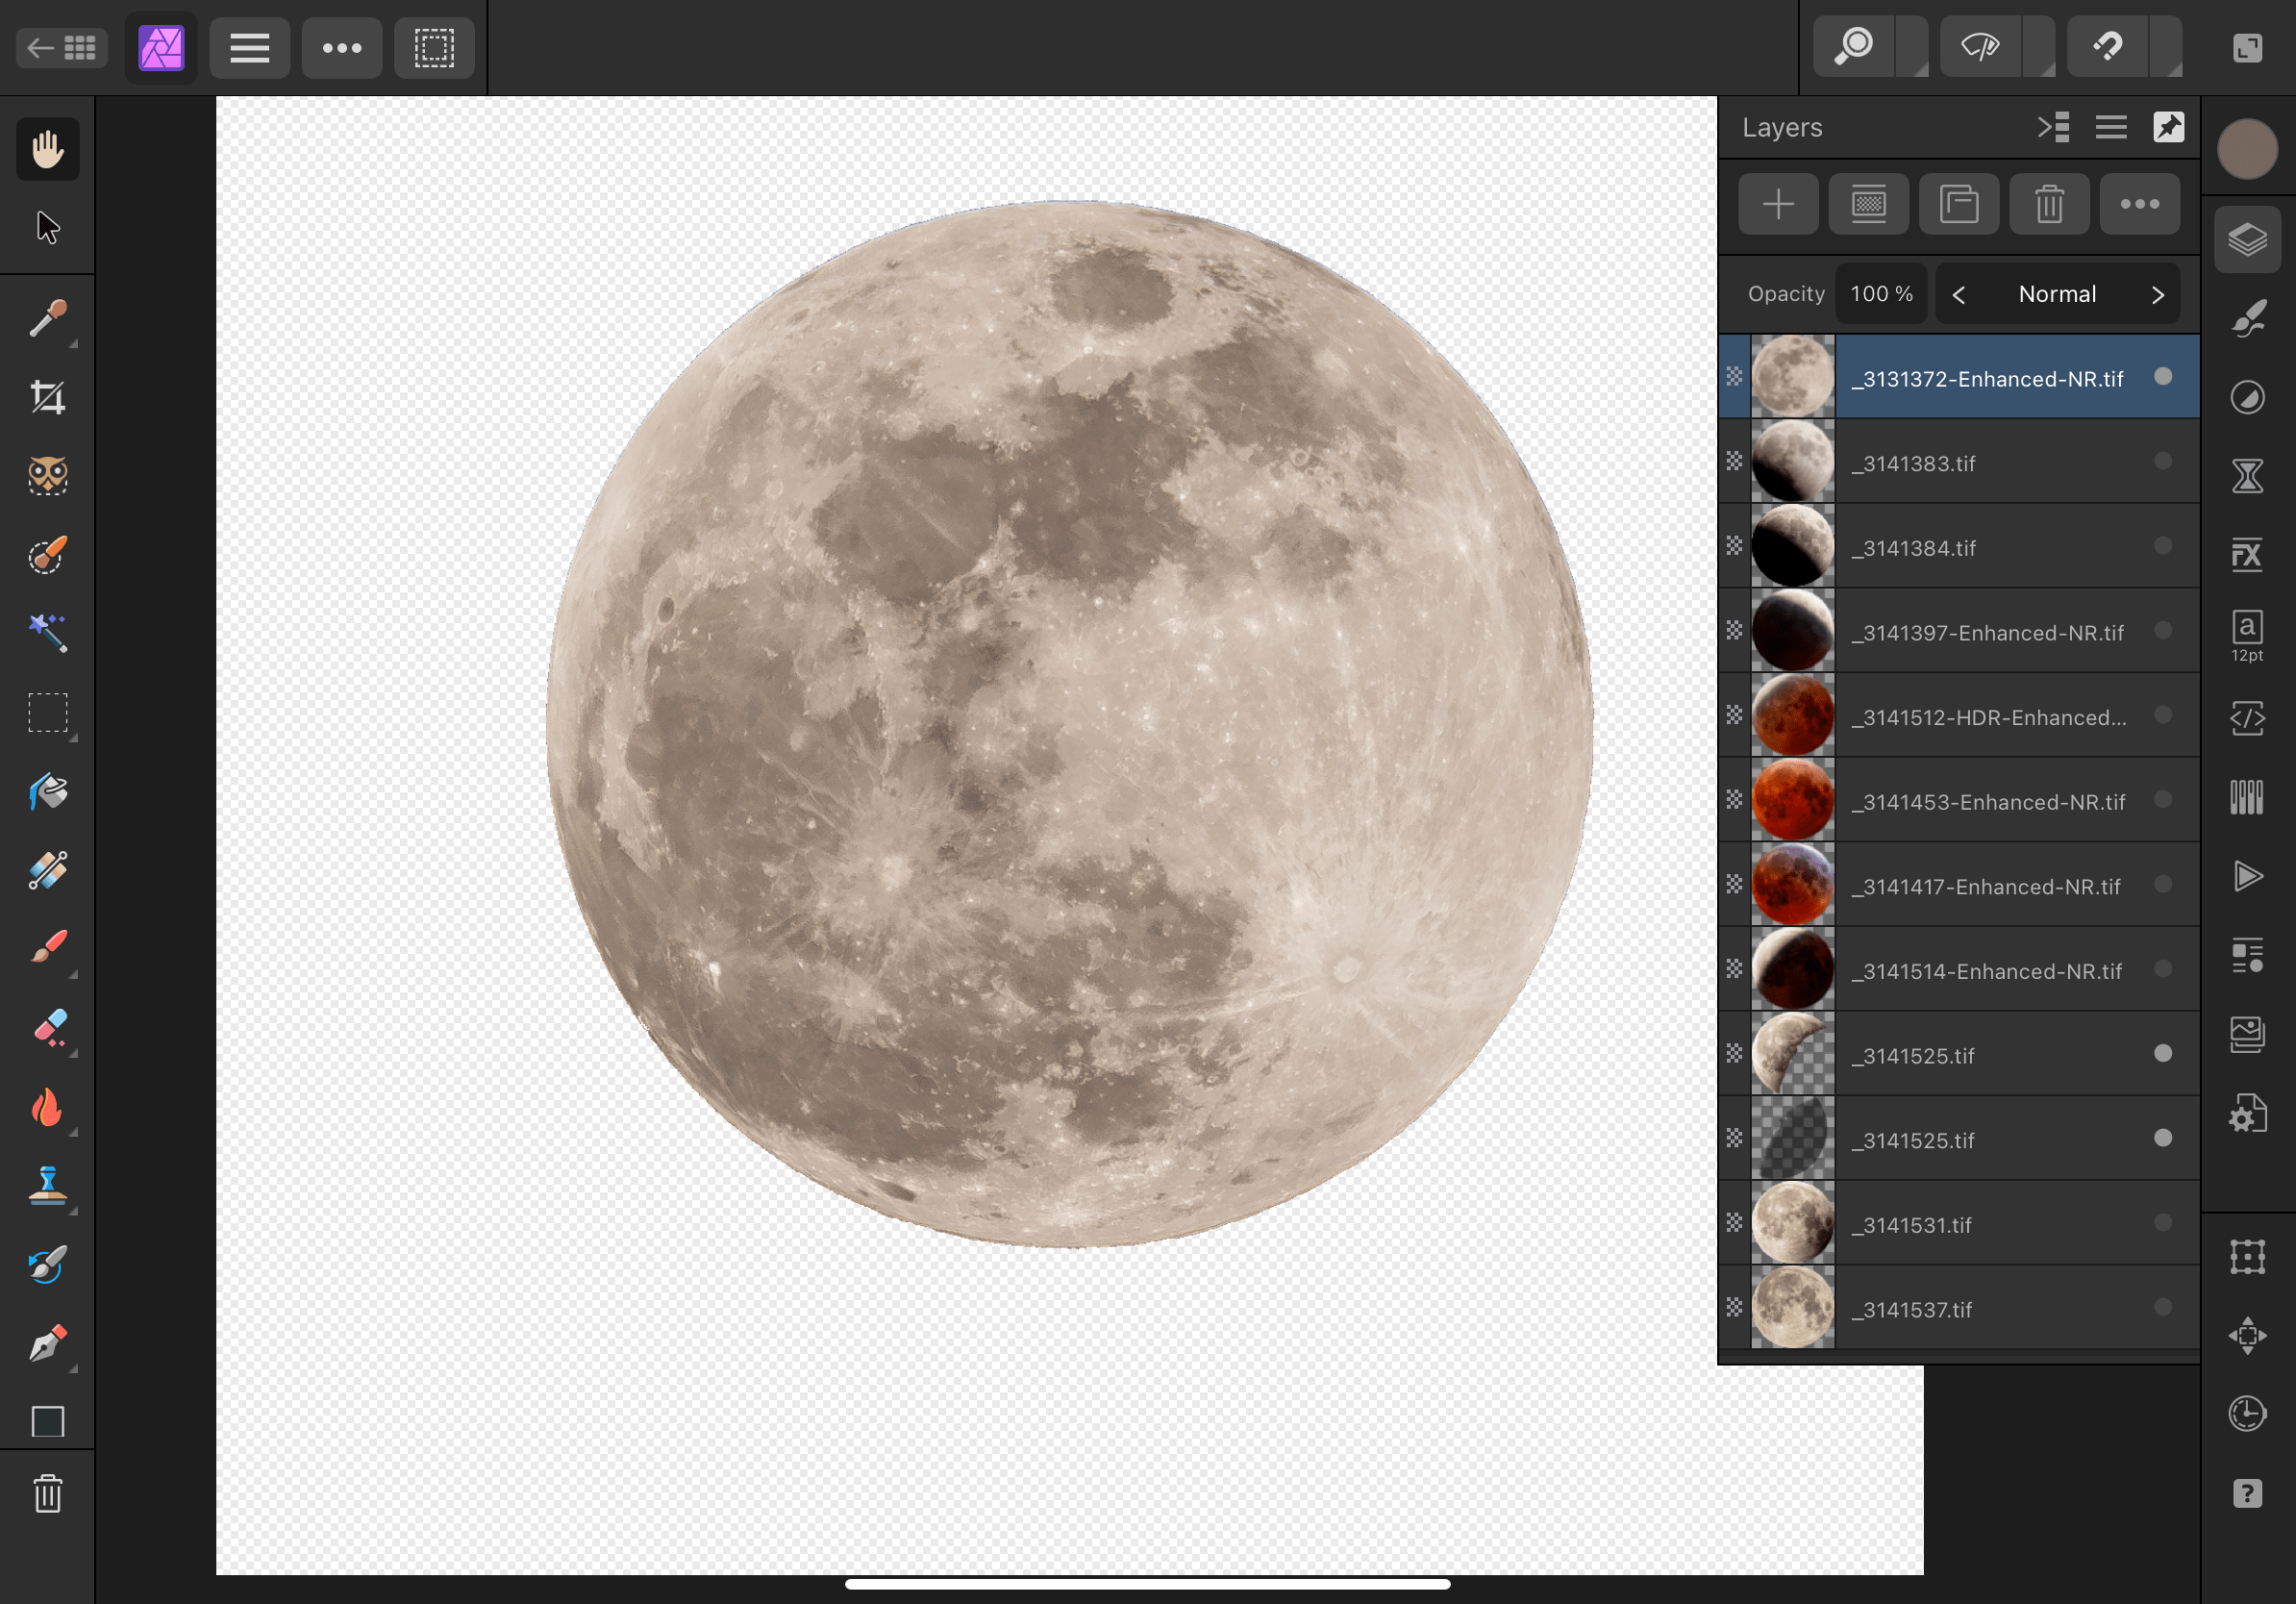
At this point, I exported the 11 Moon images from Lightroom as 16-bit TIFF files. I could have used JPEGs but, with compression and sharpening, they reduce overall image quality. The TIFFs were then brought into Affinity Photo as a ‘New Stack’. In Lightroom, I had carefully cropped each photo to centre the Moon and to maintain phase-to-phase consistency, but I wanted the circles of the Moon aligned, so I toggled on ‘Align Source Images’. The app did precisely as directed, and I carried on. The Stack was ungrouped allowing me to work on each layer individually. I could have set them up as 11 different files, but opening and closing each file would have become tedious. Working on them as 11 layers was much easier. My goal was to remove the black background of the sky, leaving just the Moon on a transparent background.
Everything looked great, but something was amiss. It was sometime later that I realized each of the eleven Moon images had been rotated. Affinity Photo had done its job correctly by aligning the various craters and features of the Moon. But something wasn’t right. I literally sat there scratching my head for a moment. It was then the light bulb of understanding flickered on—I realized that, over a period of three hours, our view of the face of the Moon changes in 3-dimensional space. Oops!
Rather than trying to undo all the alignment, I scrapped that set of images and re-imported them as a New Stack, but with ‘Align’ toggled off. Lesson learned. Part of me wonders if anyone would have noticed, though I’m sure the true Skywatchers would have alerted me to my error.
From there, it was one trial-and-error after another. I do this to myself—I set a goal, then learn the the ins-and-outs of an app while trying to achieve that goal. Working through a series of prescribed lessons without a clear and applicable end goal doesn’t keep me engaged. So I try something, then do an online search for a solution, then try it again.
I enjoy working with Affinity Photo, but haven’t used it frequently enough to learn all of its inner workings. I had originally learned many of the techniques in Photoshop and, thankfully, Affinity Photo isn’t all that different. In fact, the iPad version is far more complete than the iPad version of Photoshop. Affinity Photo on iPad is like Photoshop on desktop. It’s brilliant (and much less expensive). Kind of makes me wonder why Adobe knowingly continues to cripple its iPad version of Photoshop. I’m glad I ditched it.
By the way, there is nothing quite as intuitive as editing photos on iPad. With a $25 stylus (pencil), it is it even more so. Tapping and drawing with a fine tip is far more accurate than my pudgy finger or using a mouse/trackpad (apologies to Steve Jobs, who as always pro-finger and anti-stylus—😉)
Now, for the composite—more trial-and-error
Once each of the 11 Moon images was prepped in Affinity Photo, I exported them as 16bit TIFFs. I could have used PNGs to maintain transparency (JPEGs do not), but I also needed to maintain overall image quality.
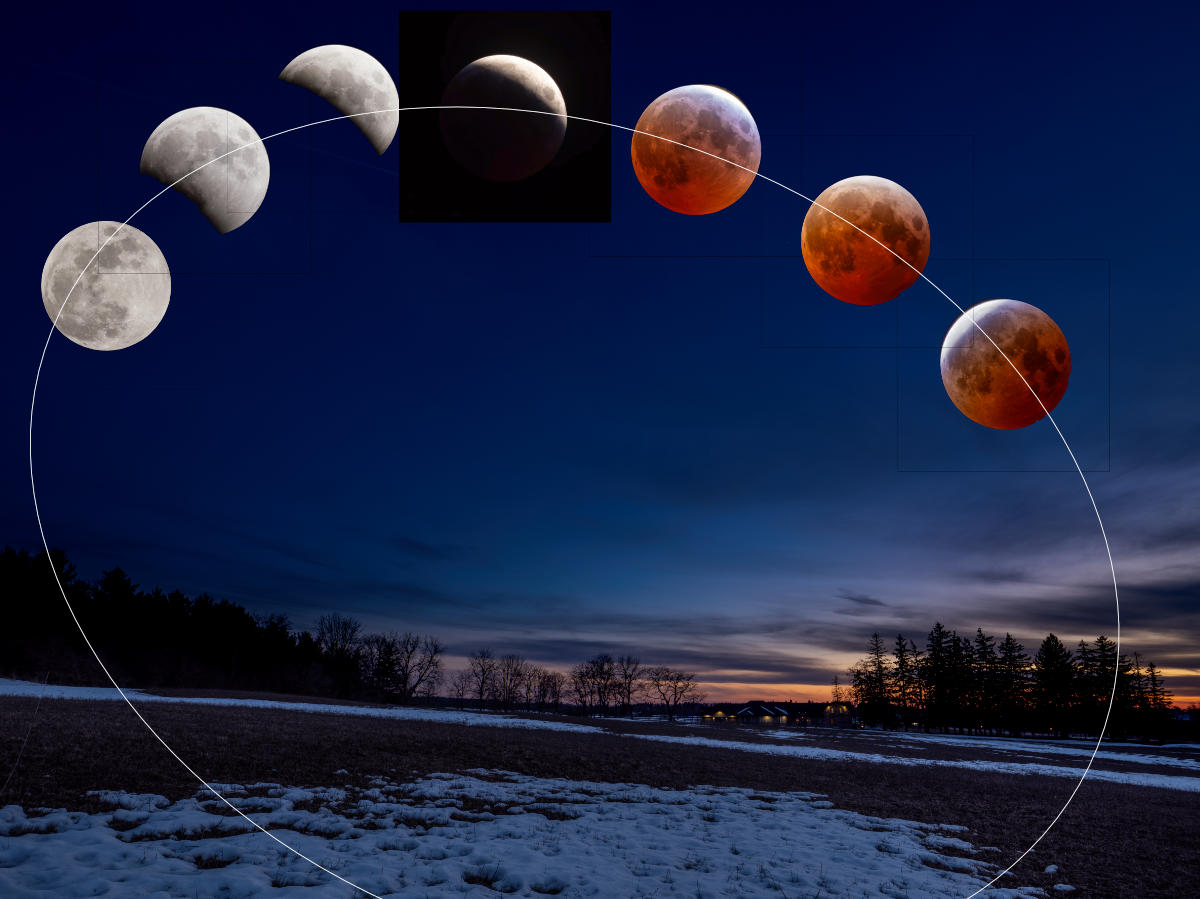
Opening one of the base landscapes, I then copied and pasted the 11 layers of Moon images. In an attempt to maintain realism, I positioned the moons in an arc across the night sky. As a guide, I drew an ellipse to help with smooth positioning and made constant use of Align > Space Horizontally as well as plenty of nudges.
It looked great, but wasn’t quite ‘there’. With coaching from my better half, Laura, we decided each Moon was much too large in the sky. As well, the sky needed to be even darker, while still maintaining that astronomical ‘midnight blue’.
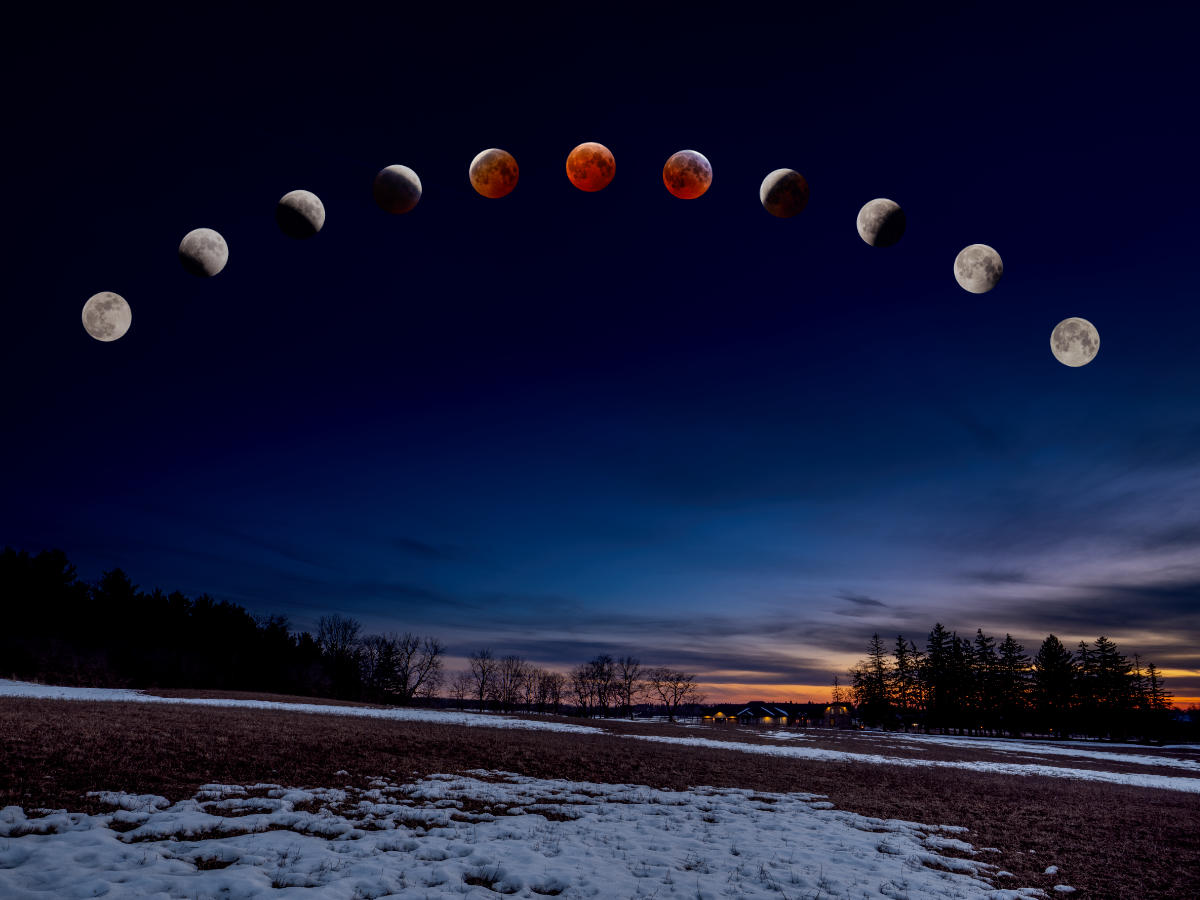
With trial and error, I ended up reducing the size of the Moons to about ½, and repositioned them on the ellipse/arc. After another assessment, we decided it still didn’t look right, so I tried arranging them in a straight line. Nope—it looked too, well, linear to be realistic.
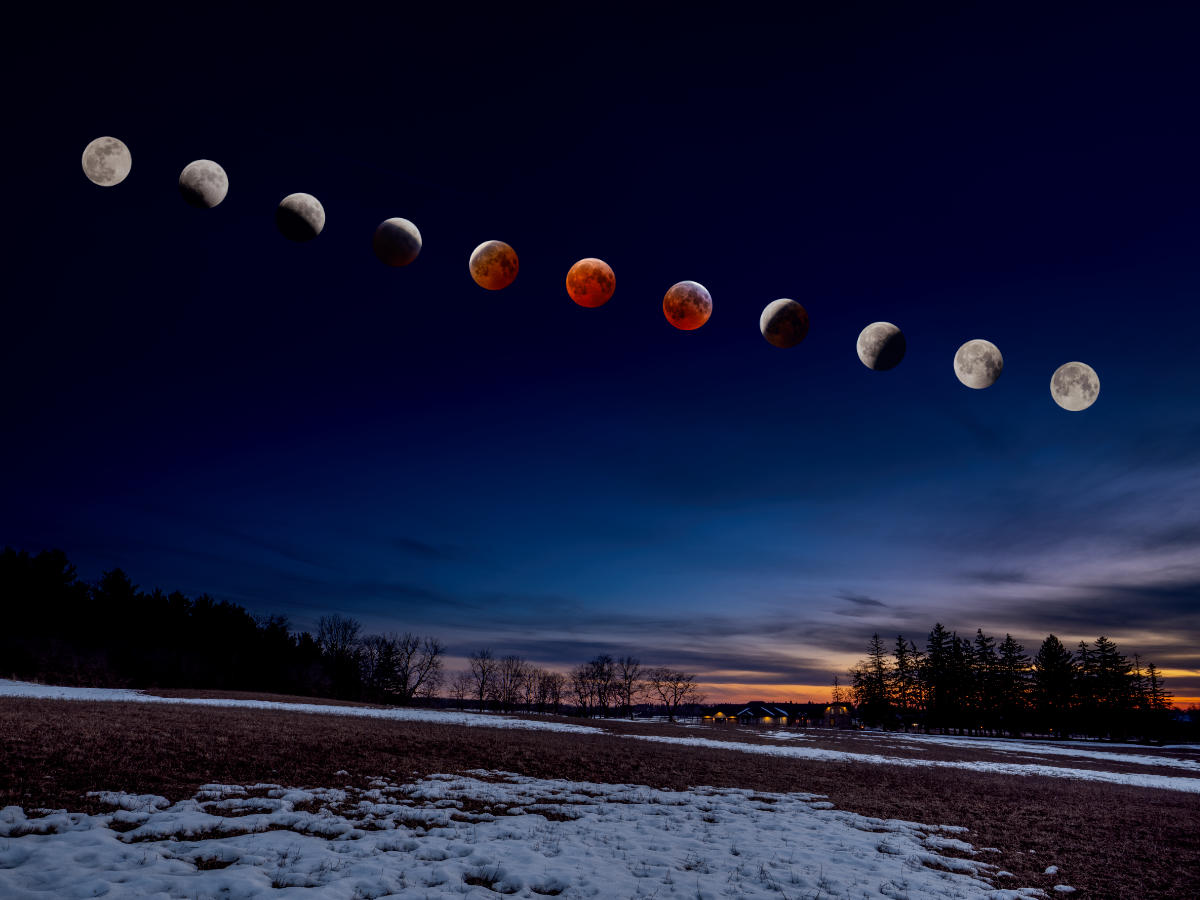
Finally we settled on a gentler arc and that seemed to do it.
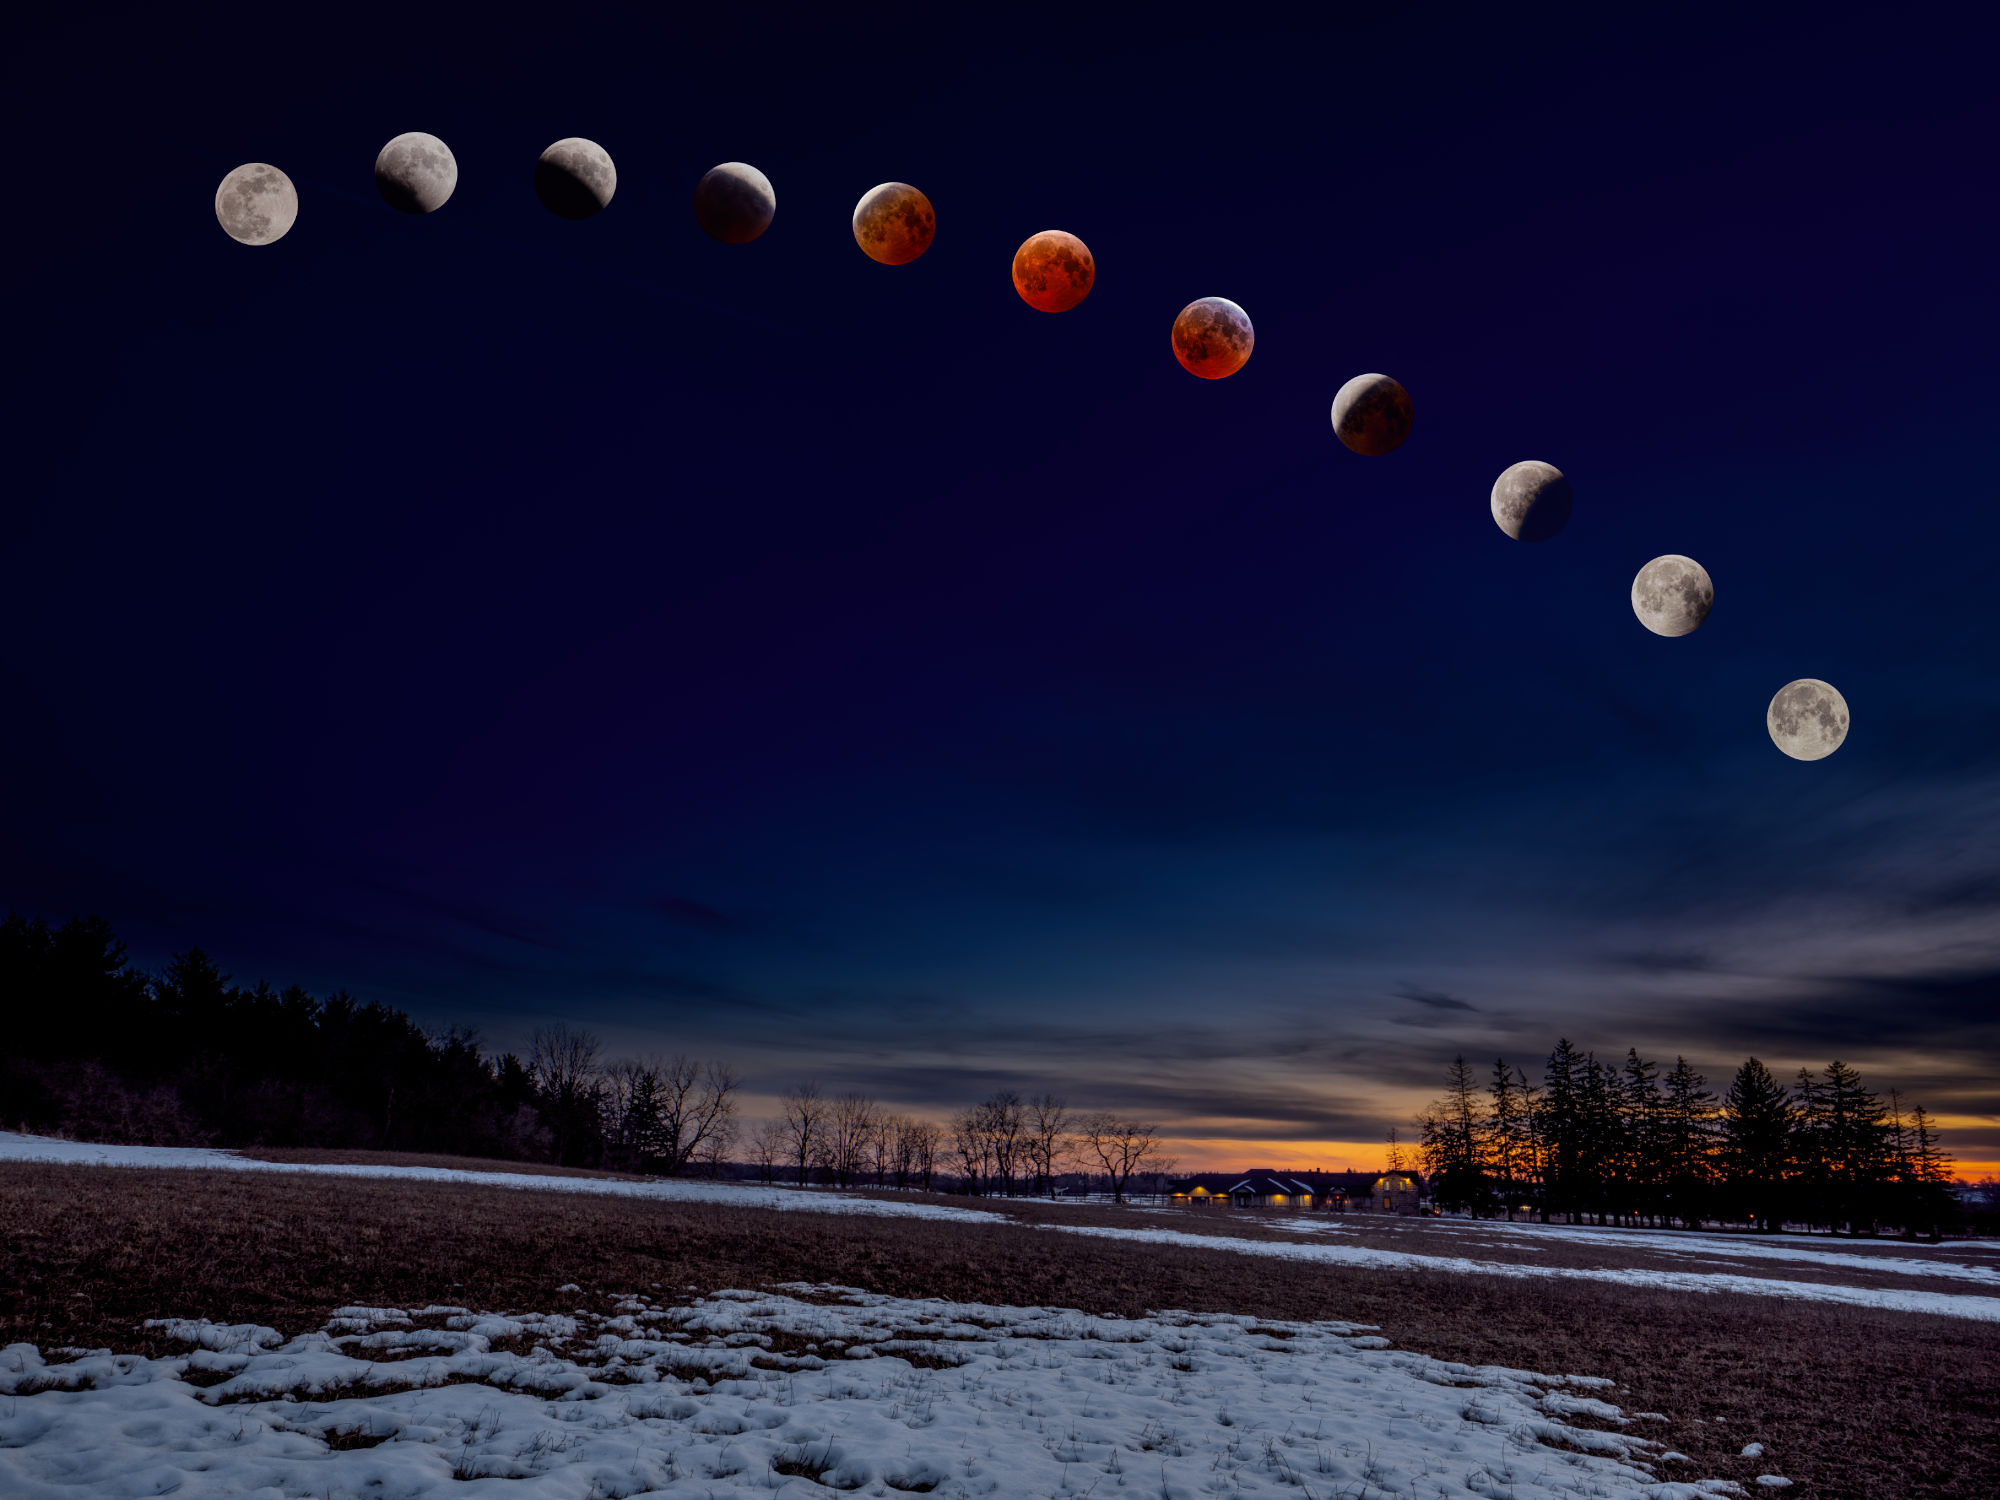
From there, I was able to copy and paste the 11 Moon layers onto each background scene. With further tweaking of each individual photo, I ended up with three landscape composites I was pleased with and one ‘meh’. Sadly, the ‘meh’ view is of one of our favourite places in the Arboretum at the University of Guelph. During the day, there is plenty of detail to draw you in but, at night, it appears too flat-looking compared to the others. Oh well. Live and learn.

Have a look at each of the four then, down in the Comments, let me know which one(s) you prefer and why.
Thanks for reading! If you have any questions about the equipment, apps or techniques discussed above, be sure to add a COMMENT.
Please take a moment and SHARE this with other photographers or with your camera club.
To receive an email notice of new articles, SUBSCRIBE below.
Text and photos are copyright ©2025 Terry A. McDonald
and may not be reproduced in whole or in part without the written consent of the author.
Have a look at my work by visiting www.luxBorealis.com and consider booking a presentation or workshop for your Nature or Photo Club or a personal Field & Screen workshop at Workshops.
Discover more from luxBorealis Blog
Subscribe to get the latest posts sent to your email.

Trackbacks