OM System Informal Testing
Okay, enough waxing. It’s time to put things to the test.
On Thursday of last week, I had a unique opportunity to test-drive some OMDS bodies, lenses, and computational photography features. This was thanks to Tom Stirr, an Olympus user whose work I came across at SmallSensorPhotography.com. I encourage you to have a look and a read. Tom has some incredible birds-in-flight photos plus numerous well-written and illustrated articles on a range of topics relevant to learning fine photography techniques.
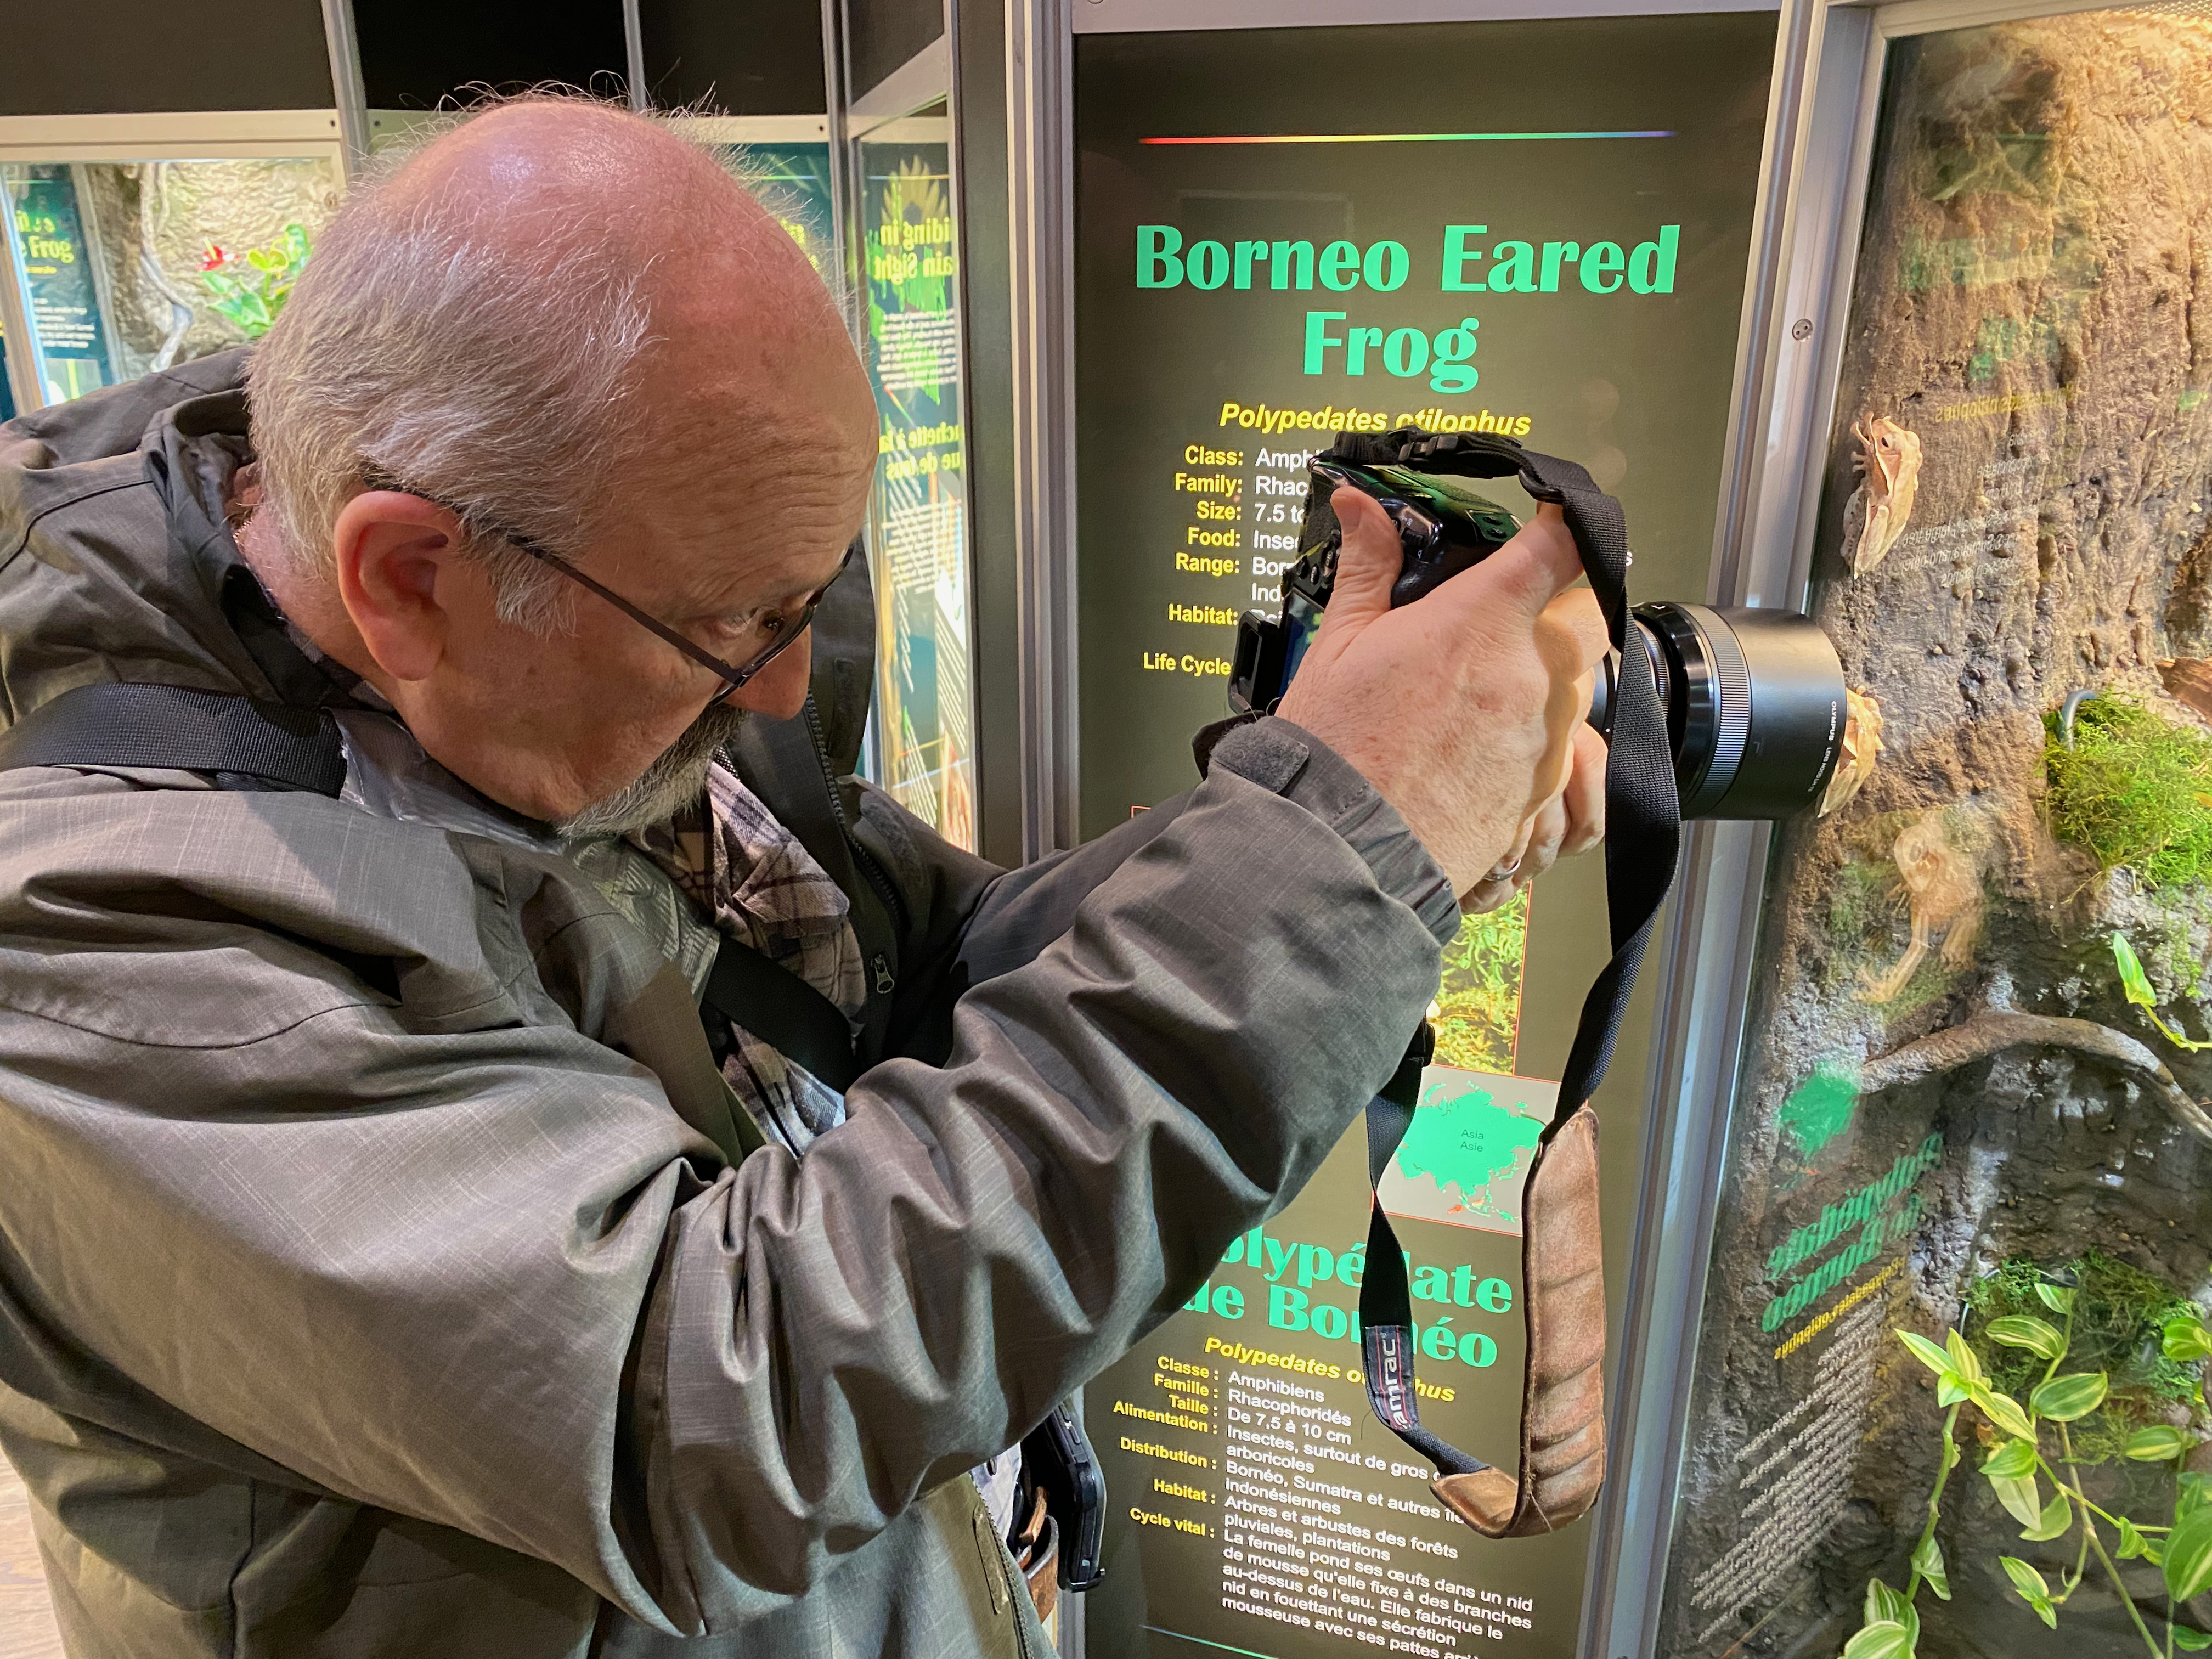
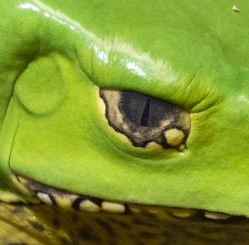
Tom suggested we meet at the Royal Botanical Gardens in Burlington, a place well-known for its wide variety of photo ops. He is a member and got us tickets to Frogs!, the RBG’s winter exhibit. It was a good place to try out some close-ups and focus-stacking at handheld at slow shutter speeds and high ISO–all features the Olympus systems excel at. However, I found the colour of the multi-source lighting was not ideal for colour balance, especially out-of-the-camera jpegs.
Note: All images were processed in Lightroom Classic and output to 1200px long. While LrC is ORF-friendly, it does not have the finesse of OM Workspace for processing ORF files. My understanding is that noise is handled far better in OM Workspace.
If you have a look at Tom’s article about the day, you will see great examples of what Olympus can do in the hands of someone with greater experience with the equipment.
EM-1 Mark III w/ M.Zuiko 60mm/2.8 Macro lens; ƒ5.6 @ 1/20; ISO 1600; in-camera focus stack of 10 frames
Finally getting an OM body back in my hands was an unexpected thrill. I knew there would be some comfort in having a smaller, lighter body, but I had not anticipated how much better it would feel with the generous built-in hand grip. Camera and lens together felt great, well-balanced, and snug. I tried a variety of lenses including the 40-150/2.8 Pro (Tom’s favourite), the 12-100/4, the 60mm Macro and the 100-400/5-6.3.
A note about Micro Four Thirds (MFT) focal lengths: the Olympus 12-100mm provides the same coverage as a 24-200 full frame zoom (or 16-135 APS lens). None of the big three—Nikon, Sony, Canon—make anything like this of this quality. The 12-100mm is tack sharp wide open and half the size of the equivalent FF lens—a win all around.
Additionally, there are gains in depth of field with Micro Four Thirds: f4 in MTF provides the same depth of field as f8 in full frame terms. For my work, whether I’m shooting landscapes or close-ups, I really depend on depth of field, so this is very helpful. Being able to shoot at ƒ4 rather than ƒ8 also has the advantage of being 2 stops brighter.
Computational Photography
Tom also took the time to walk me through some of the amazing computational photography options with OM:
THRS – Tripod High Res Shot – With THRS. an 80mp image is created by micro-shifting the sensor on 8 consecutive frames then combining them into 1 raw file. I didn’t use this function, because Tom assured me HHHR will do the job for me, but for landscape photography, it really piqued my interest.
I’ve never minded using a tripod for landscape work, as I find it centres me, it slows me down, forcing me to consider the scene ahead of me more closely, more thoughtfully. Stay tuned. As Tom assures me, with the in-camera stabilization as good as it is, he has it used a tripod since he bought into his Olympus system!
HHHR: In Handheld High Res mode, a 50mp image is created handheld in a similar way, by combining 12 images into a single raw file. Tom was right. I am blown away by how clean these 50mp files are! Here’s an example:
E-M1 Mark III w/ M.Zuiko 40-150mm/2.8 lens at 135mm (270mm efov); ƒ8 @ 1/80; ISO1600; EV-⅔

Focus Stacking: Once your focus point is set, the OM body will automatically take consecutive images in front and behind, then combine them into a single jpeg. This is ideal for close-up work and landscapes. In addition to the jpeg, the camera saves the raw files it took to make the jpeg. I really prefer raw to jpegs, so having them is helpful. That being said, I stacked the rags in Photoshop and came up with an almost identical image, but with the additional advantage of working with 12-bit raw images. Here is the original from the camera:


To me, having raw output is essential. Although the jpeg output from the OM-1 is excellent, it is still only an 8-bit file. A 12-bit raw file gives added “room” for editing (raising shadows, finessing colour and light shaping with adjustment masks) without degrading colour. Jpegs also come pre-sharpened and compressed – no thanks.
A second concern I have with computational photography is that in HDR mode, only a jpeg is created, and he raw images used to make the jpeg are binned. (Users: correct me if I’m wrong here!) This doesn’t make sense! Many of my landscapes involve backlighting which produces a dynamic range far beyond any sensor, making HDR an essential tool. Even my iPhone creates HDR-raw files as DNGs when using Lightroom Mobile as a camera. The OM really should do the same or at least keep the raw images it created.
It took a bit of digging, but I learned jpeg-only output also occurs with Live ND (imagine ND2 to ND64 built into the camera!) and Live Composite modes. Perhaps the engineers at OMDS can figure out a way of providing even a single shot 12-bit raw output from these very helpful modes.
Perhaps my perspective will change once I’ve had more experience with the quality of jpegs produced by an OM camera.
Enough camera talk – back to the live action . . .
Tom and I spent some time in the Frog exhibit, followed by lunch at Tim’s, then off to do some live shooting of moving targets – birds. We dropped by mouth of Grindstone Creek to point our some birding hotspots, but it was quiet to we headed to LaSalle Park, another of Burlington’s birding hotspots. It was busy with swans and geese, a few coots, great scoters, and many mallards. the virus were lively, though the light was beginning to dim and the heavy cloud cover ensured contrast would be at a minimum.

I have never made a shot like this in all my years of photography. None of the cameras I have owned could keep up with a bird flying towards me. As the mallard took off, I swung and fired. The Olympus produced three shots in a row in sharp focus, despite the light being atrocious.
E-M1 Mark III w/ M.Zuiko 100-400/5-6.3 lens at 400mm (800mm efov); ƒ6.3 @ 1/1250; ISO3200
Stabilisation: OM cameras have industry-leading in-body stabilisation (IBIS). Their claim is 8 stops and Tom can verify it. Additionally, some Olympus lenses have internal stabilisation and the Pro lenses talk to the camera to make sure they are in-synch. This level of stabilisation allows Olympus users to claim hand-held shutter speeds into the seconds, something Tom has experienced, but wouldn’t typically rely on it. That being said, the stabilisation is that good, he hasn’t used a tripod in four years. My limited use of the equipment today confirmed two things: (a) the claims are real as evidenced by Tom’s shots; and (b) I still need to perfect my technique for hand-holding at slow shutter speeds. 🙂
ProCapture: this is feature that every bird photographer raves about. Typically, if you see that perfect moment in the viewfinder, you’re too late to capture it. However, with ProCapture, if your finger is half-depressing the shutter release, the camera is spooling though 1 or 2 seconds of frames at time, without you knowing it. When the moment arrives and you release the shutter, the previous 1 to 2 seconds of frames are kept, thereby providing your shot. If the camera is set to 25 frames per second, they you’ll have between 25 and 50 raw images. one of which (or several of which) will be of “the moment”. If you’re set up at 50fps, then you will have between 50 and 90 raws, 90 being the buffer limit. I never had the time to really delve into this feature, but I can see the definite potential it has, especially for sloths like me.
Lenses: I loved using all of them. They are all very comfortable in the hand and the larger 100-400 isn’t so big as to wear me out. I particularly like the focal range provided by the 12-100/4 combined with the 100-400/5-6.3. Add an 8-25mm for landscapes and that would do it. However, I could definitely see why the 40-150/2.8 Pro is Tom’s favourite lens. If I anticipated doing more sports photography, it would be ideal.

At ISO 3200 and there is NO discernible noise in this image, even at 100% on screen. Furthermore, the feather detail is all there–and this is wide open!
E-M1 Mark III w/ M.Zuiko 100-400/5-6.3 lens at 400mm (800mm efov); ƒ6.3 @ 1/2500; ISO3200
I did not feel hampered by the ƒ6.3 of the 100-400mm zoom. Sure ƒ4 or ƒ2.8 would be brighter, but I can’t imagine the size of lens needed for those maximum apertures, to keep the image quality and focal length the same. Remember 100-400 is like 200-800 on a full frame. And to be able to hand-hold with virtually instant auto-focus? It’s a compromise that is well worth it. In fact, the only compromise is one or two stops of light and improved ISO noise solves that problem.
The odd one, to me anyway, is the 60mm macro lens. There is no other way to describe it but SMALL. With a filter size of just 46mm, it looks like a toy on on the camera. But it proved to be one amazing lens. All the photos of the frogs were made with the 60 and I seriously would consider this lens, except for one thing: the 100-400mm focusses so closely (1.3m at 400mm), it is ideal for most close-up photography.
Silent Shutter: I shot for most of the day using silent shutter and guess what? It really is silent. There is no auditory cue for having made an exposure, only a blip in the viewfinder. This is great for times when silence is golden, which for me is most of the time.
High ISO: Amazing! I couldn’t believe I was actually processing images shot at ISO 1600 and 3200, and OM Workspace does an even better job with noise than Lightroom Classic which became apparent at ISO 6400, where a denote sal-and-pepper patter appeared. This would not be the case in OM Workspace with AI noise reduction. Other recommendations include DxO PureRaw and DxO Deep Prime.
As afternoon began slipping towards evening, we encountered a few of the smaller birds: sparrows and chickadees. The chickadees proved to be more elusive, flitting from branch to branch. With the light dimming, I put the ISO up to 6400 and was pleasantly pleased with the result. Again, the photos would look better processed through OM Workspace, but even through LrC, I was able to get better results than I have ever seen from my D800E at ISO 6400.
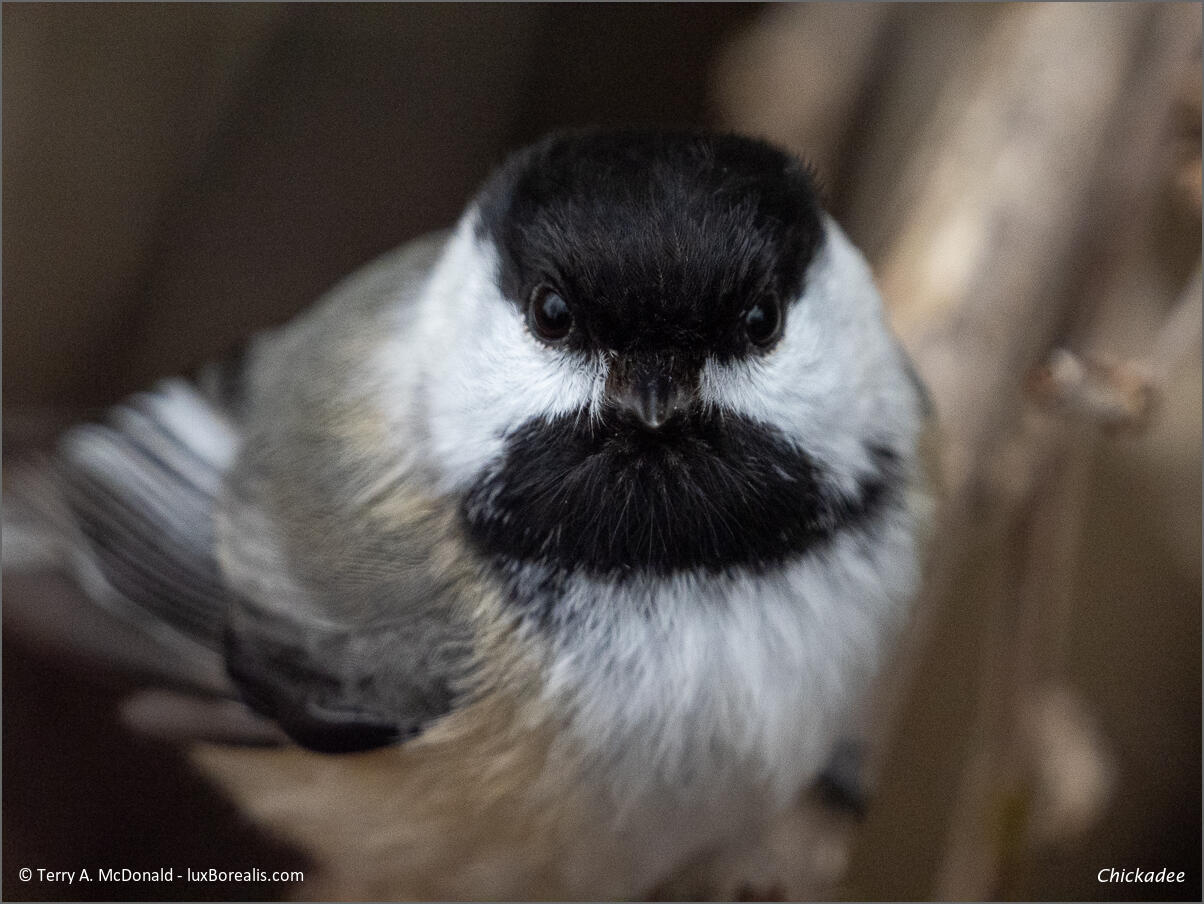
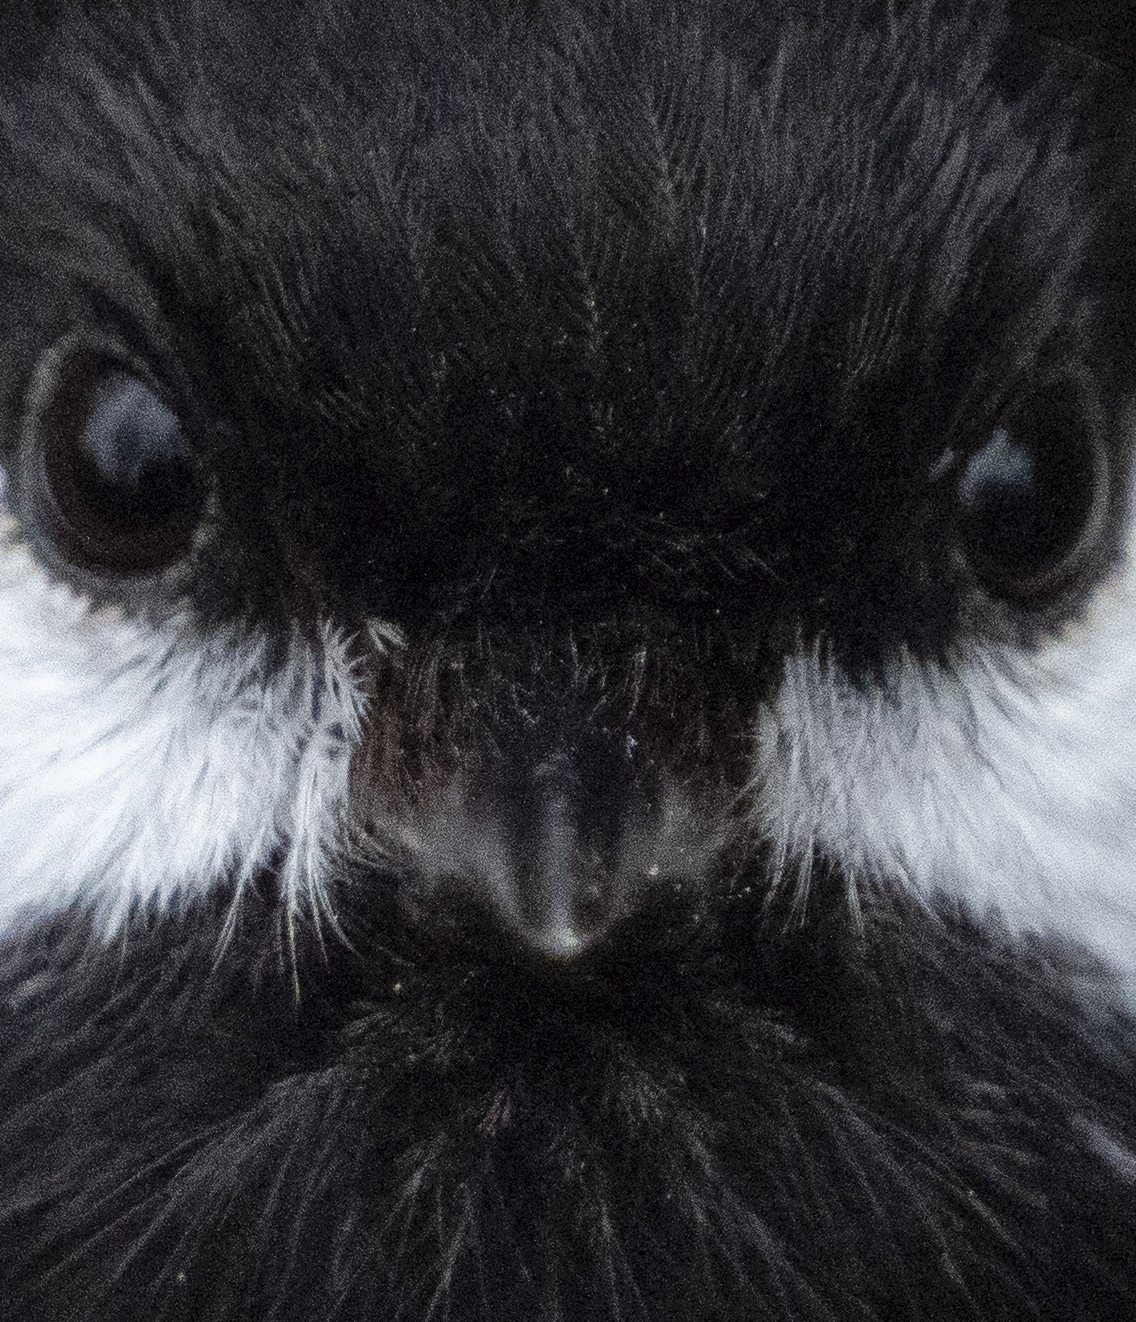
Close focus, no problem. this was another quick “grab” shot. The 100% crop screenshot below is from the untouched raw image with no sharpening applied. The narrow depth of field is evident, as is the feather detail – and this is from a first-timer. I’m sure that as my familiarity with the lens increases, the results will improve.
E-M1 Mark III w/ M.Zuiko 100-400/5-6.3 lens at 400mm (800mm efov); ƒ6.3 @ 1/1600; ISO6400
Needless to say, although these shots are not stellar, I recognise that most of the problem is with me and my lack of familiarity with the system What I am pleased with is the potential OM bodies and lenses offer. As my Nikon gear continues to sell, I will be making the trip to a local bricks and mortar camera store to replace my gear. With the spring sports term on the horizon and a school trip to Iceland in June, there will be plenty of opportunity to put the OM gear through tis paces.
Update: The bricks and mortar store indicated a 4 to 8 week wait for the lenses I wanted. I phone OM Digital Solutions and they have them in stock. They will arrive tomorrow!
Thanks for reading. Be sure to subscribe to my blog and visit luxBorealis.com to see my work.
If you have any questions about the bog or the photos, please send me an email: terry at luxborealis dot com.
Happy Shooting!
Discover more from luxBorealis Blog
Subscribe to get the latest posts sent to your email.
